So, you got a new printer? Congratulations! After all, printing documents is still essential. However, before you start printing, there’s a dreadful job of setting up and adding the printer to your Mac’s list. However, it is not as hard as everyone makes it look. Read along to see how you can add it to any Mac.
How to connect a USB printer to your Mac
Connecting devices through a cable is the oldest method. Modern printers support both wired and wireless connections. If you want to connect your printer to your Mac via a USB, follow the below steps.
- After setting up your printer, plug it into your Mac.
macOS will download the required software for your printer. - Once connected, download and install the software if you see the message.
If your MacBook does not have a USB port, you can buy one of these best USB-C hubs for your MacBook.
How to add a wireless printer to Mac
Printers sold today usually support Wireless pairing and printing. If your printer and Mac are connected to the same Wi-Fi network, chances are the printer might already be connected to your Mac. Otherwise, here’s how you can connect it:
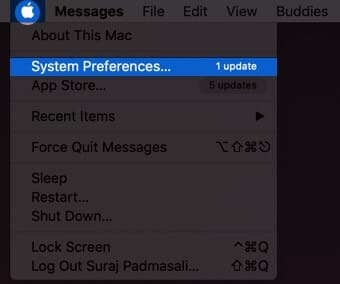
- Click the Apple logo at the top left.
- Open System Preferences.
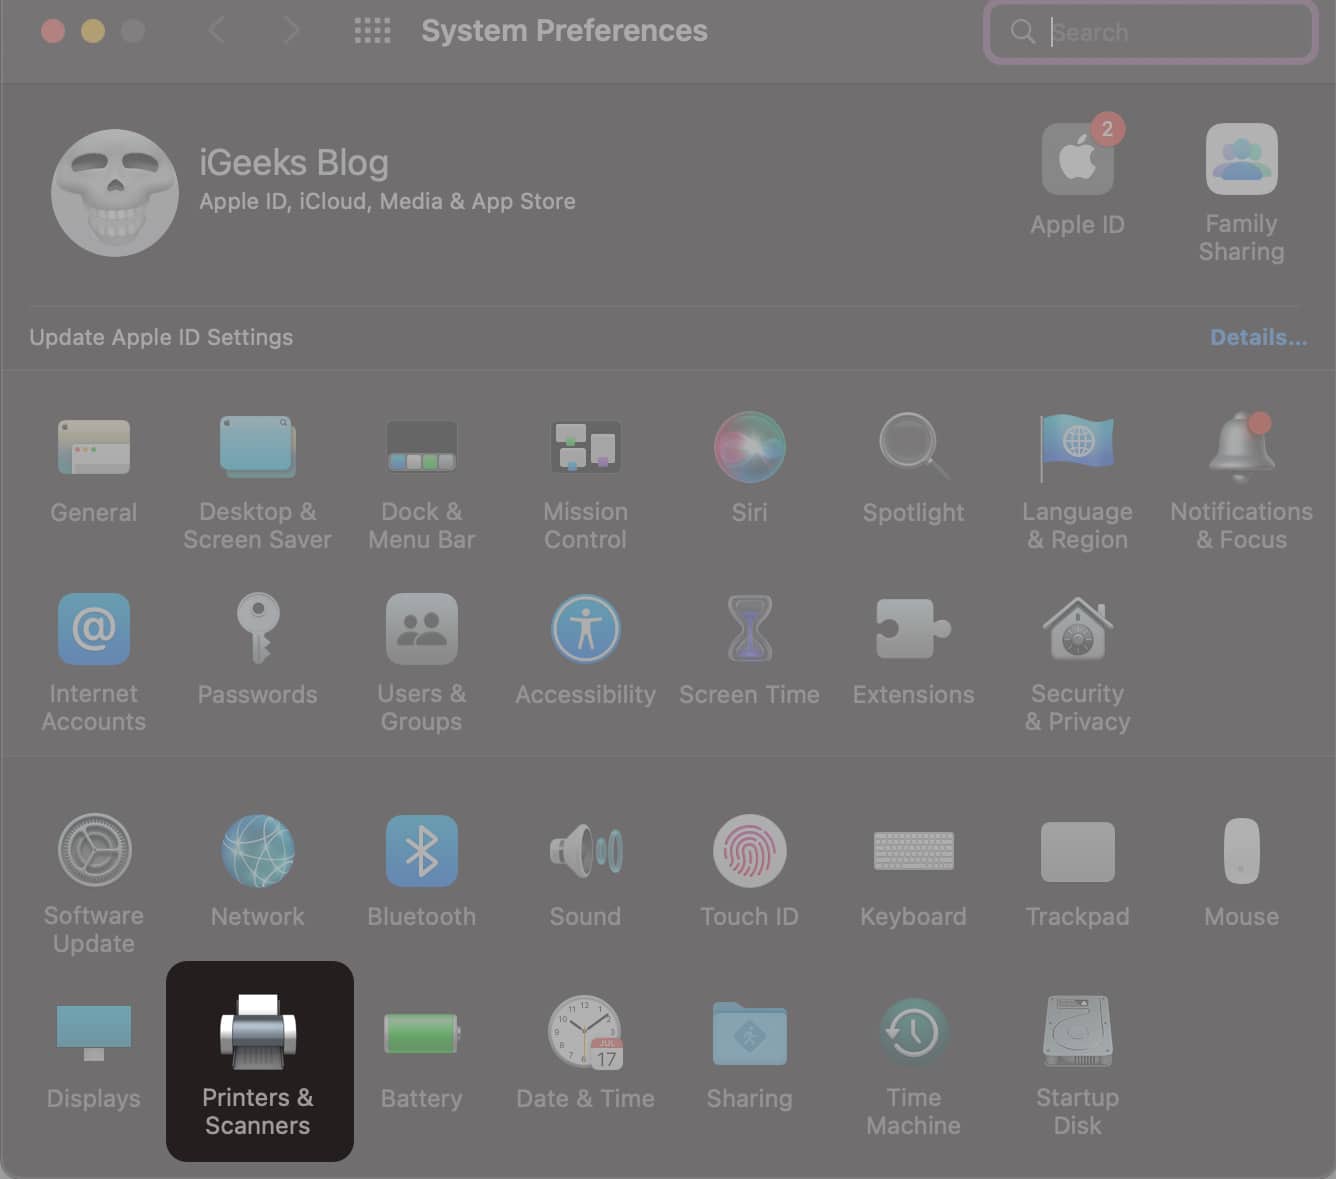
- Click Printer and Scanners.
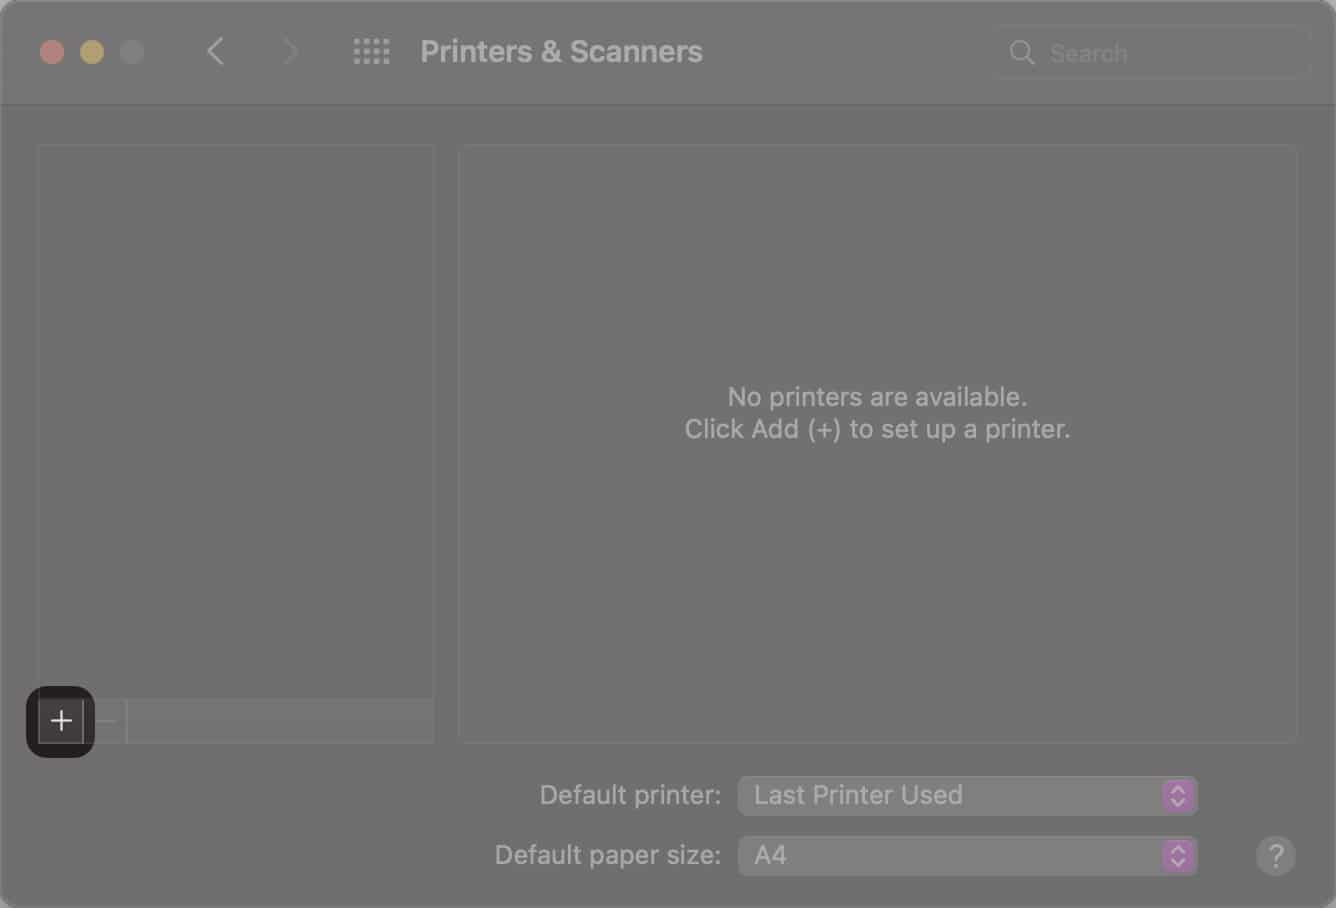
- Now, click + button.
- Select your printer.
- Click Add if you see AirPrint next to Use.
- If you do not see AirPrint, select your printer and click Add.
If your printer is AirPrint-compatible, but you cannot see AirPrint for your printer, here’s how you can fix it.
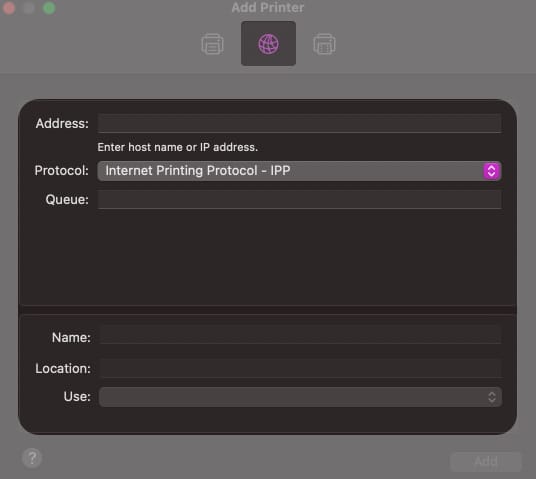
Add a printer by specifying its IP address
If the methods mentioned above do not bear fruit, connecting your printer to your Mac through its IP address is what you should try next.
- Click the Apple logo → System Preferences.
- Now, select Printer and Scanners → + button.
- Select the IP Icon (web icon) below Add Printer.
- Add your printer’s IP beside Address.
- Select the Protocol (AirPrint, IPP, LPD, etc.).
- Type the Name & Location. Also, select and download the printer’s software.
- Now click Add and done.
How to connect your Mac to Bluetooth printer
Like connecting Bluetooth speakers or headphones, you can also connect your Bluetooth-enabled printer. Here’s how to connect your printer via Bluetooth to Mac.
- Click the Apple logo → System Preferences → Printer and Scanners.
- Hit the + button.
- Select your printer.
- Click Add and done.
Add a Wi-Fi or mobile printer that requires a configuration profile
Some printers need configuration profiles to be installed so that they can be discovered on AirPrint. Now, if you’ve been provided with software that needs to be installed with your printer, copy the printer profile and install it. Here’s how to install it,
- Double click the profile you want to install.
- Click Install on the message asking you if you’d like to install the profile.
- Confirm your selection by clicking Install.
Before you go ahead with the steps, make sure your Mac is updated to the latest software version. Once you’ve updated your Mac to the latest macOS version, follow the same steps as adding a Wi-Fi or Network printer.
- At the top left corner of your Mac, click the Apple logo.
- Open System Preferences.
- Click Printer and Scanners.
- Click the + button.
- Select your printer.
- Click Add if you see AirPrint Just beside Use.
- If you do not see AirPrint, select your printer and click Add.
How to set default printer on Mac
Now that you have learnt how to add printers to your Mac, if you prefer a particular printer over the rest, you can set it as default by following these steps:
- Click the Apple Logo () → access System Settings.
On macOS Monterey, you’ll see System Preferences. - Navigate to Printers and Scanners.
- Click on the dropdown menu next to Default printer → select the printer you wish to make default.
That’s it! Alternatively, you can opt for the Last Used Printer option, which remembers the same based on location. However, it’s important to remember that the last used printer may vary based on different regions.
Wrapping up!
Following these methods, you can add printers to your Mac. If these methods do not work for you, let us know in the comments below, and we will try our level best to help you.
Read more:



Leave a Reply