- Auto-Lock may be disabled if set to ‘Never’—check Settings > Display & Brightness to make sure it’s set to a timed interval.
- Low Power Mode can disrupt Auto-Lock behavior—turn it off in Settings > Battery to restore screen timeout functions.
- AssistiveTouch may prevent your screen from locking—disable it under Accessibility settings if Auto-Lock isn’t working properly.
- Toggle your passcode off and back on in Settings > Face ID & Passcode to reset Auto-Lock-related security settings.
- Install the latest iOS update if Auto-Lock still fails, as recent patches may address lock screen bugs or device-specific glitches.
If your iPhone’s Auto-Lock feature isn’t working as expected after updating to latest iOS version, you’re not alone. Auto-Lock is designed to dim the screen and lock your device automatically after a specified period of inactivity. This helps to preserve battery life and protect your privacy so that others can’t use your phone when it’s left unattended.
However, with the latest iOS update, some users have reported issues with this feature, such as the screen staying on indefinitely. Let’s troubleshoot and find some solutions. Here’s how to fix your iPhone Auto-Lock not working.
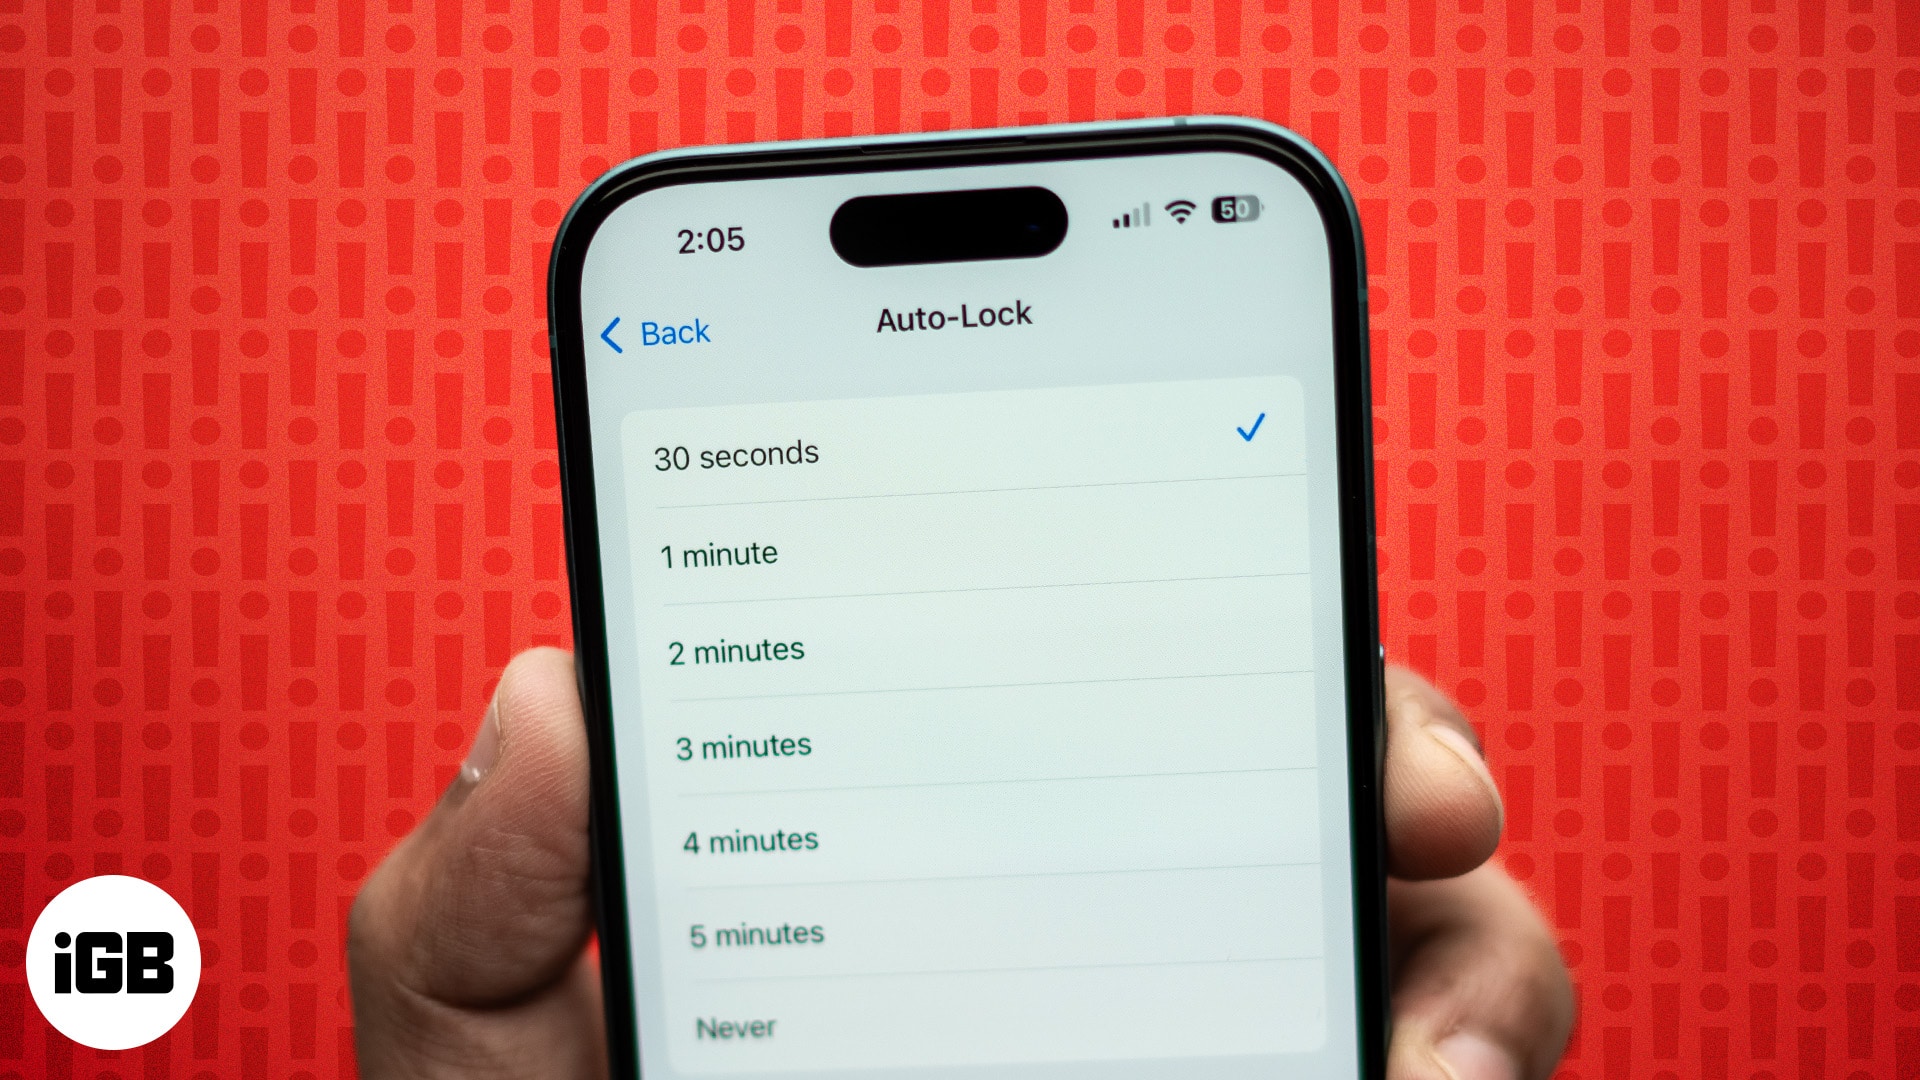
1. Ensure Auto-Lock is Enabled
Let’s begin with the simplest solution. Sometimes, you may have turned off Auto-Lock without knowing. So, it’s good to check if it is enabled before moving on to more troubleshooting. Follow the steps below to turn on Auto-Lock on your iPhone:
- Open the Settings app and select the Display & Brightness option.
- Tap Auto-Lock and select a time frame from the options provided. If you select “Never,” Auto-Lock will be disabled.
- When done, tap Back to complete the process.

Then, leave your phone untouched for the time period you chose and see if it Auto-Locks. If not, move on to the other solutions below.
2. Disable Low Power Mode
Low Power Mode can be helpful when you’re trying to conserve battery life. However, it can sometimes interfere with the Auto-Lock feature. To turn it off, follow the steps below.
- Open the Settings app and select Battery.
- Toggle OFF Low Power Mode.

Check if your phone now Auto-Locks when left unused. If not, proceed to the next steps.
3. Turn Off AssistiveTouch
AssistiveTouch is a great accessibility feature on the iPhone, but it might prevent Auto-Lock from functioning. You can, therefore, try disabling AssistiveTouch using the steps below.
- Open the Settings app and select Accessibility.
- Choose the Touch option under the PHYSICAL AND MOTOR section.

- Tap on AssistiveTouch and then toggle OFF AssistiveTouch.

If this still doesn’t fix your iPhone Auto-Lock issues, you can try the other solutions listed below.
4. Re-enable Passcode on Your iPhone
Sometimes, turning off your passcode and then re-enabling it can do the trick to fix Auto-Lock issues. Just follow the steps below:
- Go to Settings and select Face ID & Passcode.
- Enter the Passcode of your device when prompted.
- Choose the Turn Passcode Off option.

- Tap Turn Off to proceed.
- Now, enter your Apple ID password to finalize the changes → tap Turn Off.

- In this instance, you must again enter your device’s password and wait for the changes to take place.
- Once you’ve successfully disabled the Passcode of your device, restart your iPhone.
- Now, again go to Settings→ Face ID & Passcode → Turn Passcode On to set it up again.

This often works like a charm to quickly fix Auto-Lock issues on your iPhone.
5. Check and Update Software
If all the solutions so far have still not helped you, make sure your iPhone is updated to the latest software. This can ensure there are no bugs or glitches.
- Go to Settings → General → Software Update.
- Download and install any updates if they’re available.

6. Force Restart Your iPhone
If Auto-Lock still does not work, it’s a good idea to force restart your iPhone. This often clears any glitches.
- On the left side of your phone, press and quickly release the Volume Up button.
- Next, press and quickly release the Volume Down button.
- Now, on the phone’s right side, press and hold the Side button. Release it when you see the Apple logo on the screen.
Once your phone restarts, check if Auto-Lock functions as expected.
7. Reset All Settings
Finally, you can reset your iPhone to default settings to see if it fixes the Auto-Lock issue you’re facing. This will not erase the data on your device like a factory reset does. It will only erase any custom settings you may have enabled. However, we still recommend backing up your device before following the steps below, just in case.
- Open the Settings app and tap General.
- Scroll down to the end of the screen and select Reset.
- Select Reset All Settings and enter your screen passcode to begin the process.
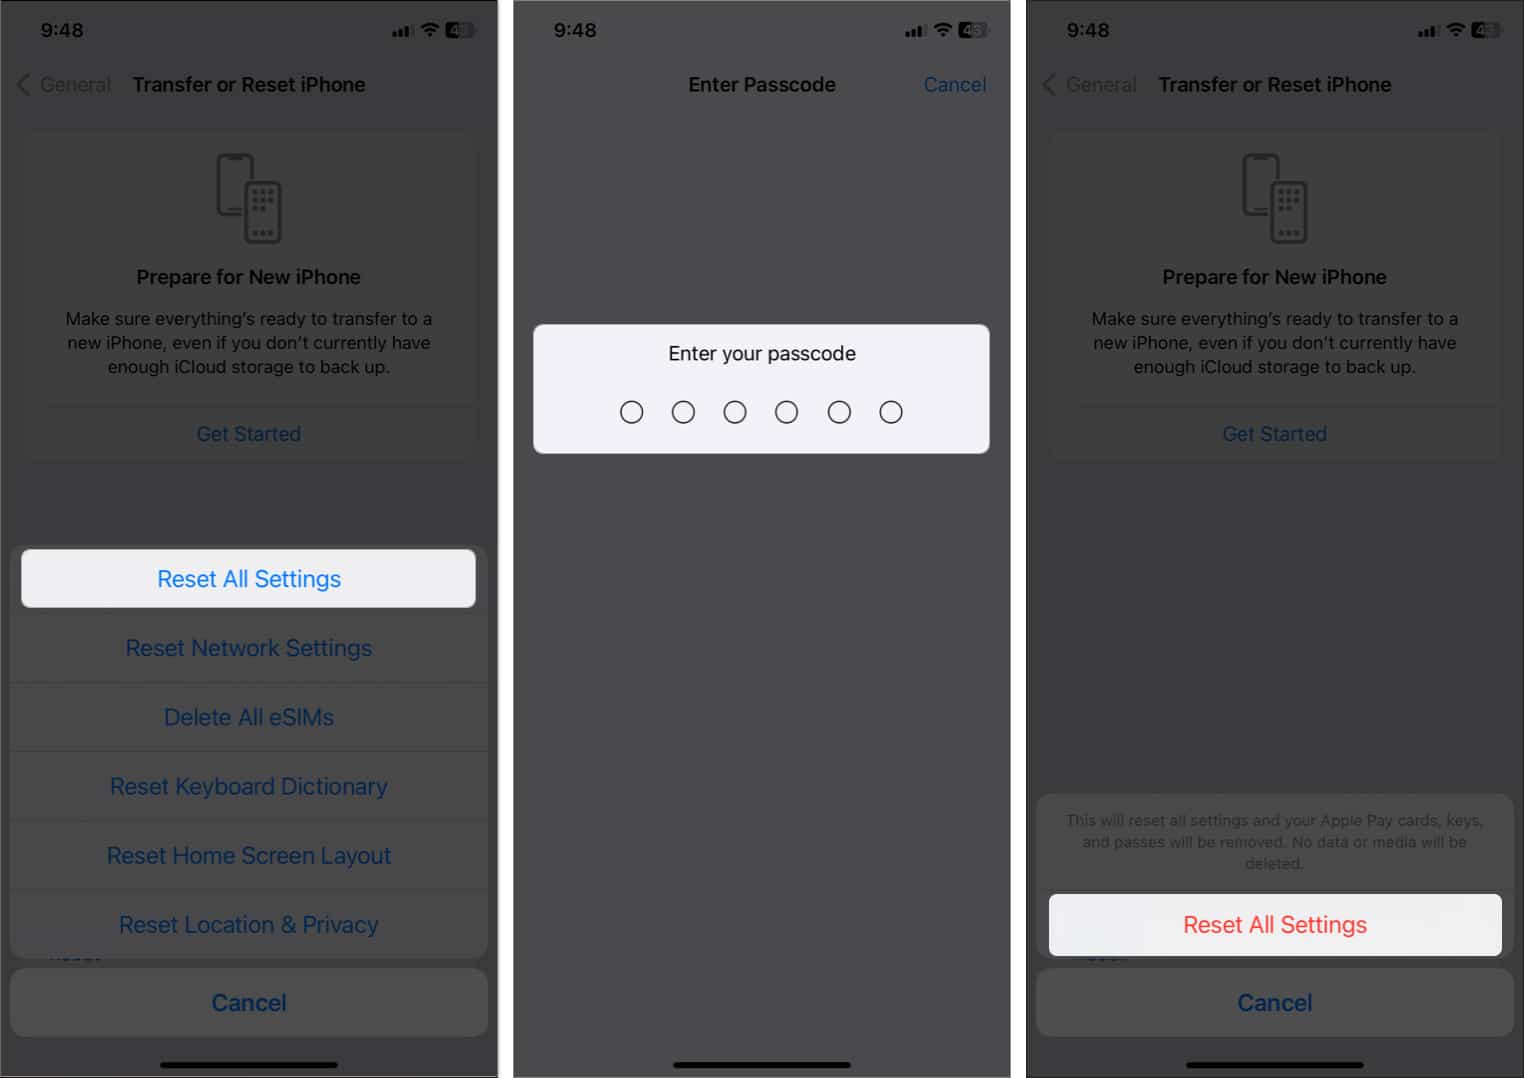

Once done, your iPhone Auto-Lock should work as expected.
Summing up
I hope these solutions have helped you fix the Auto-Lock problems on your iPhone. If you continue to face issues, you should contact Apple Support. They can help you to diagnose and fix the issue. Let me know in the comments below if you have any questions.
Read more:


