What you need to know:
- 4DDiG has an impressive file type, and device support.
- Thanks to a three-step process, recovering data is no more rocket science.
- It’s definitely worth a dig, so don’t skip the review
Data recovery is no joking matter. It ensures that your efforts, time, and invested money do not go in vain due to a stupid mistake or an unfortunate system crash. Tenorshare’s 4DDiG data recovery software can help retrieve the data without a backup, a technical degree, excessive wait time, and tons of $$$. But how?
Well, that’s exactly what we are going to uncover in this review. And most importantly, why do I feel that 4DDiG data recovery for Mac is a cool recovery option.
Tenorshare 4DDiG: It’s all about that data, no trouble!
If you missed my pun in the above title, let me remind you of a Meghan Trainor’s song – I’m all about that bass, ‘Bout that bass, no treble. Agreed, that might not be my smartest one yet, but it certainly clicks.
Whether you go through the 4DDiG website or poke around its app on your Mac or Windows device, the emphasis is to help you recover any and every kind of data. I present exhibit A, aka that next section, to prove the point.
An exhaustive support system
First and foremost, 4DDiG promises to help you recover data in any scenario, whether it’s update failure, system crash, partition loss, accidental deletion, disk damage, or virus attack. In addition, it covers almost all file types, OS, and devices.
1000+ files and formats types
- Documents – DOC, XLSX, PPTX, CWK, HTML, etc.
- Photos – JPEG, PNG, BMP, GIF, PSD, CRW, RAW, SWF, SVG, etc.
- Video – AVI, MOV, MP4, M4V, WMV, MKV, FLV, etc.
- Audio – MP3, M4A, WMA, AAC, WAV, etc.
- Emails
- Archives – ZIP, RAR, SIT, ISO, HTML, etc.
Supported devices in Apple Ecosystem
- MacBook
- iMac
- Hard Drive
- SSD
- USB Drive
- Memory Card
- Camera
- iPod
Supported macOS
- Monterey
- Big Sur
- Catalina
- Mojave
- High Sierra
- Sierra
- El Capitan
- Yosemite
Supported File System
- APFS
- HFS+
- FAT32
- exFAT
I guess the ‘all about that data’ comment indeed makes sense now.
Smart features for smarter Mac data recovery
While exhibit A was impressive, I now present to you something more lucrative!
- Two recovery modes – 4DDiG for Mac offers
- Quick scan mode – Scans and finds most recent and easily available files.
- Deep Scan – An in-depth scanner that’ll find deep-buried deleted files. It’s time-consuming but boasts a higher recovery success rate.
- File filter – Quickly locate a lost file by its name, type, date, extension, and more.

- Free scan – Want to test the app before investing? Scan and preview lost photos and documents before you can recover them.
- User-centric UI – The app’s interface is super simple and straightforward. Everything is well-labeled, and all it takes is three steps.
- Secure data even after recovery – If you want to delete or move the data you recovered via 4DDiG, you’ll have to enter Mac’s password. An interesting way to avoid any more accidents.
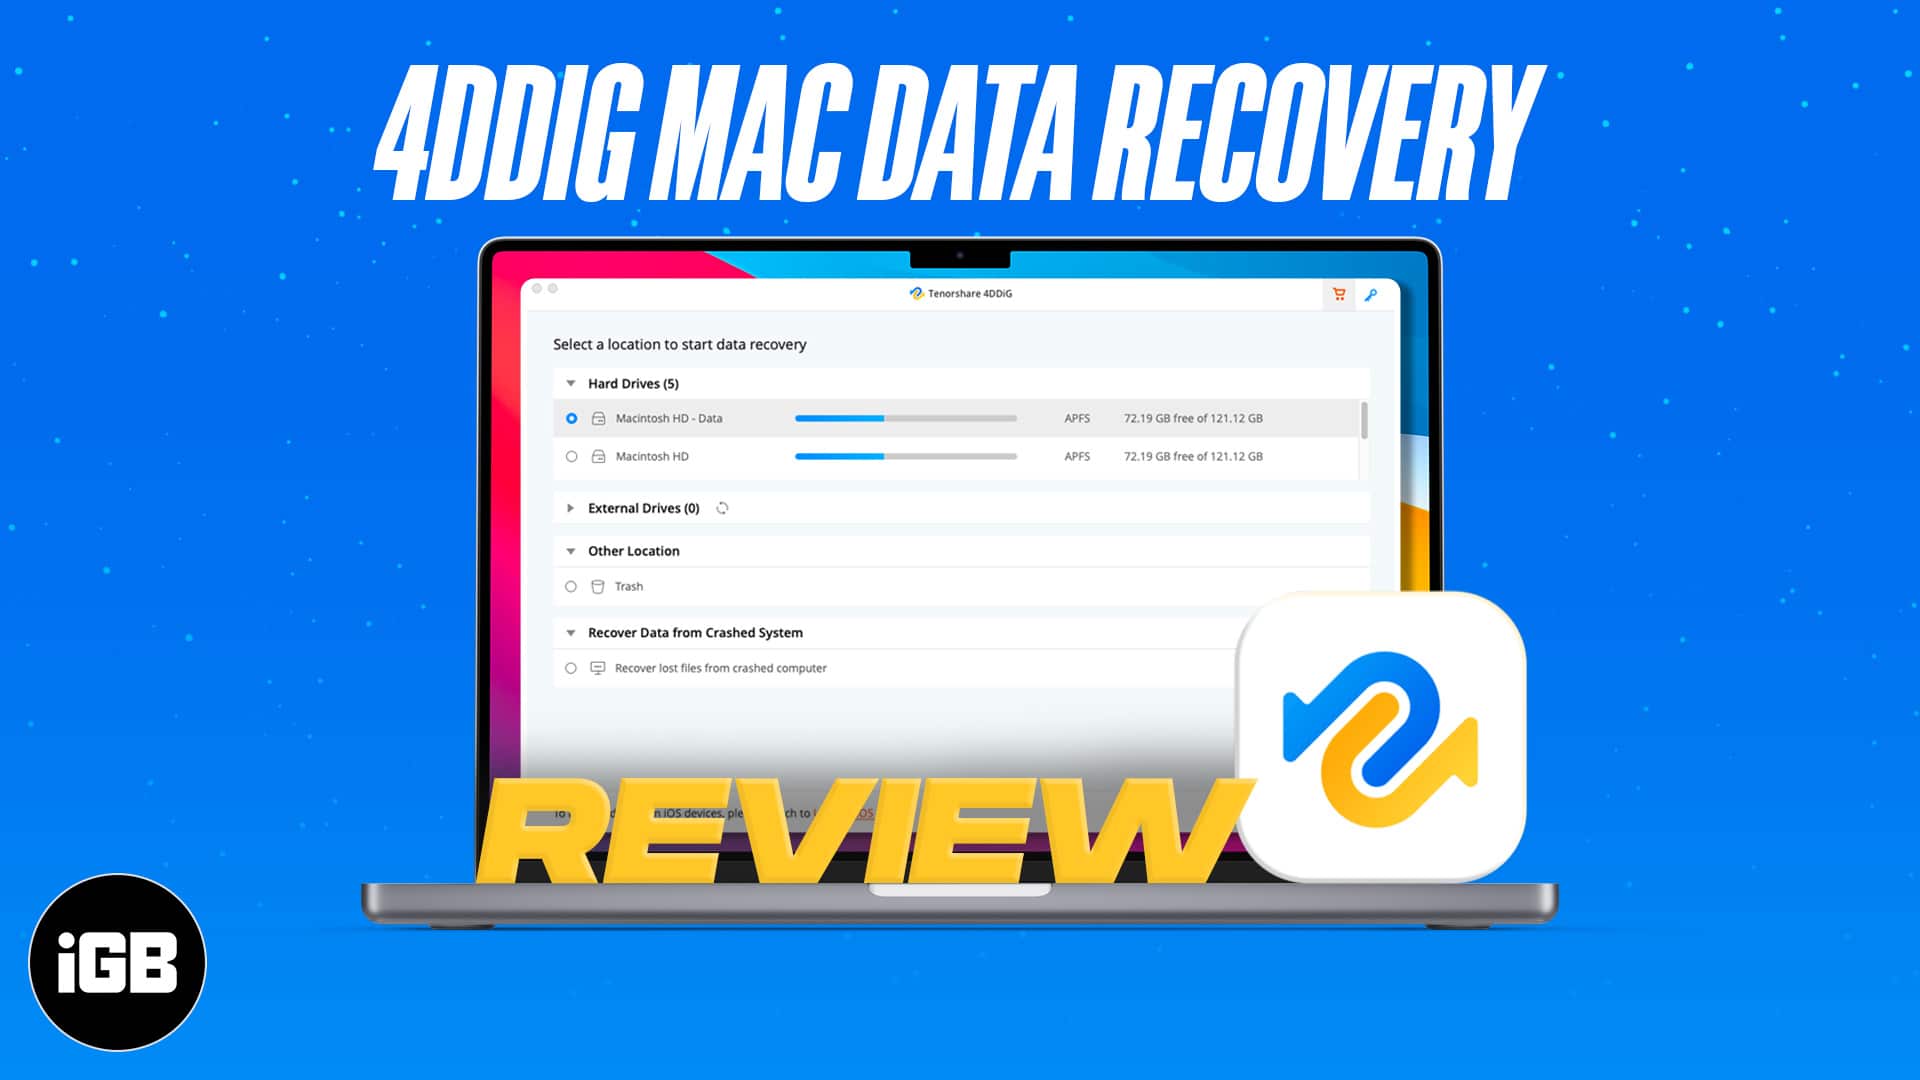
The Three-step recovery
- Choose the scan location
Open the 4DDiG on your Mac and select the directory, hard disk, USB, etc. and click Scan from the bottom of the page.

Note:
You might get a warning to disable SIP before you can proceed. Simply follow the onscreen instruction. You’ll need to restart the Mac, so save a copy of onscreen instructions for reference.
- Locate the data you want
The scan may take some time, depending upon the size of the data. Once completed, look for the file; you can choose between a Tree View or File View or click Photos, Audio, etc., to find the file quickly.

Click the file to preview and select the ones you want to retrieve.
Note:
If you can’t find the file you are looking for, click the Deep Scan link from the bottom.
- Recover your lost files
Once the files are selected, click Recover and choose a suitable location.

Note:
The downloaded folder might have sub-folders that segregate the files. So before you can admire the found file, you might have to do a bit of ruffling.
Should you dig Tenorshare 4DDiG?
Tenorshare 4DDiG had me bowled over the sheer amount of data and device compatibility it boasts. And it is almost as good as it sounds on paper, it’s simple, effective, and definitely worth a try.
Although the software could not perform as promised on my M1 Mac, that’s a bit upsetting. Nevertheless, between their simple UI and three-step guide, I believe even a non-techy user can recover data with ease.
Pros
- Simplifies the overall process
- Supports a variety of file types and devices
- Good data recovery speed, even during deep scan
- Free scan to test before you invest
- 30-day money-back guarantee
Cons
- Scans only one drive at a time
- Doesn’t support M1 Macs
- Monthy license is quite expensive
Price:
- 1 Month License – $55.95
- 1 Year License – $59.95
- Lifetime License – $69.95
Read next: