Smartphones are an integral part of our lives. We chat, email, jot notes, create presentations, make calendar events, quickly create shopping lists, and whatnot. In all these, one thing is common – typing!
And to get the most productive typing experience, you may have to use a keyboard that is a bit non-traditional, innovative, and exciting. One keyboard app that fits all these parameters is Typewise. It is insanely private + productivity-focused. Let me tell you all about it in this in-depth app review.
Distinguished features of Typewise Custom Keyboard for iPhone and iPad
Two keyboard layouts
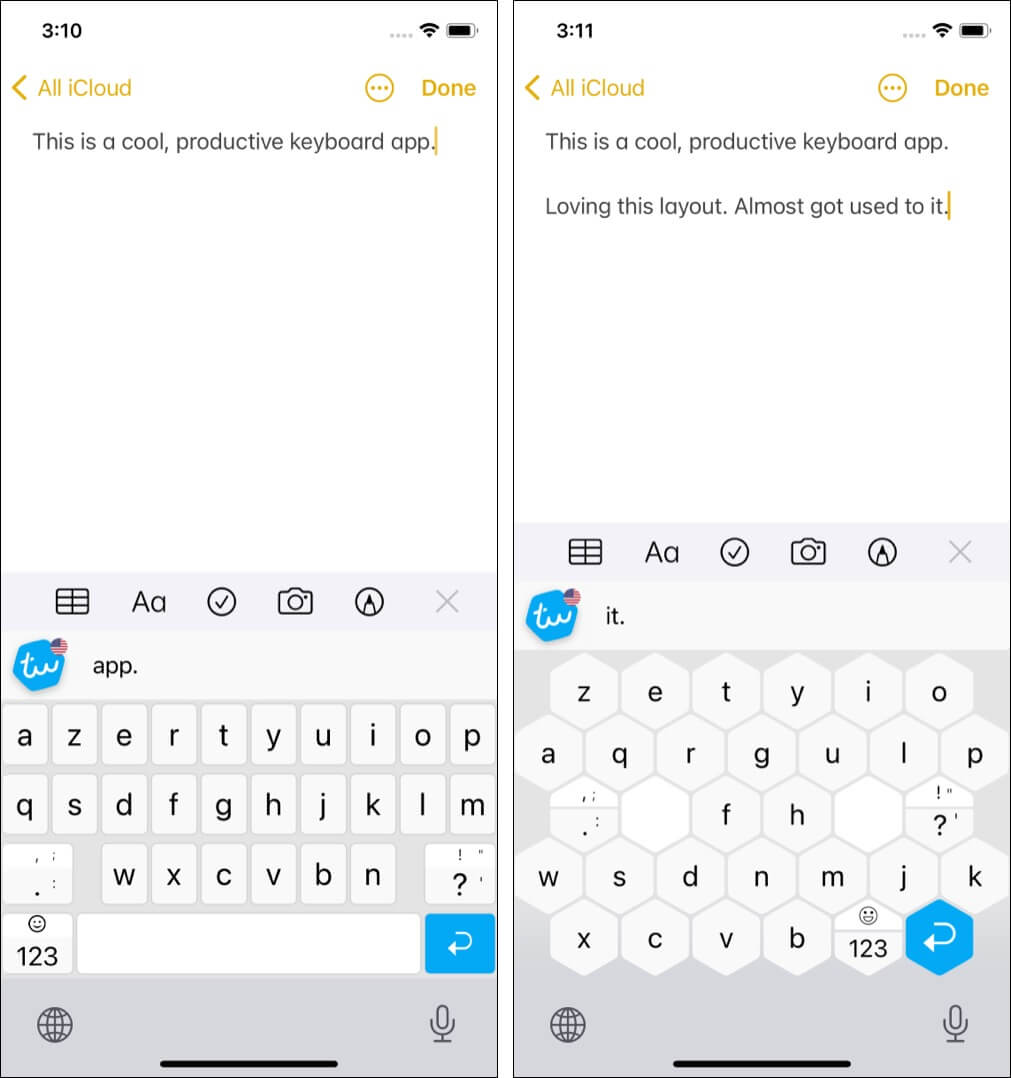
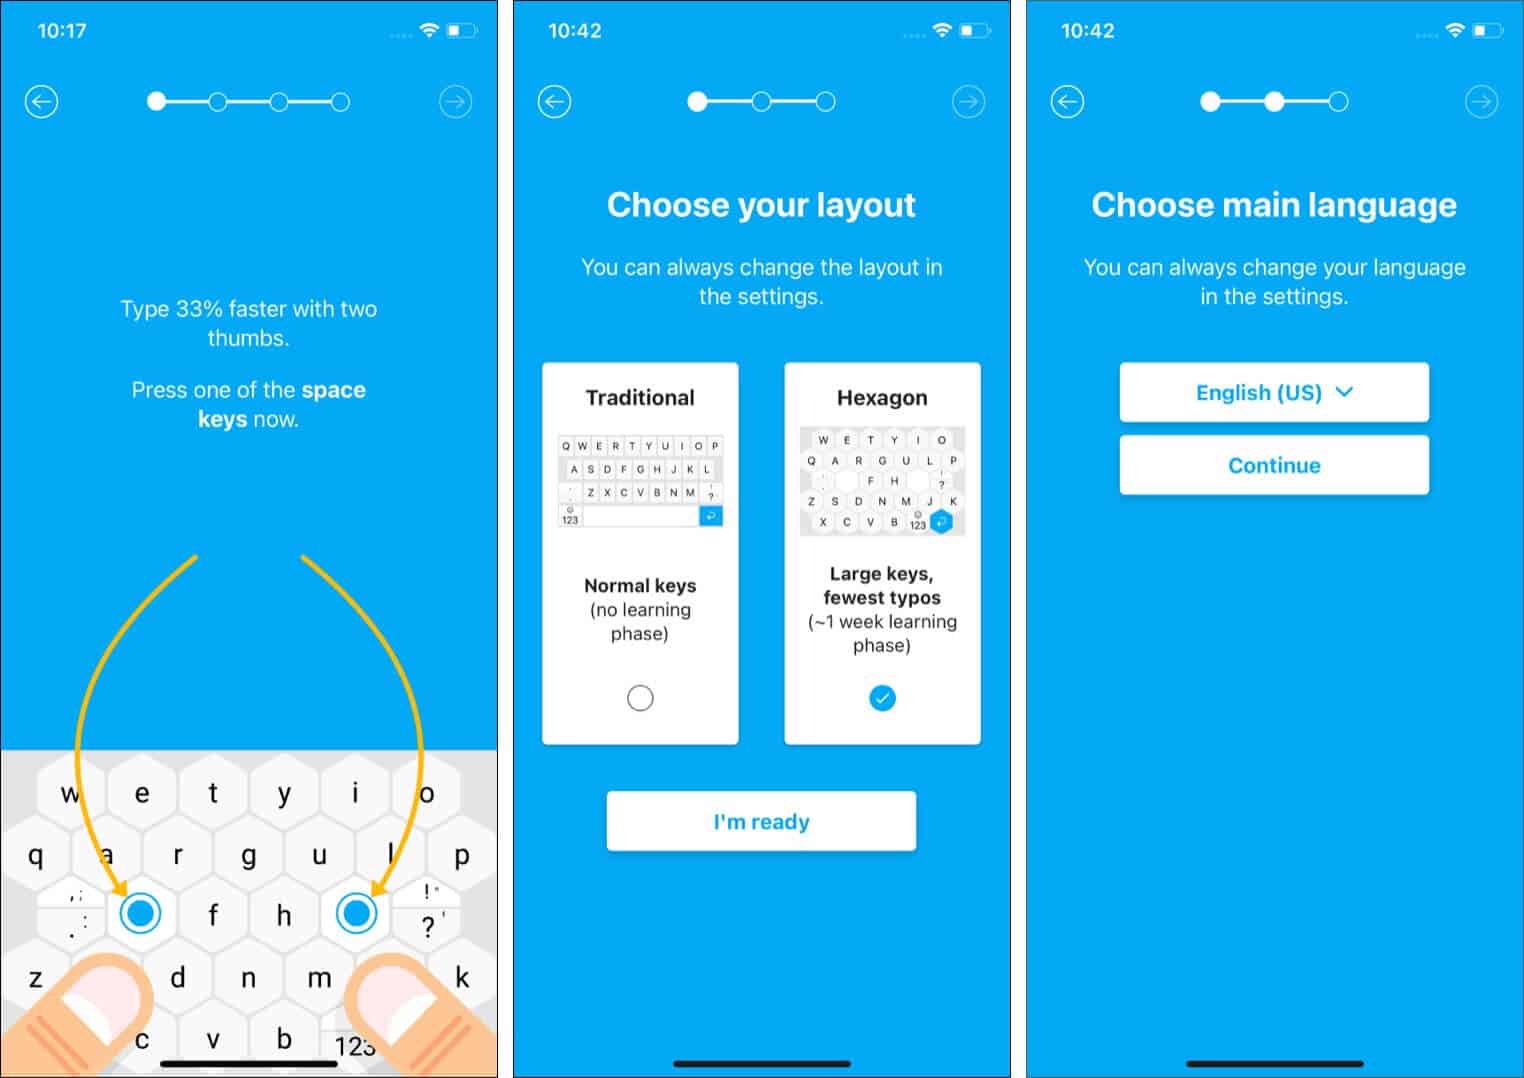
When you set up Typewise (steps below), you have the option to choose between a Traditional layout that looks almost like a standard keyboard. The second option is the Hexagon keyboard that has a striking look with large keys in unique positions. It resembles a honeycomb.
The hexagon layout has a learning curve. Depending on the user, it may take a few minutes to around seven days to get used to it. It is worth trying, and once you get the hang of it, the gestures, two space keys, and the overall experience are hard to replace with a standard QWERTY keyboard.
Multiple easy-to-use keyboard gestures
Two months ago, I switched from iPhone 6s plus to iPhone 11. Earlier, I thought it would be uncomfortable to use gestures for necessary actions like going to the Home Screen. But within 24 hours, I got addicted to it. And now, pressing the Home button on my secondary iPhone feels like a chore.
If you, too, are on an iPhone with the Face ID (iPhone X or later), you are already used to the iOS gestures. They are fluid and feel natural.
Similarly, Typewise is full of easy-to-memorize gestures that perform necessary tasks like going back, deleting word(s) or sentences, undo-redo, see emojis, capitalize alphabets, and more.
The developers have ensured that gestures like swiping left to delete, swiping right to undo the delete, hold and drag for the cursor, swipe up to capitalize, etc., correspond to actions that feel natural. Don’t worry. The app will show you all these during the setup.
This ensures that your fingers naturally inculcate the muscle memory to perform these actions irrespective of the iPhone model. And within a few days, you can start typing with improved speeds!
Sincerely privacy-focused with an offline mode!
Typewise does not collect your typing data (and thus, there is no question about selling it to someone). What you type and word completion algorithms are all processed offline on the device itself. None of the individual keystrokes or word combinations is sent to the cloud for processing.
Note: A few features like voice to text, GIFs, etc. do require the internet.
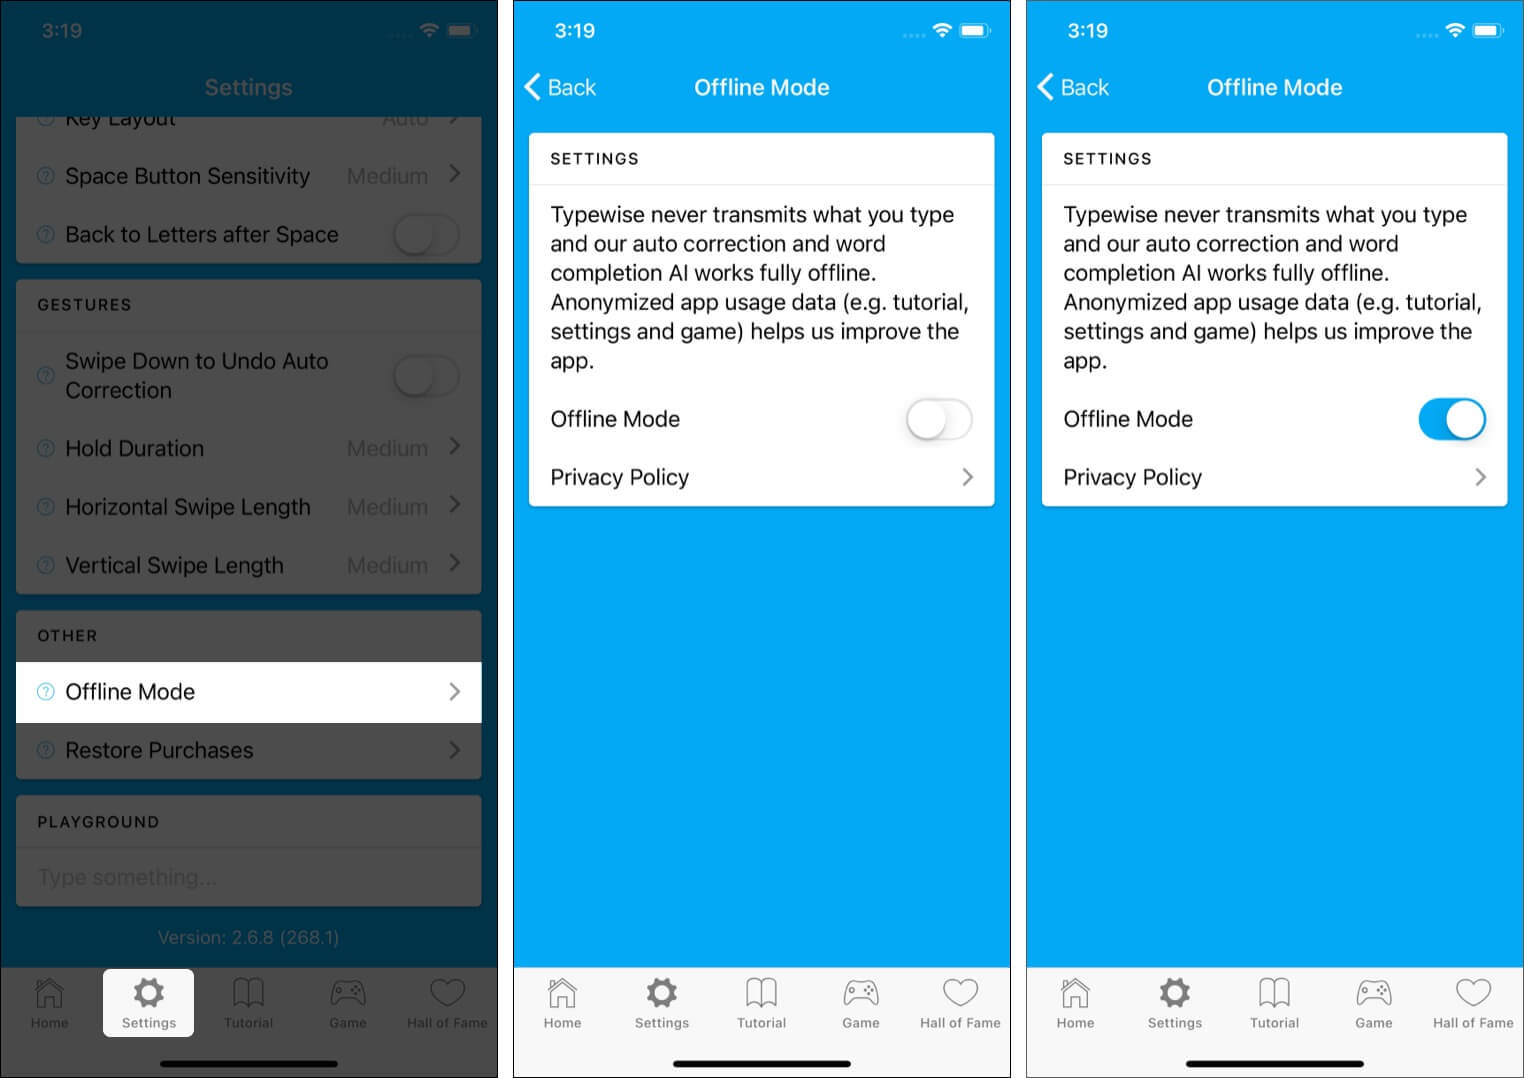
Secondly, if a miniature shadow of insecurity still lingers on the back of your mind, you can easily open the Typewise app → tap Settings → scroll to the bottom, tap Offline Mode, and enable it. Now you have completely turned off the internet for this app. There is even a second app called Typewise Offline. You may check it as well.
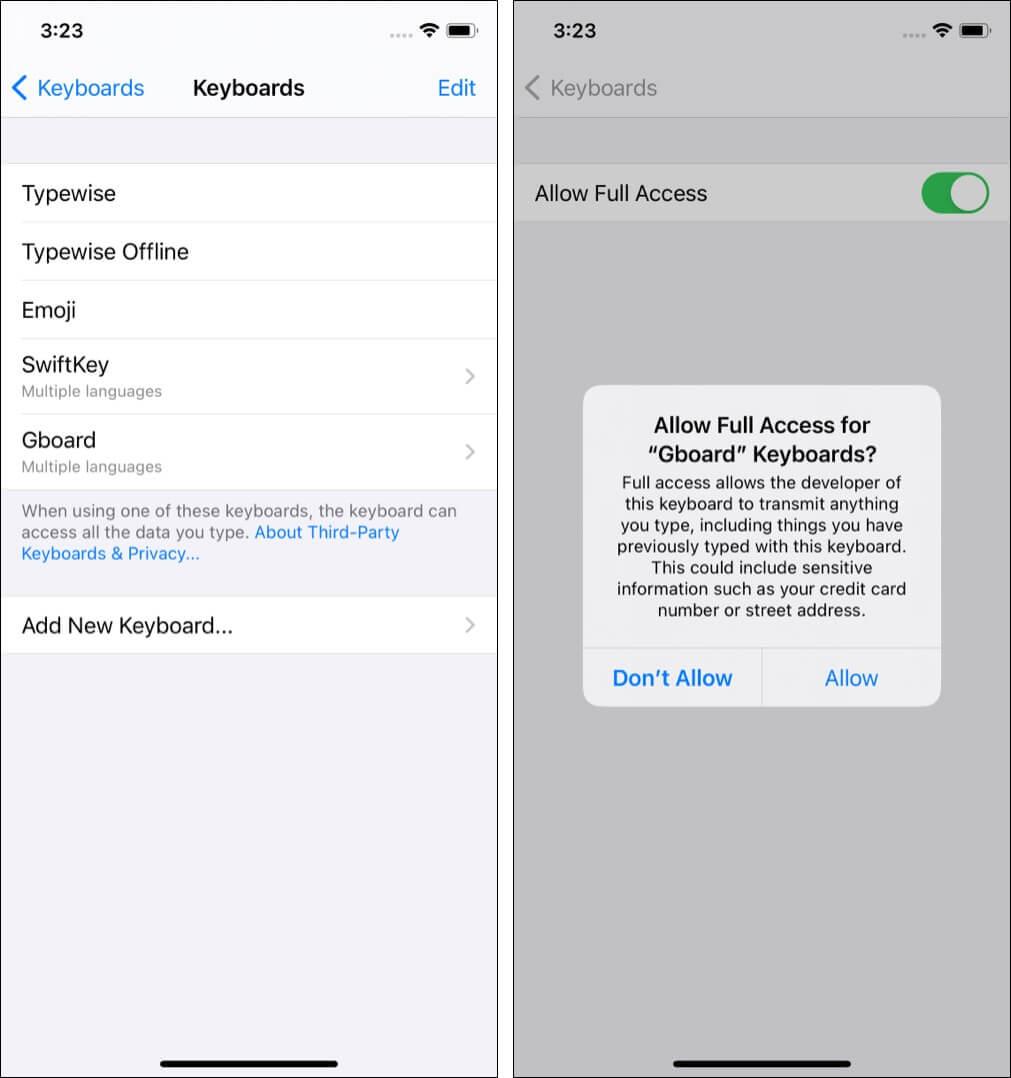
Add-on: I noticed that unlike SwiftKey or Gboard, Typewise does not need full access to provide all functionalities. Nice!
Other praiseworthy highlights of Typewise
- Support for over 40 languages. New ones are regularly added.
- You can type in multiple languages at the same time.
- The large keys of the hexagon layout ensure comfortable typing with fewer mistakes.
- Get personalized word suggestions for quicker typing.
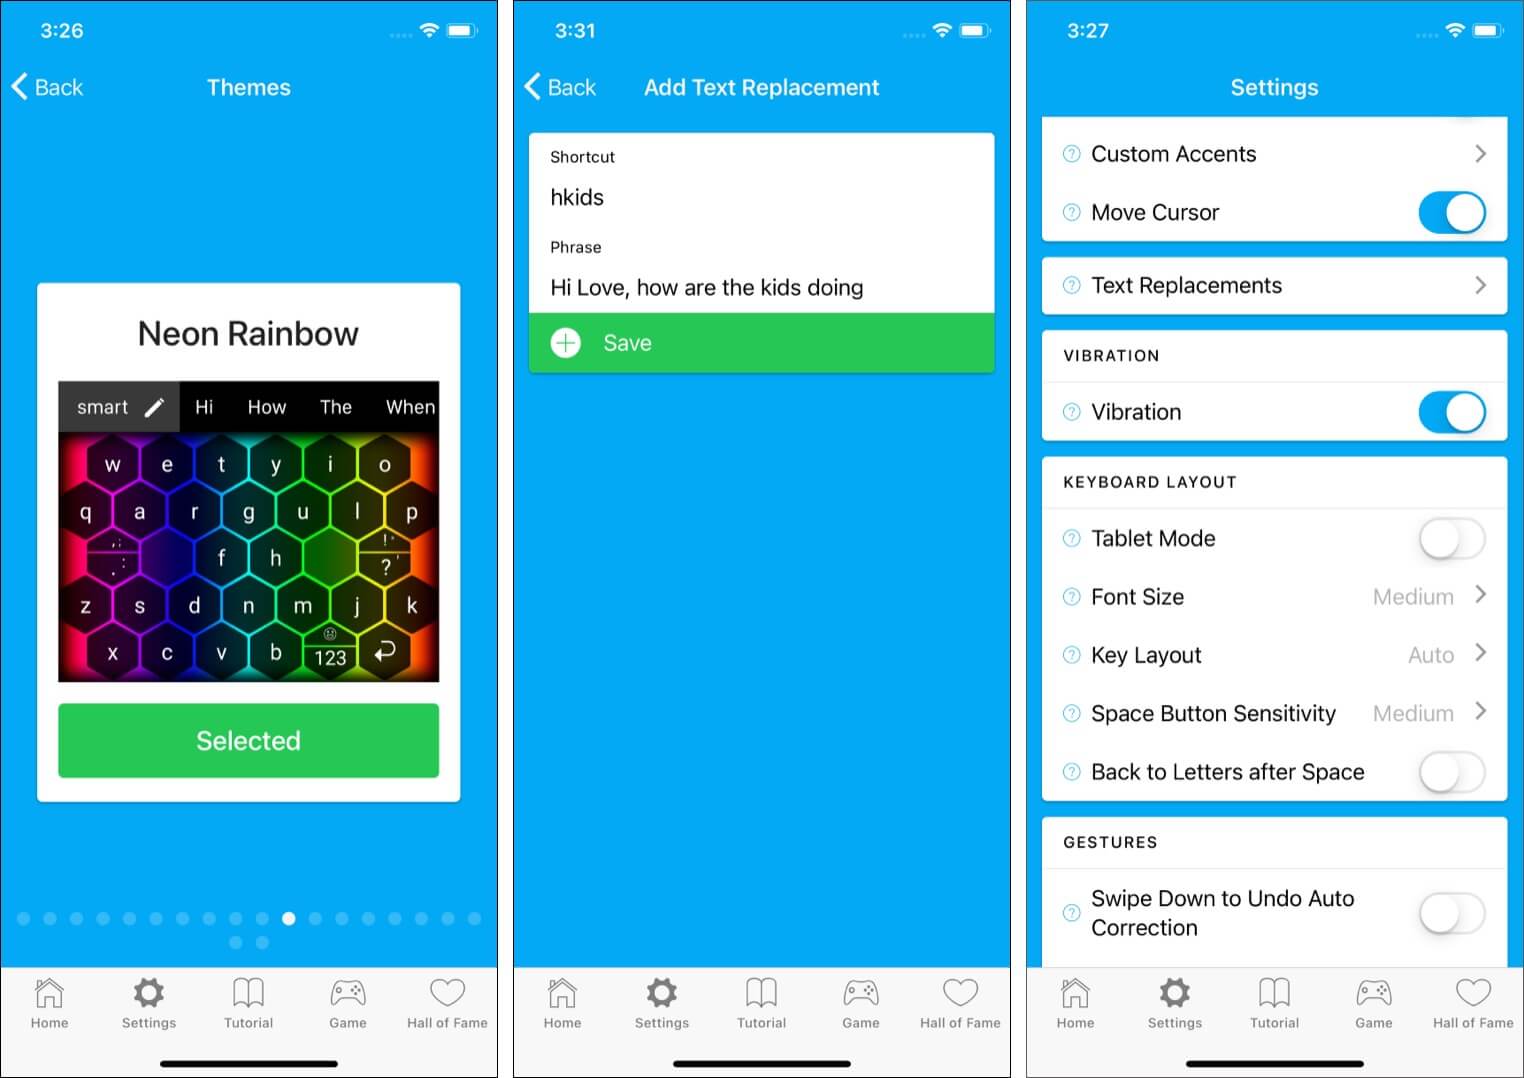
- There are around two dozen themes that include various colors like light, gray, dark, pitch black, sunset, neon rainbow (looks like a computer RGB keyboard), and more.
- Text Replacements: For example, you can just configure it to type ‘
Hi Love, how are kids doing‘ just by typing, say, ‘hkids.’ It is fantastic and worth trying if you often type the same words or phrases. - Tablet Mode for comfortable typing on the large iPad screen.
- Several customization tools to make the keyboard just the way you like. This includes options like hold duration, swipe length, font size, key layout, button sensitivity, and more.
How to install and setup Typewise on your iPhone and iPad
- Download Typewise for free from the App Store. It is also available for Android.
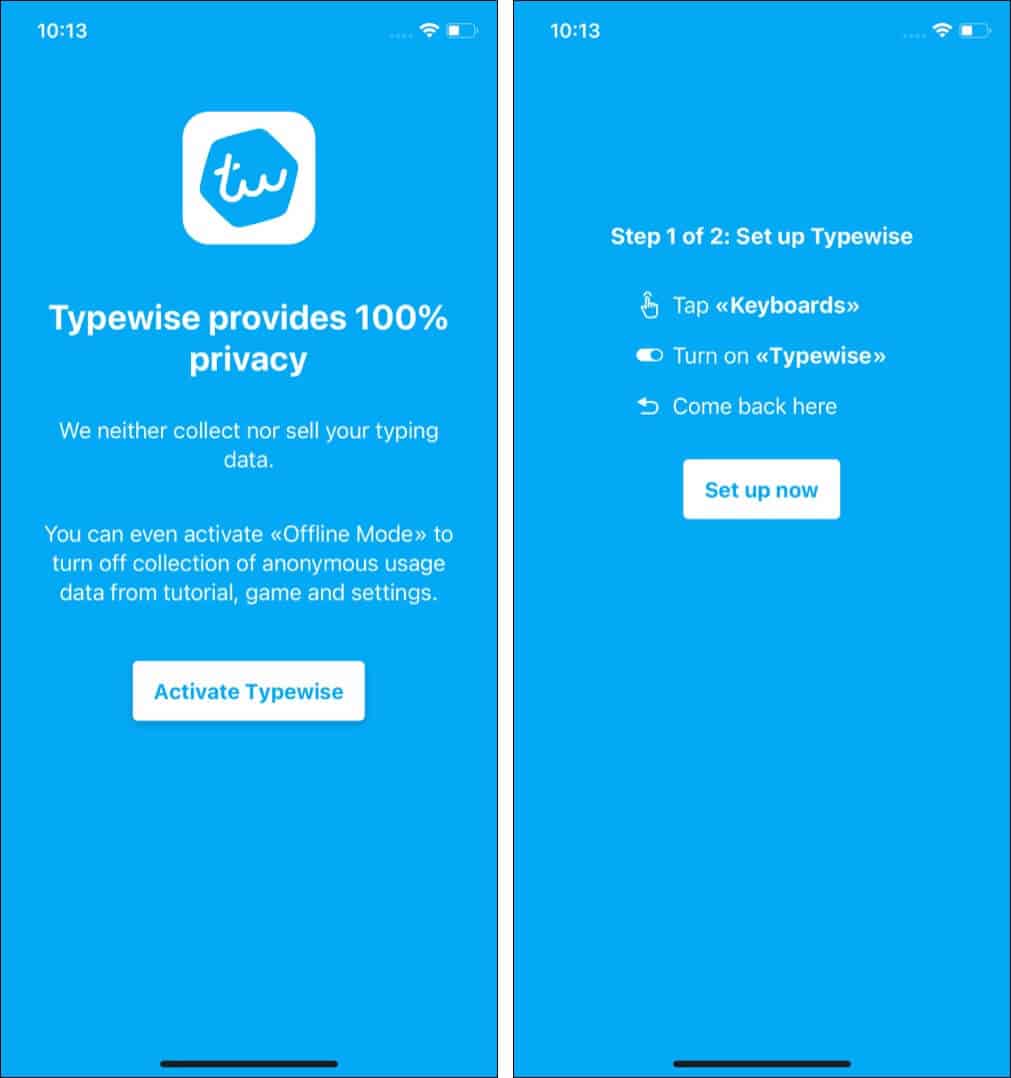
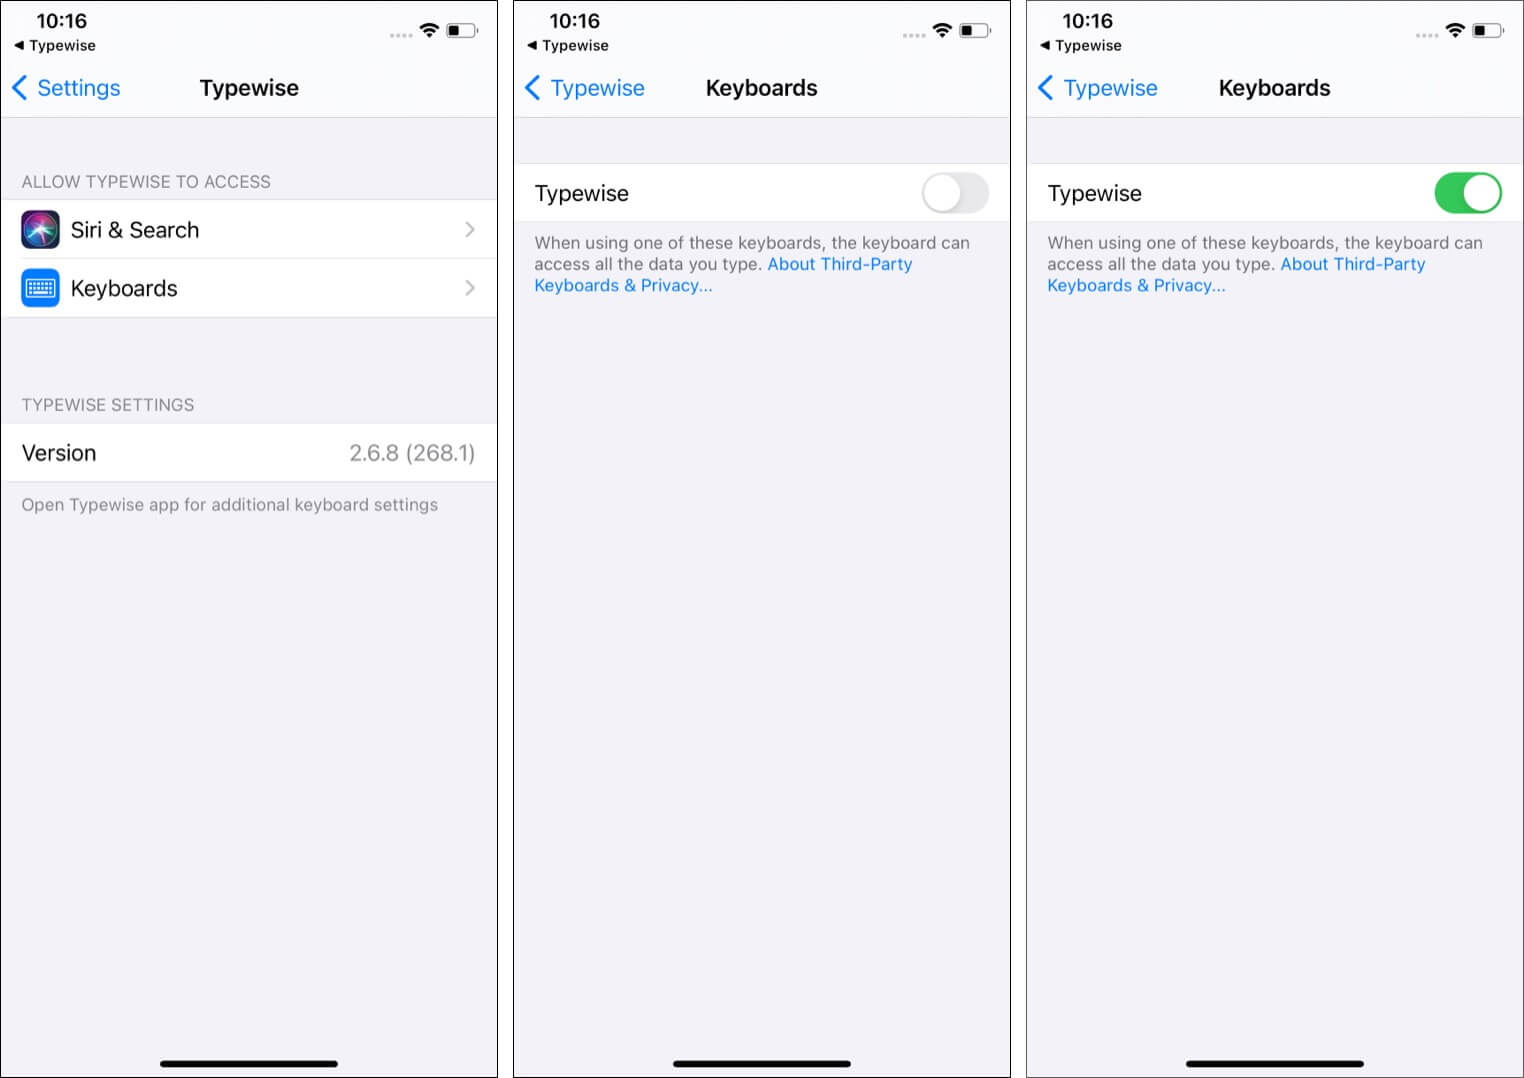
- Tap Activate Typewise → Set up now. The iPhone Settings app will open.
- Tap Keyboards.
- Enable the toggle for Typewise.
- Open the Typewise app again and continue with the simple set up instructions.
- Choose the desired layout – Traditional or Hexagon and tap I’m ready.
- Select the desired language and tap Continue.
- Like me, if you are bi or multilingual, tap Add languages and get Typewise Pro.
- You have successfully set up Typewise and are now ready to use it!
Tip: If you want, you may remove other iPhone keyboards to avoid confusion and unnecessary trigger of those keyboards. For this, open the Settings app → General → Keyboard → Keyboards → Edit → tap red minus next to other keyboards and remove them.
Make Typewise behave the way you like: Open the Typewise app and tap Settings from the bottom row. From here, you can choose which settings you wish to change. You can also switch themes, languages, etc.
Verdict: A yay or nay for Typewise Custom Keyboard?
Typewise is a must-try. For years you may be using the stock iOS keyboard, and it may be serving you just fine. But, if you wish to elevate your typing experience, you should get this app.
Easy-to-use gestures, a wide range of themes, large key sizes, etc. give you the typing experience you do not know you need (or enjoy) unless you try Typewise. It can lead to significantly fewer typos and, in some days, improve your efficiency.
The app is built with simplicity while still boasting almost all the features. However, I miss two things:
- The ability to drag the cursor even vertically (instead of only horizontally).
- There is no swipe/slide to the type option.
Finally, you must know that not all features are available in the free version. For things like text replacement, key layout, gesture customization, typing simultaneously in multiple languages, and some themes, you need the pro version. Three in-app purchase options are:
- Monthly subscription: $1.99
- Annual subscription: $9.49
- Lifetime purchase with free future pro features: $25




Leave a Reply