Are you tired of the generic “Sent from my iPhone” signature that appears at the end of your every email? You can change your email signature on the Mail app on your iPhone to personalize your threads and add a professional touch.
Follow along, and we will show you how to change your email signature on an iPhone.
Why should you change the default Mail app signature on your iPhone?
Customizing your email signature offers several benefits:
- Add a personal or professional touch: A signature with your name, job title, contact details, and other details looks more professional than the default one.
- Promote your brand: Include your company logo or website link to boost brand visibility.
- Create consistency across accounts: The Mail app lets you change the email address for all accounts altogether to maintain uniformity.
- Remove any unnecessary advertising: The default “Sent from my iPhone” can feel like a free promotion for Apple. So, you may want to replace it with something more meaningful.
- Show professionalism in emails: A well-crafted signature adds authority and elevates the quality of your emails.
Overall, editing your signature in the Mail app makes your emails more tailored and thoughtful. Now that you understand the purpose, let’s jump into the steps!
How to customize email signature on iPhone or iPad
Changing your email signature is straightforward, and you can replace the default signature with text, images, and more, depending on your preference.
1. Use text signature
If you don’t prefer the “Sent from my iPhone” signature, you can replace it with any other text like this:
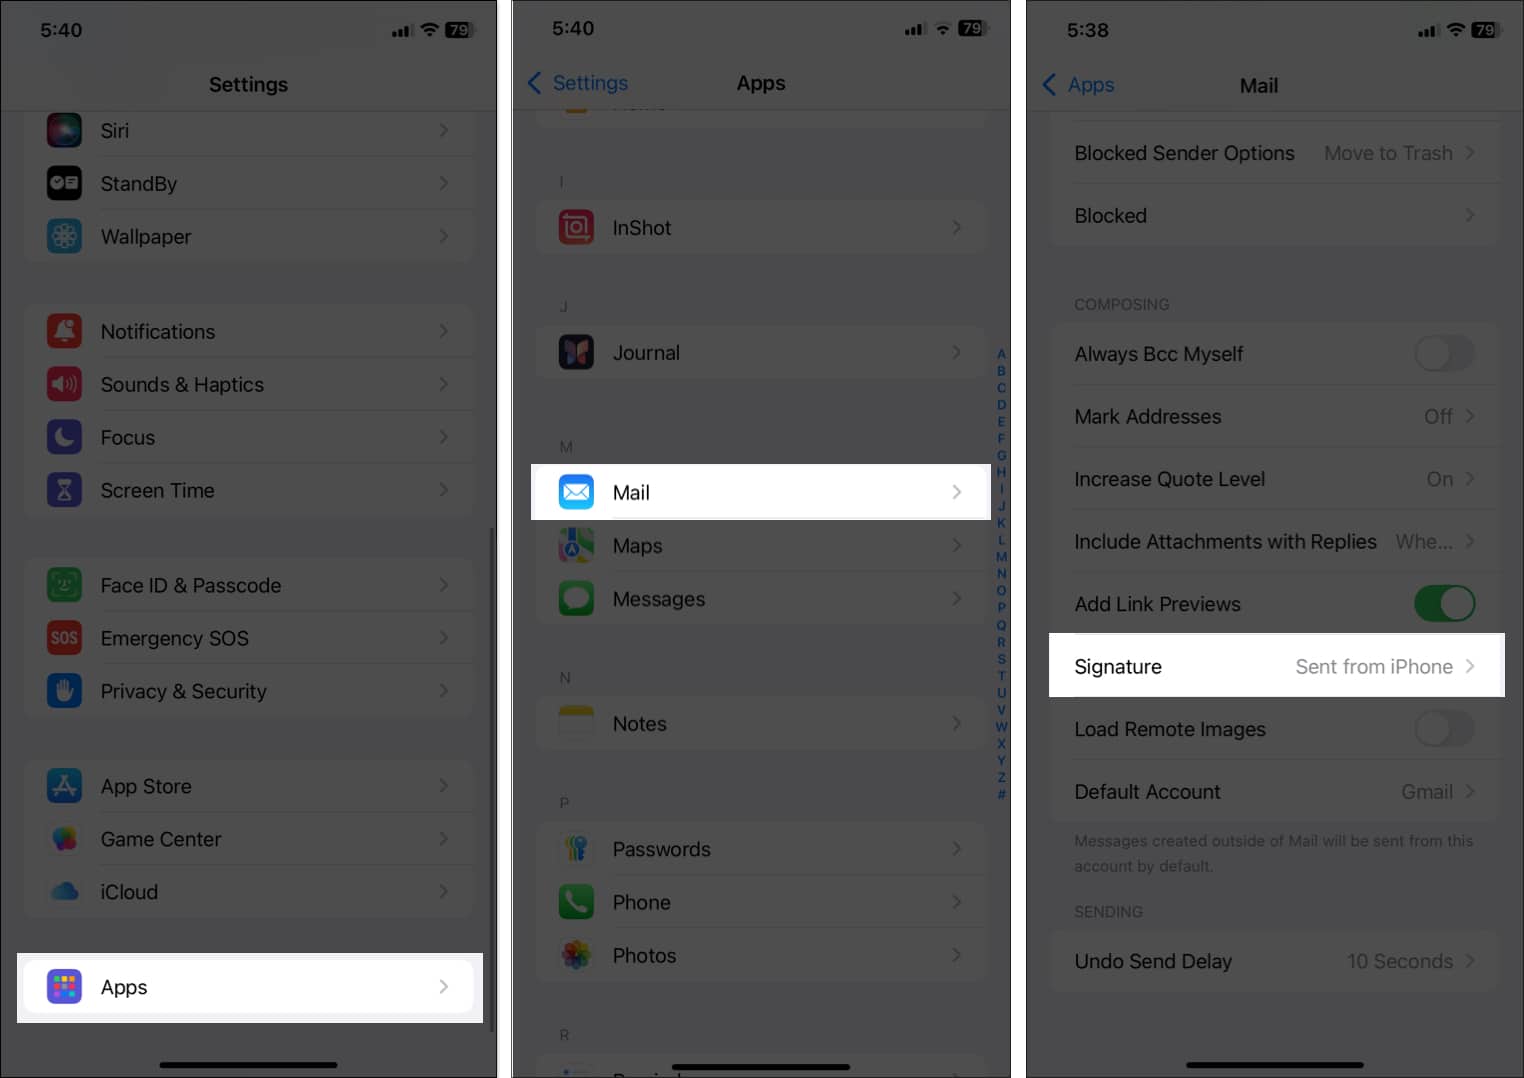
- Open the Settings app on your iPhone or iPad.
- Select Apps and tap Mail.
- Find and select Signature under the Composing section.
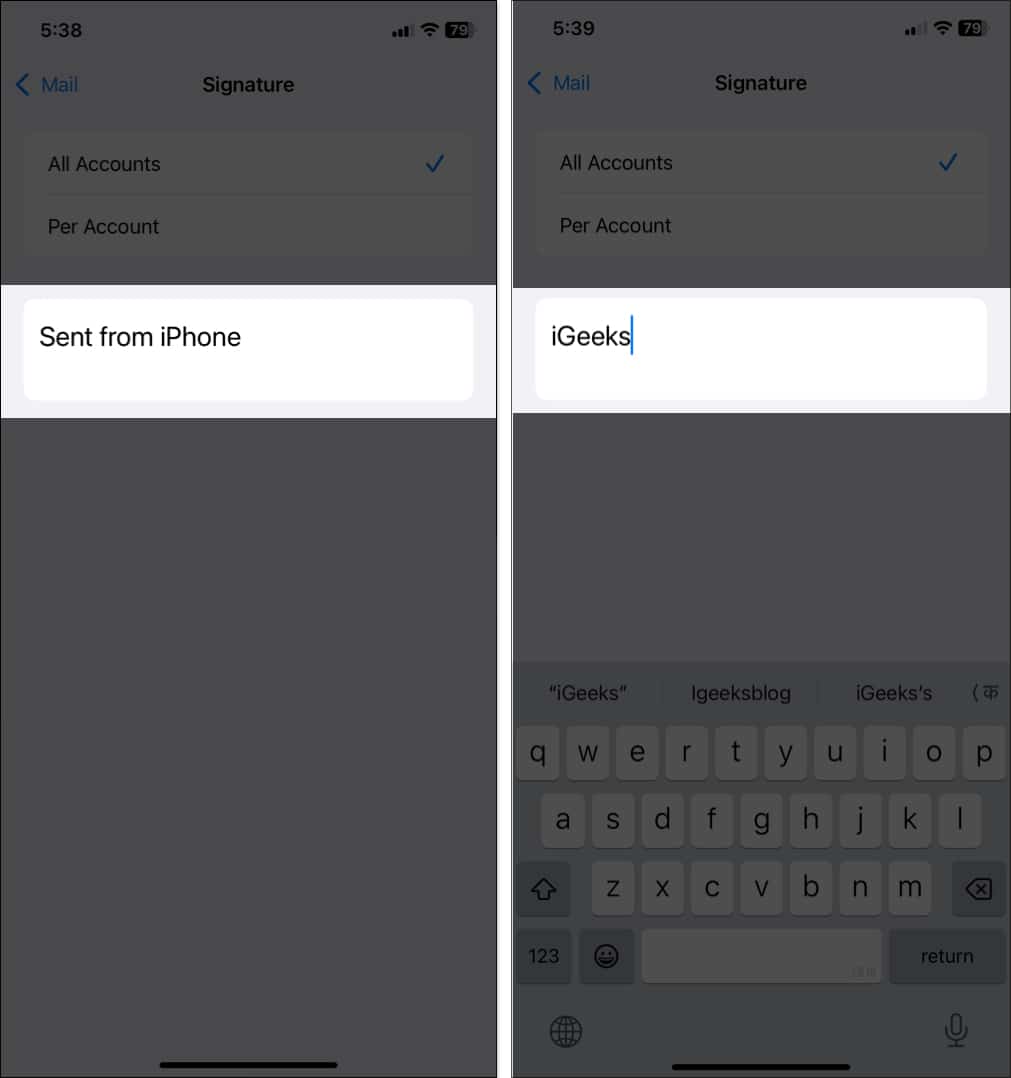
- Delete “Sent from my iPhone” and enter a custom text signature of your choice. You can include your name, job title, phone number, or any other details. Alternatively, leave the text box empty if you don’t want to use any mail signature.
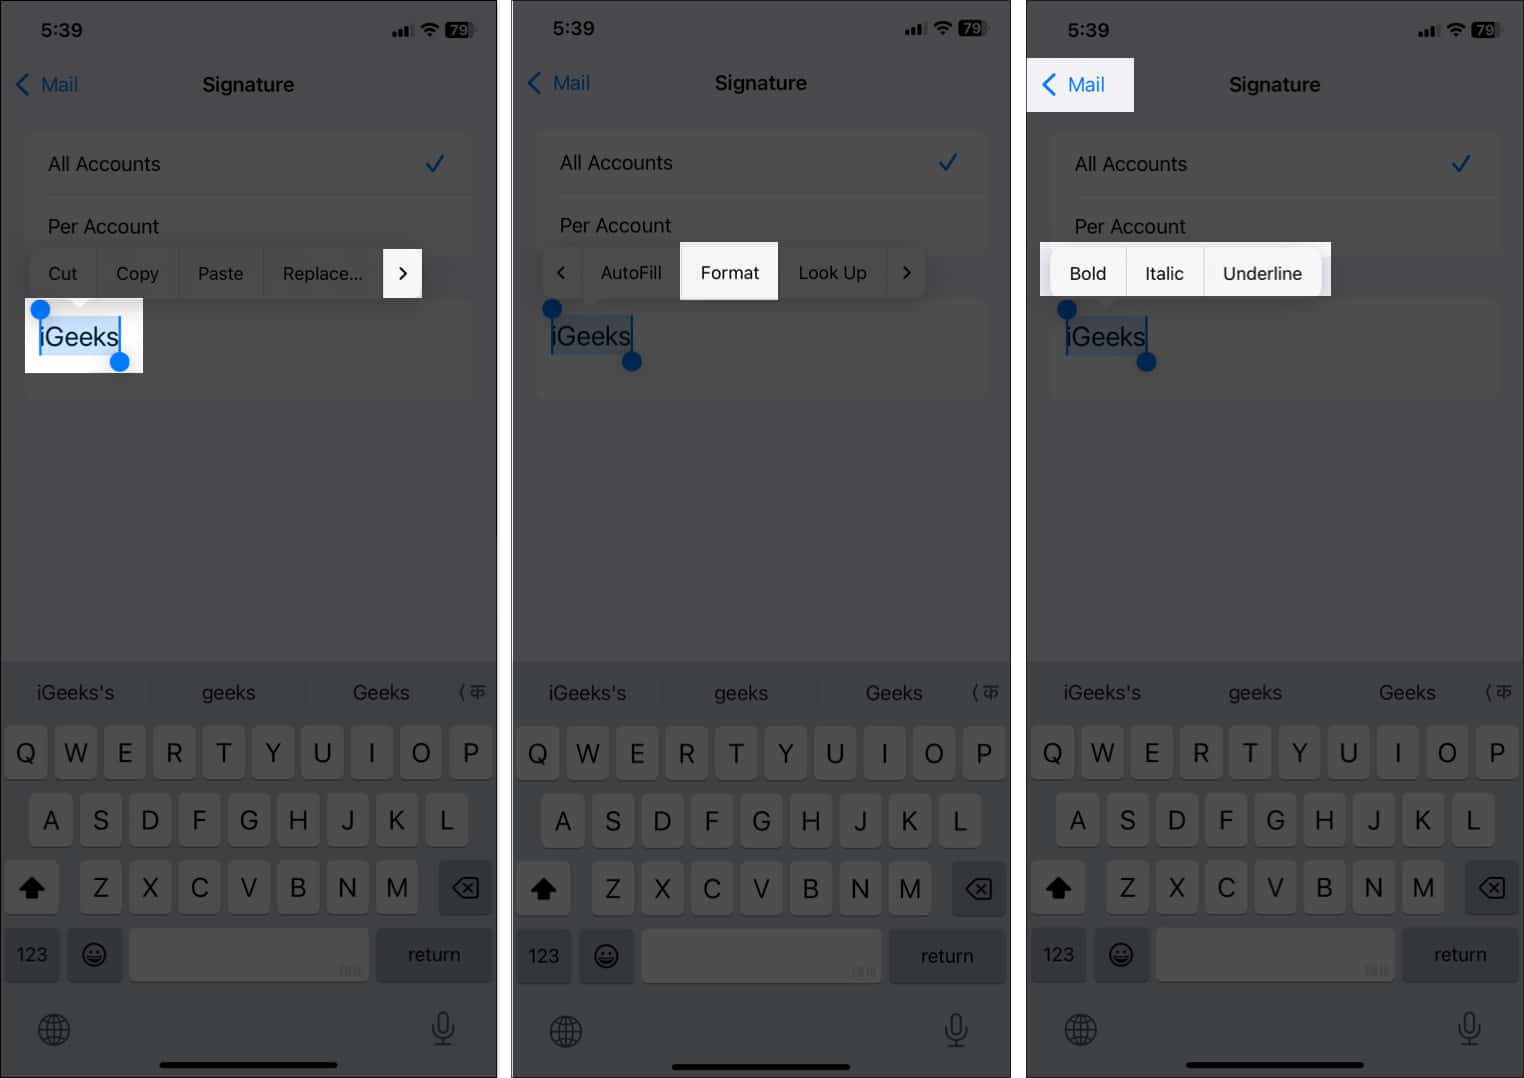
- To customize the text signature further, double-tap on a word, and you will see a pop-up menu. Tap the right arrow and select Format. Here, select between Bold, Italic, and Underline.
- Once satisfied, tap Mail in the top-left corner to save the changes.
Pro Tip:
If you have multiple email accounts on your iPhone, you can create a unique signature for each or use one signature for all accounts. To set individual signatures, select Per Account at the top and add the signature text in the respective box.
2. Add images and other formatting in your signature
Adding images like a company logo or your website links with special formatting can enhance the professionalism of your signature. However, the Mail app on iPhone doesn’t offer robust formatting tools, so you can’t change the signature’s font color, style, or size or add any images from Settings. However, you can work around this, as shown below:
First, create a signature using your computer. Here’s how to do this:
- Launch the Mail app on your Mac.
- Click Mail in the menu bar and select Settings.
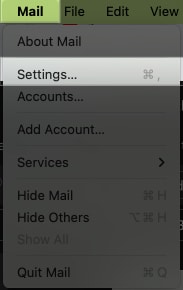
- Now, move to the Signature tab.
- Click the plus (+) icon at the bottom to create a new signature.
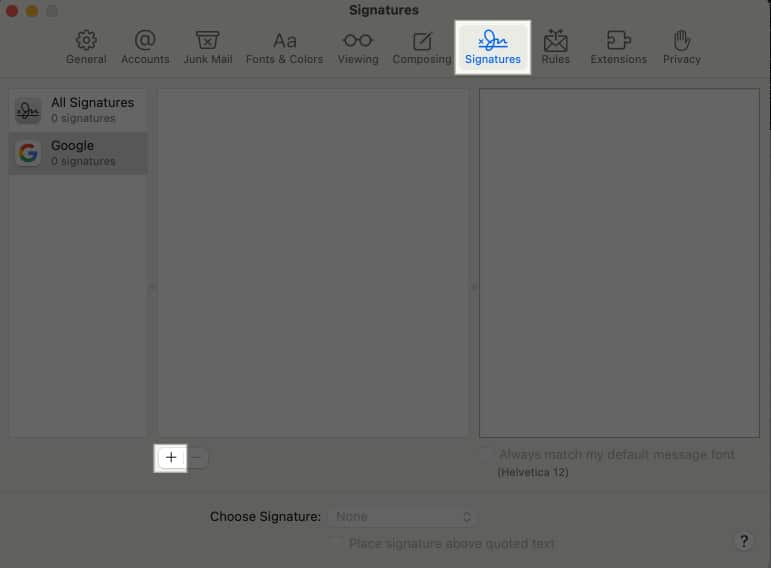
- Uncheck the Always match my default message font checkbox.
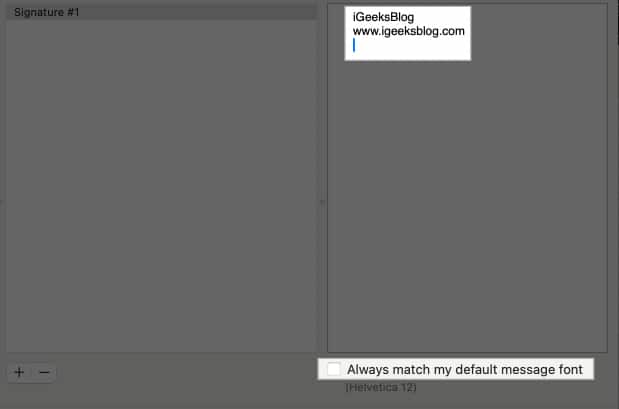
- Now, customize the mail signature as you want.
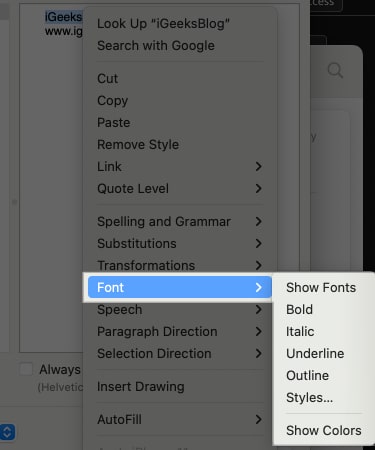
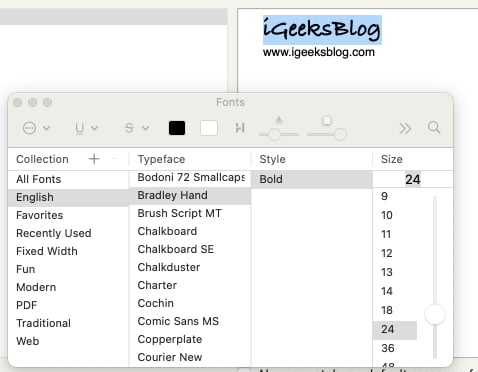
- Select the text you want to format, right-click on it and select Font from the menu. You can then choose the font style, format, and more.
- You may also add emojis and links to your signature and even change the font.
- Once done, close the dialogue box.
Now that you have successfully made your custom email signature, follow these steps to import this to your iPhone:
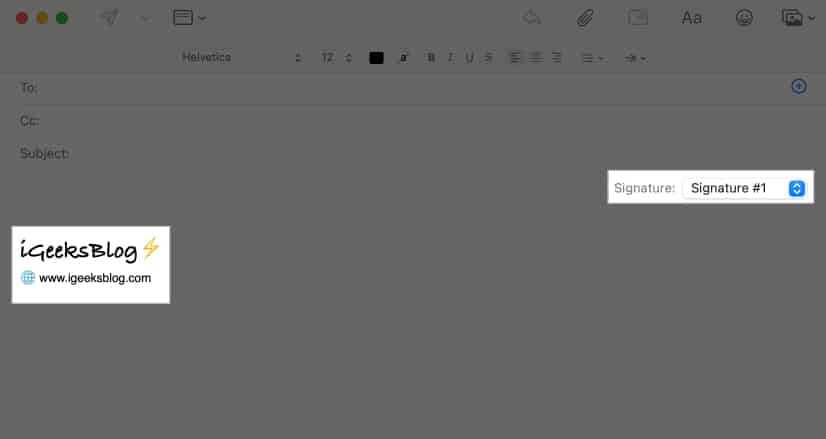
- Open the Mail app on your Mac.
- Compose a new email and select your new signature from the Signature drop-down.
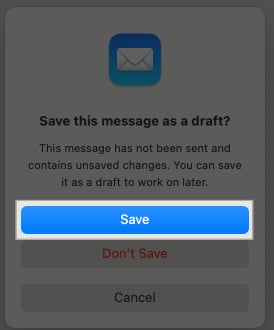
- Save the draft.
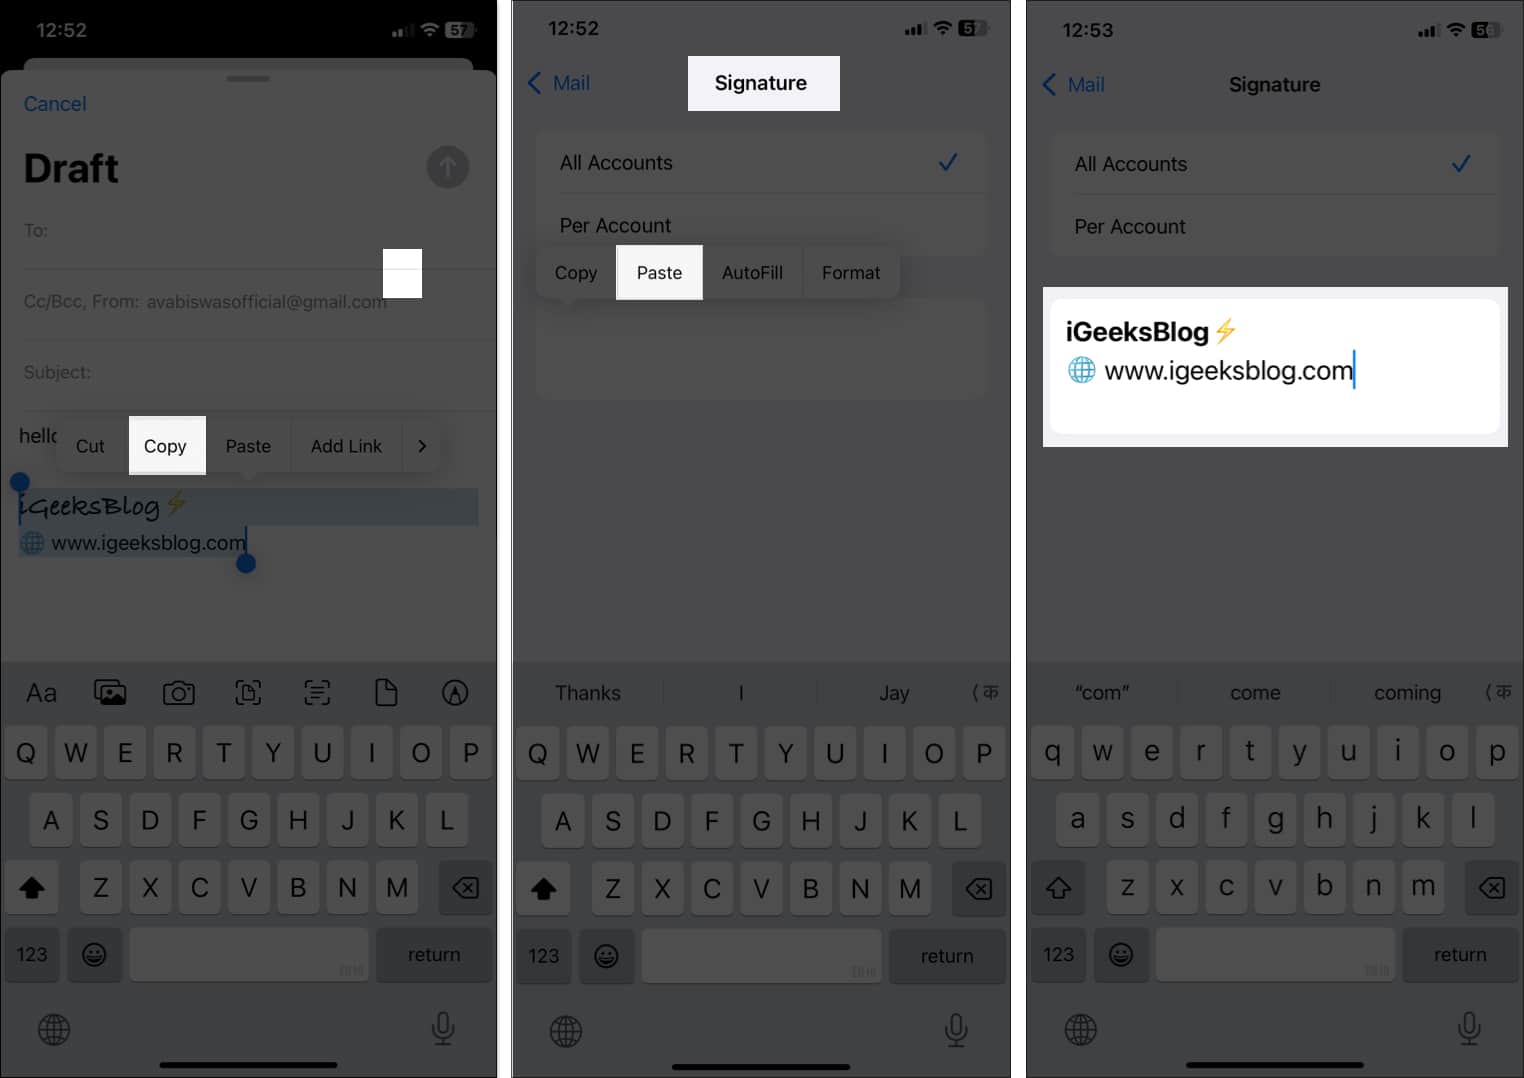
- Now, launch the Mail app on your iPhone.
- Find the draft mail and copy the signature you made.
- Go to the Settings app and paste the signature as mentioned above. You will see the signature text with emojis. However, you will see that the formatting is removed.
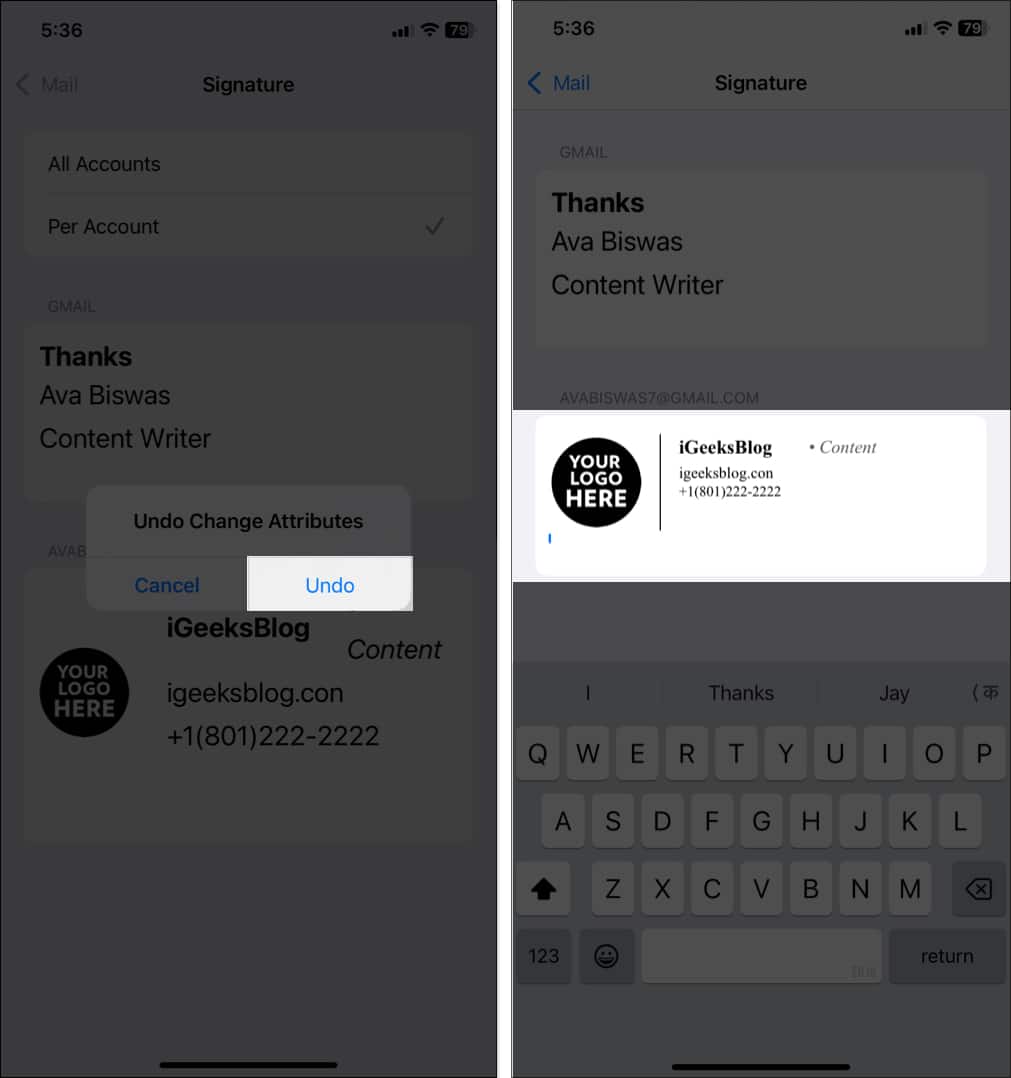
- To get the formatting back, shake your device and select Undo in the Undo Change Attributes pop-up.

That’s all! Now, you will see the signature with advanced formatting whenever you send an email from your iPhone.
You can use third-party mail signature apps to add images such as your company logo. Such apps offer HTML signature templates that you can customize and paste into the signature box. Let’s see how:
- Download and install the Email Signature Pro app.
- Launch the app and sign in or create an account.
- Choose a signature template you like.
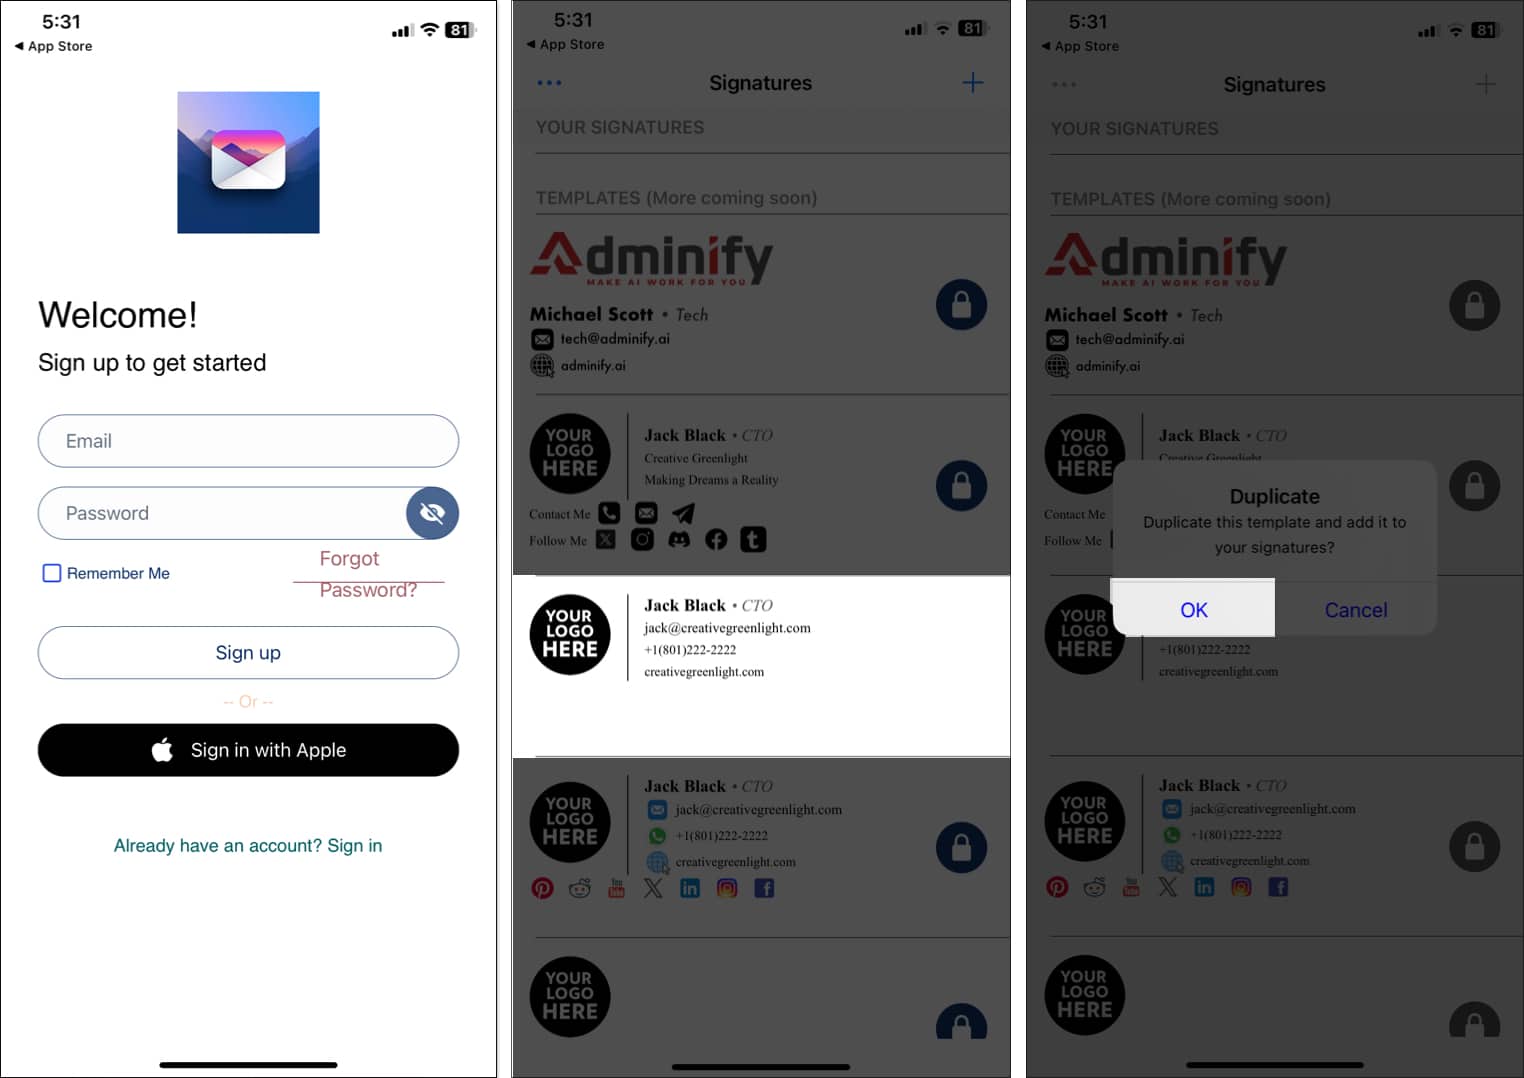
- Fill out your details in the specific boxes. Scroll down for advanced formatting and editing options.
- Once satisfied, tap on Copy to Clipboard and select Copy Formatted Signature.
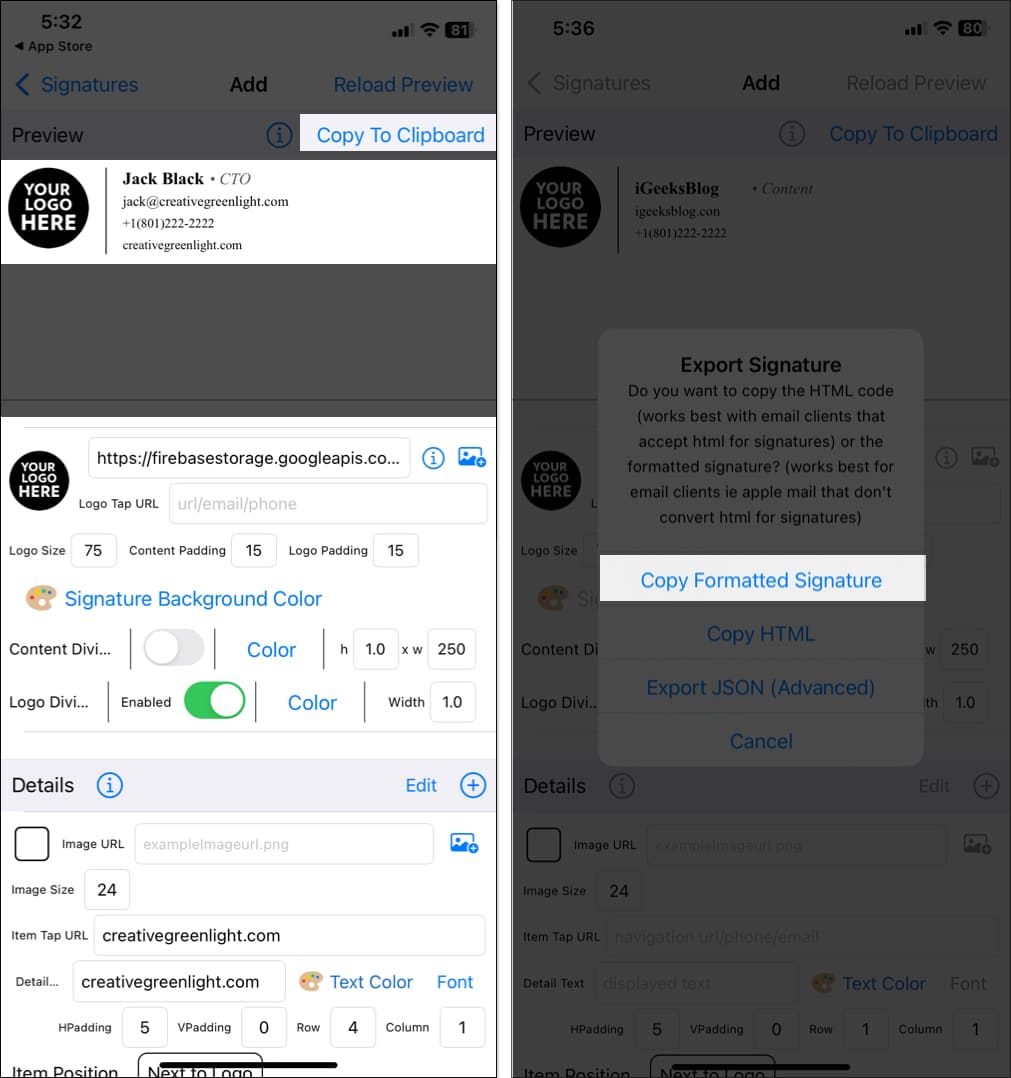
- Now, go to the Settings app and paste the signature.
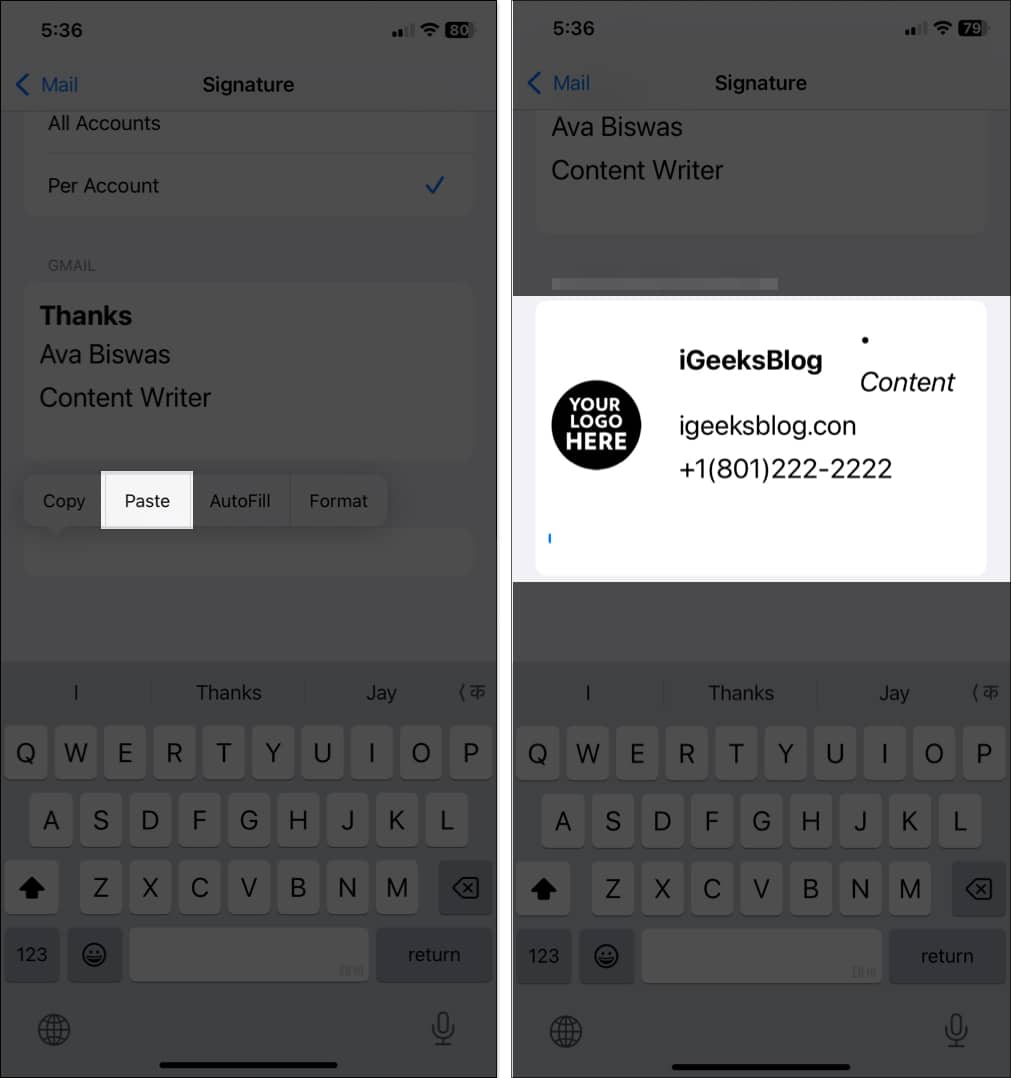
- Shake your device to undo the formatting.
Tips on changing your mail signature on an iPhone
- Keep it concise: Your email signature should not overwhelm the email content. Stick to essential information and avoid crossing more than five lines. Also, you don’t need to mention your email address in your contact information.
- Use a simple font: Avoid using too many fonts and styles to maintain professionalism.
- Add a call to action: Include links to your website or social media, but avoid cluttering the signature.
- Test across devices: Ensure your signature looks good on both desktop and mobile versions of different email clients.
- Keep it updated: Regularly review and update your signature with new job titles, contact details, or branding elements.
Signing off…
Changing the email signature in the Mail app on your iPhone is a small tweak that can have a big impact on how your emails are received. Whether you choose a simple, text-based signature or a more advanced, image-rich signature, it’s an easy way to add a personal touch and boost your professionalism.
If you encounter any issues after following the process, please let us know in the comments below, and we will help you.