While emojis are a great way to communicate our emotions, GIFs are even better. They go a long way to give people a demonstrated short scene of our reaction and communicate deep thoughts in a flash. Besides, it becomes more captivating when you’re your GIF. But how to make DIY GIFs on your iPhone or iPad?
Keep reading as I show you how to do this from your videos or pictures, following the simple tricks below.
- How to make a gif from Live Photos via the Photos app
- Create a GIF on iPhone from the Shortcuts app
- How to make a GIF from videos with a third-party app (GIPHY)
How to make a gif from Live Photos via the Photos app
Most iPhone users can’t deny their love for live photos. However, while they show a moment in time, they’re only a step away from becoming GIFs. Well, giving them a repetitive effect does the trick.
Using the Photos app on your iPhone or iPad is one of the easiest ways to turn live photos into GIFs.
Here’s how:
- Open the Photos app on your iPhone or iPad.
- Go to Albums.
- Tap Live Photos under Media Types.
- Now, choose the live photo you’d like to turn into a GIF.
- At the top left, tap Live → Loop.
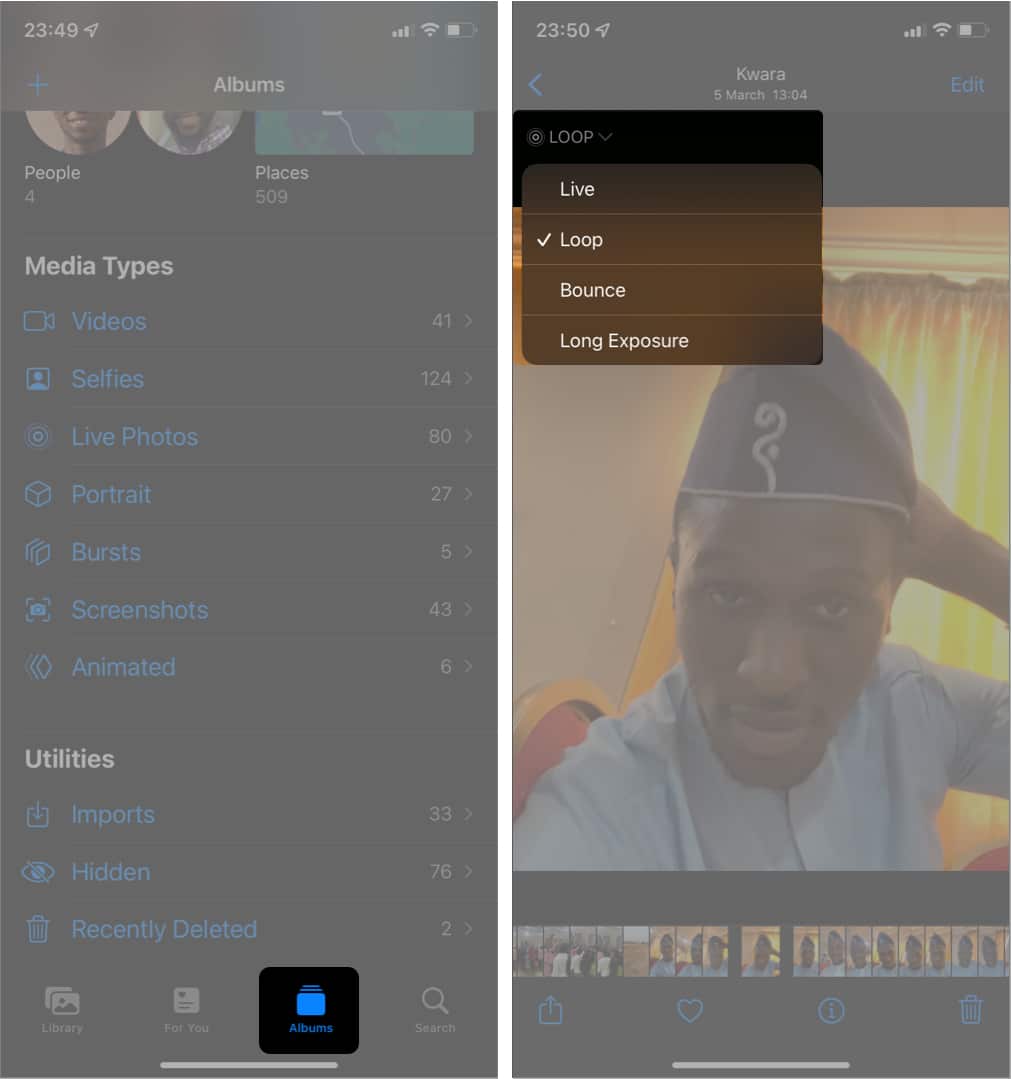
That’s it! You can now share your live photo with people as a GIF.
Create a GIF on iPhone from the Shortcuts app
If you didn’t know already, creating GIFs from Burst, live photos, or even videos is one of the ways to use the Shortcuts app on your iPhone or iPad.
To start, you first need to install the Shortcut app from the App Store if you’ve not done so already.
Next, in the following subsections, I’ll show you how to turn your burst pictures, live photos, or videos into GIFs using the Shortcuts app.
I. Make a GIF from Burst/Live Photos
To create GIFs from Burst or Live photos on your iPhone or iPad:
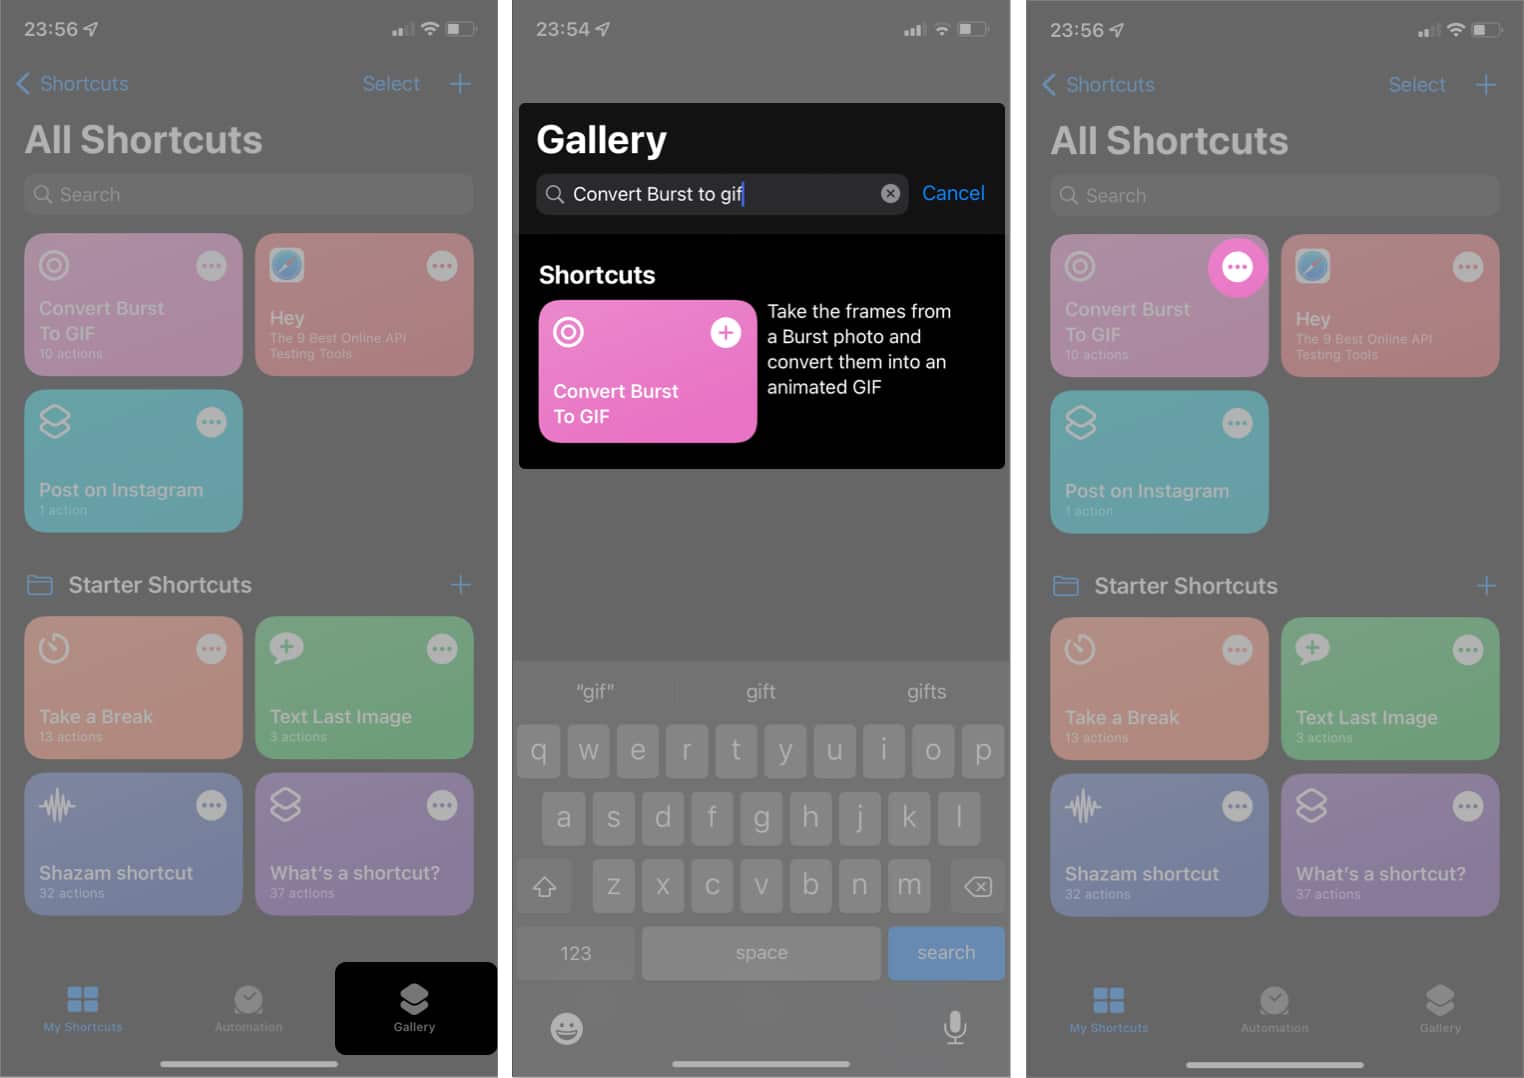
- Open the Shortcut app.
- Tap Gallery at the bottom right.
- In the search bar, search for Convert burst to GIF.
You should now see a banner with this title. - Tap the + icon on the banner to add the converter.
- Next, go to My Shortcuts at the bottom left.
You should now see the Convert Burst To GIF banner here. - To convert Live Photos to GIF (skip these steps for Burst Photos):
- Tap three horizontal dots at the top right.
- Next, tap Burst.
- Select Live Photo → tap the close (X) icon.
- Tap three horizontal dots at the top right.
- Tap the Convert Burst To GIF banner.
Choose the Photo you want to convert and wait for the process to complete. - Tap Done at the top right.
- Select Save to Photos or Share.
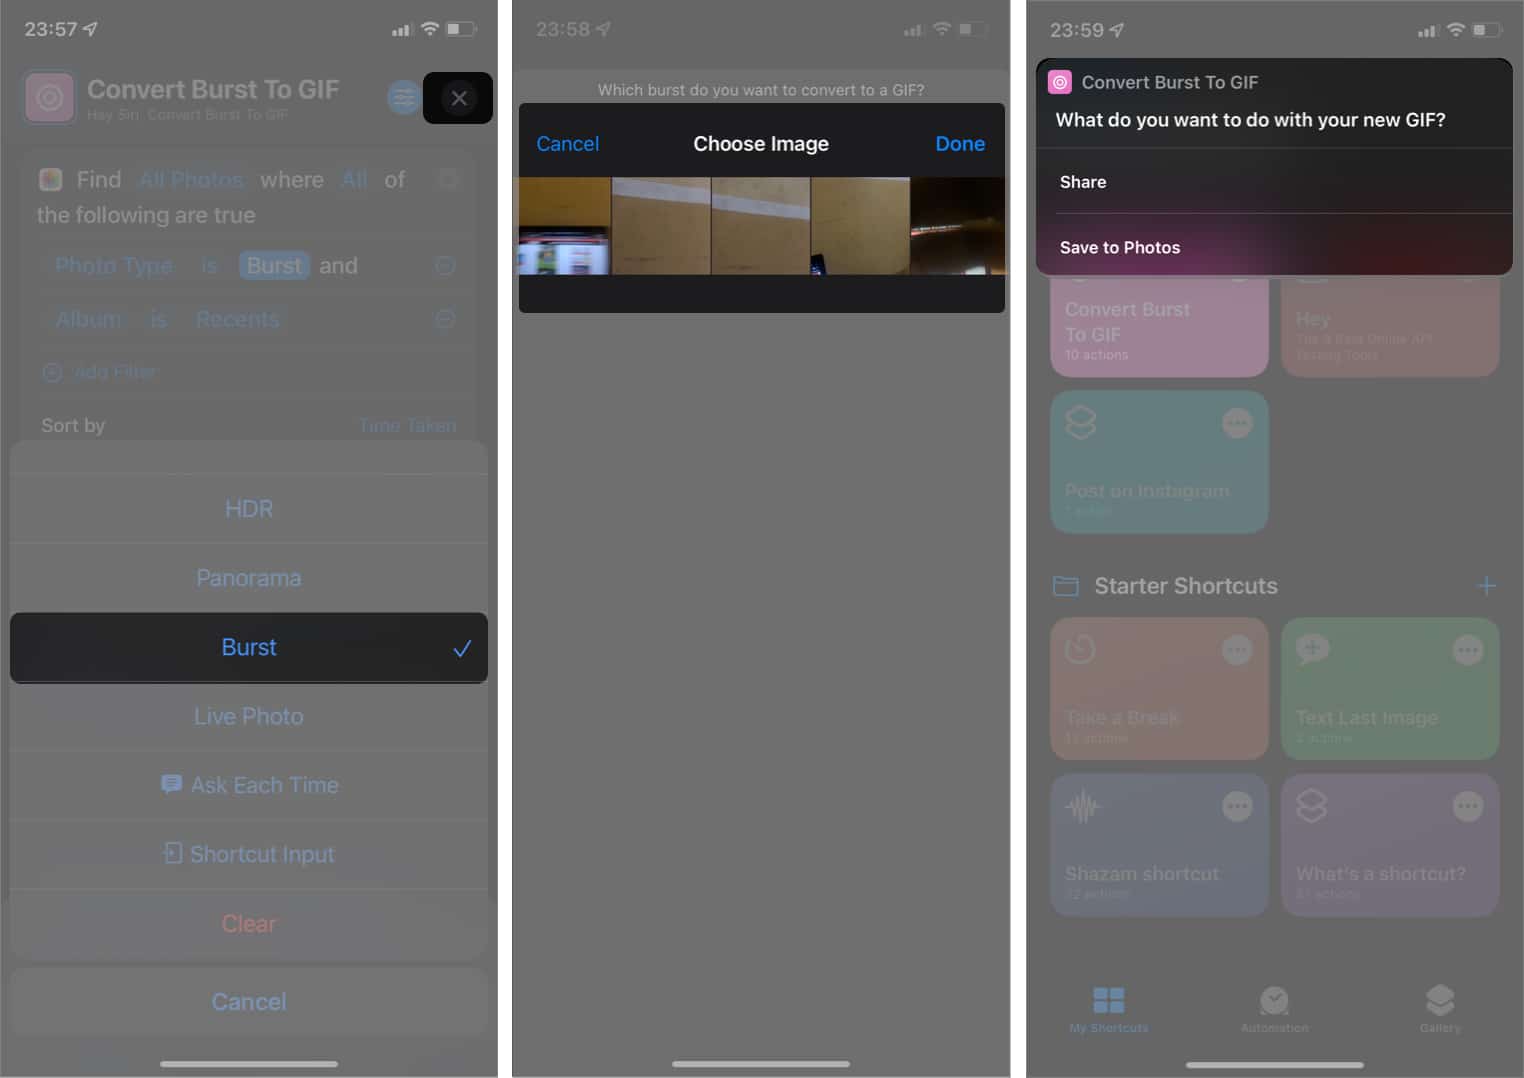
Note: The converter only converts Burst photos by default. So if you only intend to change burst photos to GIF, you need not change the Burst option to Live Photo as we did earlier.
II. Make a GIF from videos
Making GIFs from videos is also easy. But in this case, you’ll need a shortcut that can convert videos to GIFs instead. Then, as videos are typically longer than Live or Burst photos, the shortcut converter might require some trimming done the line.
⚠️ Caution: The shortcut might take some time to complete the process. Moreover, it is running glitchy on iOS 15.4.
Here’s how to go about this:
- In the Shortcut app, go to Gallery.
- Search for Video to GIF → tap the + icon.
- Next, go to My Shortcuts → tap the Video to GIF shortcut.
- Choose a video and use the slider to trim it.
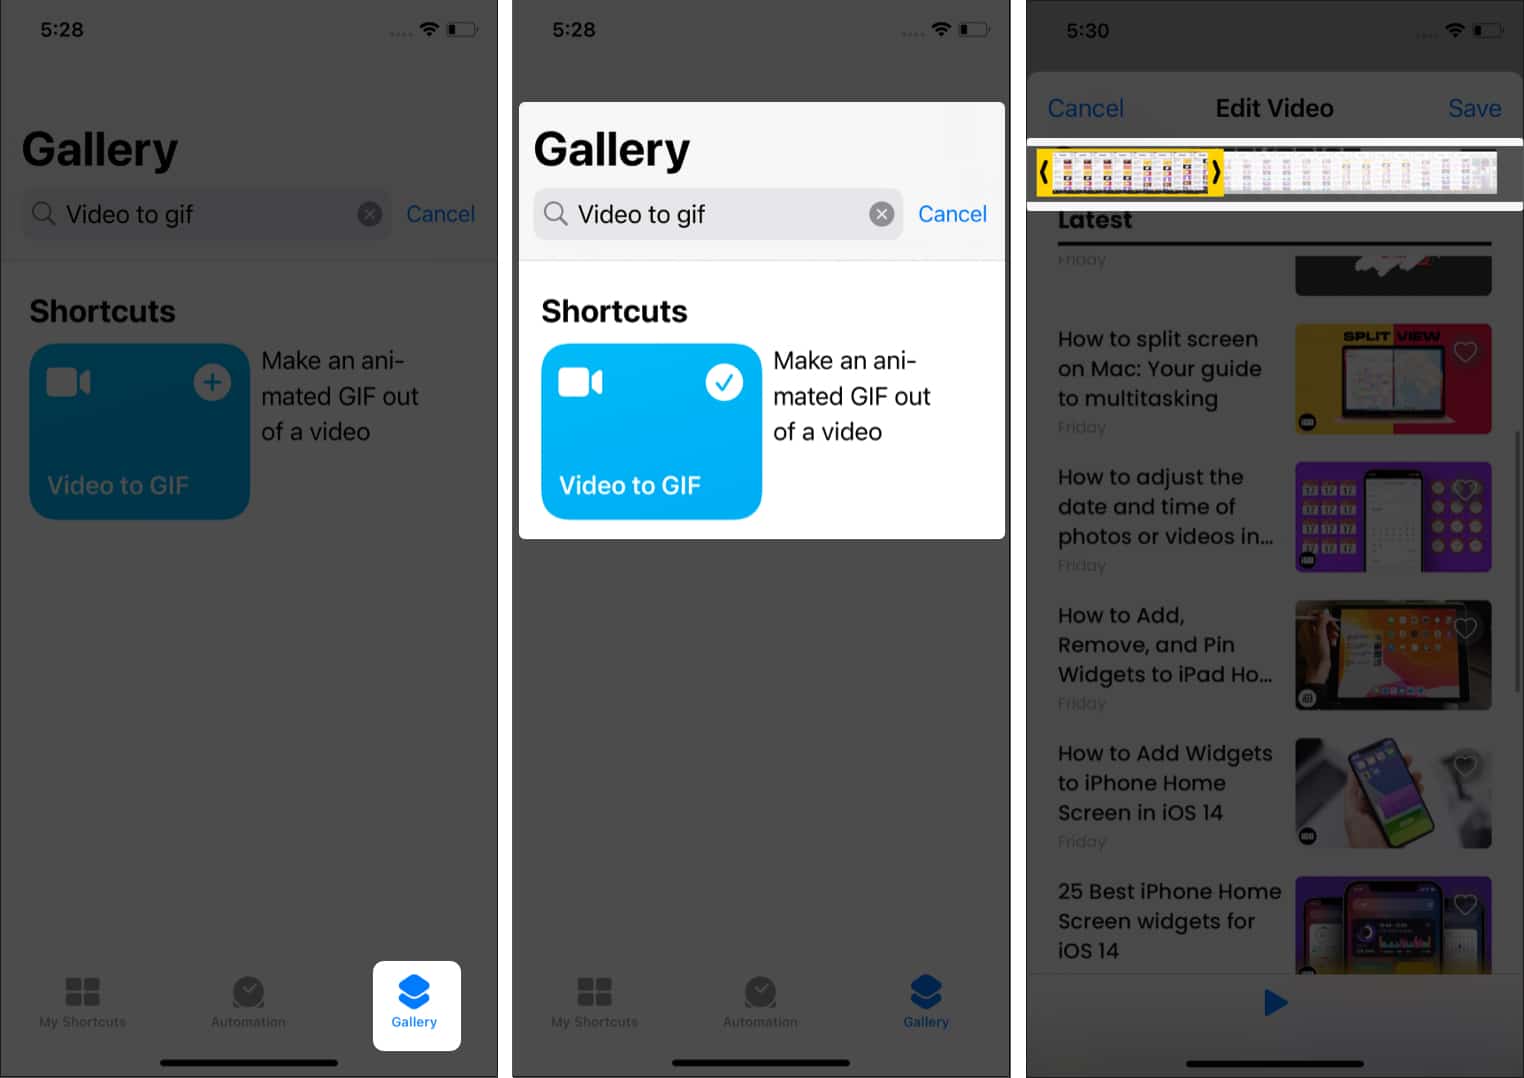
- Tap Save.
- Now, preview the gif and select Done or the Share icon.
Note: Selecting Done will not save the GIF on your device. To save, tap the Share icon → Save Image.
☁️ Tip: As said above, the shortcut doesn’t save the GIF by default. Hence, you can add the action to the shortcut as follows: Tap the … icon at the top right of the Video to GIF shortcut → scroll down and tap + → type save → select Save to Photo Album.
How to make a GIF from videos with a third-party app (GIPHY)
While you might make GIFs from videos using the Shortcut app, it fails or lags sometimes. GIPHY is a handy third-party app you can use to convert your videos to GIF in no time. Plus, the app is free and easy to use. Indeed, it’s one of the best GIF maker apps for iPhone or iPad.
To get started, install GIPHY from the App Store, and follow these steps:
- Open the GIPHY app → tap the + icon.
- Select the camera icon and choose a video from your gallery.
Optional: Use the slider to trim the video. - Tap Continue and hit the purple arrow icon at the bottom right.
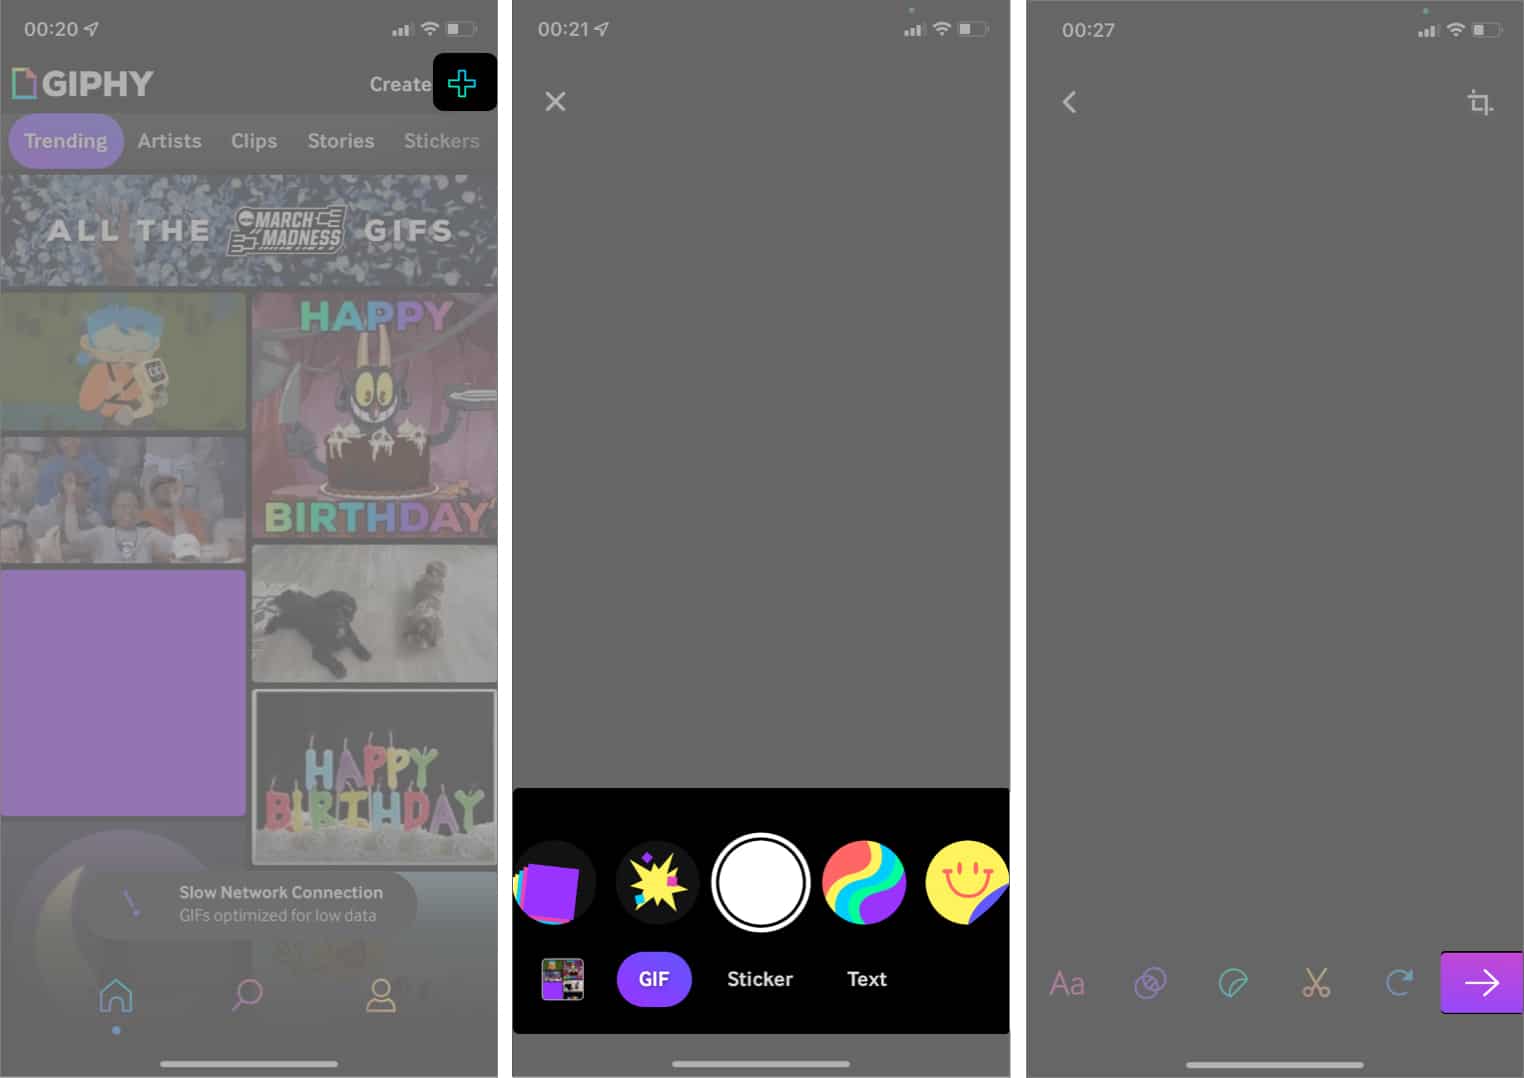
- Next, select Share GIF.
- Choose Save GIF.
You’ll now see the new GIF in the Photos app and share it via any social app.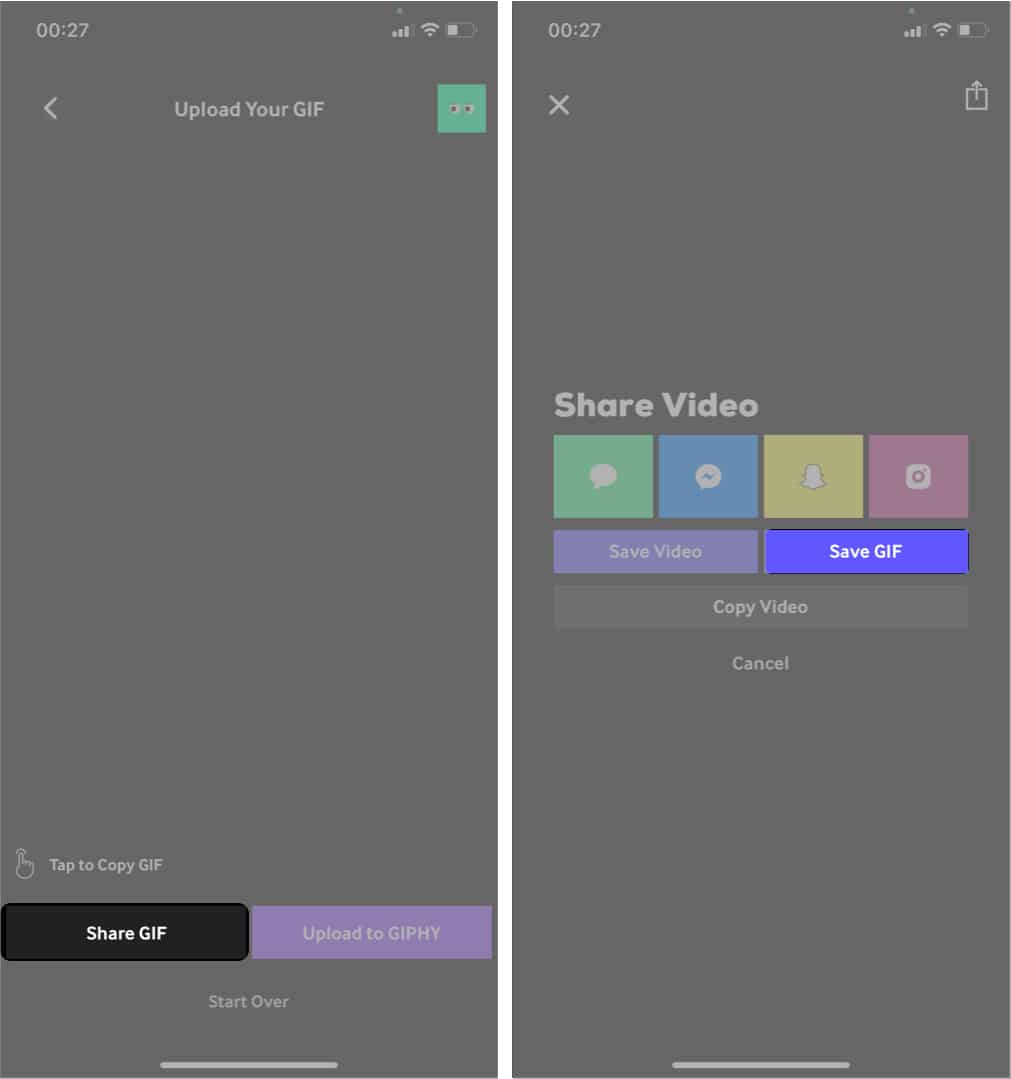
That’s it!
Although there are many ready-made GIFs, creating yours can go a long way to help express yourself better. So whether for generating memes or various reactions, GIFs are easy to make. With the steps above, you can make your GIFs on iPhone and iPad in no time.
Do you enjoy making your GIFs? Let me know in the comment section below.
Read more:

