We sit in front of the Mac for hours, and thus it is essential to have the color and contrast of the screen according to our liking. macOS offers several tools to change the screen settings, and Color Filters is one of them.
Color Filters are helpful for people with color vision deficiencies and also useful for anyone looking to tint the entire screen to make the text easier to read. If you are looking to make use of this accessibility feature, here are steps to turn on and use Color Filters on Mac.
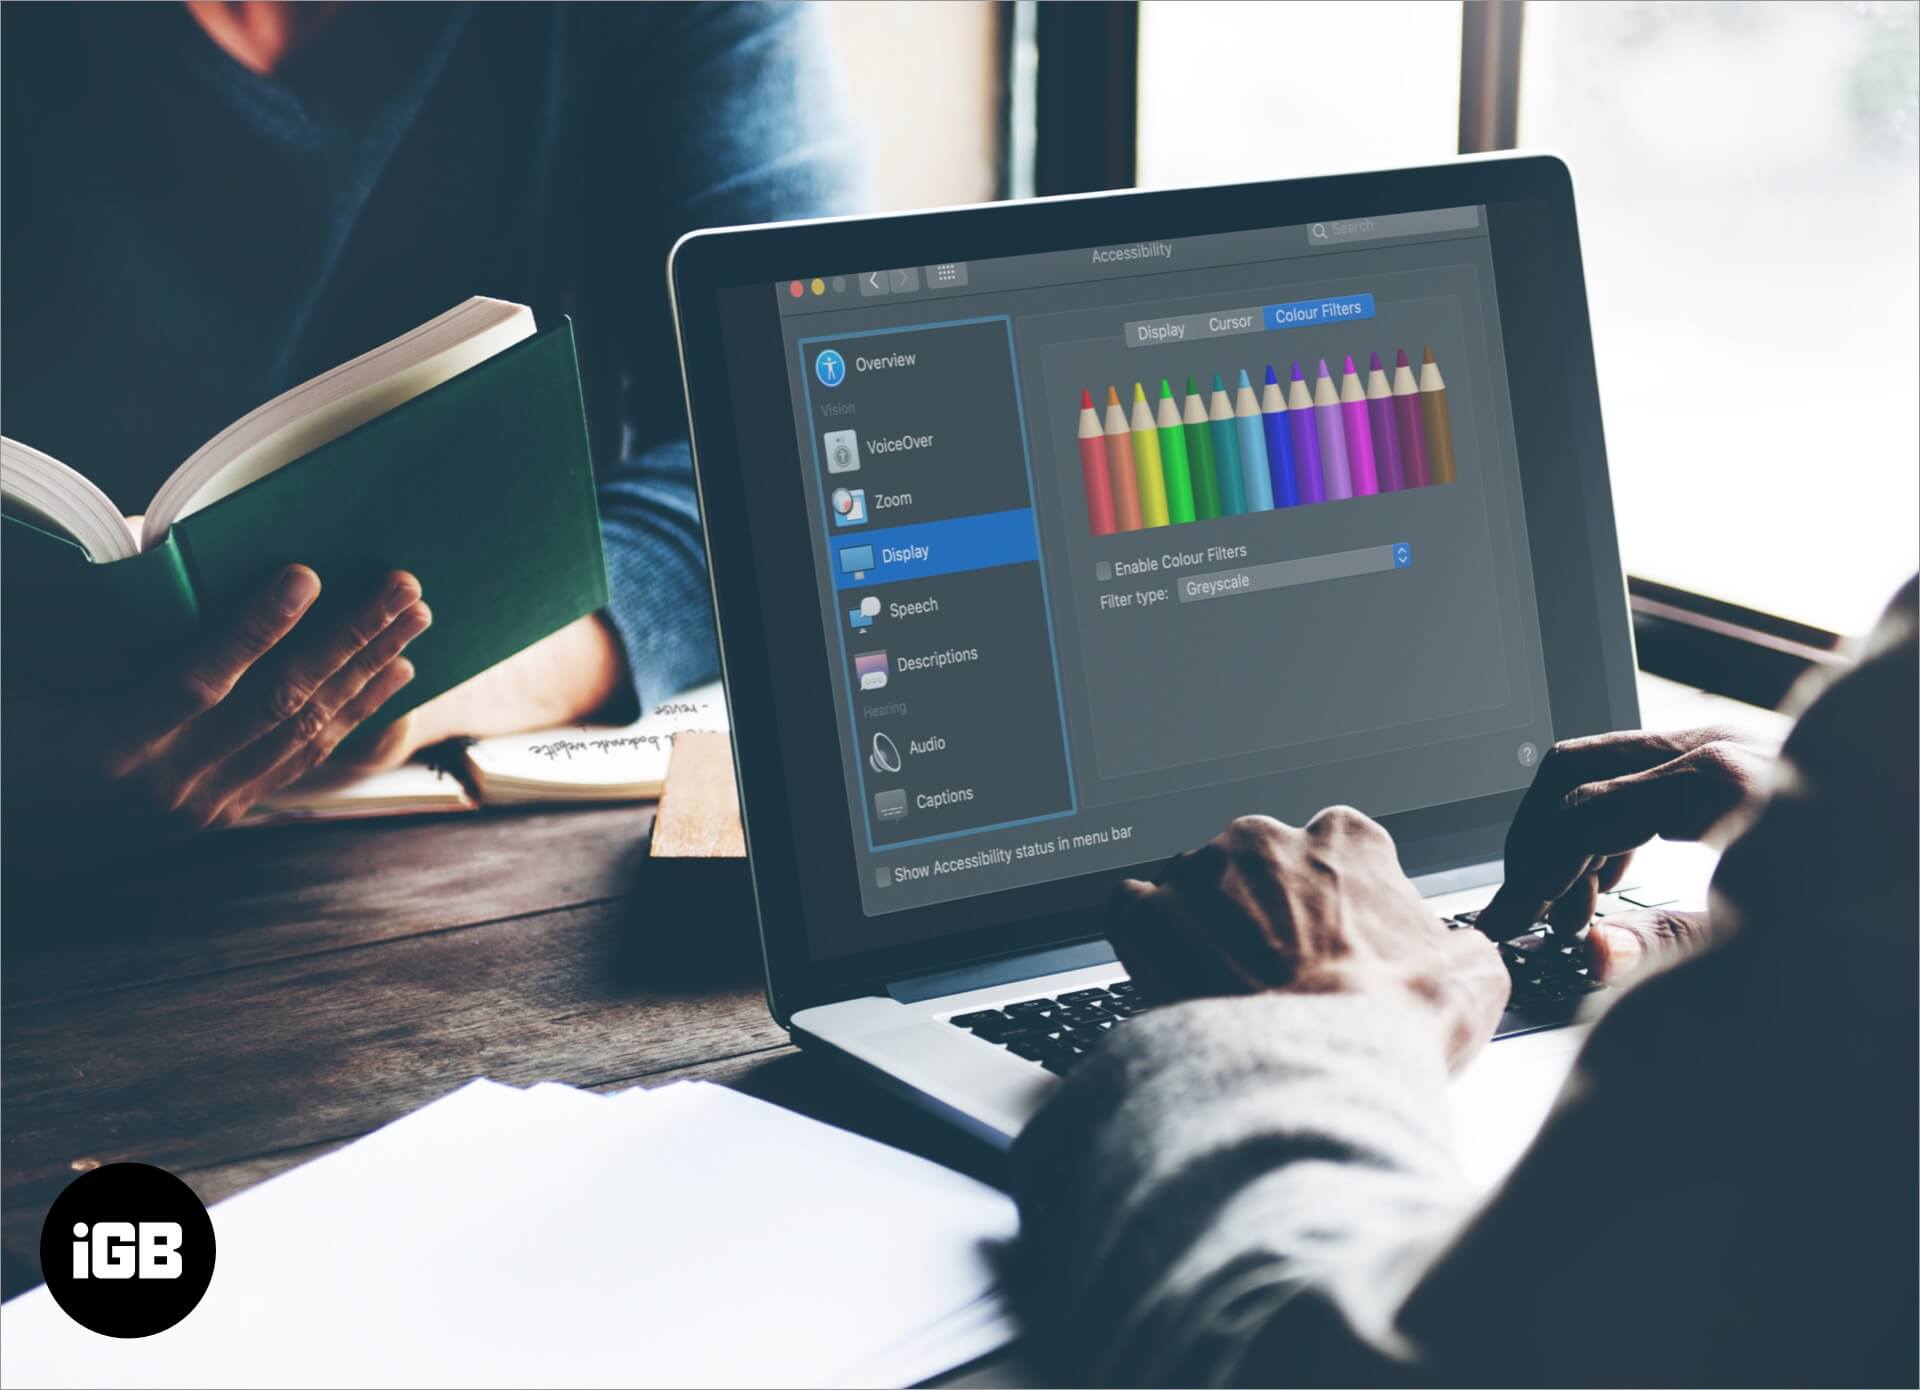
How to Enable Color Filters on Mac
Step #1. Click on the Apple logo () from the top left. Now, click System Preferences.

Step #2. Click Accessibility.

Step #3. Select Display from the left sidebar.

Step #4. Next, click on the Color Filters tab.

Step #5. Here, check the box to Enable Color Filters.

Step #6. Now, click on the dropdown menu for Filter type. Here you have the following options:
- Grayscale
- Red/Green filter (Protanopia)
- Green/Red filter (Deuteranopia)
- Blue/Yellow filter (Tritanopia)
- Color Tint

Select the one according to your liking. If you choose Color Tint, you can further select the color of your taste.
Adjust the Intensity of Color Filters on Mac

Mac also allows you to change and customize the intensity of the Color Filter you choose. In Step #6 above, when you select a specific Color Filter, an Intensity slider appears below it. You may drag it to the left or right and set it according to your liking.
Accessibility Shortcut to Quickly Enable and Disable Color Filters on Mac
There may be times when you need to turn off Color Filters quickly. Accessibility Shortcuts on Mac let you do this effortlessly with the press of a few keys.

On Macs without Touch ID: Press Command (⌘) + Option (⌥) + F5 to quickly bring up the Accessibility options.
On MacBook with Touch ID: Quickly press the Touch ID button three times. From the Accessibility Shortcuts pane, you may turn ON and turn OFF Color Filters.
On MacBook with Touch Bar: You may follow both the above options. However for first method press, Command (⌘) + Option (⌥) + fn + F5.
Additionally, when you are inside ‘Accessibility’ menu (Step #2), you may check the box for ‘Show Accessibility status in menu bar.’
Closing Thoughts on Mac Color Filters
So this is how you can turn on Color Filters on Mac and improve your readability as well as Mac’s usage. They change the appearance of images, text, and any UI element that appears on the screen.
The new Dark Mode on Mac and well known Night Shift let you enhance your Mac’s screen so that it is comfortable on your eyes. Similarly, on a Mac, Invert Colors, Reduce Motion, Increase Contrast, Reduce Transparency, and Display contrast are additional options that let you have the display according to your preference. You will find all these options in the Display tab.
You may also like to read…
What are your thoughts on Color Filters? Do you know someone who would benefit from this? Share this article with them.


