How to Downgrade macOS 26 Tahoe Beta to macOS Sequoia Without Losing Your Data
Key Takeaways:
macOS 26 Tahoe beta can break apps and workflows due to bugs, crashes, and system instability not ready for daily use.
Back up before downgrading using Time Machine, iCloud, or manual copies to avoid permanent data loss when reinstalling macOS Sequoia.
Choose a downgrade method that fits your setup: Time Machine for easiest recovery, bootable USB for clean install, or Internet Recovery if unprepared.
Time Machine restores both system and files if you backed up before installing macOS 26, making it the safest rollback option.
Clean installs require a bootable USB drive and Terminal commands, better suited for advanced users doing a full wipe and reinstall.
Apple’s macOS 26 Tahoe introduces exciting features like the Liquid Glass UI, the native Phone app, Live Activities on desktop, improved Spotlight search, and more. However, being early beta software, it’s also prone to bugs, app crashes, performance lags, and compatibility issues. If your Mac feels sluggish or unstable, downgrading to the reliable macOS 15 Sequoia could be your best bet.
In this guide, I’ll walk you through multiple methods to remove macOS 26 Tahoe Beta and safely revert to macOS Sequoia—without losing your apps, settings, or precious files.
Why You Might Want to Downgrade
macOS beta versions are meant for developers and early adopters. While they offer a sneak peek into future features, they also come with risks:
Apps may crash or behave unpredictably.
Features like the new Games app or Continuity may not function properly.
Your Mac could overheat or perform sluggishly due to unoptimized code.
Constant beta updates can disrupt daily workflow.
Some third-party apps or external hardware might not be compatible yet.
By downgrading, you regain stability—especially crucial if you use your Mac for professional tasks or schoolwork.
What to Do Before Removing macOS 26 Beta
Before downgrading, take these essential steps to avoid data loss and prep your Mac.
1. Remove the Beta Profile
To stop receiving macOS 26 beta updates:
Open System Settings from the Apple menu () in the top-left corner.
Go to General > Software Update.
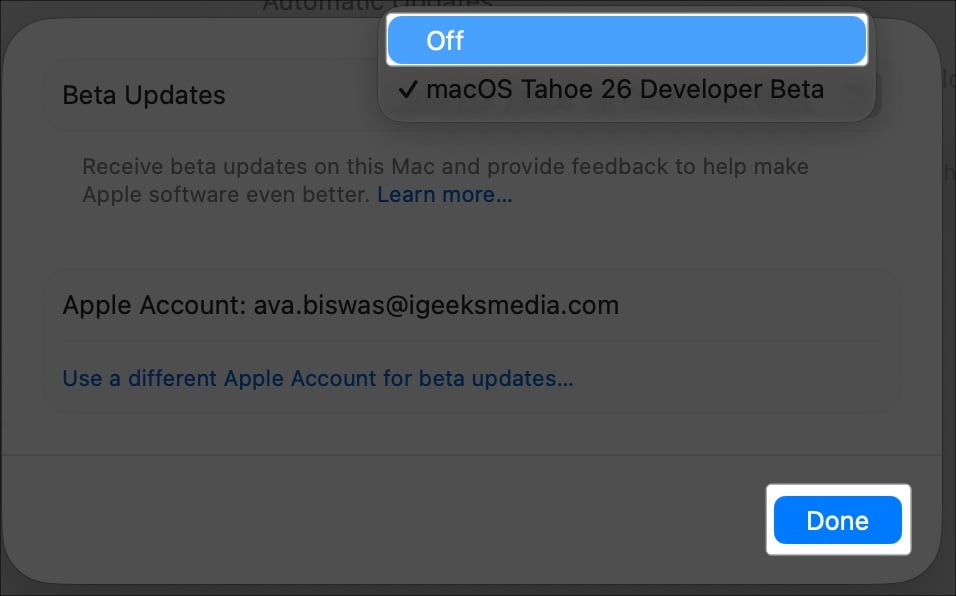
Click the info (i) icon next to Beta Updates.
Now, click the dropdown next to Beta Updates.
Select Off from the list of options.
Confirm by clicking Done and restart your Mac if prompted.
This ensures your Mac will only receive stable macOS Sequoia updates after the downgrade.
2. Take a Full Backup
Since downgrading erases your Mac’s drive, backing up your data is crucial. Choose one or more of the following:
Time Machine Backup
Connect an external drive (at least twice your Mac’s storage, e.g., 1TB for a 500GB Mac).
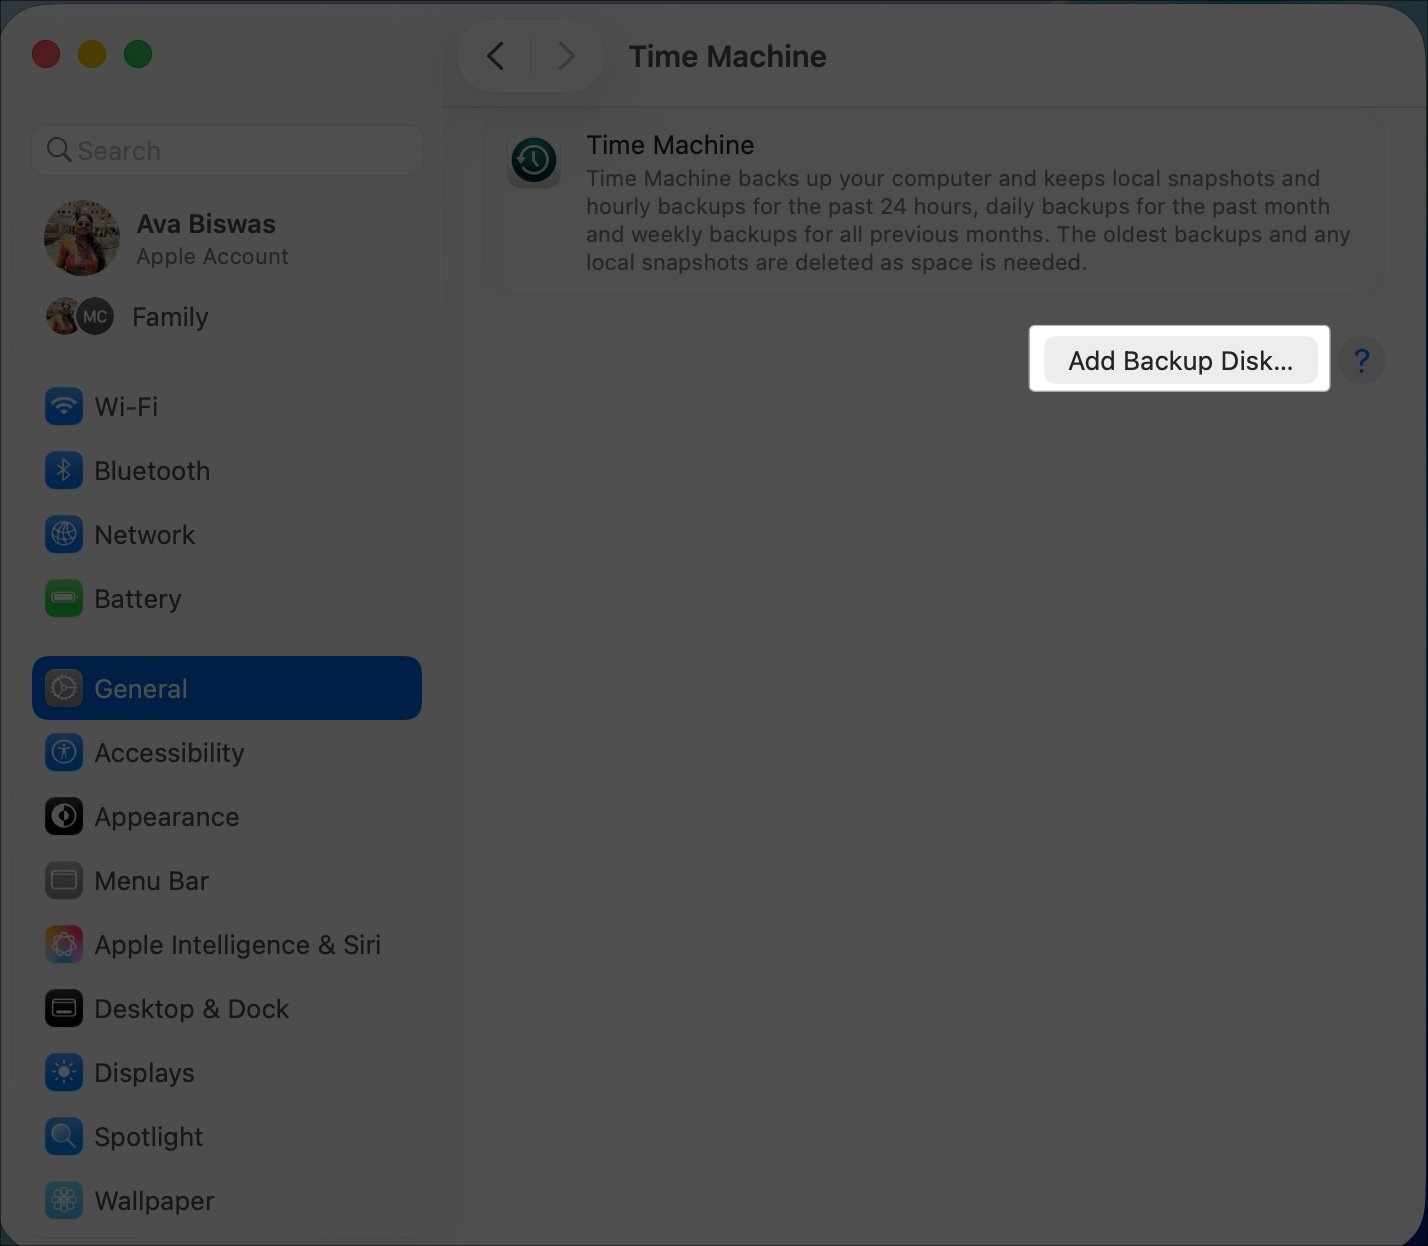
Go to System Settings > General > Time Machine.
Click Add Backup Disk, select your external drive, and follow the prompts.
Wait for the backup to complete (this may take hours depending on data size).
iCloud Backup
Go to System Settings > [Your Name] > iCloud.
Enable iCloud Drive and ensure Desktop & Documents Folders are toggled on.
Also, click Apps syncing to iCloud Drive and toggle on the apps.
Check storage availability (you may need to purchase more iCloud space).
Manual Backup
Copy important files (documents, photos, videos) to an external drive or cloud service like Google Drive or Dropbox.
Double-check that all critical data is saved.
How to Downgrade From macOS 26 Tahoe to macOS Sequoia
You’ll need to erase your Mac’s disk and reinstall macOS Sequoia using one of the following three methods:
Quick Overview of the Methods
Method
Requirements
Pros
Cons
Time Machine
Time Machine backup from macOS Sequoia
Restores all data, apps, and settings; user-friendly
Requires a prior backup; slow if data is large
Internet Recovery
Stable internet connection
No extra hardware needed; clean install
Restores factory macOS (may not be Sequoia); requires fast internet
Bootable Installer
32GB USB drive, macOS Sequoia installer
Precise control over macOS version; reusable
Requires setup time and technical knowledge
Method 1: Use Time Machine Backup
If you created a Time Machine backup before installing macOS 26 Beta, this method is the most straightforward.
Time Estimate: 1–3 hours, depending on backup size and drive speed.
Steps:
Plug in the external drive that contains your Time Machine backup.
Shut down your Mac. Press and hold the power button until “Loading startup options” appears.
Select your administrative account and enter your Mac password.
In the macOS Utilities menu, select Restore from Time Machine Backup and click Continue.
Choose your Time Machine backup drive.
Select the most recent backup from when your Mac ran macOS Sequoia.
Follow the on-screen instructions to erase the drive and restore your data, apps, and settings.
Your Mac will restart with macOS Sequoia, and your previous settings, apps, and files will remain intact.
Method 2: Use Internet Recovery
Internet Recovery reinstalls the macOS version your Mac had before upgrading. First, you need to factory reset your Mac using Disk Utility.
Time Estimate: 3–4 hours for erasing the disk, downloading macOS, and setting up Mac.
Steps:
Enter Recovery mode using the steps above.
In the macOS Utilities menu, select Disk Utility > Continue.
Choose Macintosh HD (your main drive) and click Erase.
Set the format to APFS (or Mac OS Extended (Journaled) for older Macs) and select the Erase button.
Enter your Apple ID if asked and click Erase Mac and Restart.
After the Mac has restarted, follow the on-screen prompts. Next, join a Wi-Fi network and select Exit to Recovery Utilities to quit Disk Utility. Now, you can revert from macOS Tahoe beta to macOS Sequoia.
Back in the macOS Utilities menu, select Reinstall macOS Sequoia and click Continue.
Enter your Mac password if prompted and select Macintosh HD to install the macOS.
Follow the prompts to download and install the macOS version.
Your Mac will restart and show the setup assistant. Follow the instructions to restore your data.
During setup, choose Transfer from a Time Machine Backup or manually copy files from your external drive or iCloud.
Method 3: Use a Bootable macOS Sequoia Installer
For those who want complete control over the downgrade, this method is ideal.
Time Estimate: 1–2 hours for setup and installation, plus time for data restoration.
Steps to Create Installer:
Open the App Store and search for macOS Sequoia.
Click View > Get to save the installer to your Applications folder.
Connect a USB drive (minimum 32GB) and rename it for easy identification (e.g. MyVolume).
Open Disk Utility via Spotlight, select the USB drive, and click Erase.
Set the format to APFS and click Erase.
Open the Terminal and enter sudo /Applications/Install\ macOS\ Sequoia.app/Contents/Resources/createinstallmedia --volume /Volumes/MyVolume
Enter your admin password and wait until you see the message: “Media now available at…” (10–30 minutes).
Now, you can use this USB drive to boot macOS Sequoia on your Mac. Reset your Mac using the steps above then:
Quit Disk Utility and connect to a Wi-Fi network. Enter your Apple ID if prompted.
Click the Apple logo at the top and select Restart.
Connect the USB drive to your Mac.
Press and hold the power button until “Loading startup options” appears. Select the USB drive and click Continue.
Select Install macOS Sequoia.
Follow the prompts to install Sequoia.
Now, you can restore your Mac from backup or external drive.
Post-Downgrade Checklist
Once you’re back on macOS Sequoia:
If you used the Time Machine method, your files, apps, and settings should already be restored. For manual backups, copy files from your external drive or iCloud to their original locations.
Some apps (e.g., Adobe, Microsoft Office) may require re-entering licenses or signing in again.
Verify Wi-Fi, iCloud, and other system settings are correct.
Go to System Settings > General > Software Update to install the latest Sequoia patches.
Use a reliable, high-speed connection. If necessary, restart your router.
Free up at least 25–50 GB of storage space on your Mac to ensure a smooth installation.
If the App Store fails, download the Sequoia installer from Apple’s support website or use Internet Recovery.
For professional guidance, contact Apple Support.
How to Stop Getting macOS Beta Updates
To avoid beta versions in the future:
Go to System Settings > General > Software Update and confirm Beta Updates is set to Off.
Click the i button next to Automatic Updates.
Toggle off Download new updates when available and Install macOS updates.
Now, you can manually install only stable macOS versions like Sequoia.
Enjoy macOS Sequoia’s Stability
Downgrading from macOS 26 Tahoe Beta to macOS Sequoia isn’t complicated if you follow the right steps. Just remember to back up first, pick the method that suits your situation, and take your time during restoration.
By switching back, you regain speed, reliability, and compatibility—without losing your valuable data or productivity.
Ava is a die-hard Apple aficionado and seasoned writer with a knack for breaking down complex tech concepts into easily digestible content. Having honed her writing and editing skills over 5 years at renowned media houses like TechBurner, Ava crafts informative and engaging articles including troubleshooting guides, product reviews, editorials at iGeeksBlog. When not typing, you can find her exploring the latest Apple releases or pondering the future of tech innovation.
I stopped using iPhone Mirroring months ago because it felt too limiting. Apple’s latest iOS 27 and macOS 27 updates finally fixed many of my biggest frustrations and gave me a reason to use it again.