Apple’s iMovie is a powerful yet beginner-friendly video editing tool that comes pre-installed on your Mac. Whether you’re creating a short film, a YouTube video, or a cinematic trailer, iMovie delivers impressive results with minimal effort. With its drag-and-drop interface and robust editing tools, you can easily cut clips, add music, insert transitions, and polish your footage like a pro.
In this detailed guide, you’ll learn how to use iMovie on your Mac—from setting up your first project to exporting your finished video. Let’s dive in and bring your story to life.
Table of Contents
- What is iMovie?
- Getting Started with iMovie on Mac
- Import and Organize Media on iMovie
- How to Play Videos in iMovie on Mac
- How to Edit Videos in iMovie on Mac
- How to Add Audio in iMovie Project
- Edit Cinematic Mode Video Clips on iMovie
- Advanced Features of iMovie
- Create Hollywood-Style Trailers with iMovie
- Preview and Share Your iMovie Project
- Create an App Preview on iMovie for App Store
- Adjust iMovie Settings for a Personalized Editing Experience
- How to Send iMovie Projects to Final Cut Pro on Mac
- Tips and Best Practices to Use iMovie on Mac
- Is iMovie Not Working on Your Mac? Try These Fixes
- Create Professional Videos with iMovie!
What is iMovie?
iMovie is a free video editing app designed by Apple for macOS, iOS, and iPadOS. You can trim, cut, or crop videos, add music, apply effects and transitions, and create professional-looking projects like Hollywood-style trailers.
Its simple drag-and-drop interface makes it perfect for beginners, while advanced features like green screen effects and Cinematic Mode editing appeal to more experienced users. With iMovie, you don’t need to be a pro to make videos that look polished and creative.
Getting Started with iMovie on Mac
Let’s start with the basics of iMovie. If you don’t have the app pre-installed on your Mac, simply go to the App Store and download it. Once iMovie is ready, follow the steps below.
Launch and Create a Project
To begin using iMovie, open it from the Applications folder, Launchpad, or by searching for iMovie using Spotlight (press Command (⌘) + Space and type “iMovie”). Tap Continue > Get Started to proceed.
Once launched, you’ll see the iMovie interface with two tabs: the Media Library (for your clips and photos) and the Projects (to create and preview your video project).
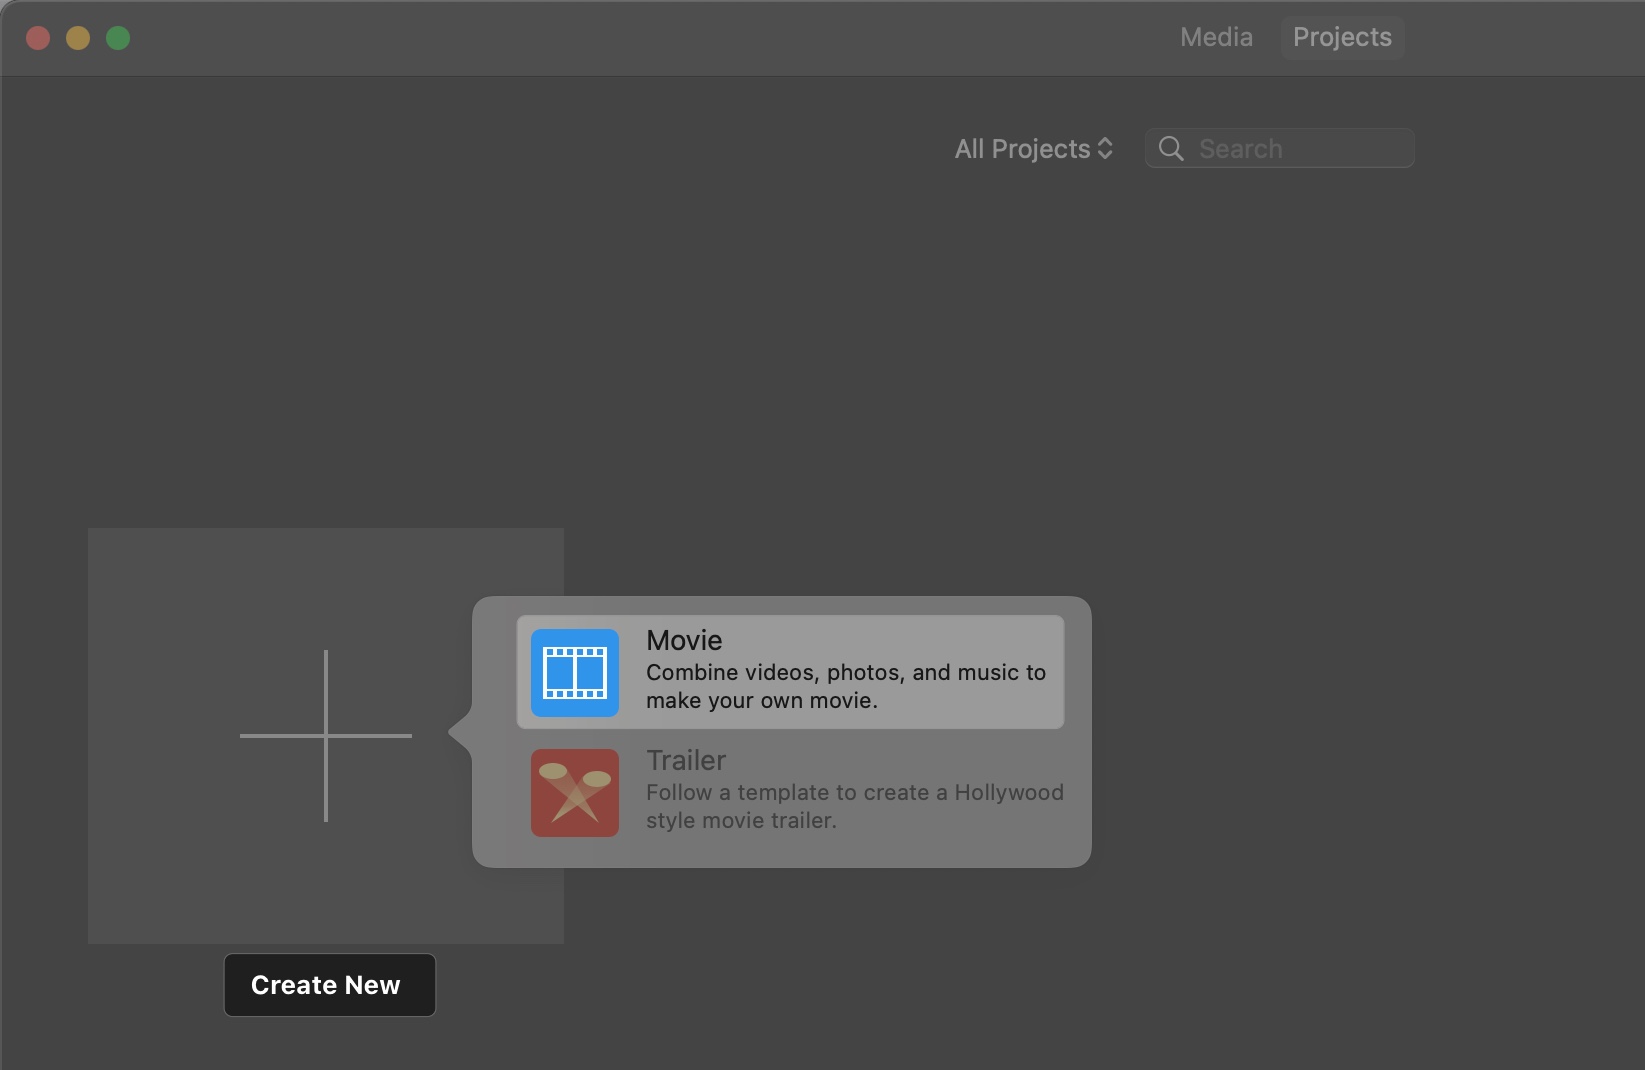
To start a new project:
- Click the Projects tab at the top of iMovie.
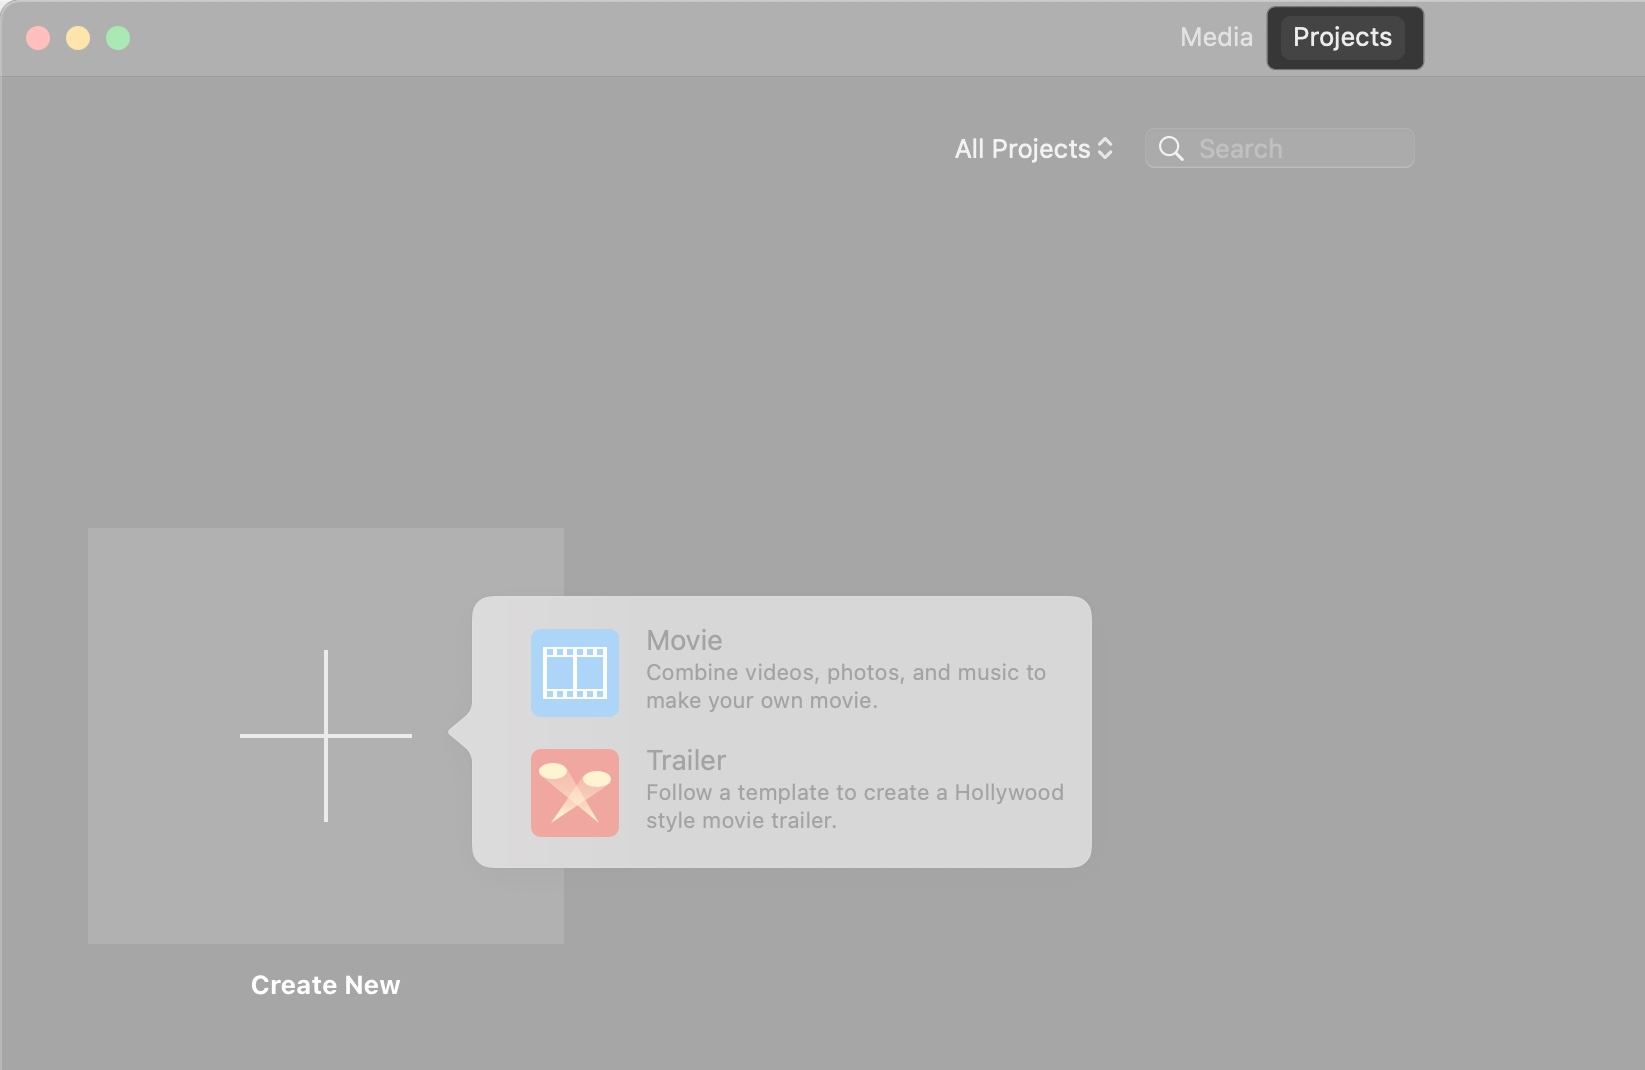
- Click Create New, then choose a Movie for a standard video or Trailer for a pre-designed Hollywood-style trailer.
- iMovie will open a blank Timeline where you can start building your video.
Import and Organize Media on iMovie
Before editing, you need to bring your videos, photos, and audio into iMovie. The app makes it easy to import and organize media from various sources.
Add Media from the Mac Photo Library
- In the iMovie Timeline window, click “Photos” under Libraries and then click “Allow” for the first time.
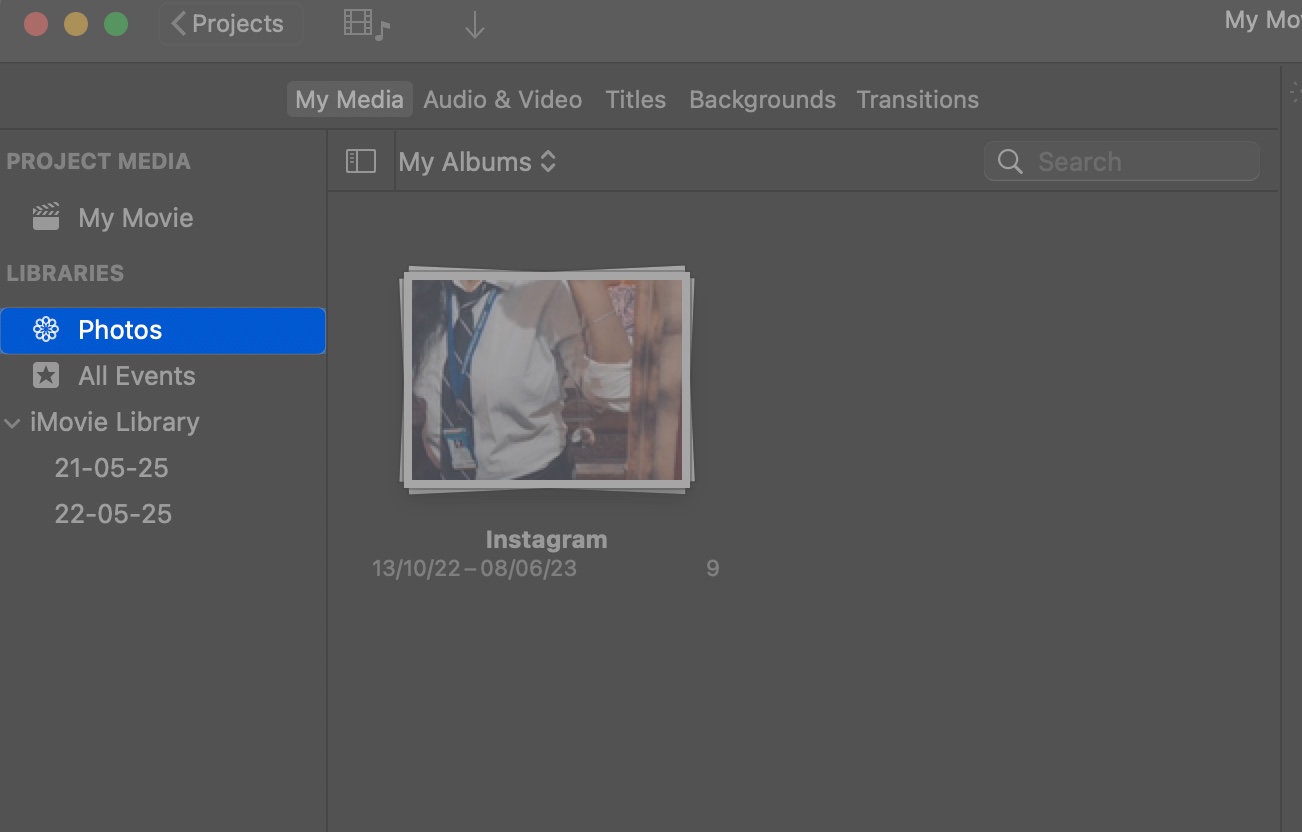
- Now, you will see your albums on the right. Double-click on an album and select the plus sign on the photo or video to add it to your timeline.

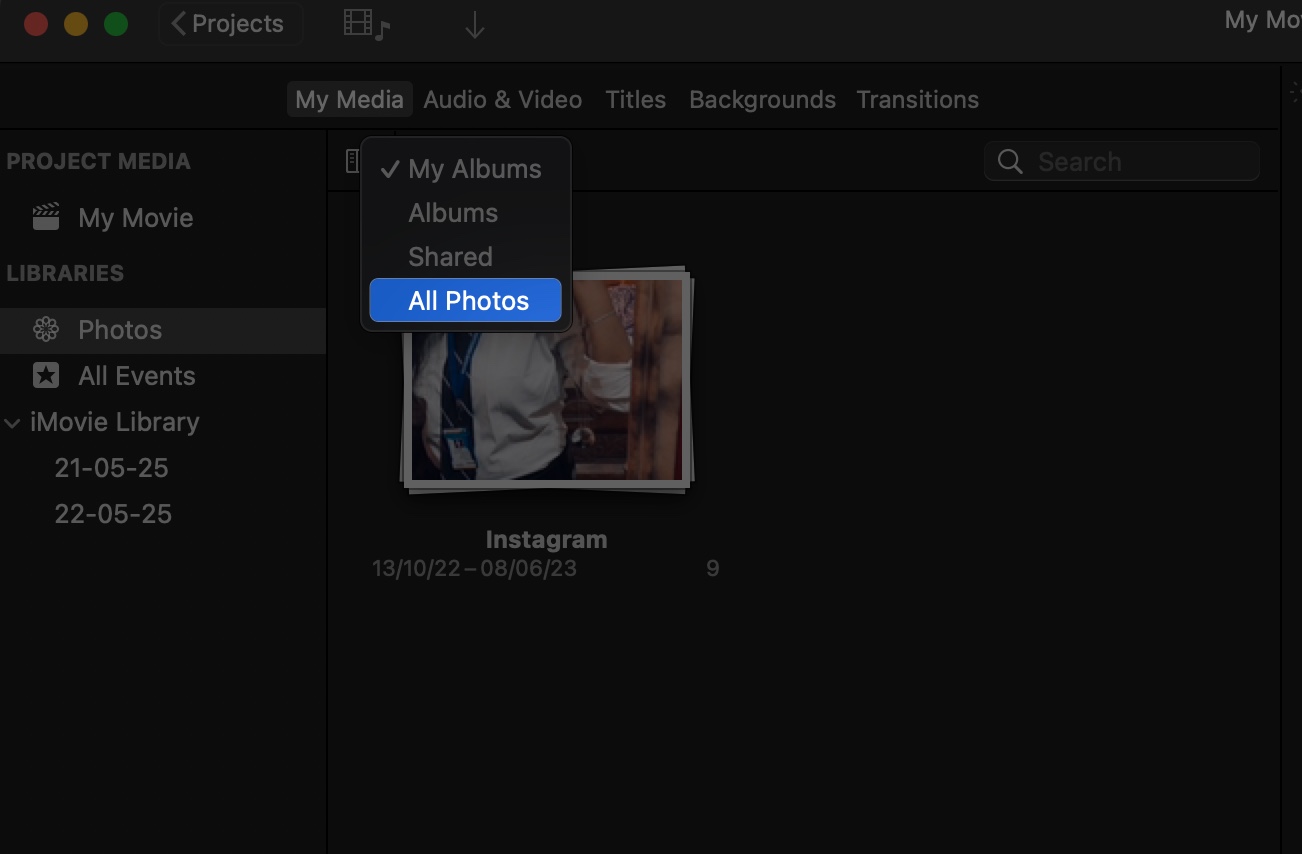
- To access your whole photo library, click the “My Albums” dropdown at the top and select All Photos.

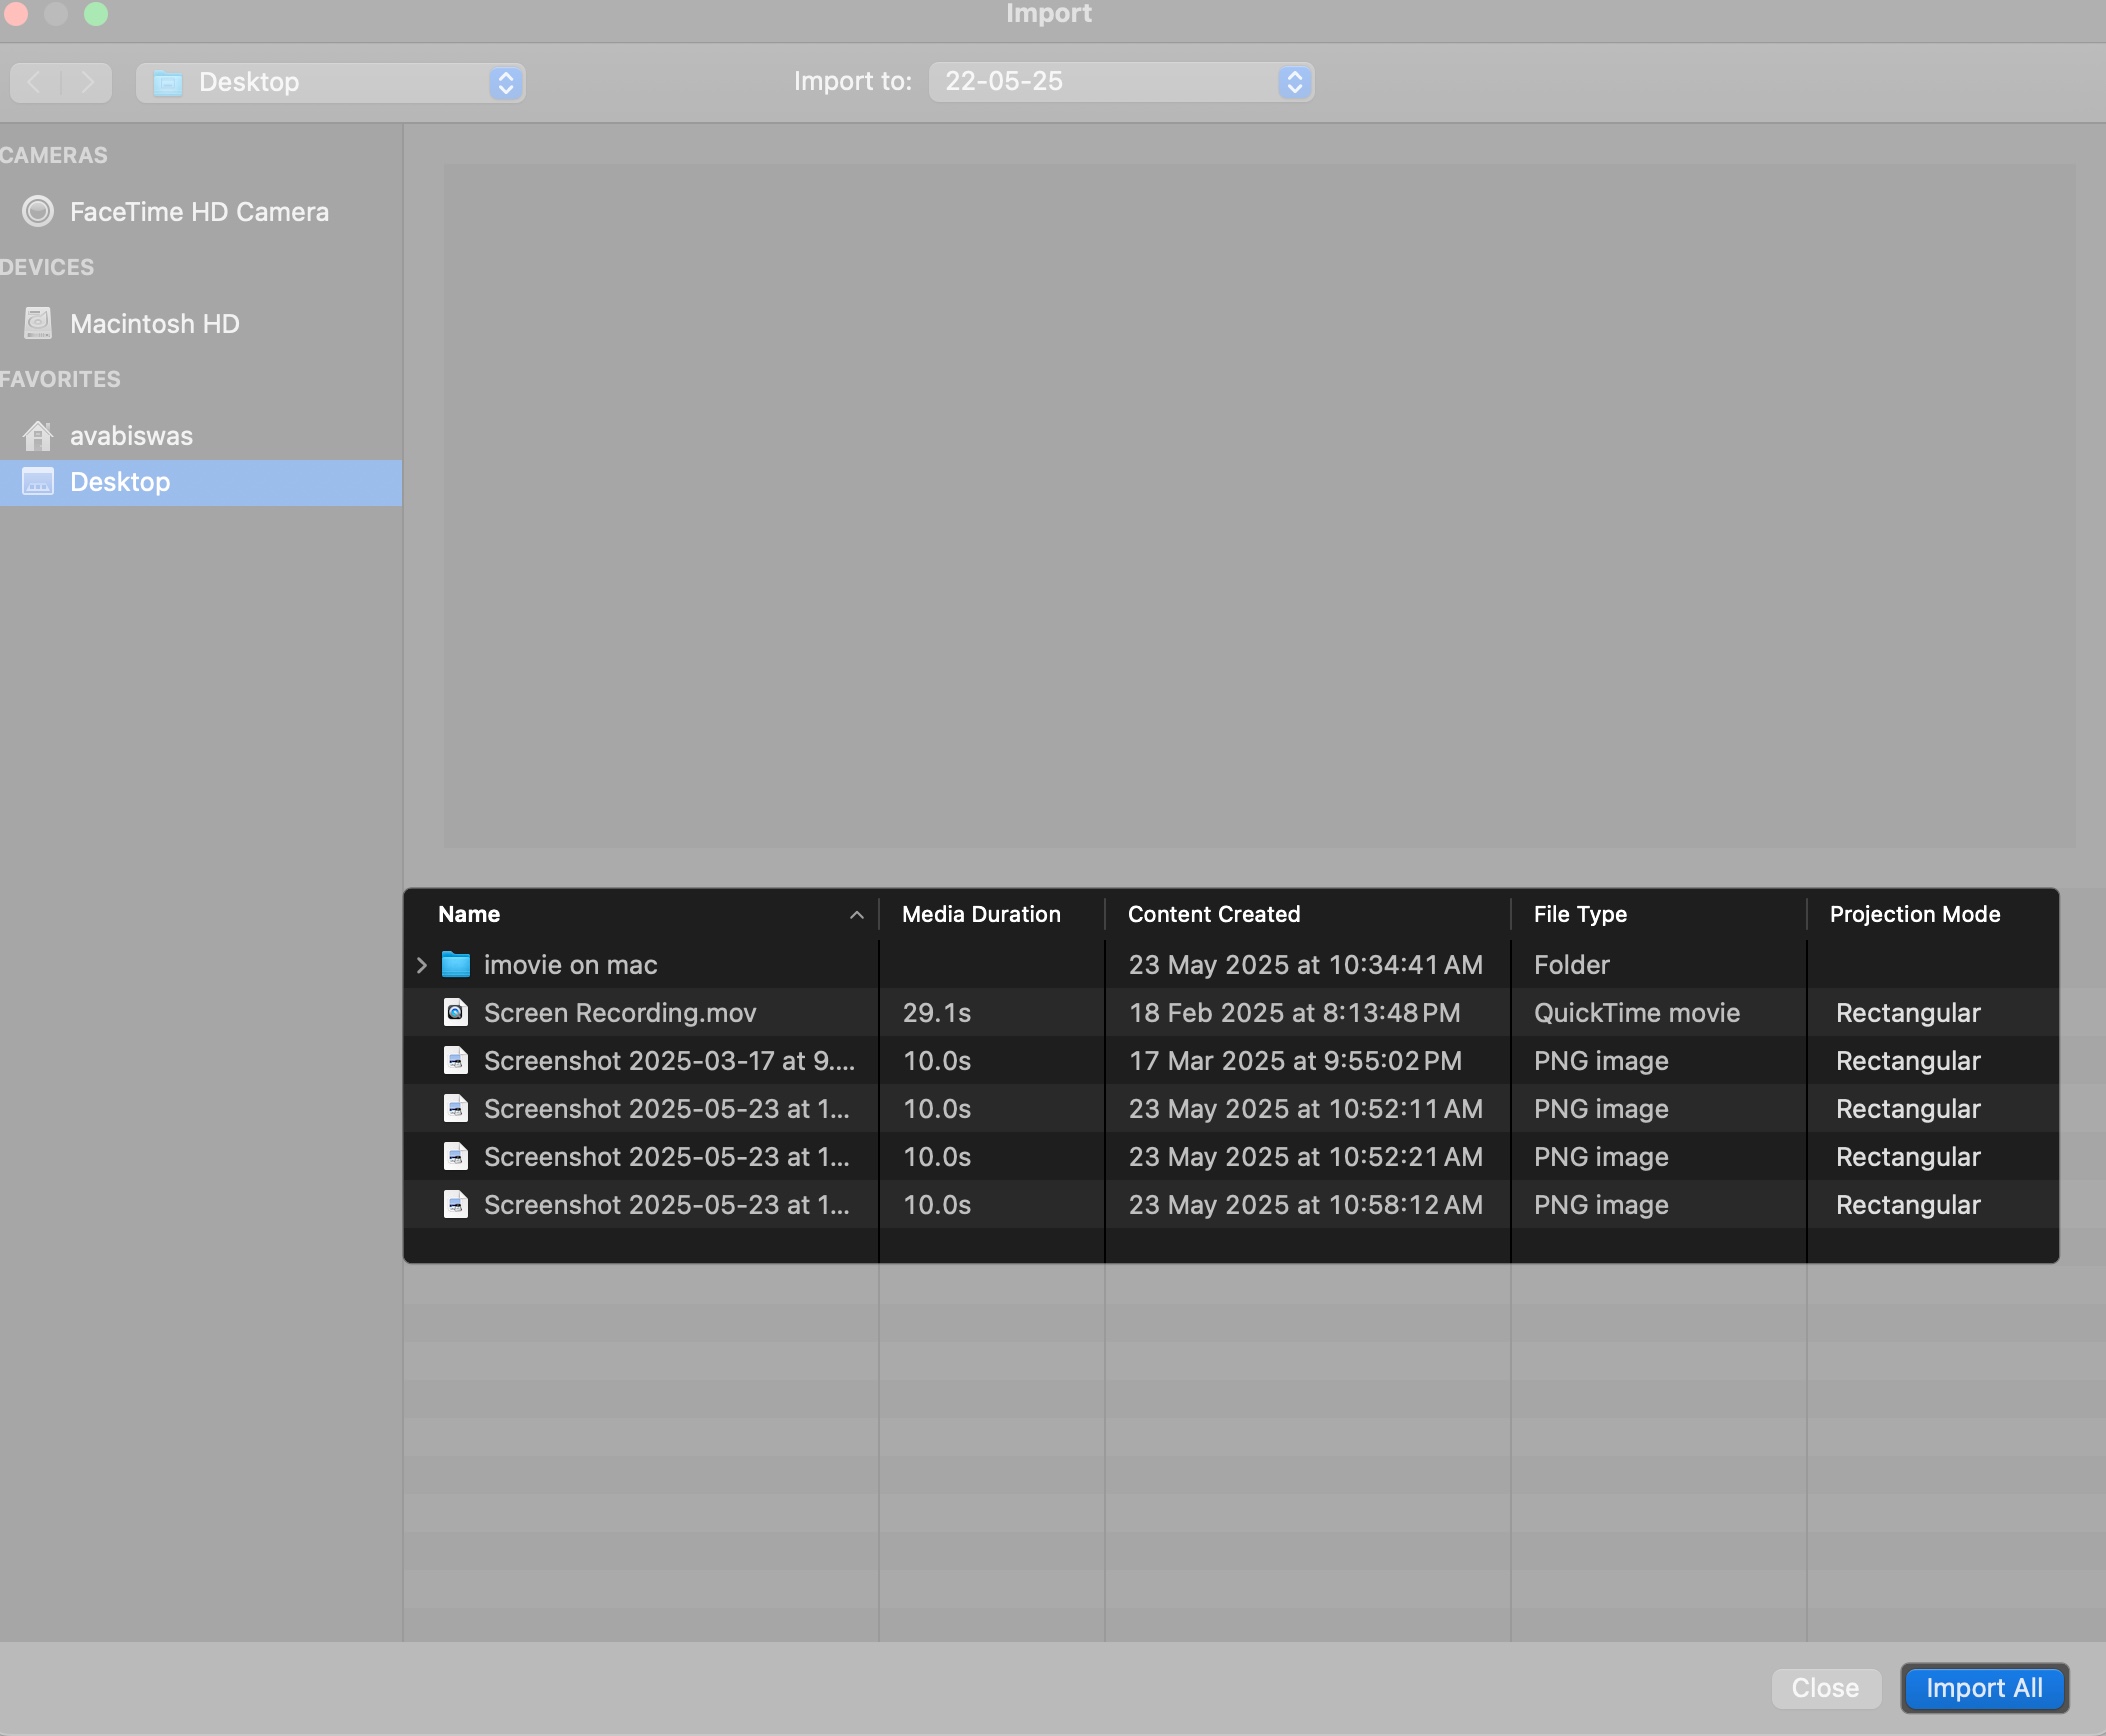
If you have your clips saved in other places, Don’t worry—you can easily import them to your iMovie Media Library. Here’s how:
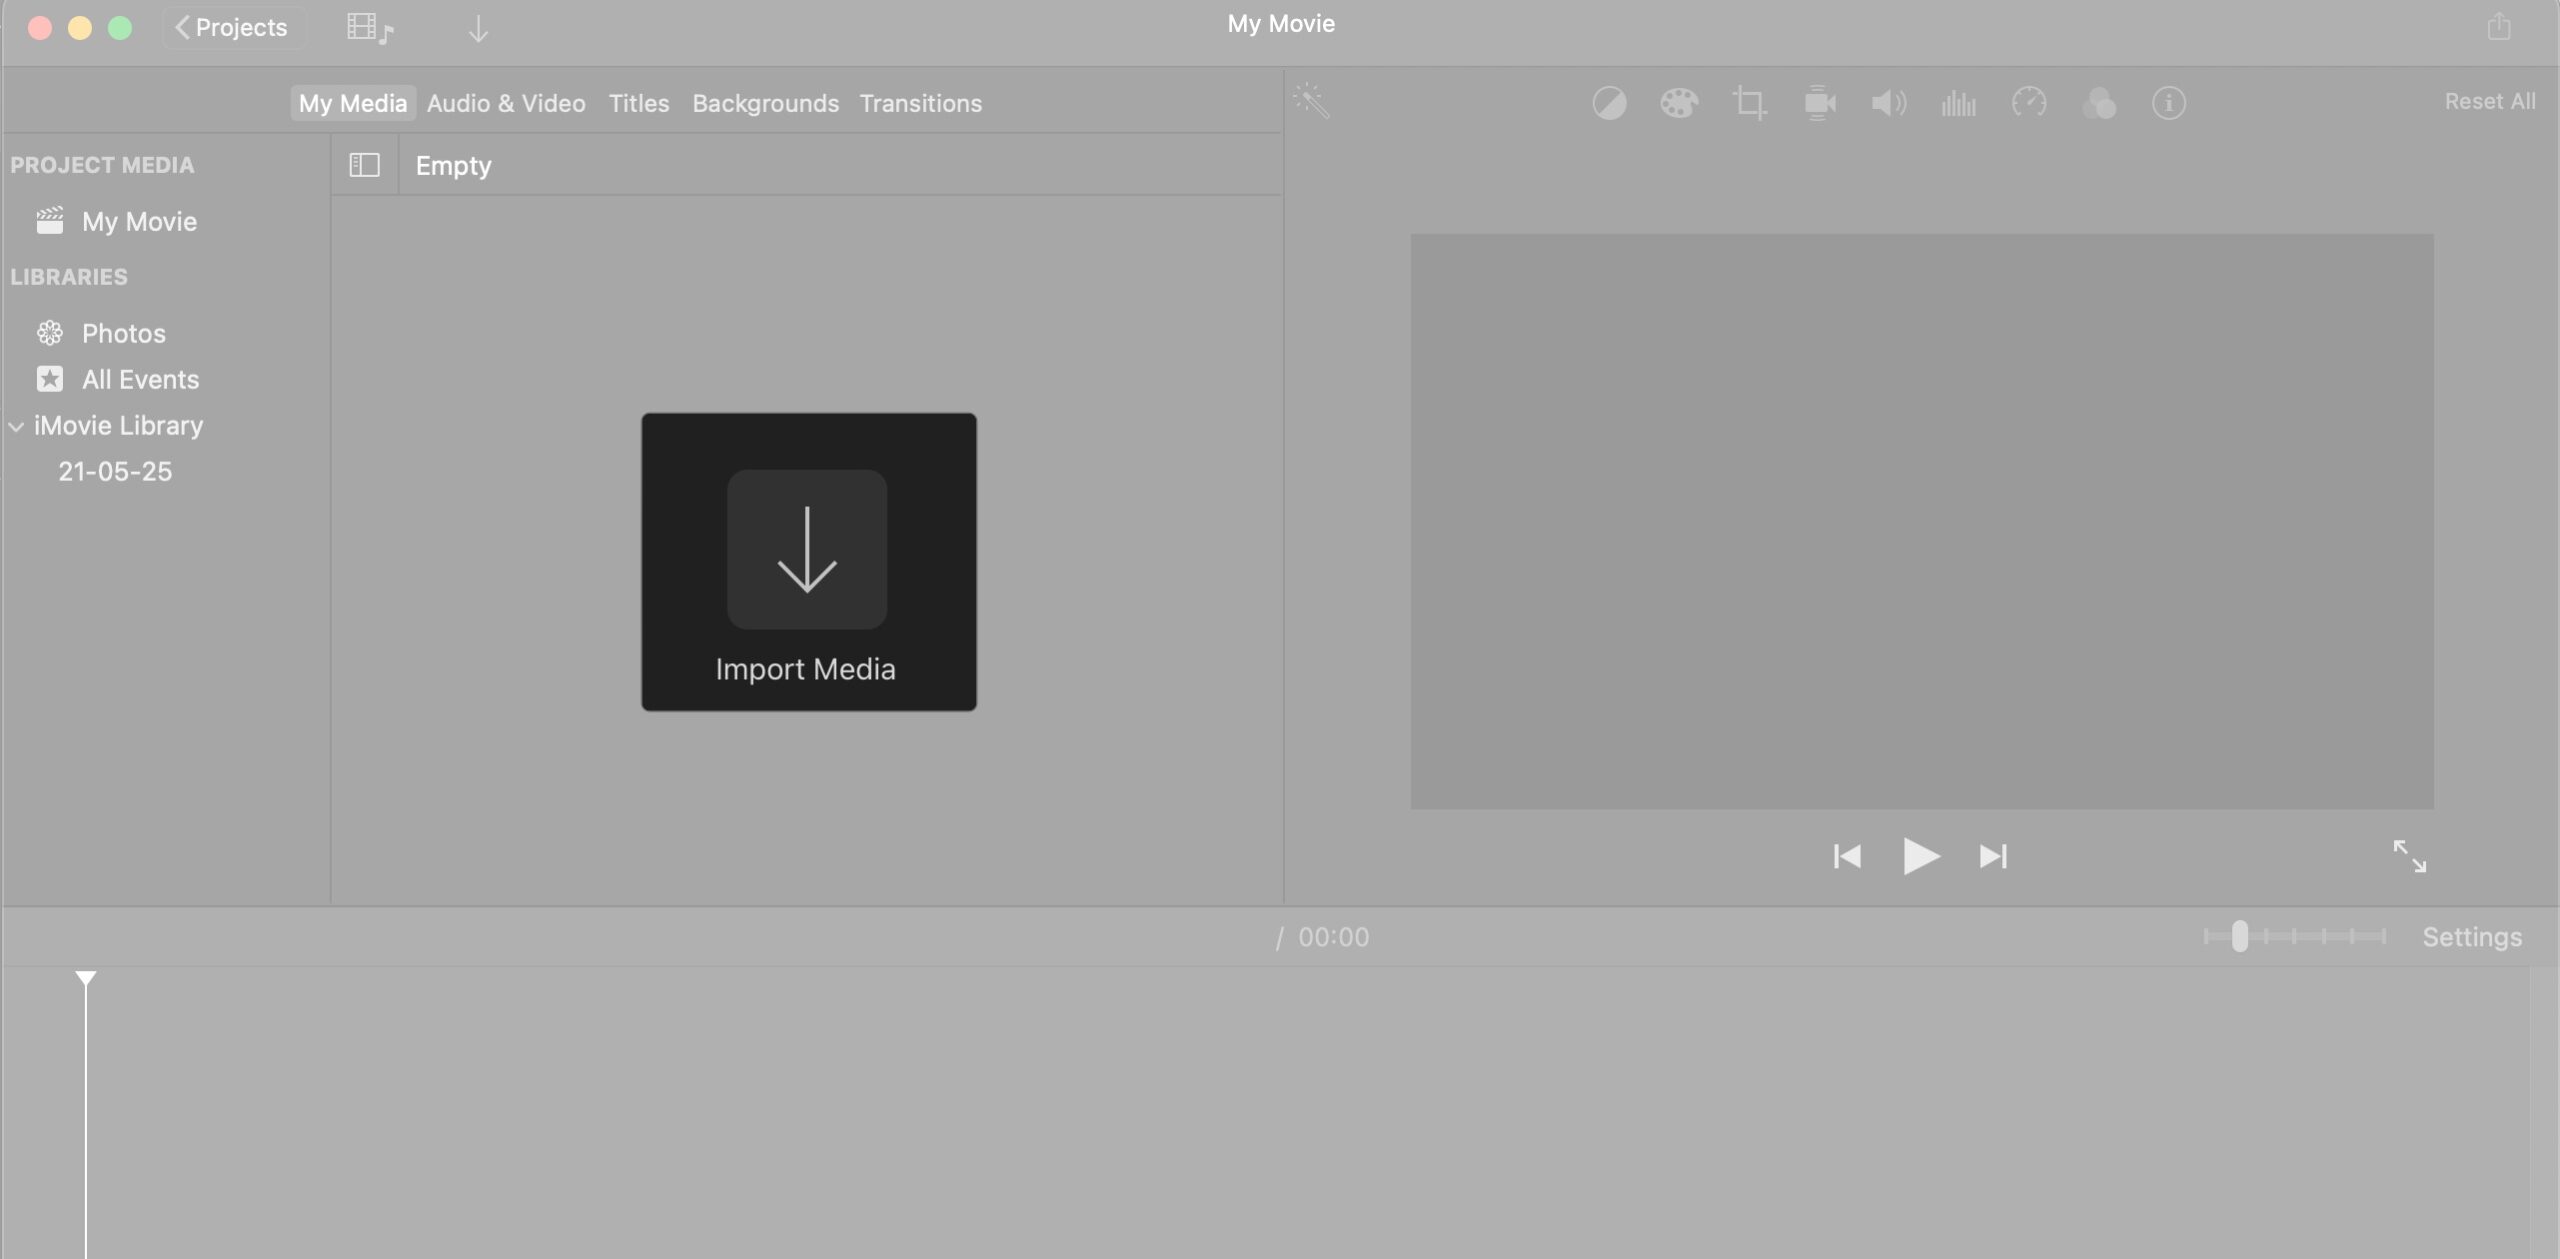
- Click the Import Media button (a downward arrow) in the Media Library.
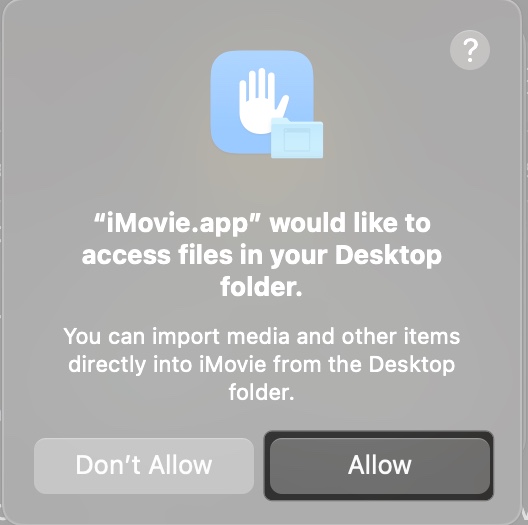
- For the first time, click Allow to grant permission.
- Select Desktop, or your Mac drive from the sidebar to access your Mac’s Photos app library.
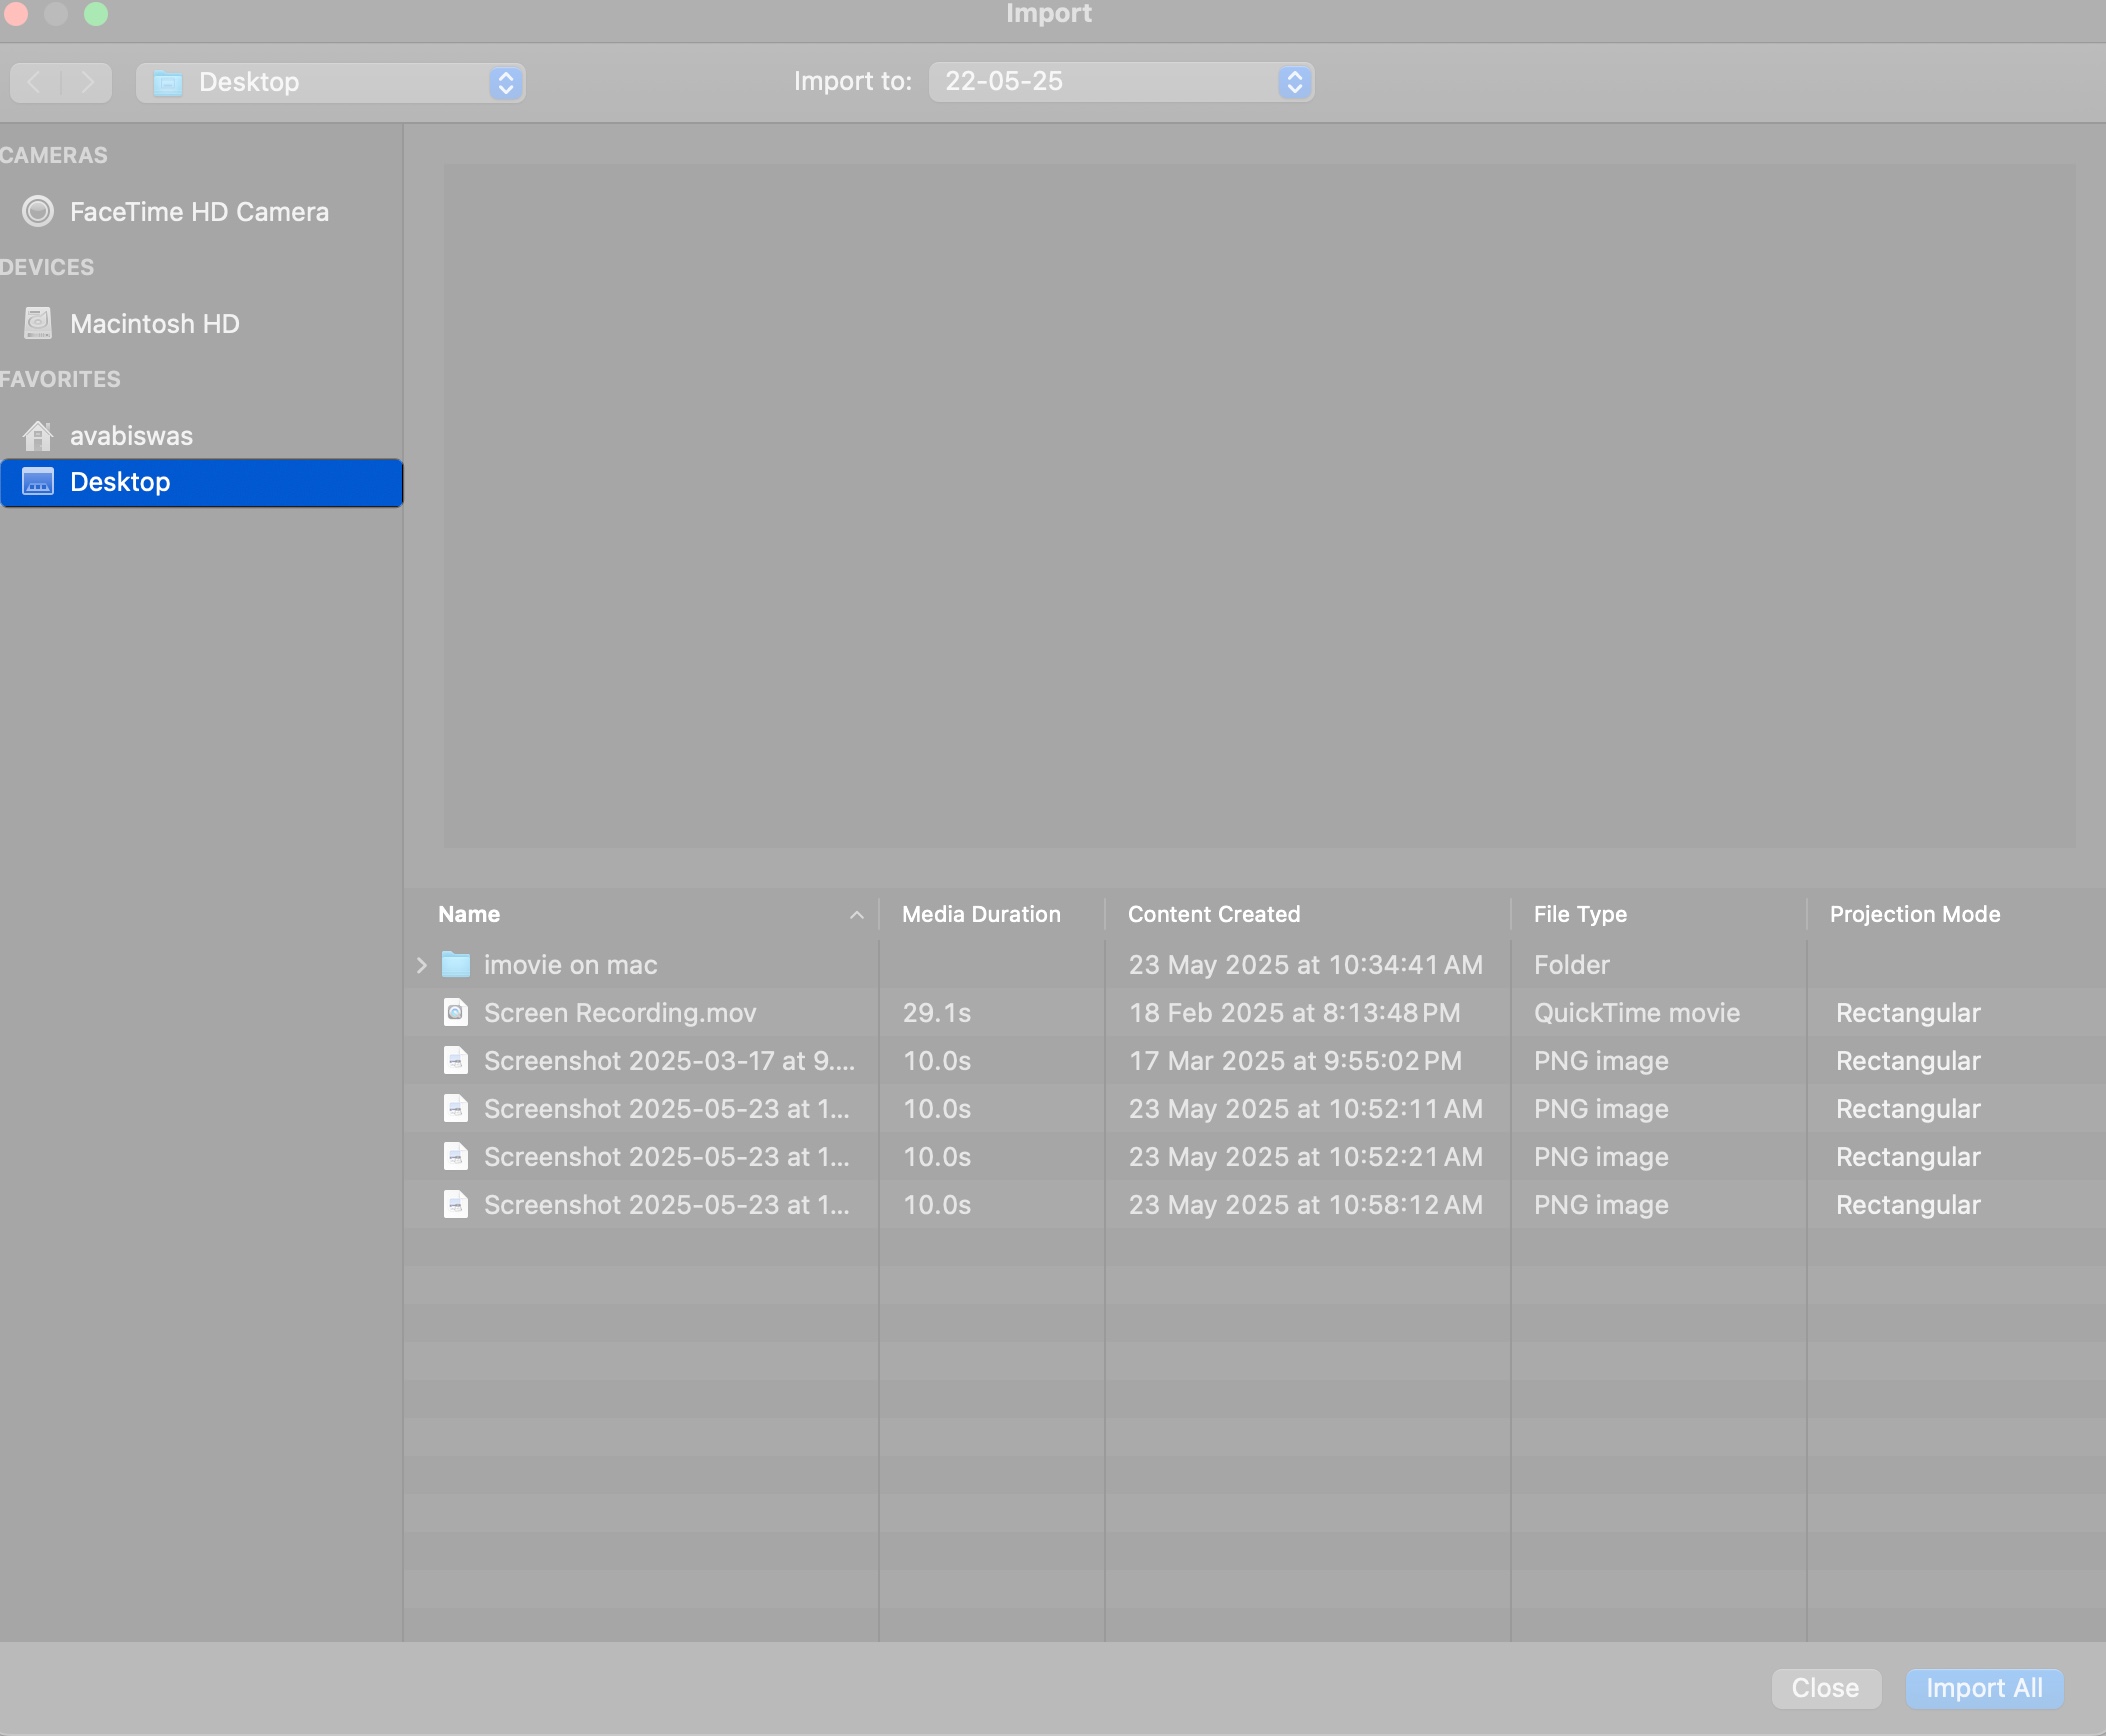
- Browse and select photos or videos, then click Import Selected (or drag them to the Timeline) or click Import All to use all of them in the project.


Import from iPhone or iPad
- Connect your iPhone or iPad to your Mac using a USB cable or use AirDrop for wireless transfer.
- In iMovie, click Import Media, then choose your device from the sidebar.
- Select the videos or photos you want and click Import Selected.
You can also import projects created on iPhone or iPad by going to Files in the menu bar > Import iMovie iOS Project.
Import from Your Camera
- Connect your camera or SD card to your Mac via USB or a card reader.
- Open iMovie, click Import Media, and select your device or SD card name from the sidebar.
- Choose the clips you want to import and click Import Selected. iMovie supports common formats like MP4 and MOV.
Record Video into iMovie
- Click Import Media, then select FaceTime HD Camera (or another connected webcam) from the sidebar.
- Grant camera and microphone permissions by clicking Allow on the popup.
- Press the red Record button to start recording directly into iMovie.
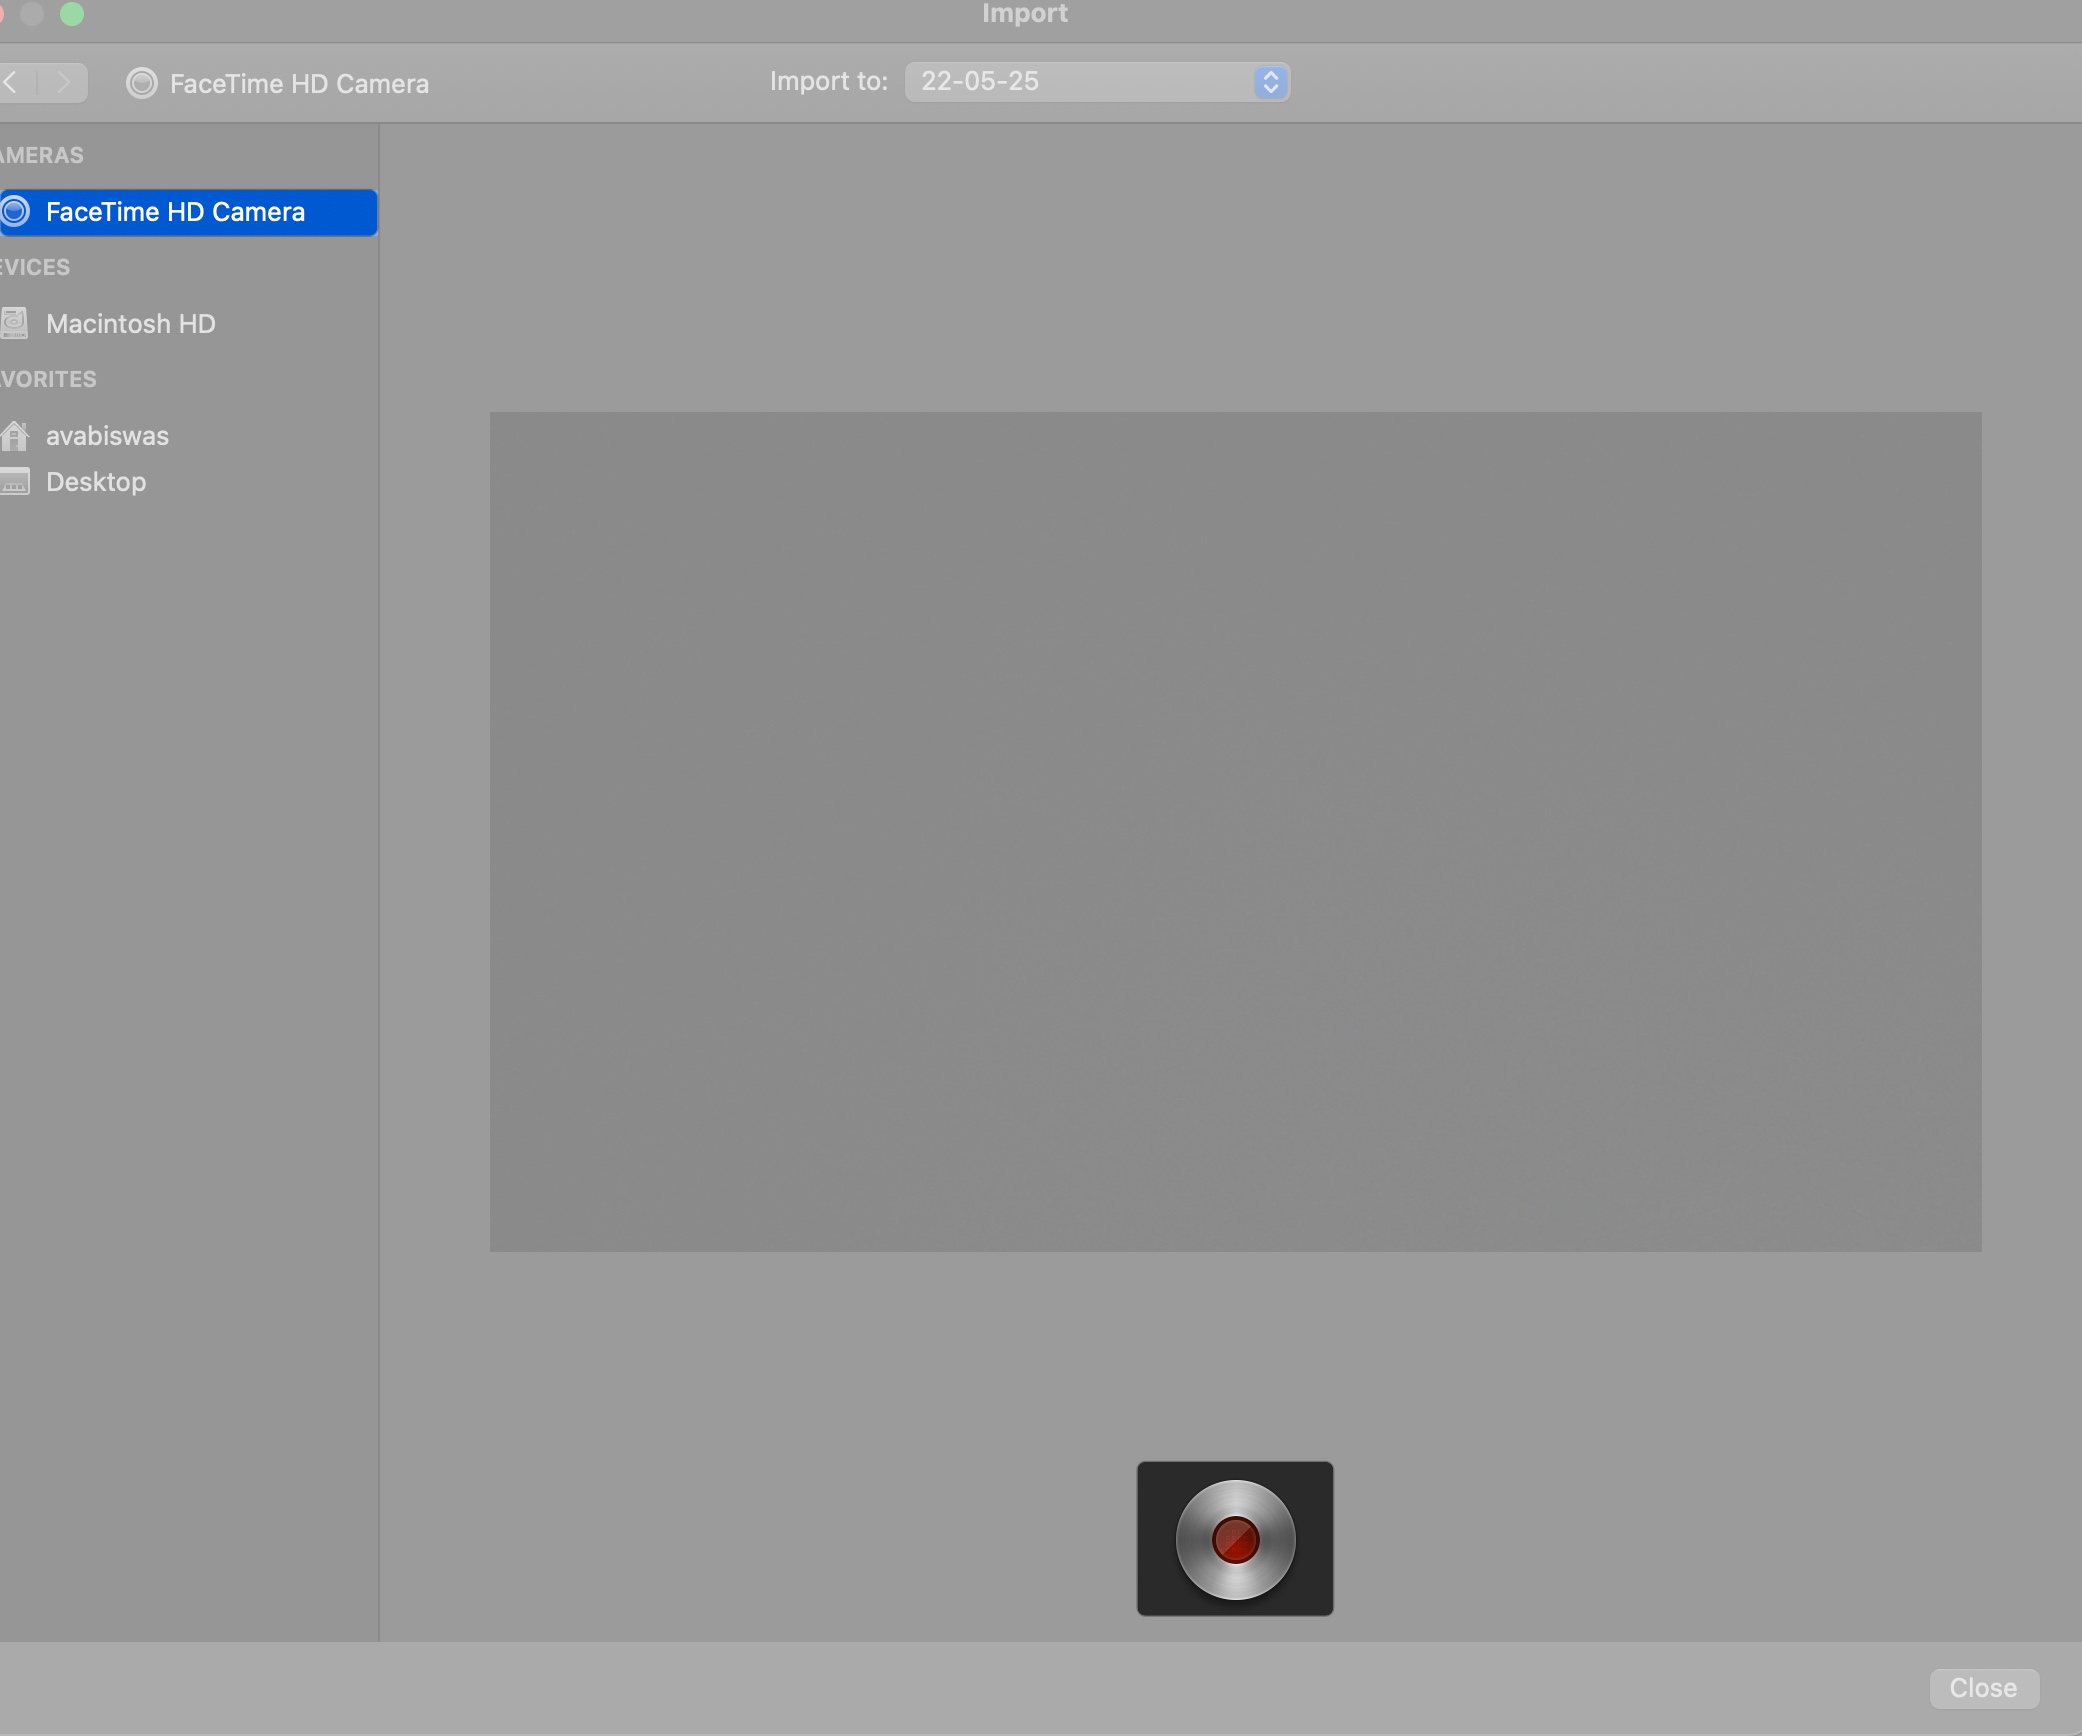
- Click the Stop button when done, and the clip will appear in your Media Library.

To keep your media organized, create Events in the Media Library (e.g., “Vacation 2026”). Click the Import to dropdown at the top and select New Event, then enter a name and click OK. Now, import your preferred photos and videos. You will see the events under iMovie Library in the Timeline window.
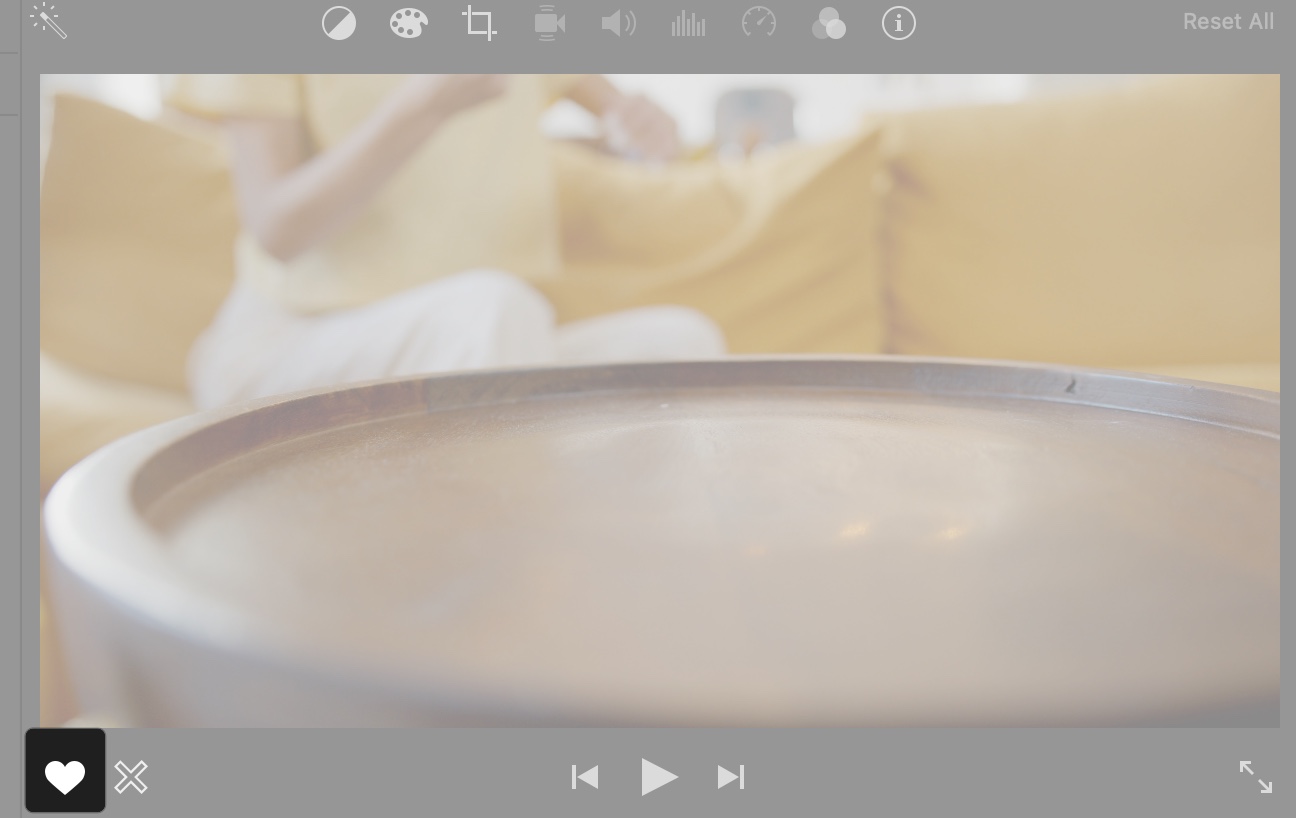
How to Play Videos in iMovie on Mac
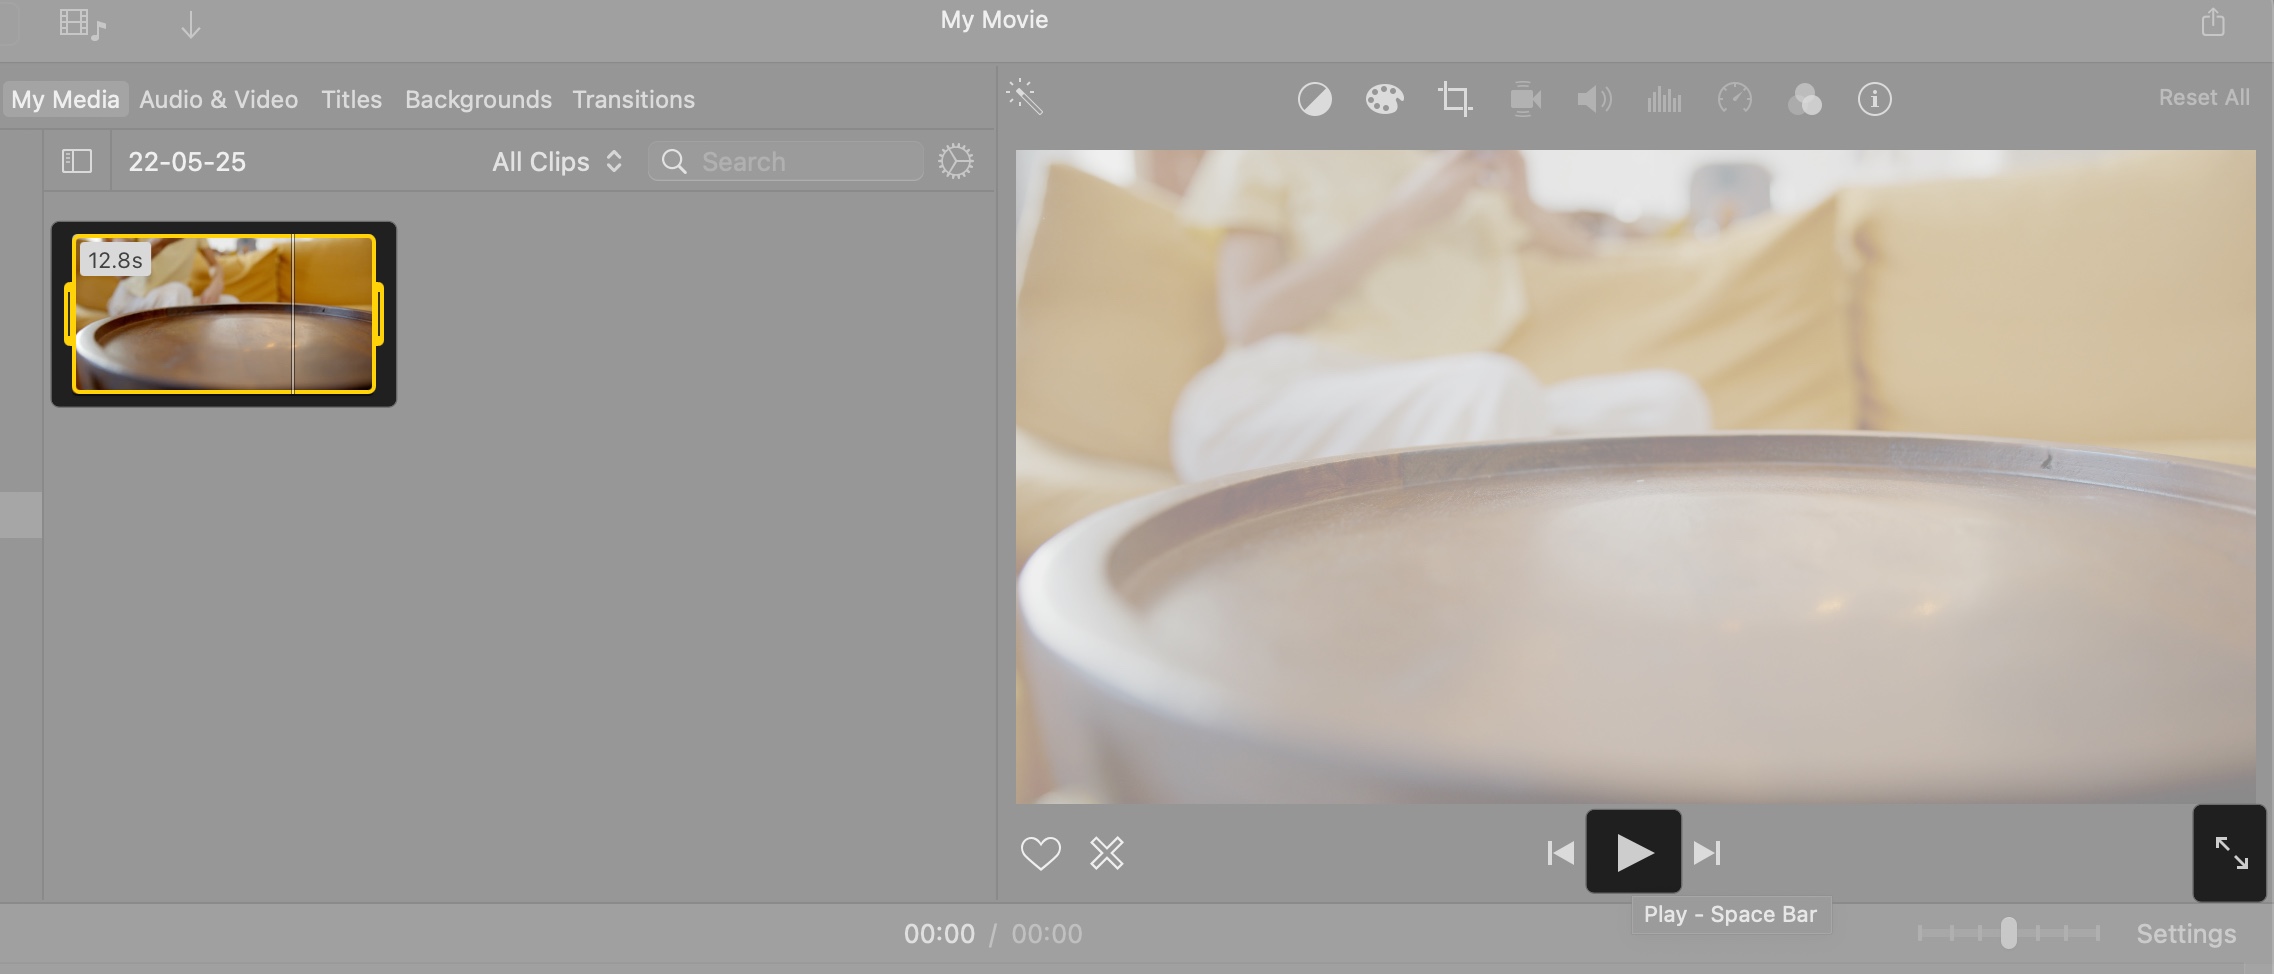
To preview clips or project:
- In the Media Library, select a clip and hover your cursor on it to view a particular section in the Viewer.
- To play your entire project, click the Play button (triangle) below the Viewer or press the Spacebar.
- Use the Play button again to pause. You can also click the expand button to view the clip in full screen mode and drag the playhead in the controls to jump to specific moments.

Tip:
You will get more playback options from View in the menu bar.
How to Edit Videos in iMovie on Mac
Editing is where iMovie shines, letting you make raw clips into a polished movie. Here’s how to use iMovie editing tools on Mac.
Add Clips to the Timeline
Now that you have imported all your media into iMovie let’s start building your movie by creating the Timeline.
- In the Media Library, select a clip or photo.
- Drag it to the Timeline at the bottom or click the + button to add it.

- Arrange clips in the Timeline by dragging them left or right to set their order.

Sort and Search for Clips
- In the Media Library, use the search bar to find clips by name or keyword.

- Click the Filter icon to sort clips by All Clips, Favorites, or Rejected.
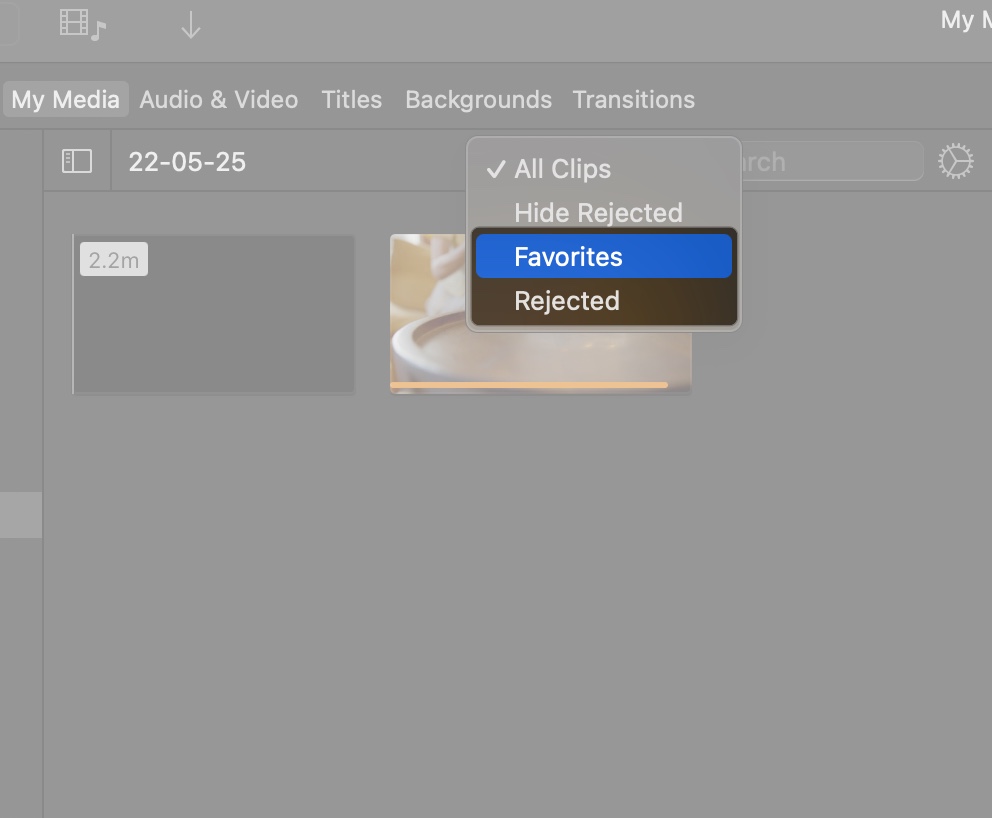
- To mark your clips, select the photo or video from the iMovie library and click the heart icon for Favorites or the X icon for Rejected under the Viewer.
Have you wrongly marked your clip? Worry not! Simply select the clip, go to Mark in the menu bar, and click Unrate.
Basic Editing Tools in iMovie
Once you have your movie timeline, start editing the clips to make it more polished.
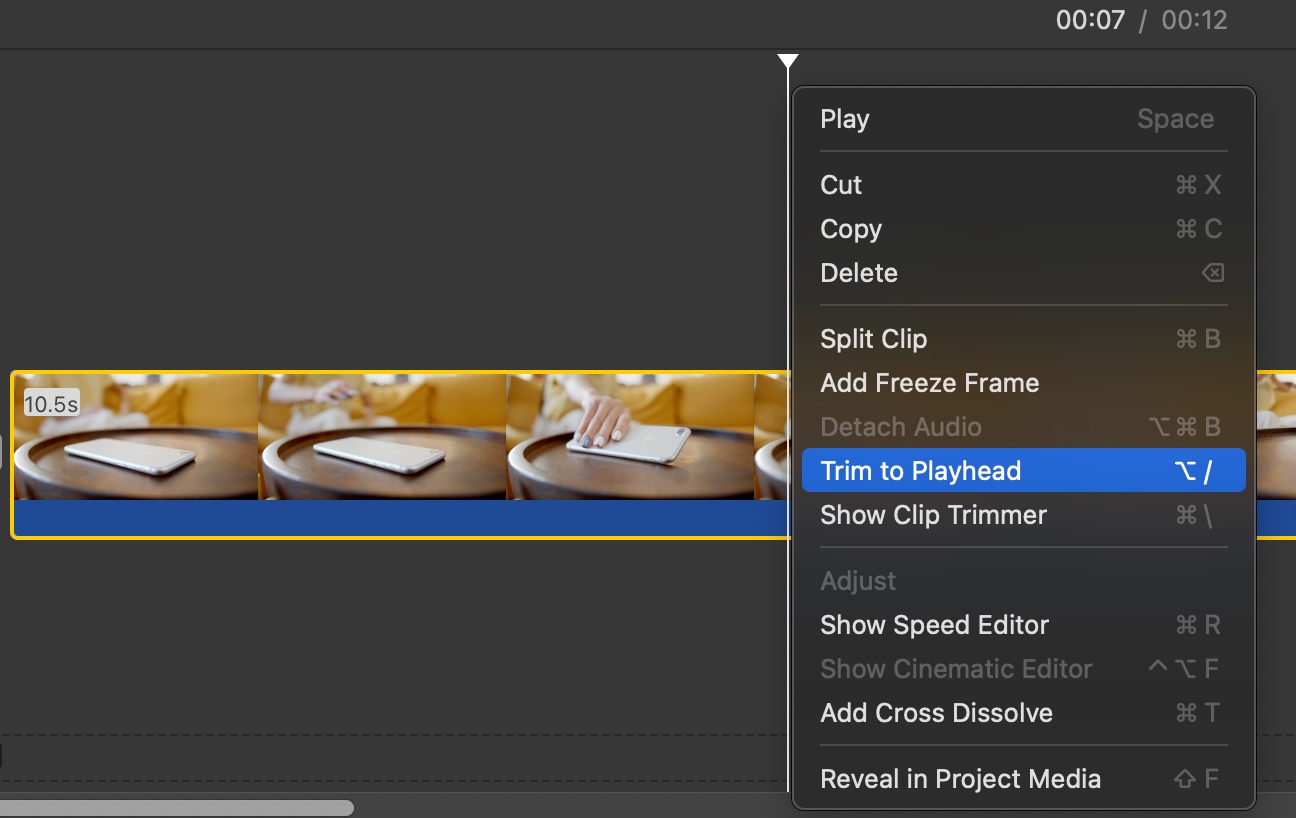
- Trim: Click and drag the yellow edges of a clip in the Timeline to shorten it. If you want to remove a large part, click on the specific scene on the timeline, right-click, and select Trim to Playhead.
- Split: Select a clip and press Command (⌘)+ B to split it into two parts. Then, you can trim accordingly or change the clip order.
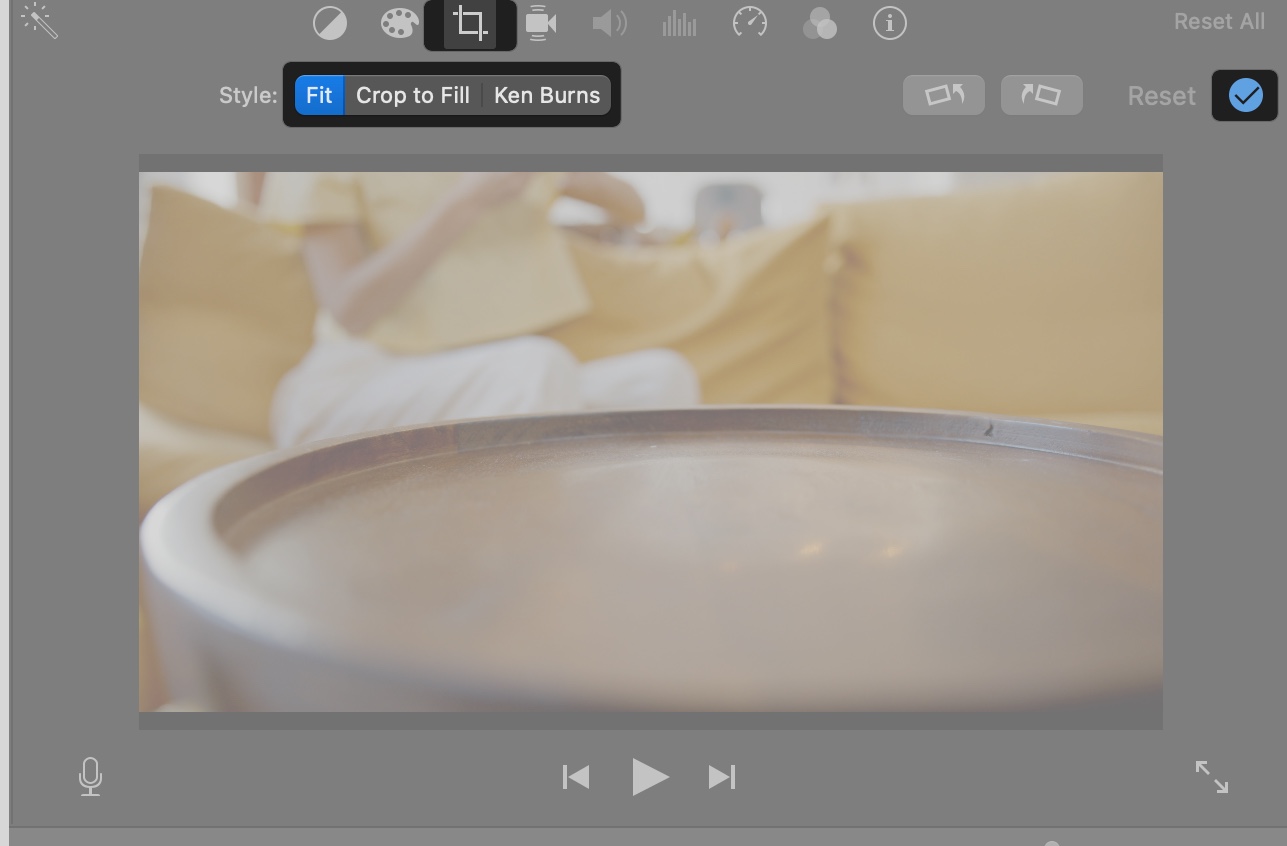
- Crop: Select a clip in the Timeline, click the Crop icon above the Viewer, select the Crop to Fill or Fit button, and drag the corners to adjust the frame. Click the blue tick icon to save it.
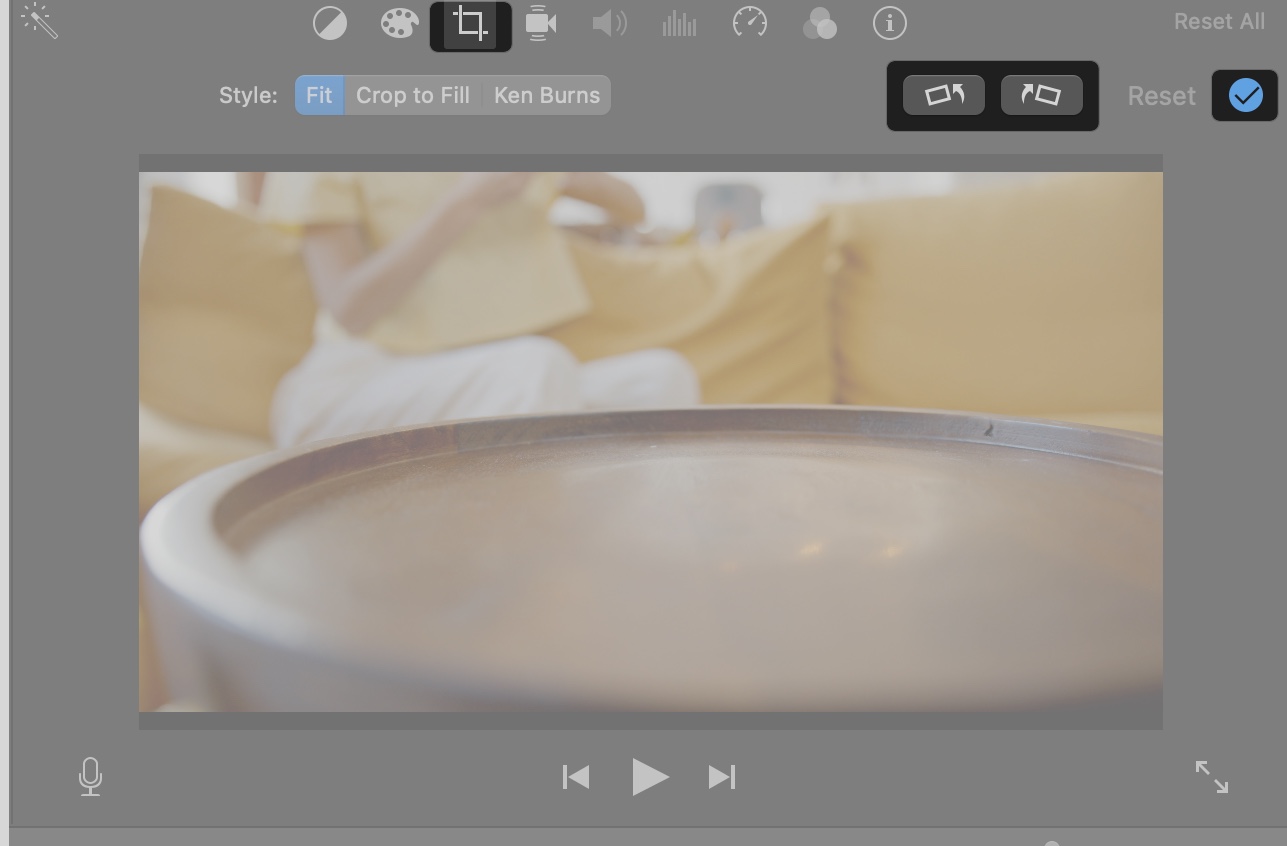
- Rotate: click the Crop icon, then Rotate button above the Viewer to rotate a clip 90 degrees. Hit the tick mark.
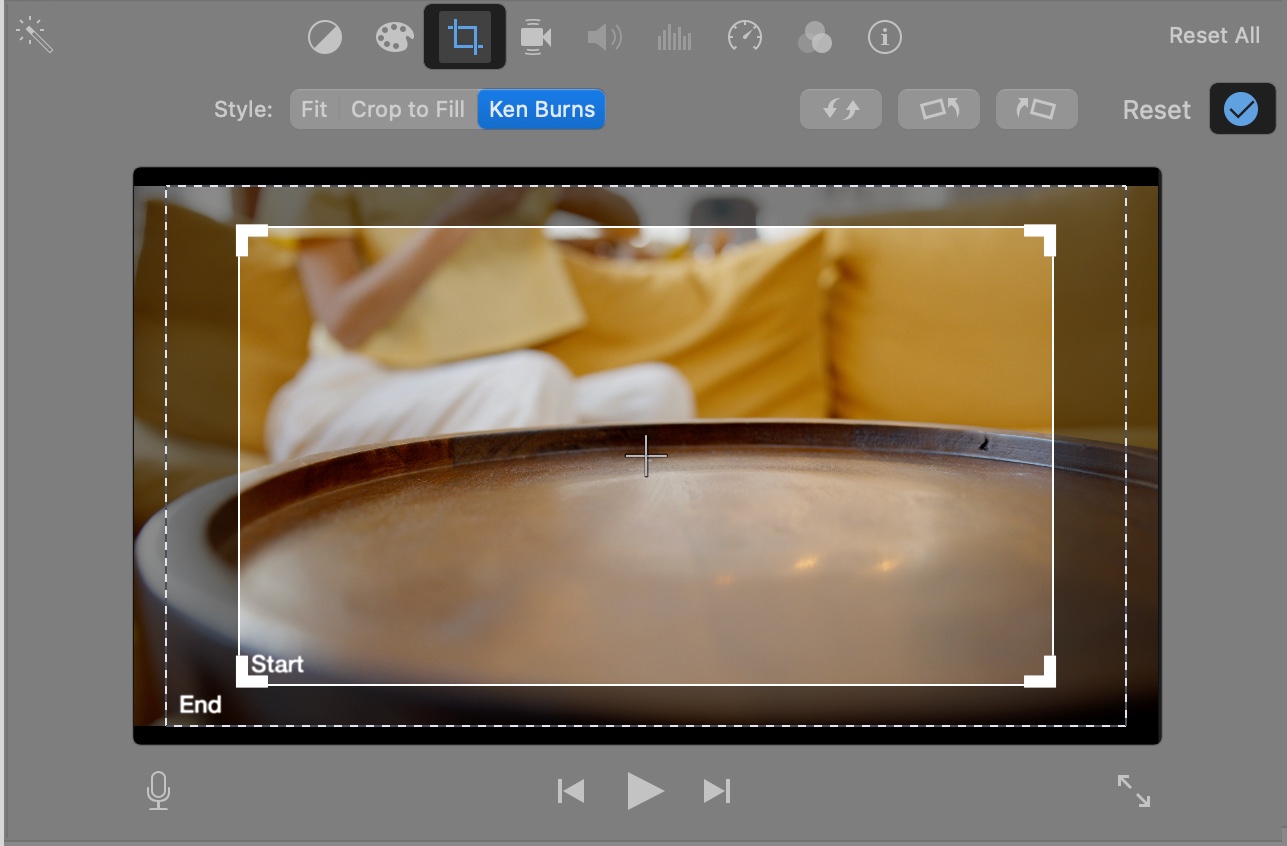
- Ken Burns Effect: Select a photo or clip, click Crop icon > Ken Burns, then set Start and End positions from the Swap icon to create a smooth zoom or pan effect. You can also crop the inner frame to decide the zoom level. Play the preview and click the tick icon to save it.
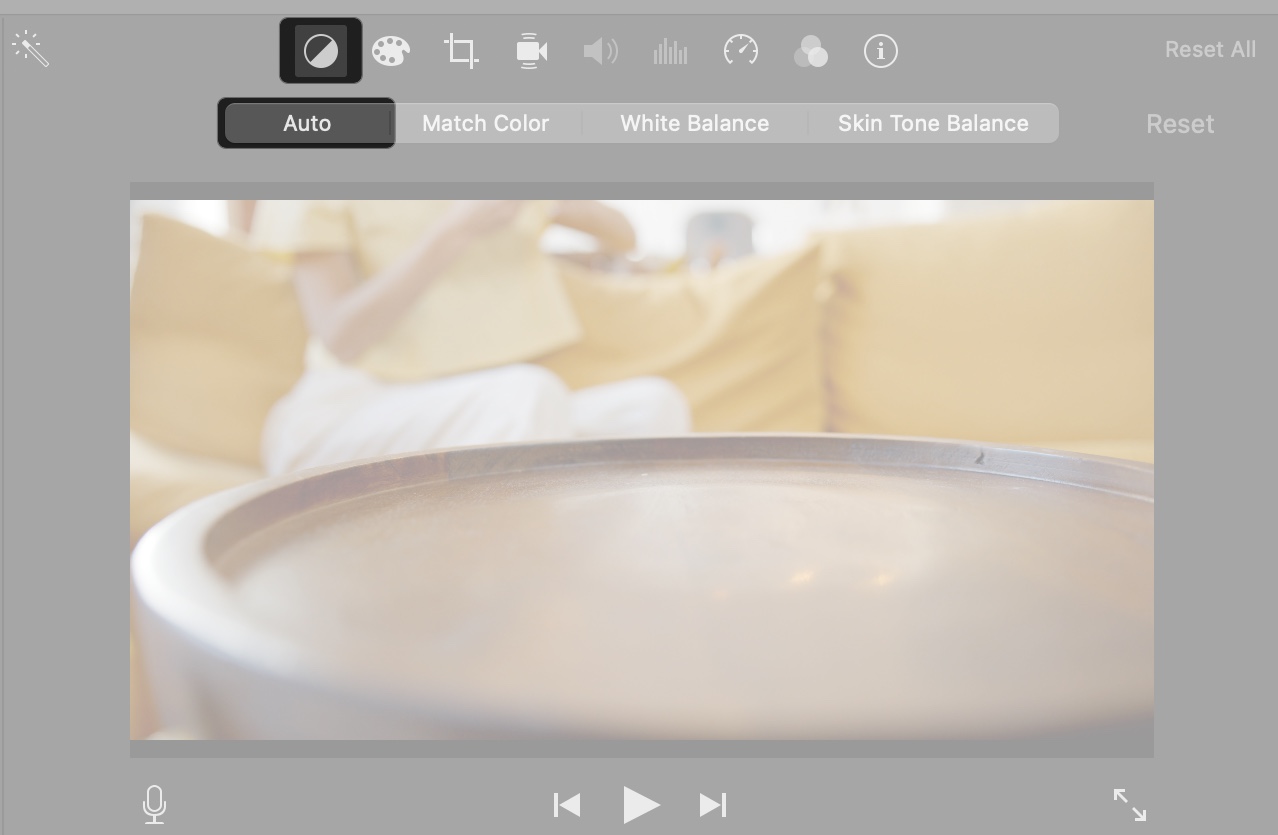
- Color Correction: Click the Color Correction button (color palette) above the Viewer to manually adjust brightness, contrast, or white balance.
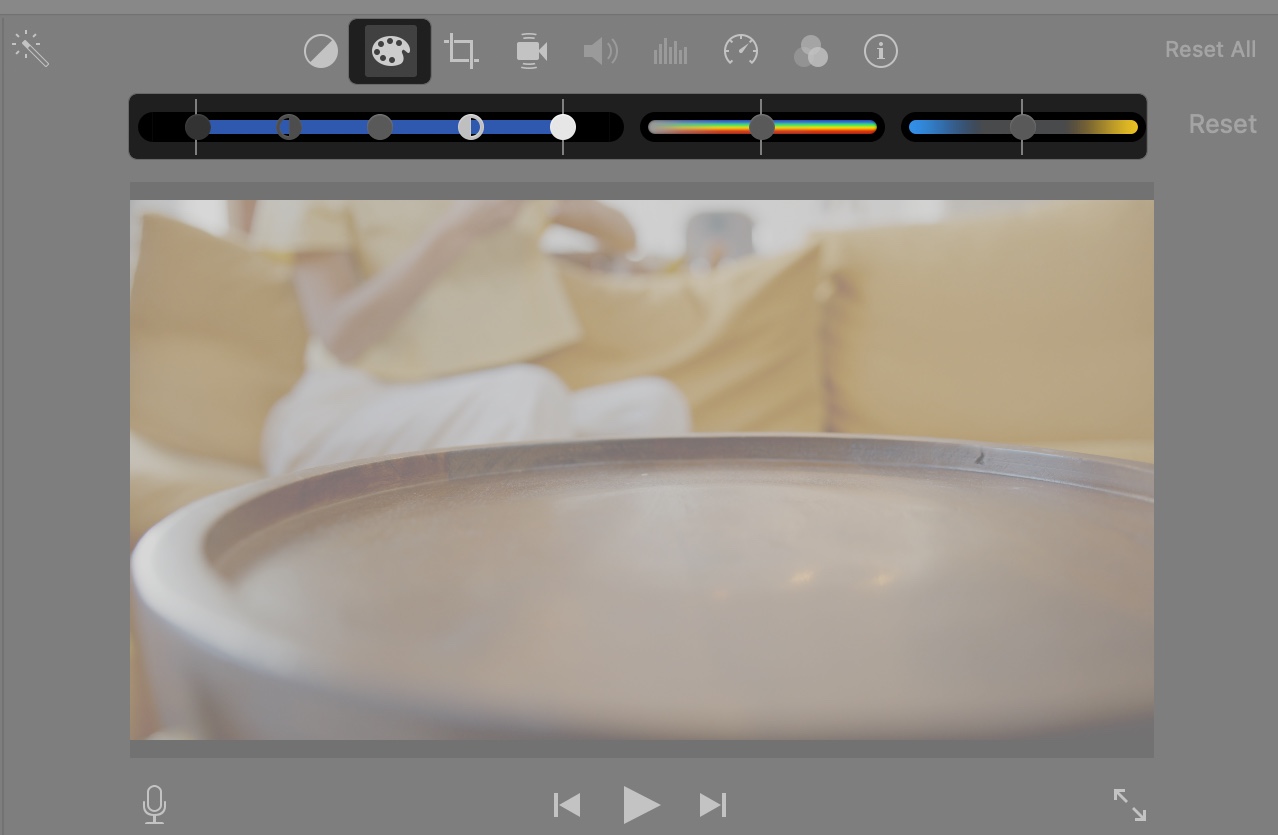
- Color Balance: Click the Color Balance icon and select Auto to automatically improve the color profile. To maintain consistency between clips, use the Match Color option.
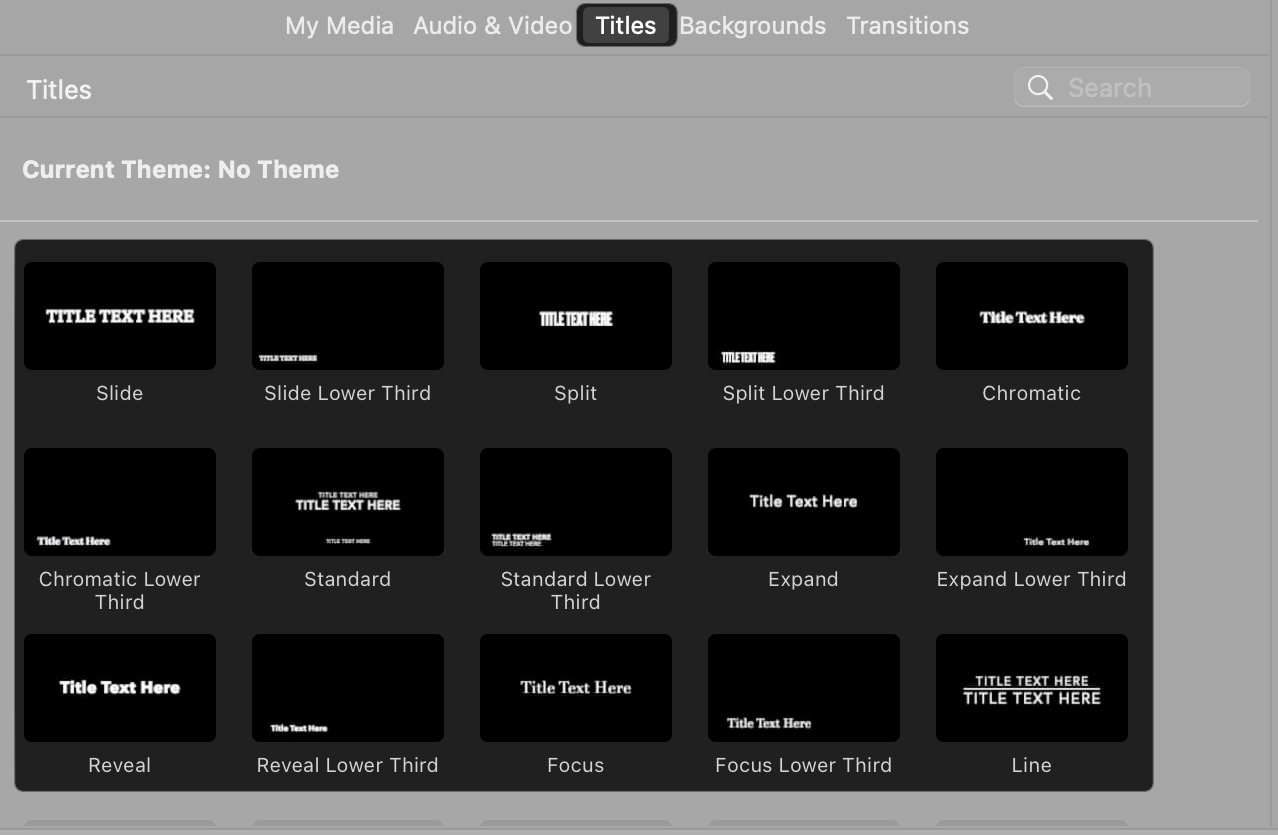
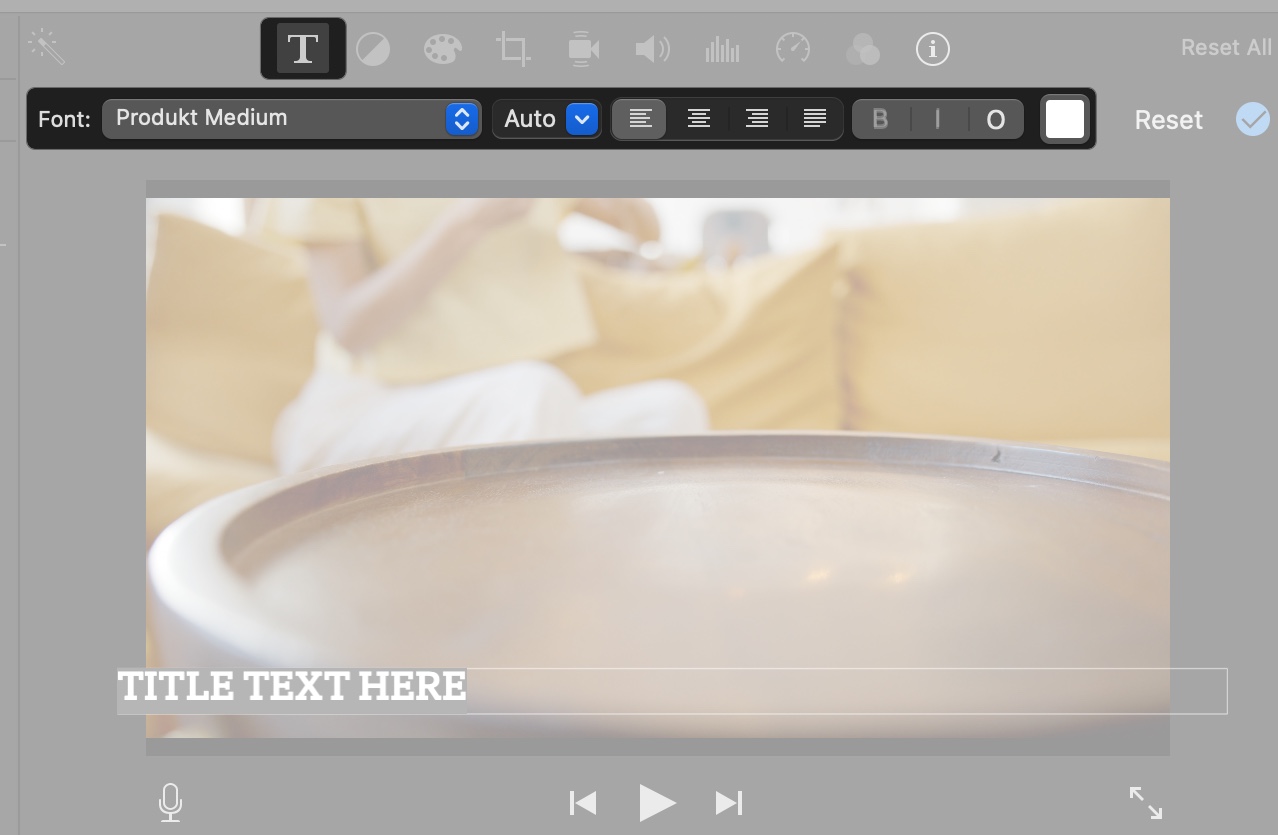
- Adding Titles: Click the Titles tab above the Media Library, choose a style (e.g., Slide or Reveal), and drag it to the Timeline above a clip. Click the textbox on the Viewer to edit the text.
- Style the Title: To format the title text, click the T icon above the Viewer and change the font style, size, and color. You may also adjust its alignment and apply bold, italics, and outlined styles.


Enhance Clips and Add Filters
In addition to basic editing, iMovie offers on-device intelligence to enhance clips automatically. Select a clip in the Timeline and click the magic wand icon at the top left corner above the Viewer. This will balance the clip’s color profile. ![]()
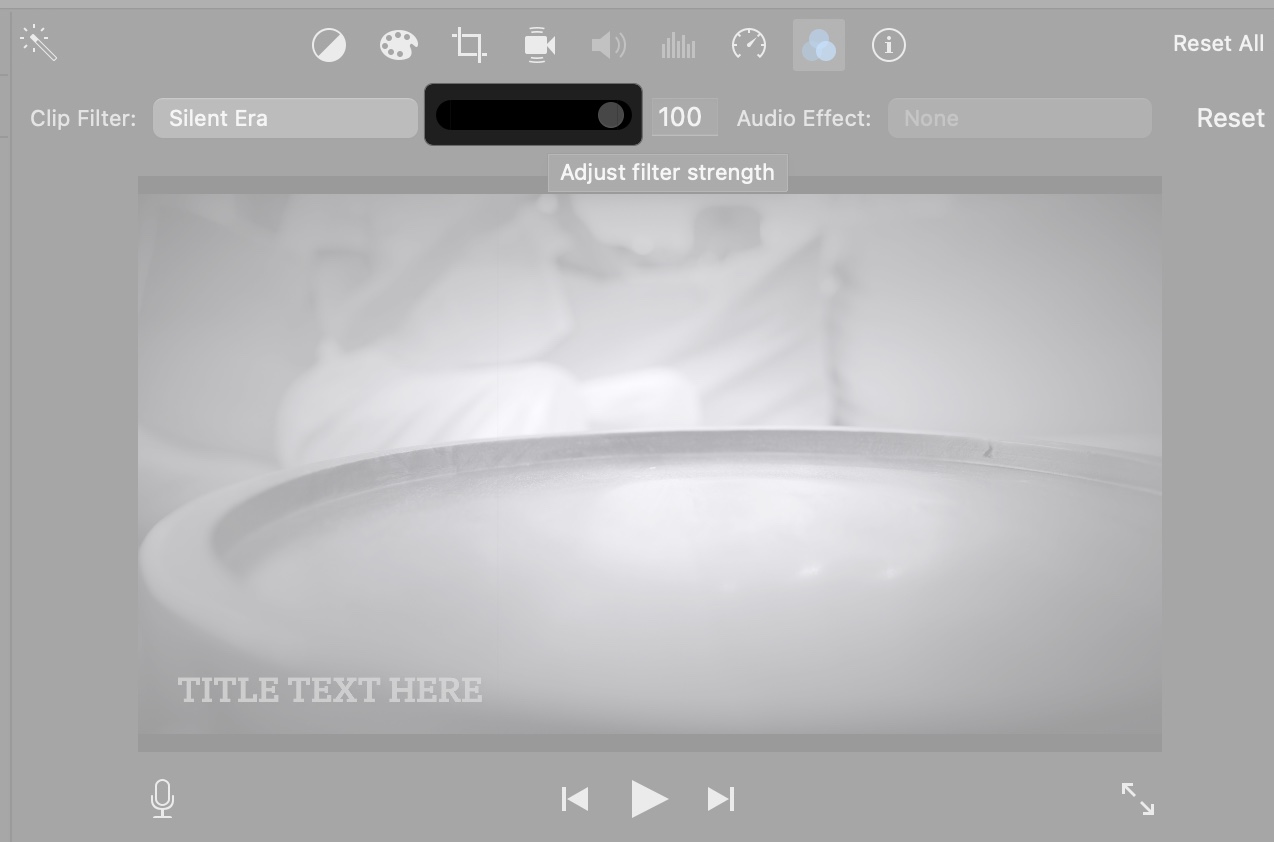
If you want to add a more creative touch to your clips, try iMovie filters.
- Click the Filter button above the Viewer.
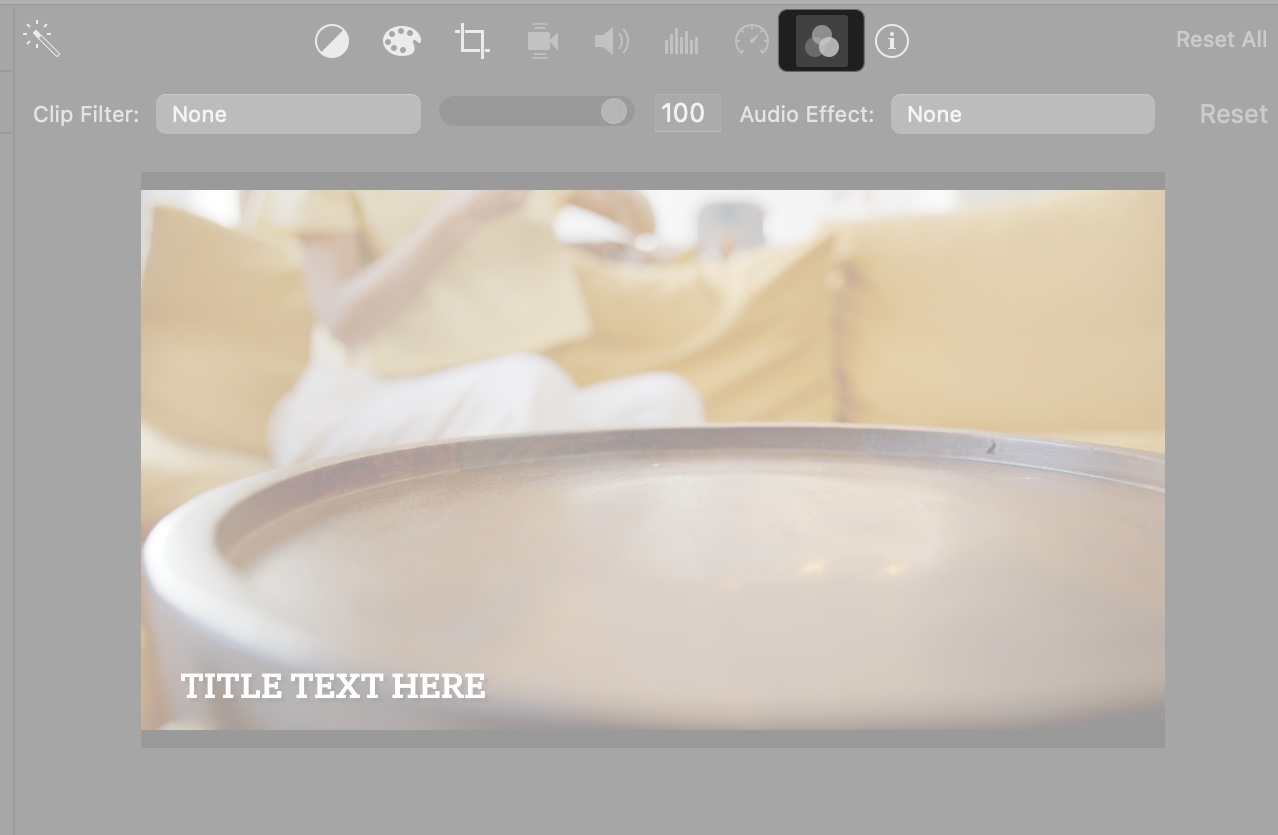
- Choose from filters like Black & White, Vintage, or Comic Basic to change the clip’s look.
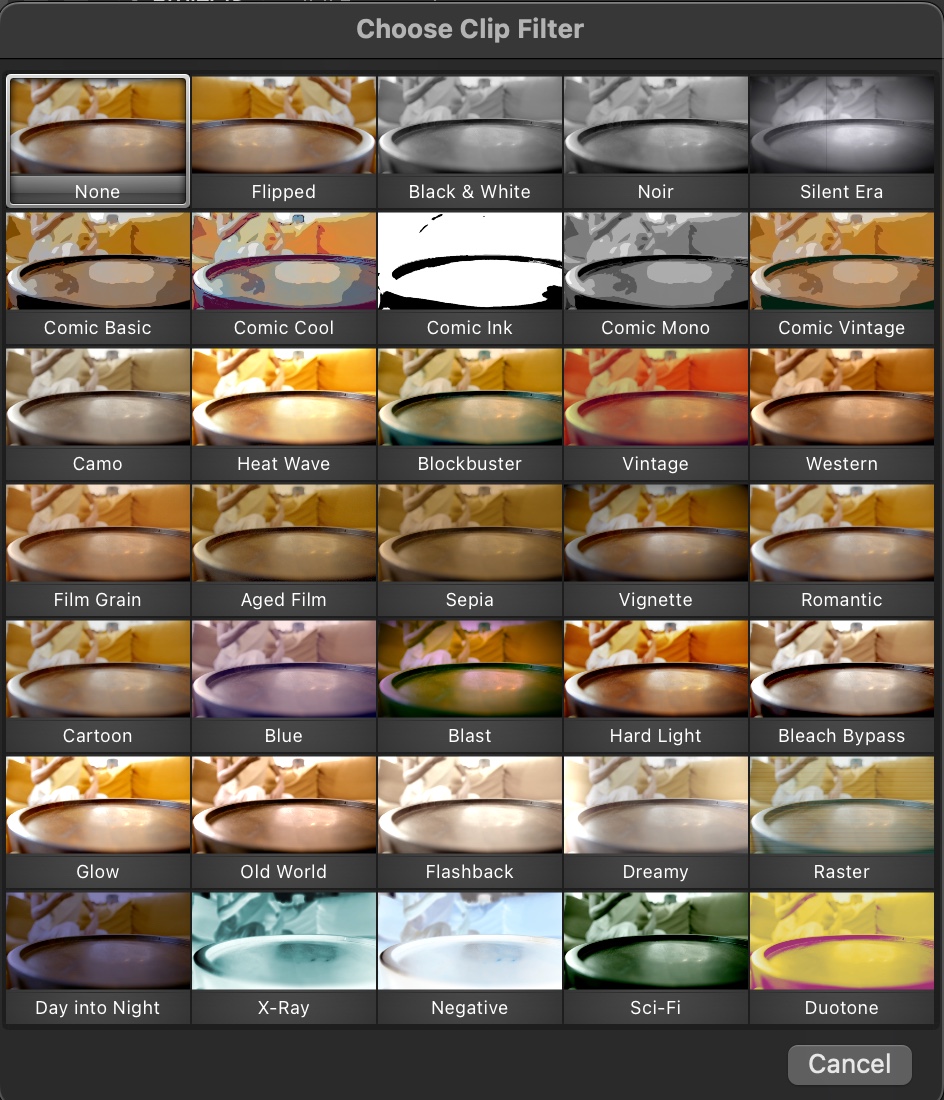
- Adjust filter intensity using the slider for a subtle or bold effect.


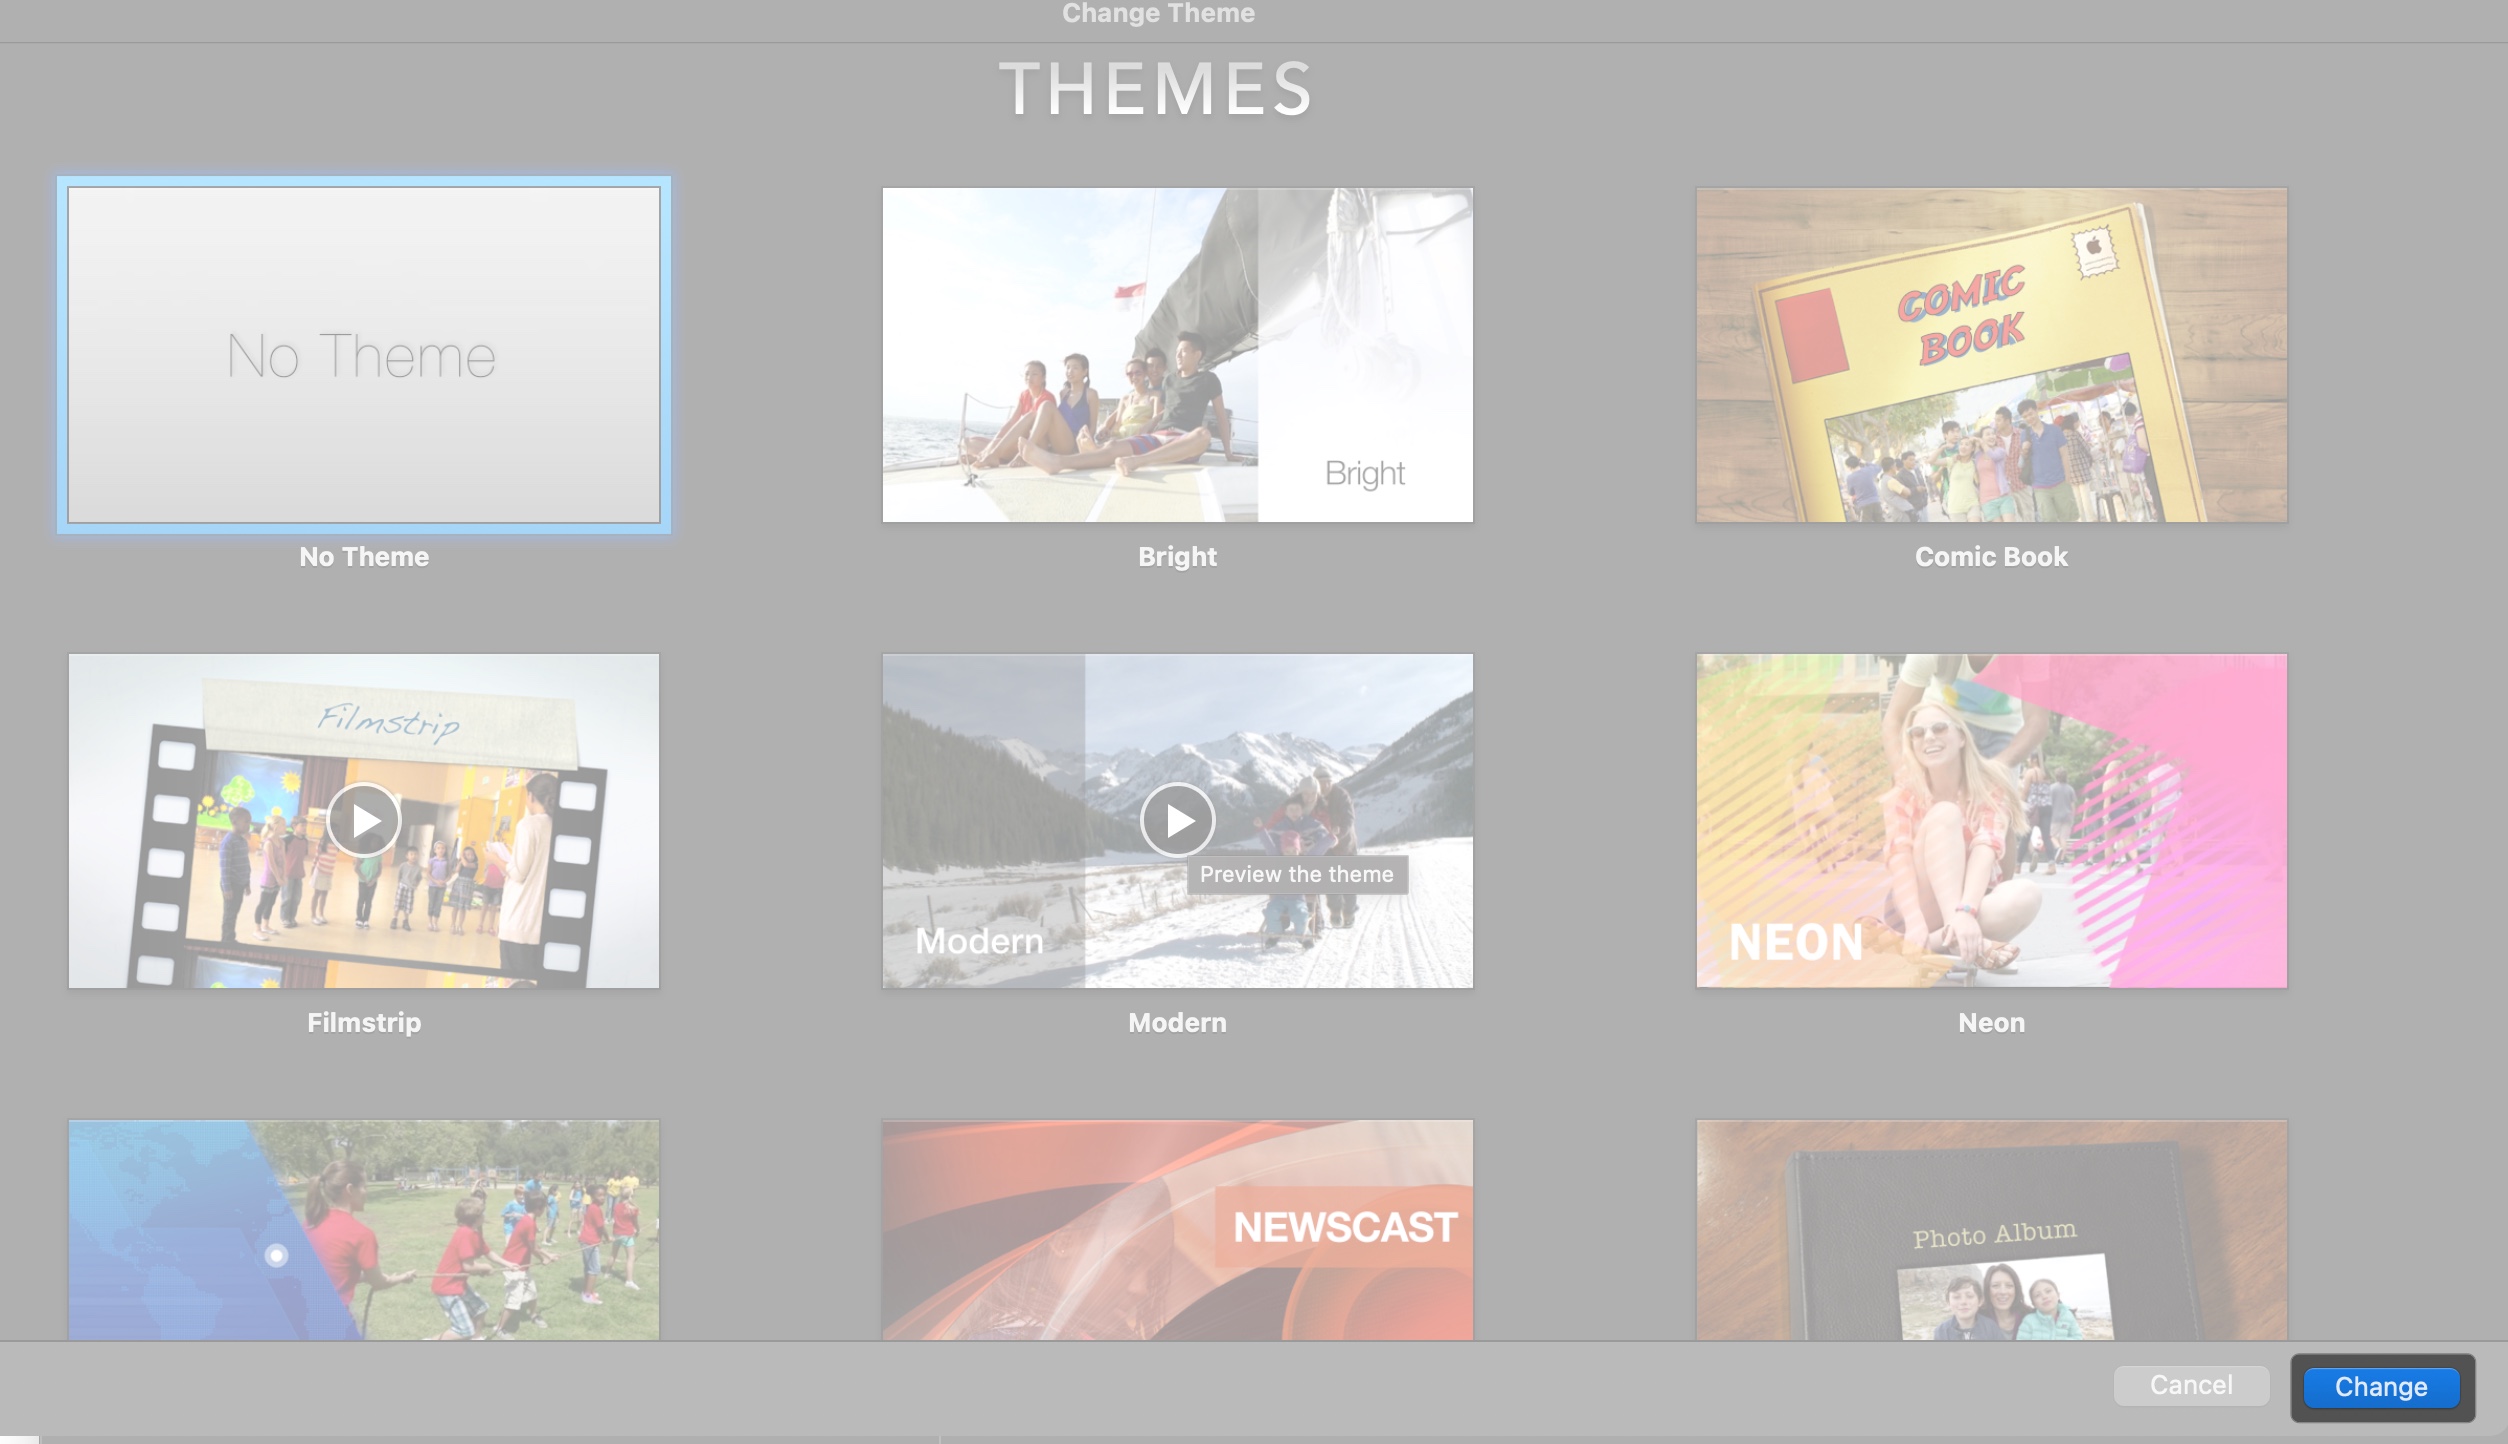
Change Movie Theme
iMovie has some predefined Movie Themes like News, Travel, Comic Books, etc., to help you create social media-worthy videos in minutes. You only need to add compatible clips according to the theme.
- Click Settings on the right in the Timeline and select No Theme.
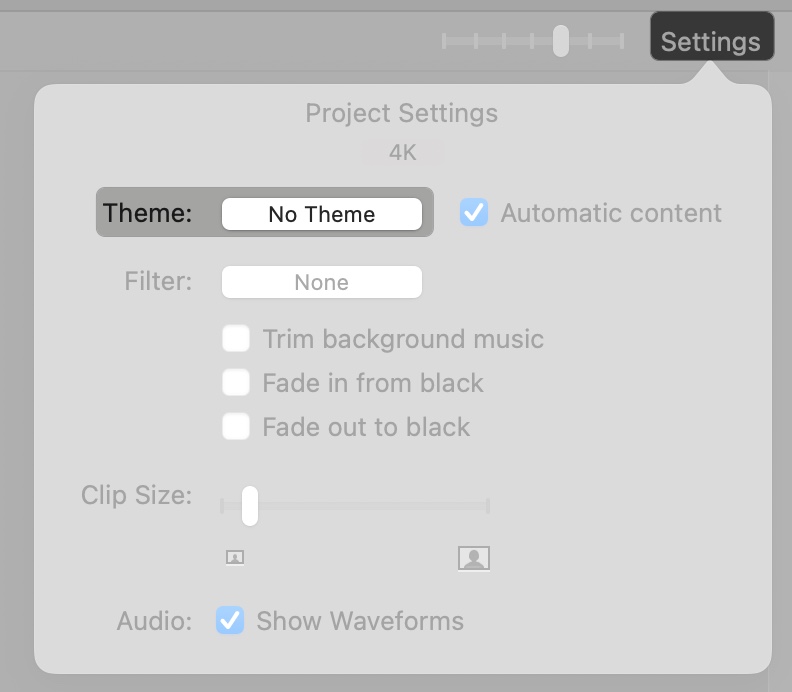
- Click the play button on a theme to preview it. If you like the theme, click Change at the bottom. It will apply consistent titles and transitions across your project.

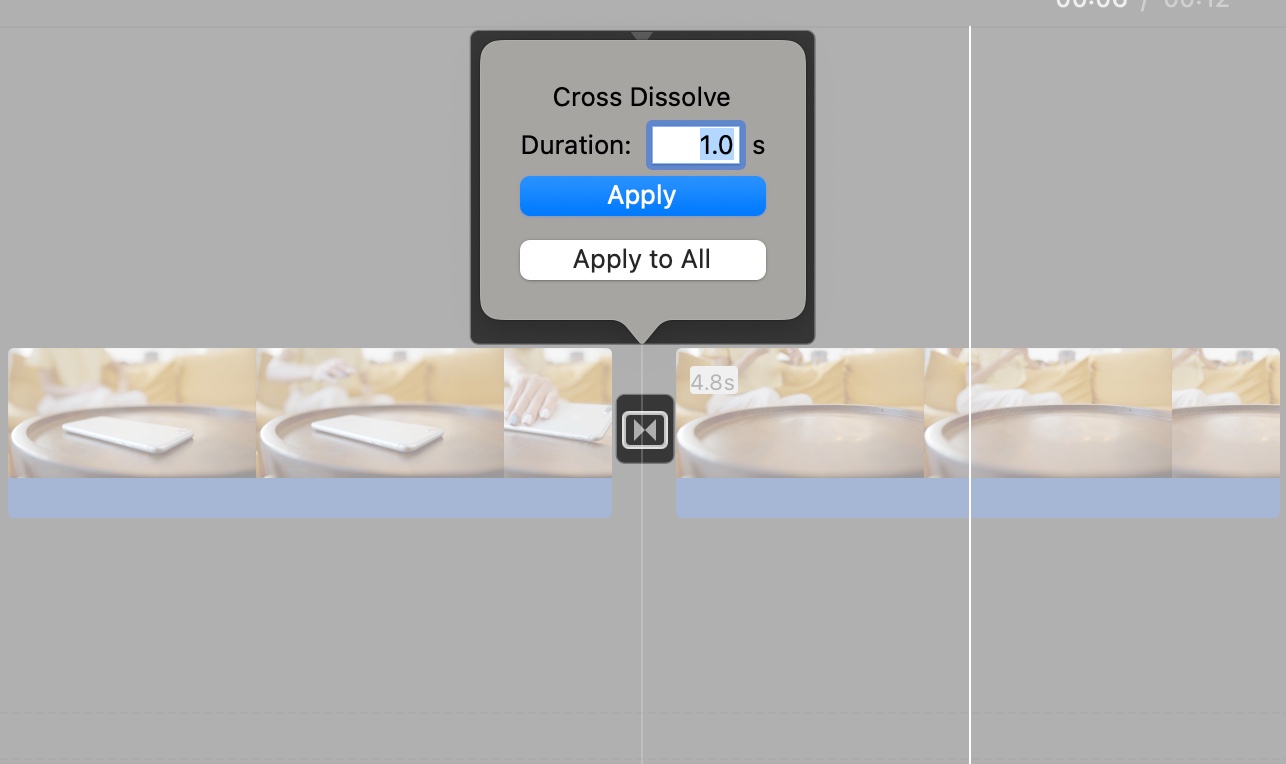
Add Transitions
Transitions make your video more creative and professional-looking. You can choose how each clip transitions into the scene.
- Click the Transitions tab above the Media Library.
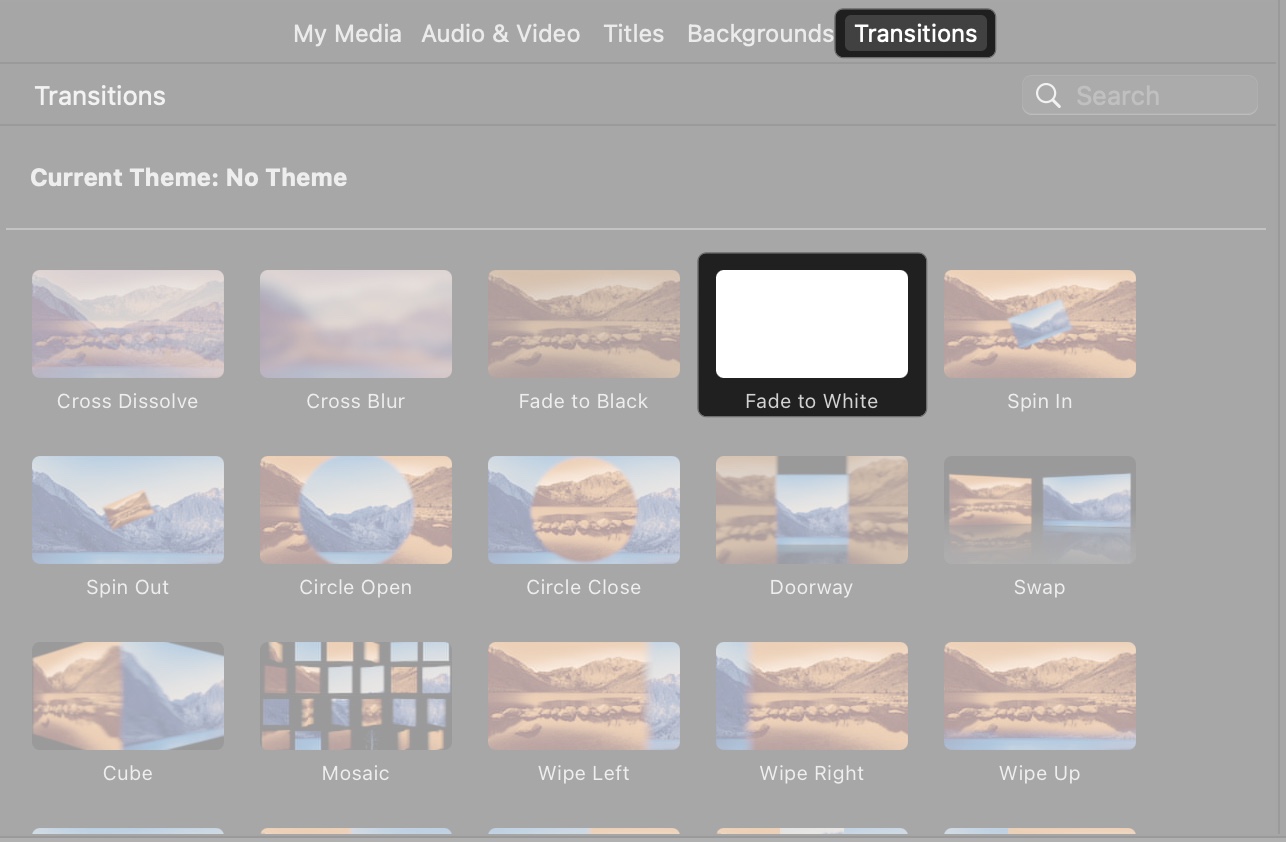
- Drag a transition (e.g., Fade to Black, Cross Dissolve) between two clips in the Timeline. A small double-triangle box will indicate the transition.
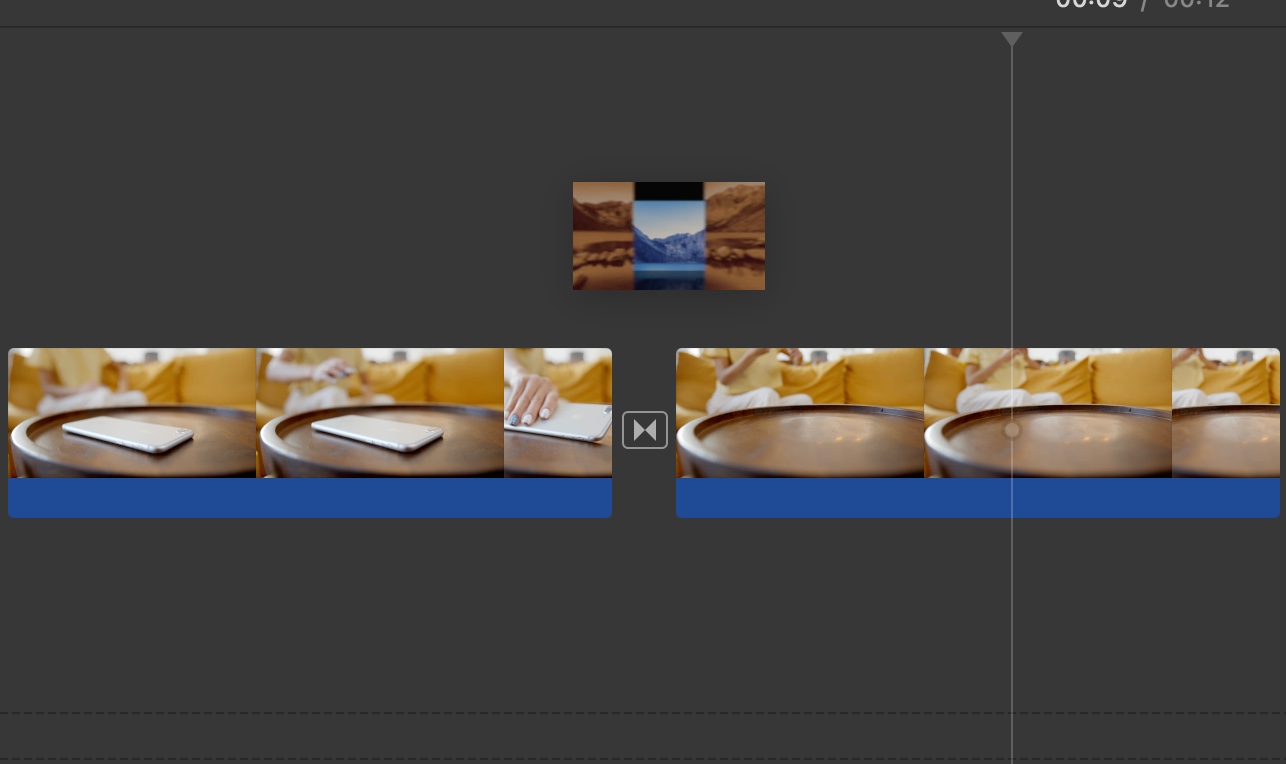
- Double-click the transition to adjust its duration and click Apply.


Change Clip Speed
- Select a clip in the Timeline and click the Speed button (clock icon) above the Viewer.
- Now, select Slow, Fast, or Custom from the Speed dropdown and set the speed percentage.
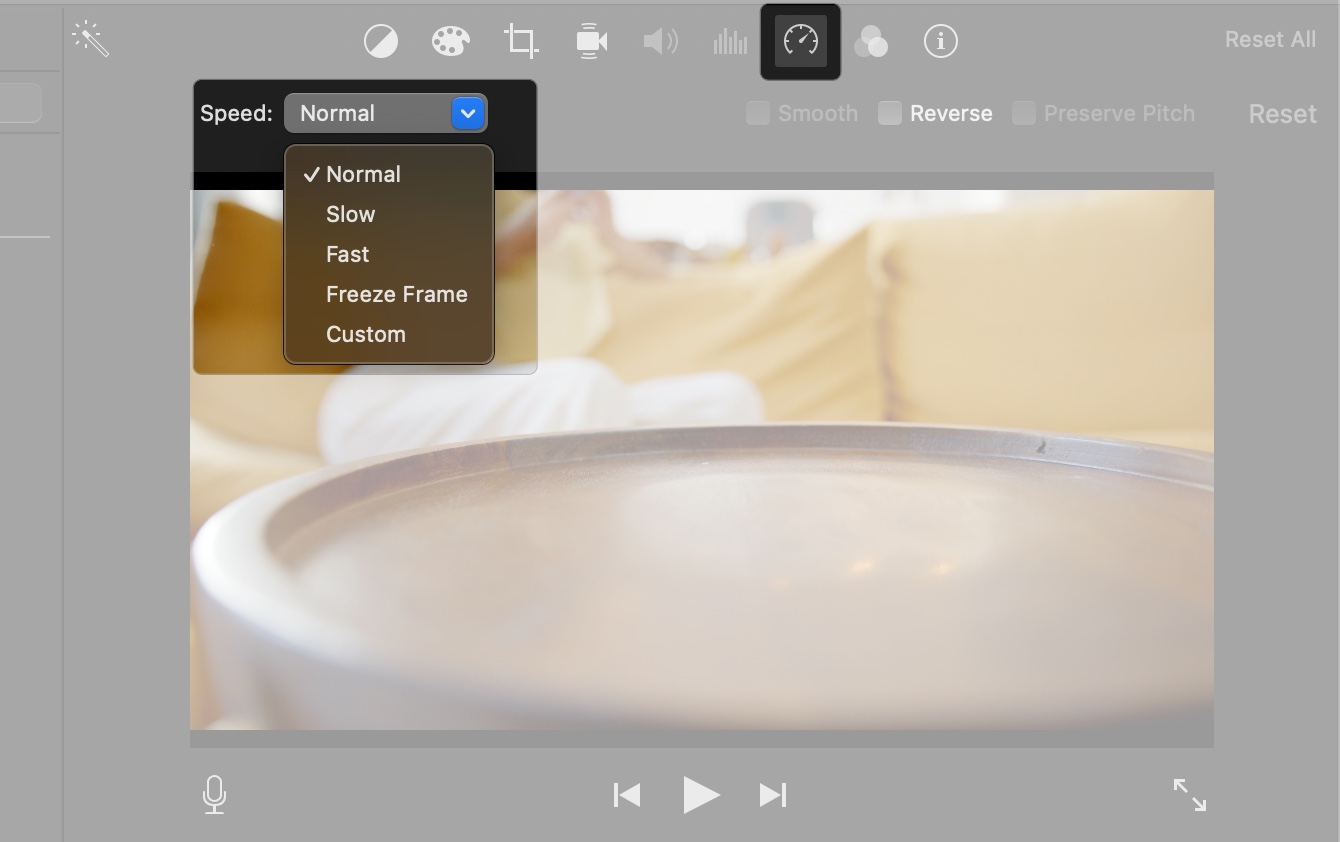
- You can also choose Freeze Frame to stop a scene in a video for a few seconds.

Tip:
Go to Modify in the menu bar to access more speed options, such as Instant Replay and Rewind.
How to Add Audio in iMovie Project
Audio can make your video more engaging. iMovie makes it easy to add music, voiceovers, and sound effects.
Add Music
Click the Audio & Video tab above the Media Library, then select Music or Apple TV on the sidebar to browse tracks. Click the play button next to a track to listen to it. You can also drag a track to the Timeline for background music. 
Record Voiceover
Click the Microphone icon below the Viewer, select your Input Source from the Controls button, and press the red Record button.
For better recording, click the mic icon on the menu bar and select Voice Isolation. Speak clearly, then click Stop to add the voiceover to the Timeline.

Sound Effects
Browse iMovie’s built-in sound effects in the Audio & Video > Sound Effects tab and drag them to the Timeline. You can also use themed sound effects. For that, click the Effects dropdown, scroll down, and select Theme Music. 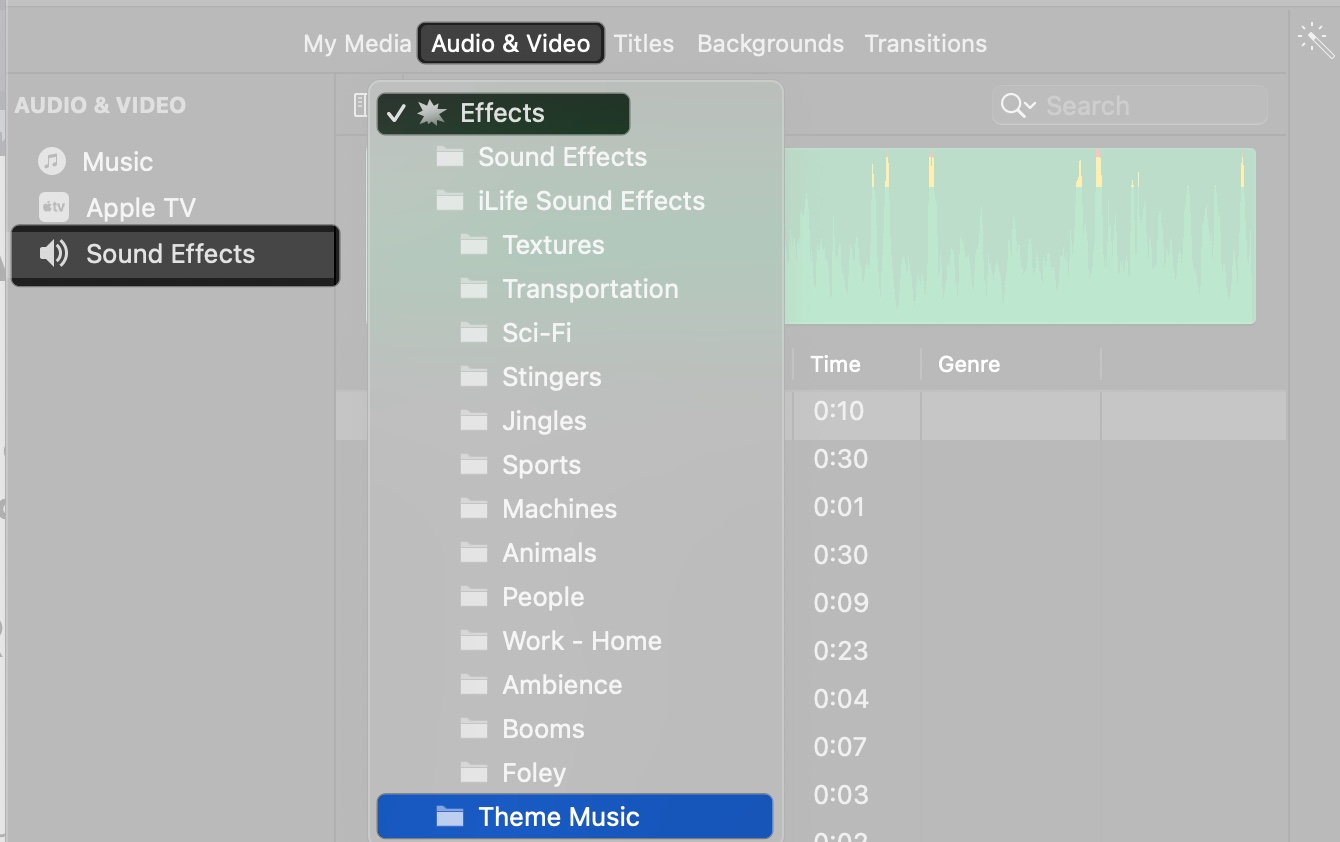
Once you have added the audio, you can edit it. Click the audio clip (green color) in the Timeline, select the speaker icon at the top, and drag the volume slider. You can also use the Auto button to adjust audio levels automatically. 
To make your background score crisp, select the audio clip, click the levels icon above the Viewer, and check the Reduce background noise box. Drag the slider next to it to adjust the intensity. Further, use the Equalizer dropdown to customize bass, treble, etc.
Edit Cinematic Mode Video Clips on iMovie
Cinematic Mode, available on iPhone 13 and later, records videos with a depth-of-field effect, letting you adjust focus after recording. To edit these in iMovie:
- Import a Cinematic Mode clip (shot in the Camera app’s Cinematic mode) into iMovie.
- Select the clip in the Timeline and click the Cinematic button above the Viewer.
- Tick the Depth of Field box and adjust the slider to blur or sharpen the background.
- Next, press the Option + Command (⌘) + F keys and move the playhead where you want to add a new focus point. Then, click a tracked object such as a face, person, or animal in the viewer.
- From the same Cinematic Editor, click on an object in the Viewer with yellow brackets around it. This will lock the focus on the object.
- Preview the changes in the Viewer to ensure the focus shifts look natural.
Advanced Features of iMovie
iMovie offers advanced tools to make your videos stand out.
1. Use Green/Blue Screen and Cutaway Effects
You may shoot a video against a green or blue backdrop, then isolate the subject and superimpose it on another video clip. This is known as the green or blue screen effect. You may also drag these clips onto a solid-color or dynamic backdrop clip.
To use it, import a clip shot against a green or blue background. Drag it to the Timeline above another clip, select it, and select the Video Overlay Settings button above the Viewer.
From the pop-up option on the left, select Green/Blue Screen. The green or blue backdrop is deleted in the viewer, and the subject appears in another clip. 
2. Add Cutaway Effect
You can add a secondary clip (e.g., a close-up) above the main clip in the Timeline. As you drag the secondary clip, the cursor changes to the green “Add” icon (+), and a line emerges between the clips.
You can adjust the visibility of the video overlay by dragging the Opacity slider from the Video Overlay Settings. You can also make a cutaway clip fade in and out while controlling the duration. To do this, drag the Fade slider.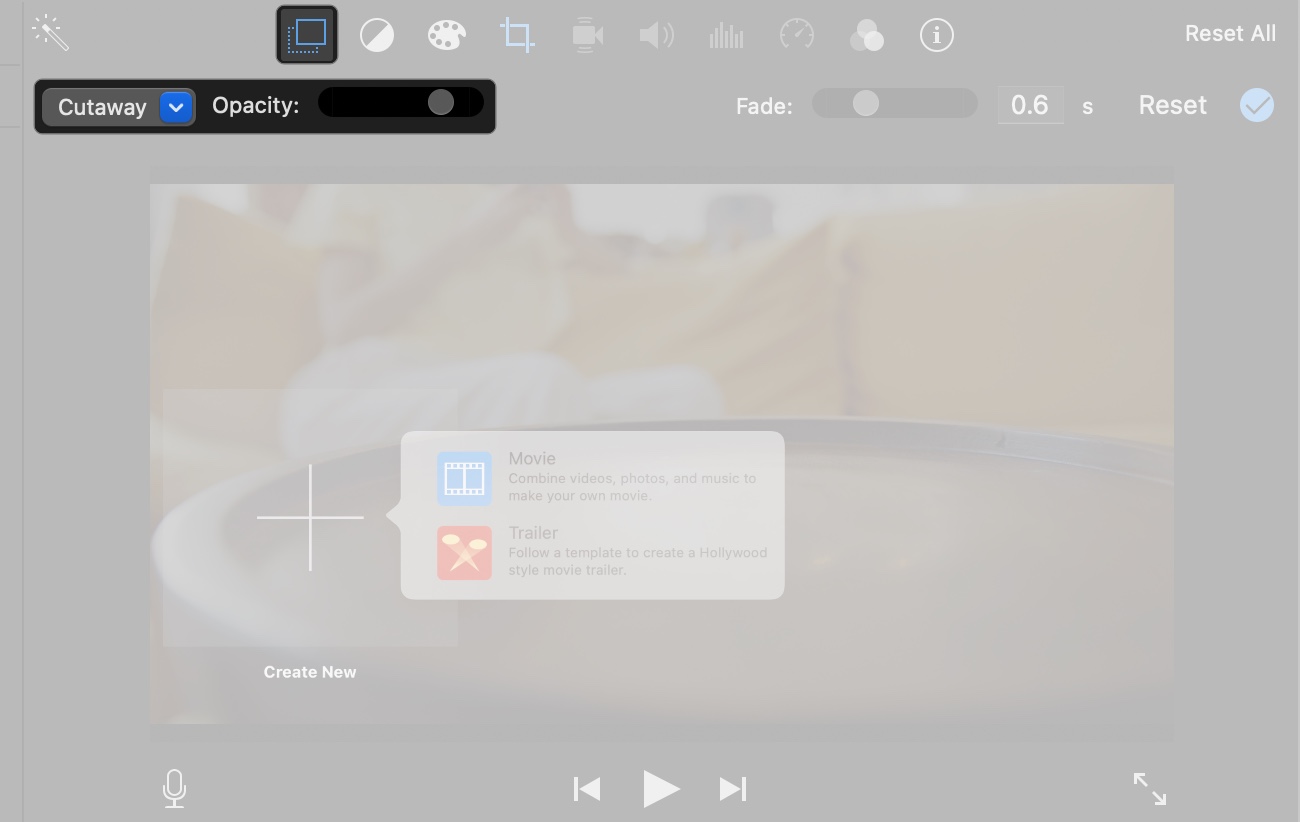
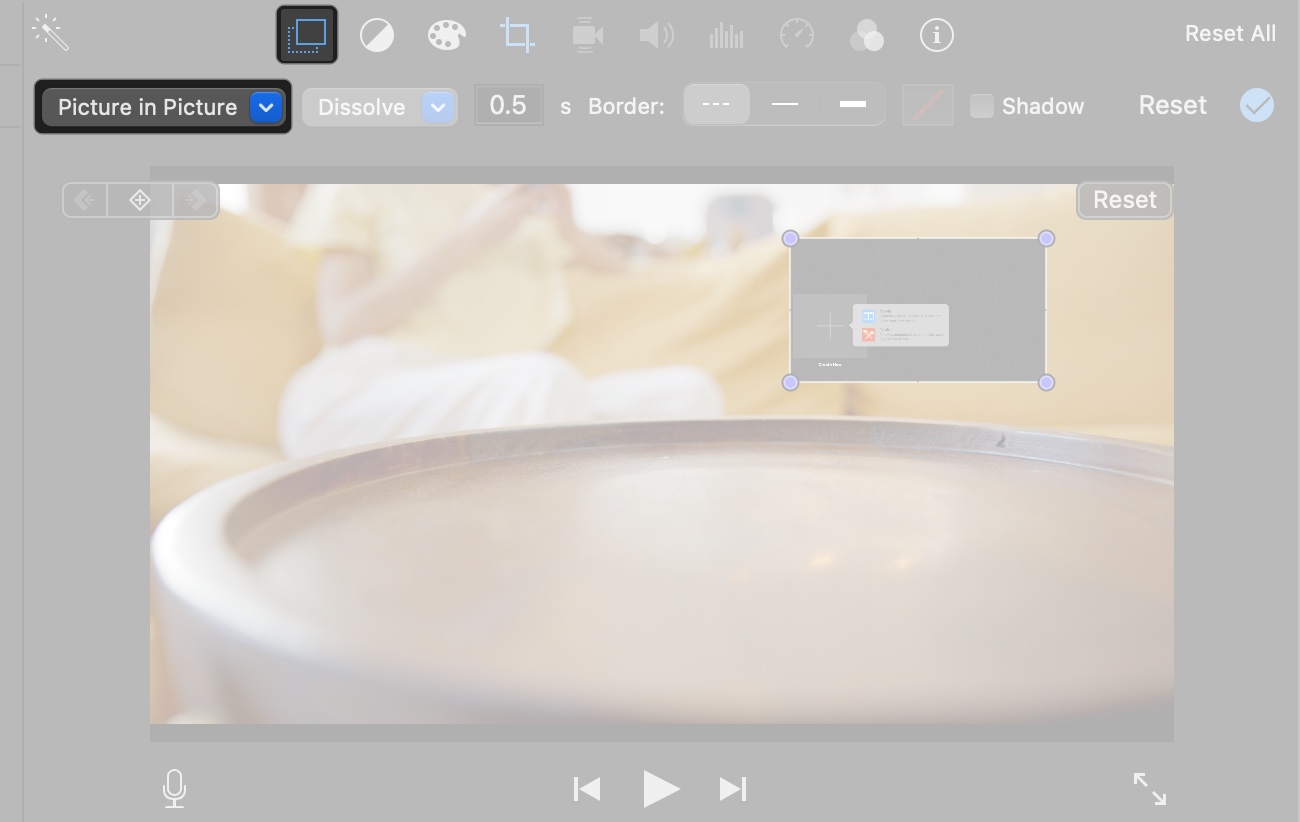
3. Picture-in-Picture and Split Screen
With iMovie, you can easily overlay one clip above another, for example, to show someone narrating the action happening in the main clip. You can also place them side-by-side to play. Both clips will play simultaneously in their respective frames.
- Picture-in-Picture: Drag a clip above another in the Timeline, select Picture in Picture from the left, and resize/position it in the Viewer.
- Split Screen: Drag a clip above another, select Split Screen from the left popup, and choose a layout (e.g., side-by-side or top-bottom) from above the Viewer.
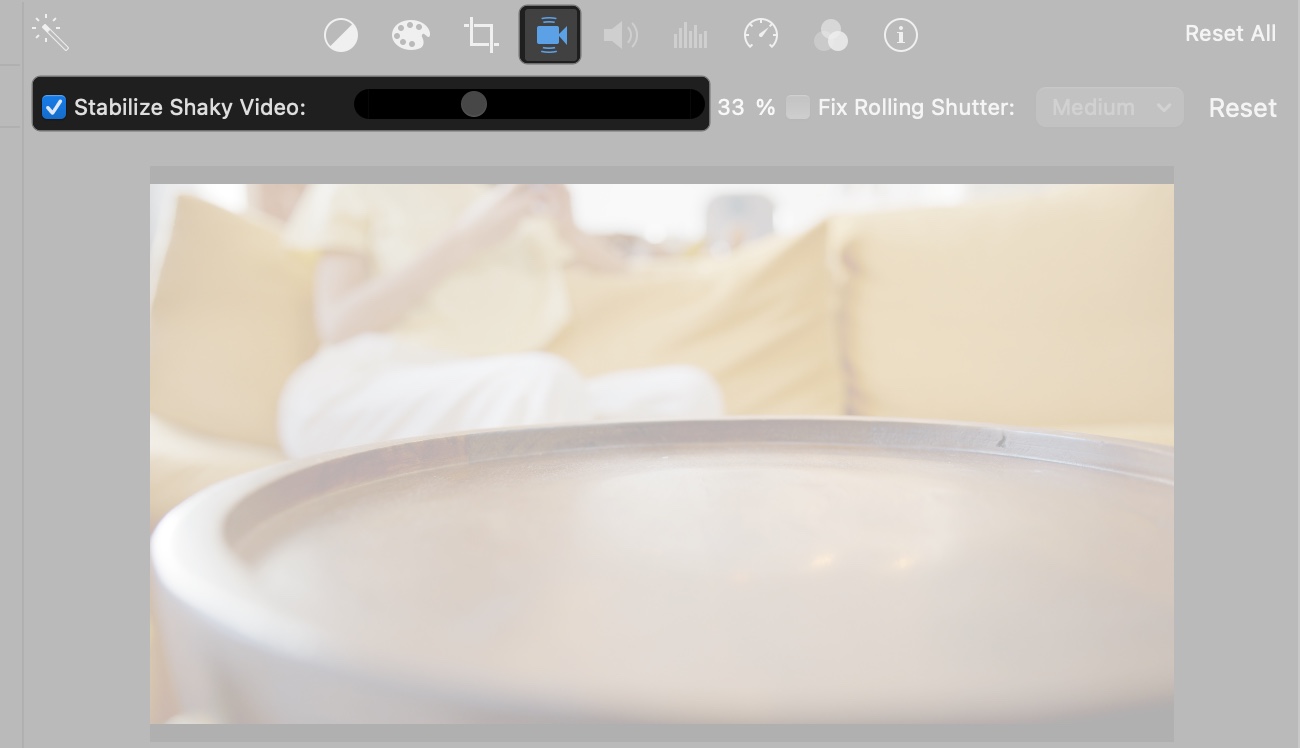
4. Stabilize Shaky Footage
- Select a clip in the Timeline and click the Stabilization button (shaky camera icon) above the Viewer.
- Check Stabilize Shaky Video and adjust the slider to smooth the motion.
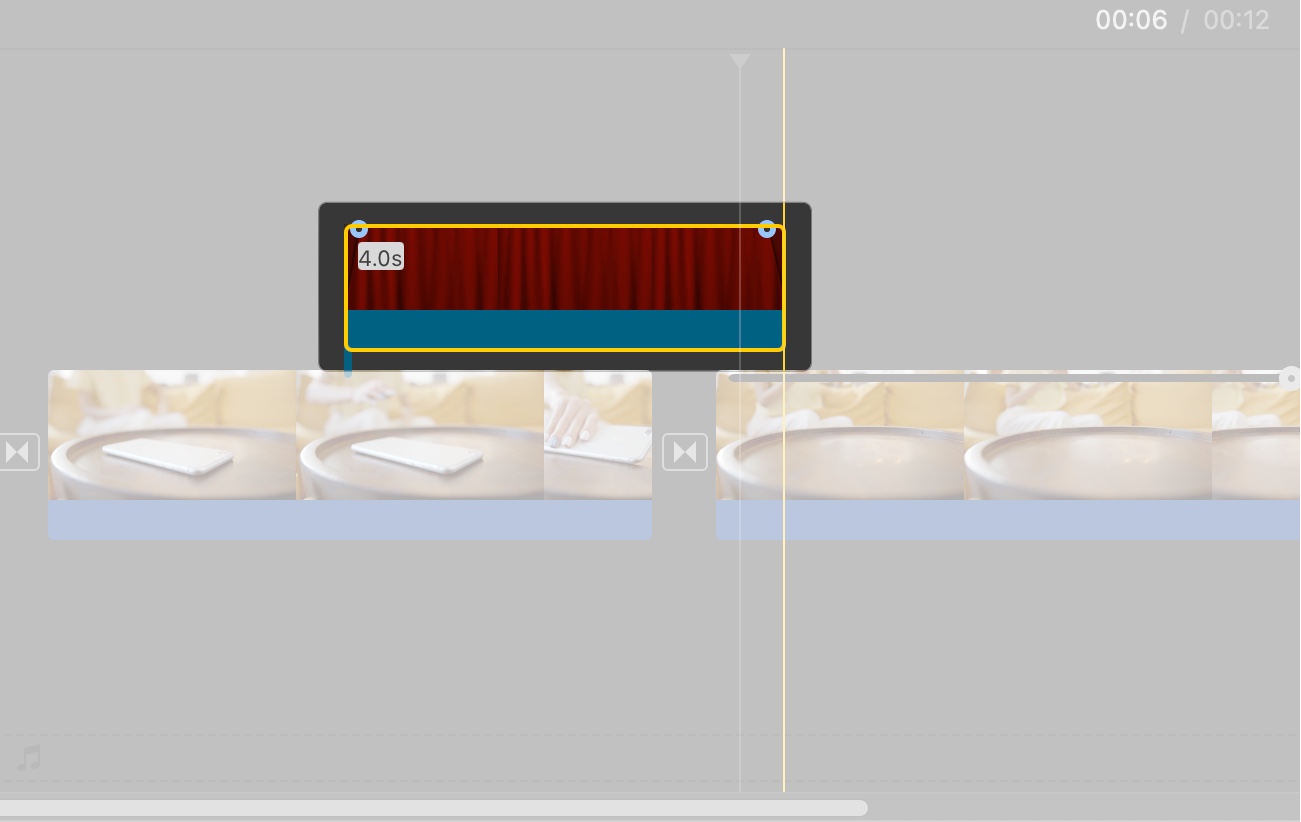
5. Add Backgrounds to Your Video
- Click the Backgrounds tab above the Media Library.

- Drag an animated background to the Timeline.
- Customize fades by dragging the small balls on the clip.
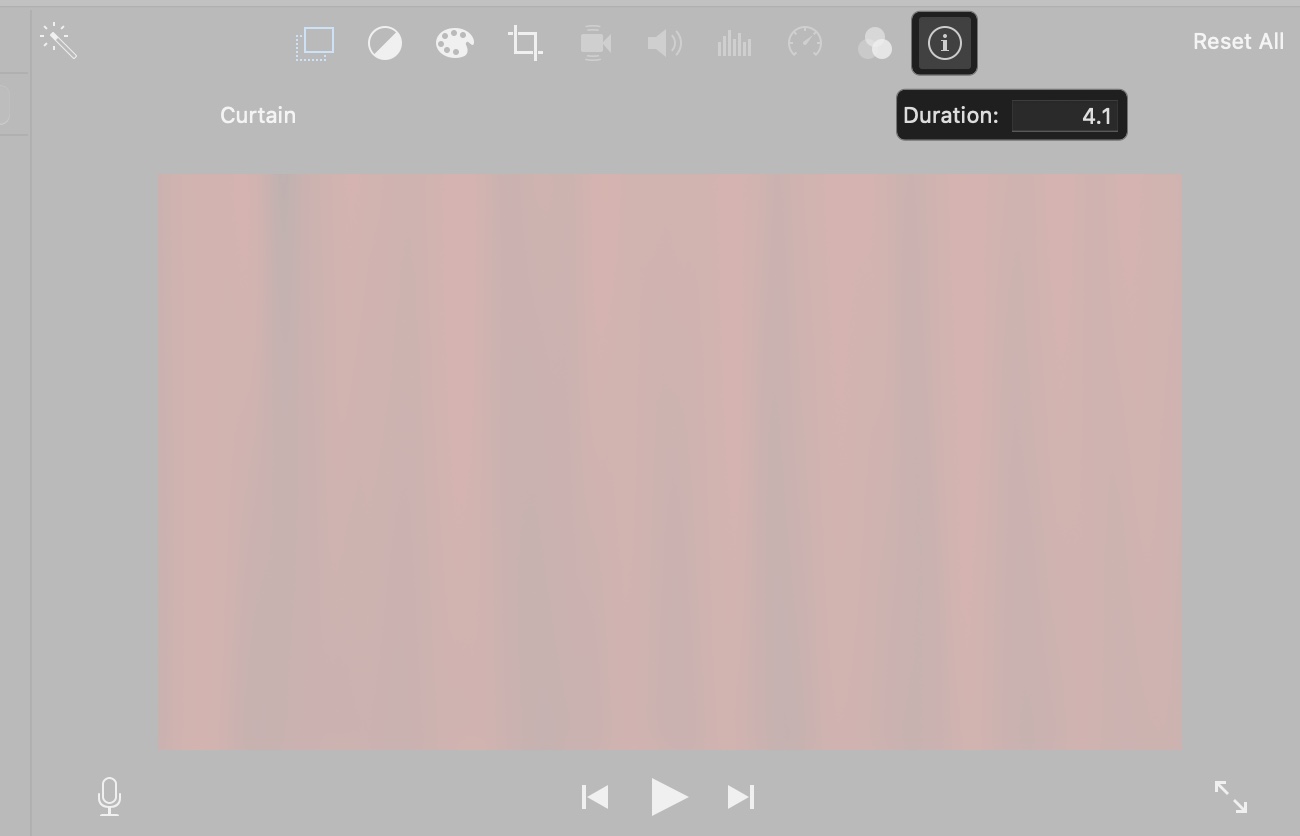
- To change the background duration, select it and click the i icon above the Viewer. Then, enter a time in the Duration box.
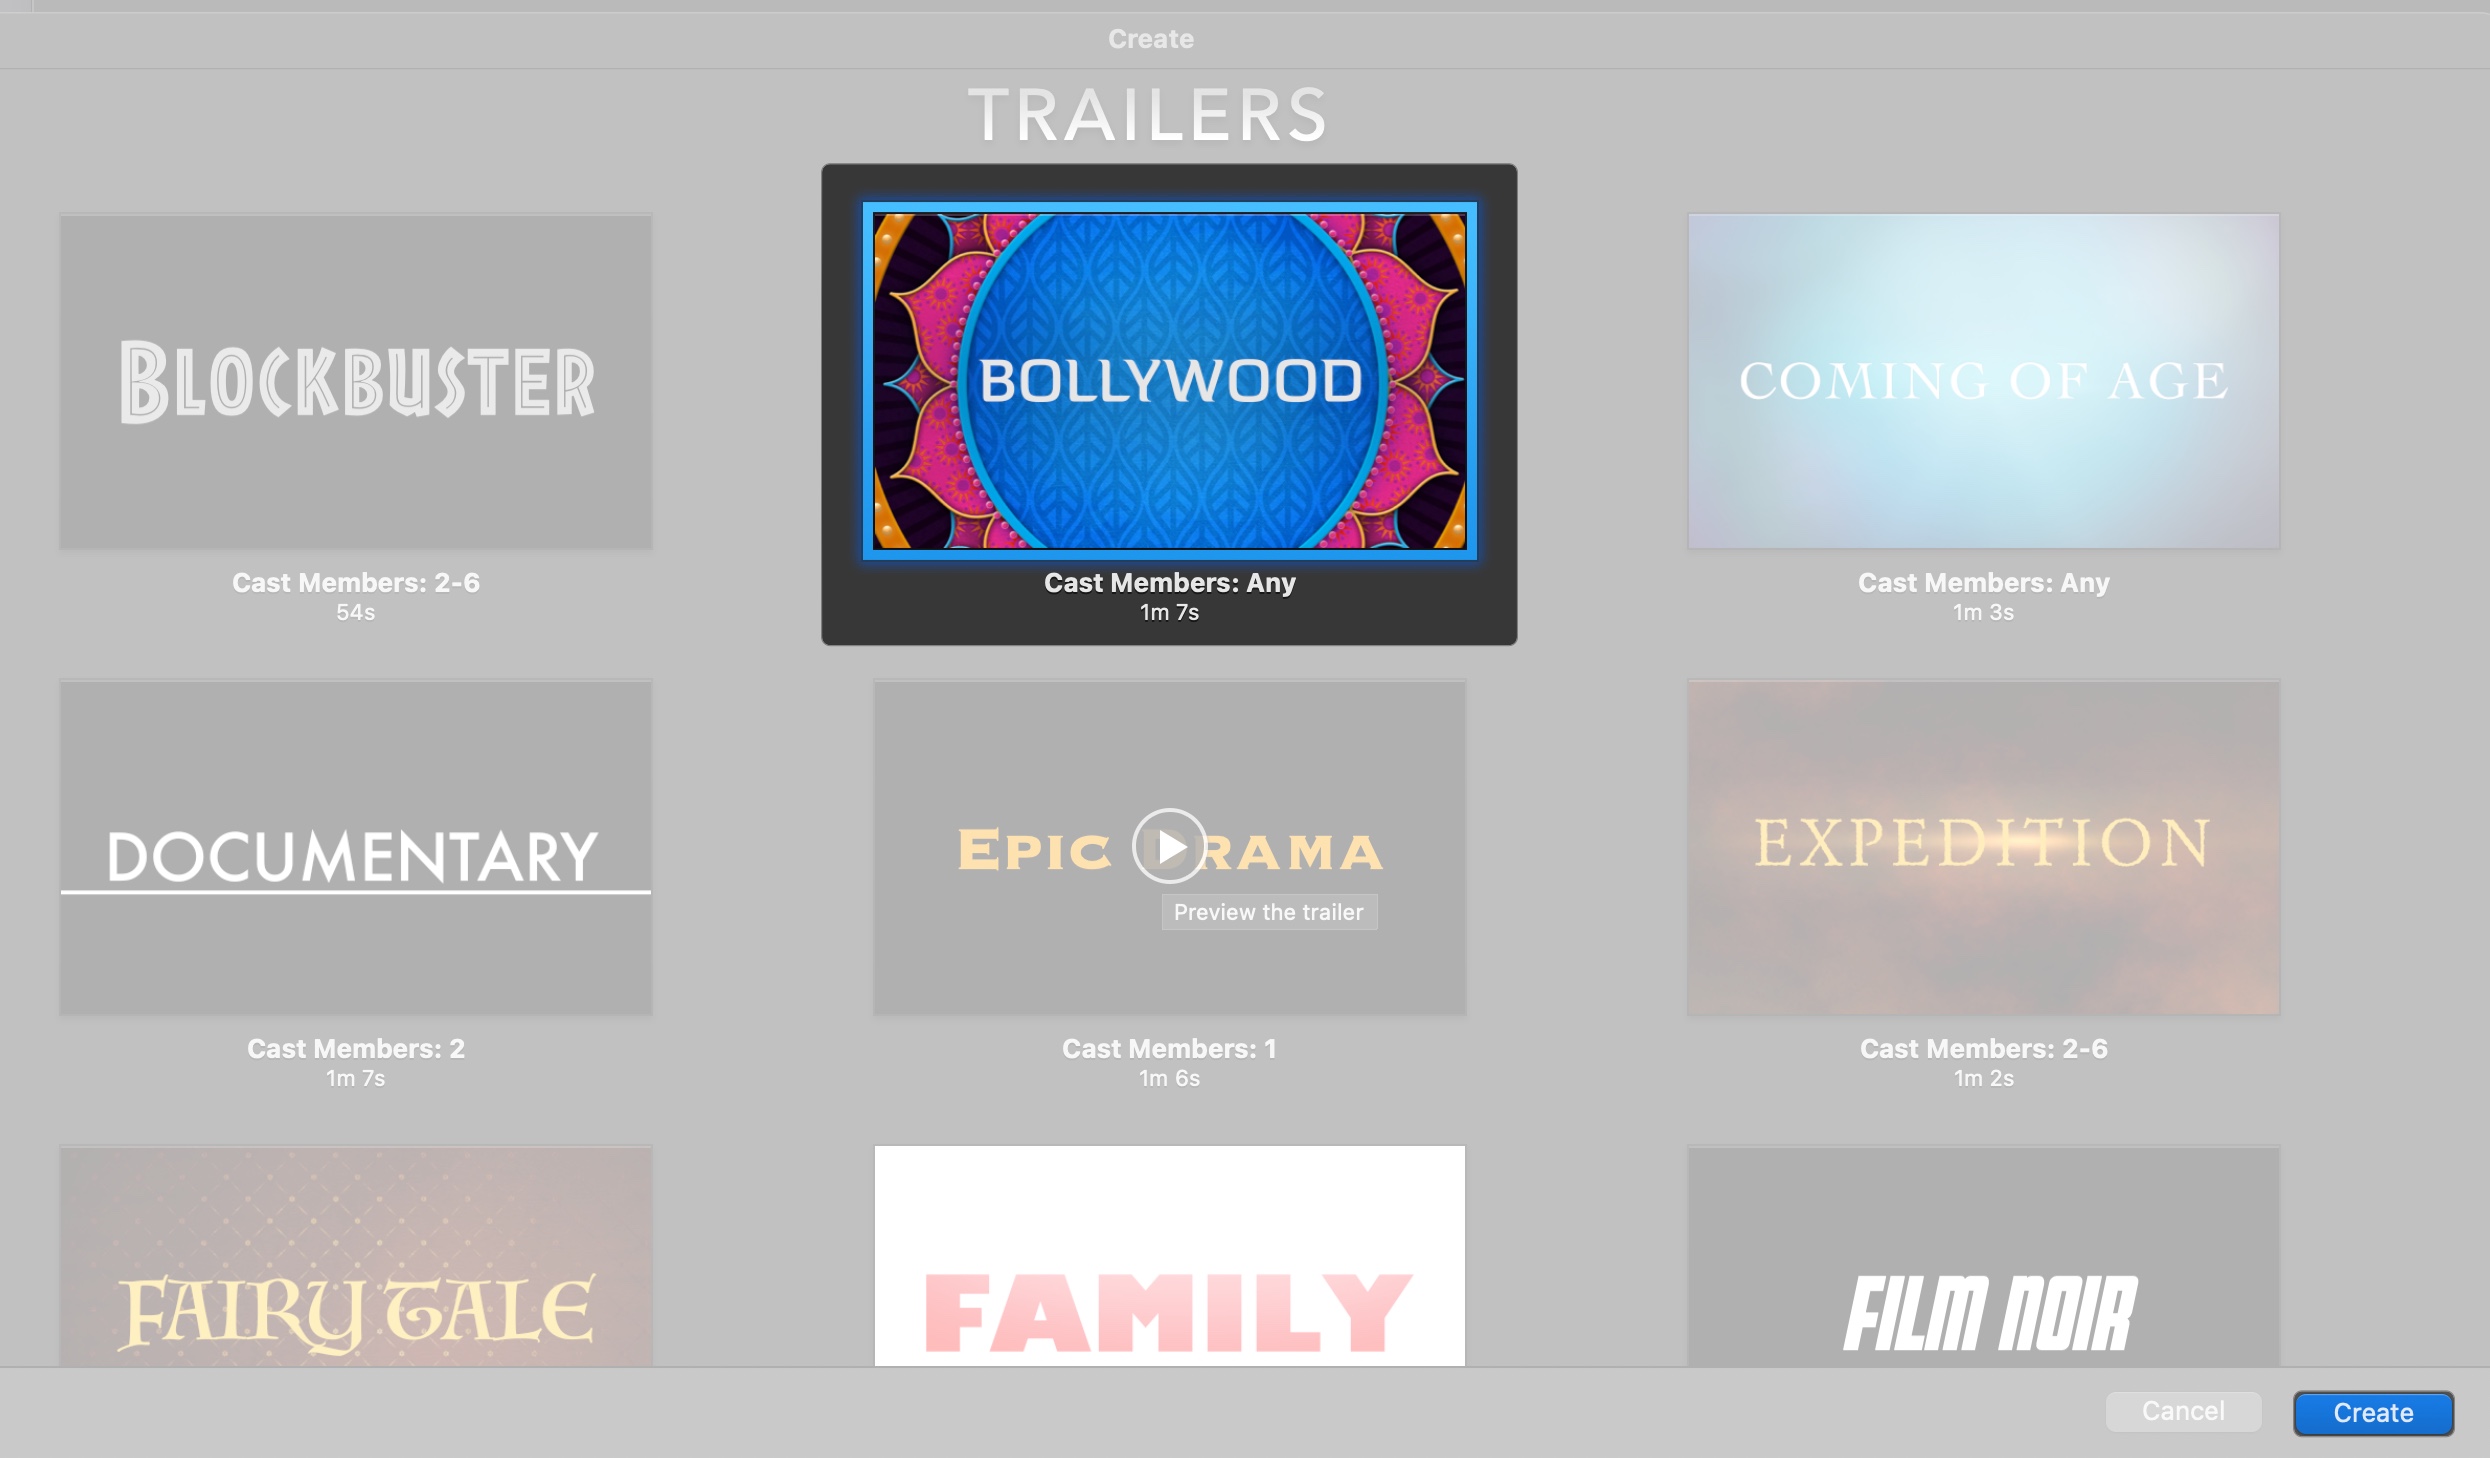
Create Hollywood-Style Trailers with iMovie
iMovie contains templates for creating Hollywood-style movie trailers. Each design allows you to alter the movie title and credits, as well as add your own video clips and images. Moreover, all the templates have a distinct musical score that complements the trailer’s style.
- From the iMovie home page, click Create New > Trailer.

- Click the play button on a template (e.g., “Adventure” or “Bollywood”) to preview it. If you like it, click Create.
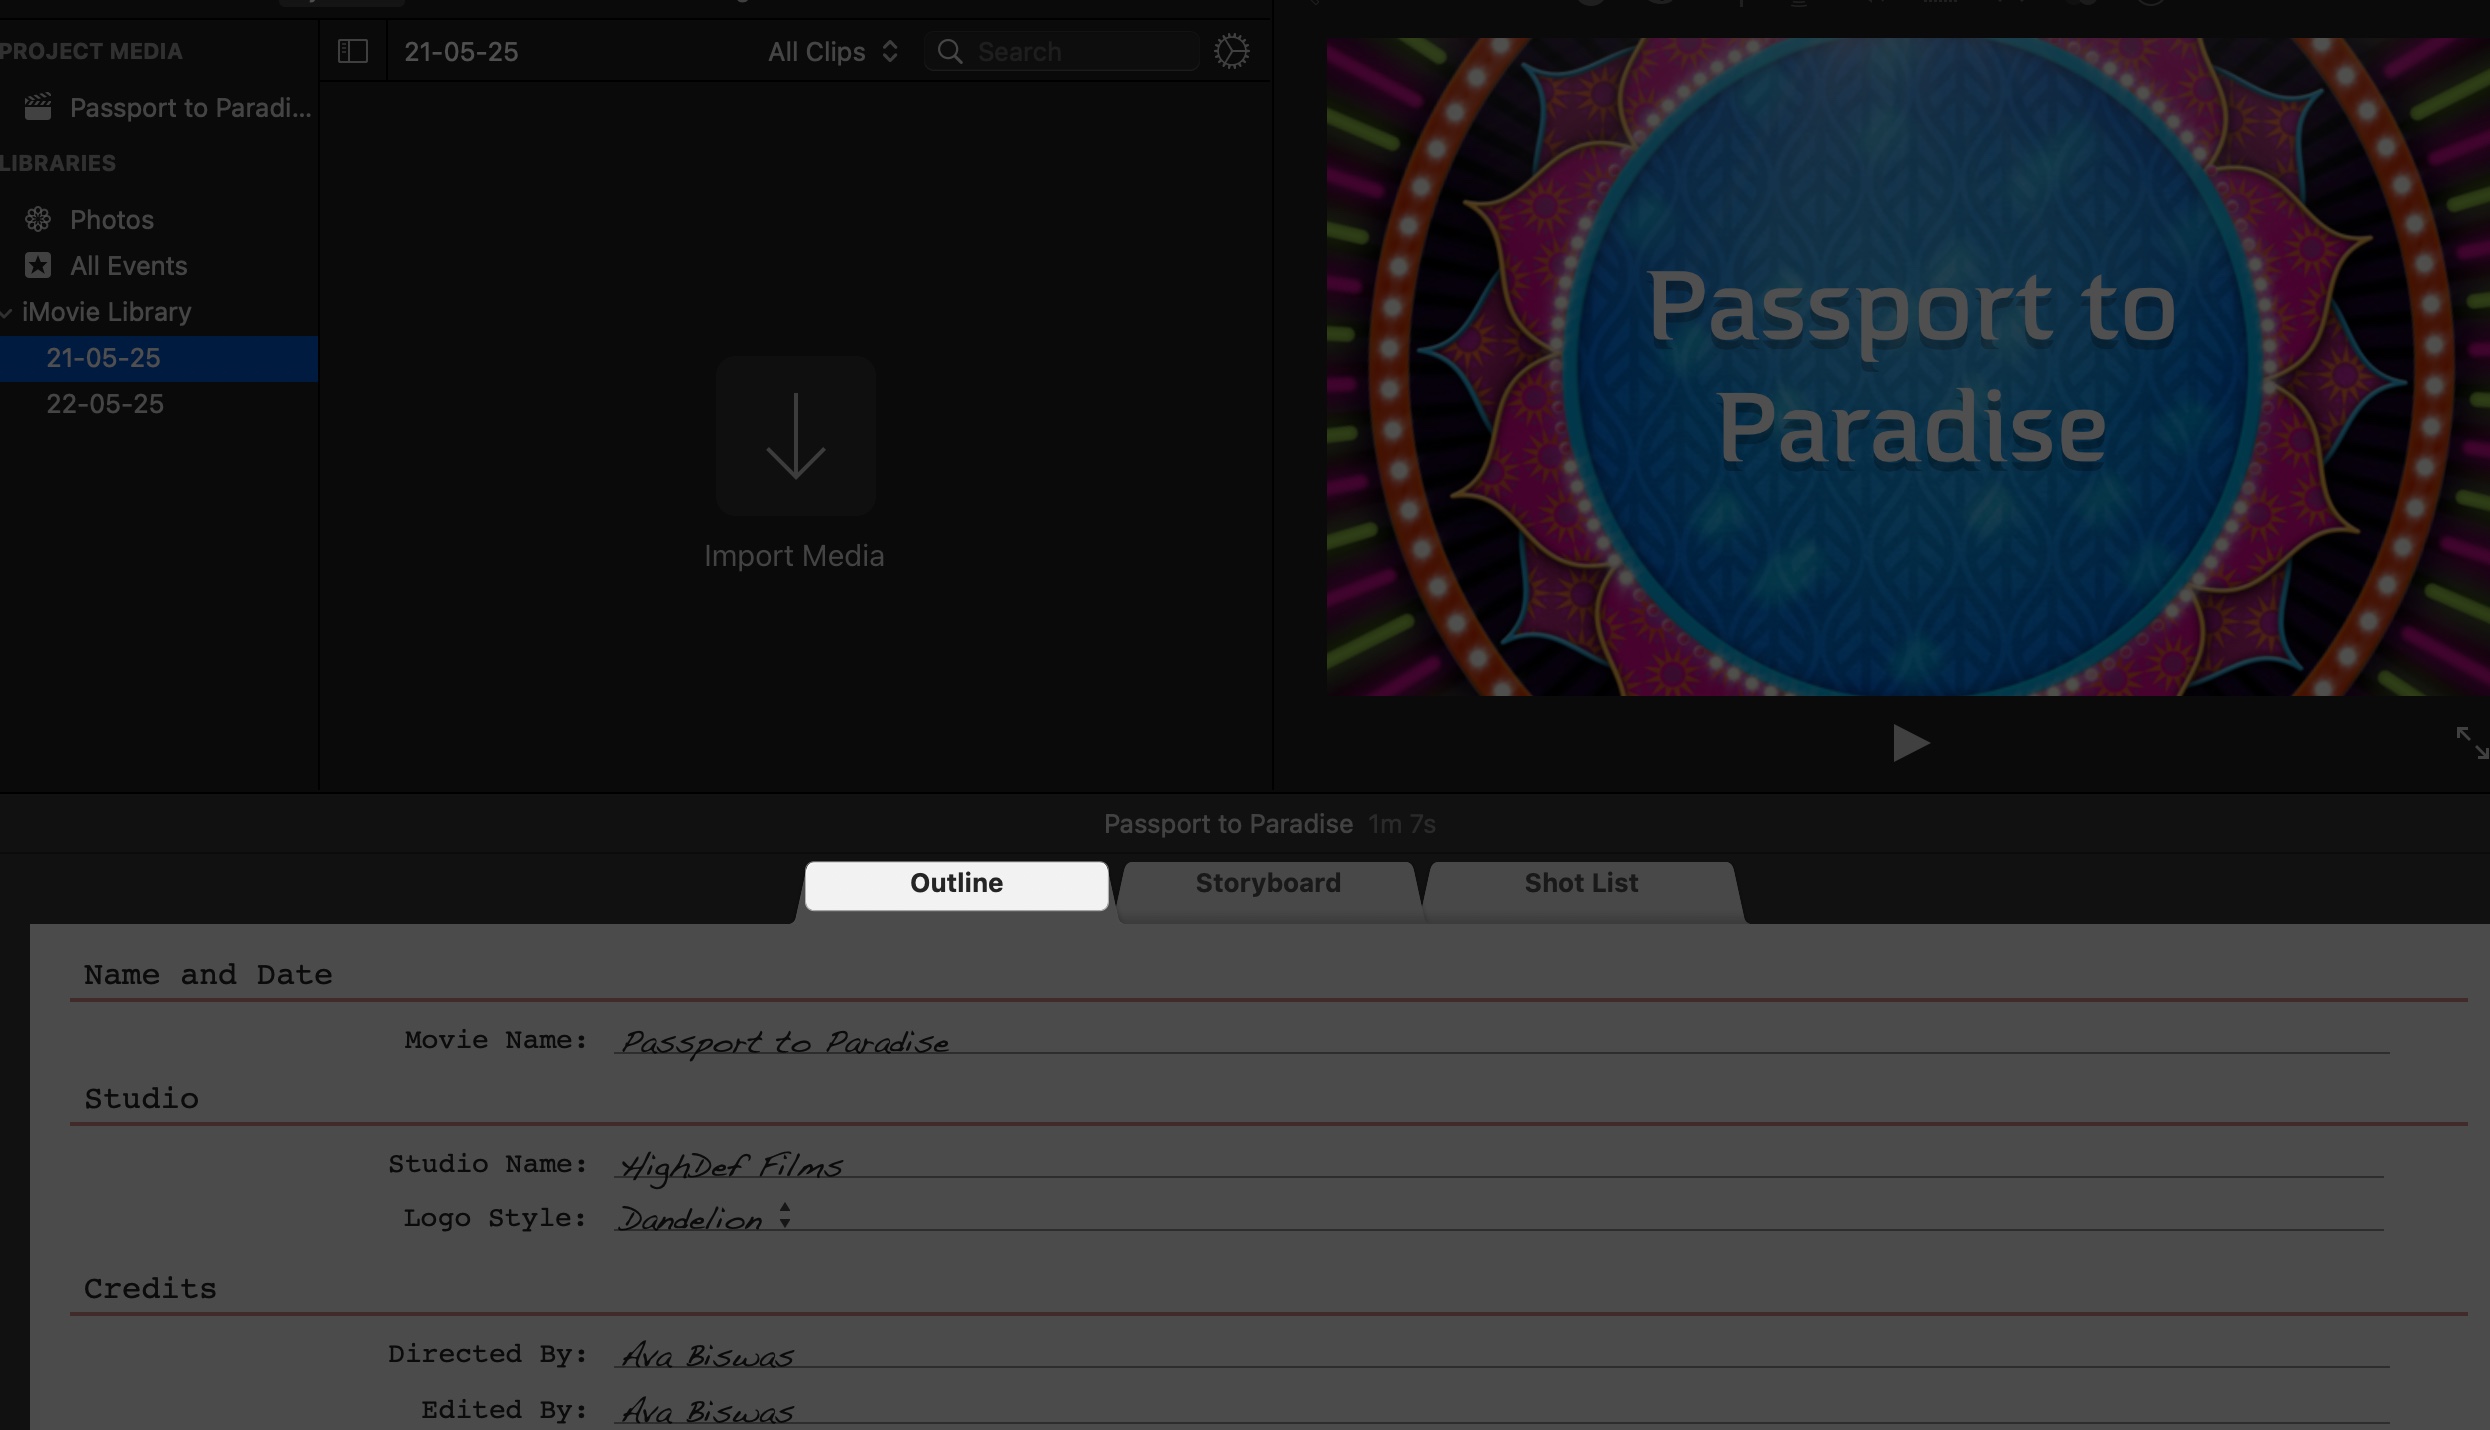
- Fill in the Outline tab with details like movie title and cast.
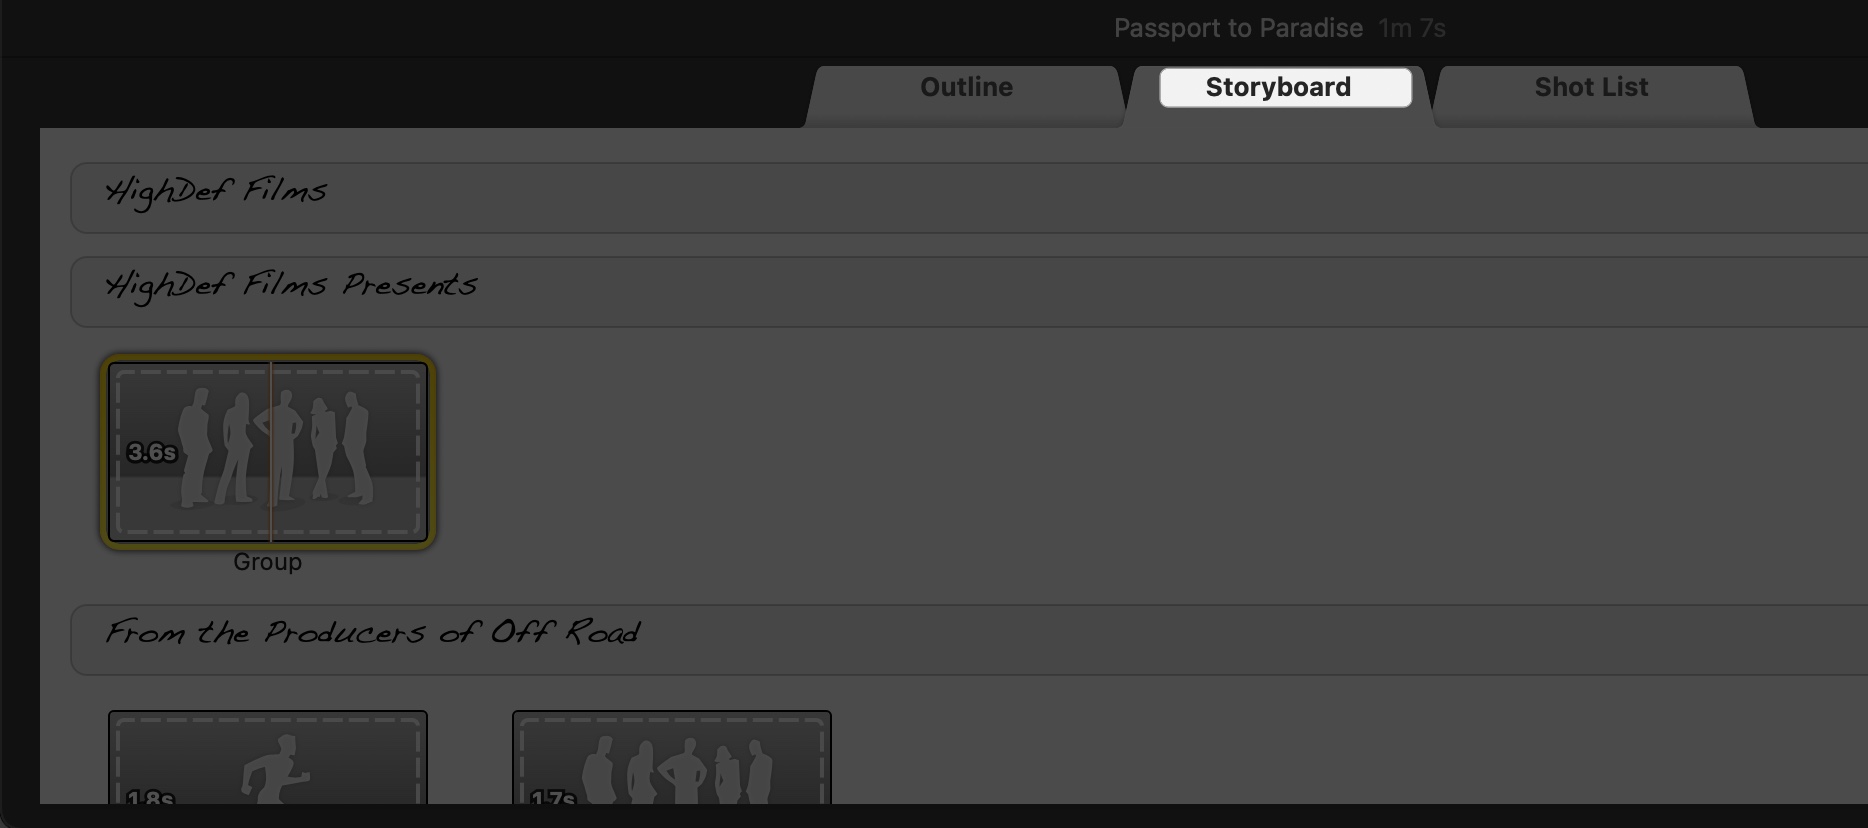
- In the Storyboard tab, drag clips from the Media Library to match the template’s shot list. Then, change the text to match your script.
- Preview and tweak music, then export.
Preview and Share Your iMovie Project
To preview your project, click the Play button below the Viewer or press the Spacebar. Scrub the Timeline to check specific sections and ensure audio and video are synced.
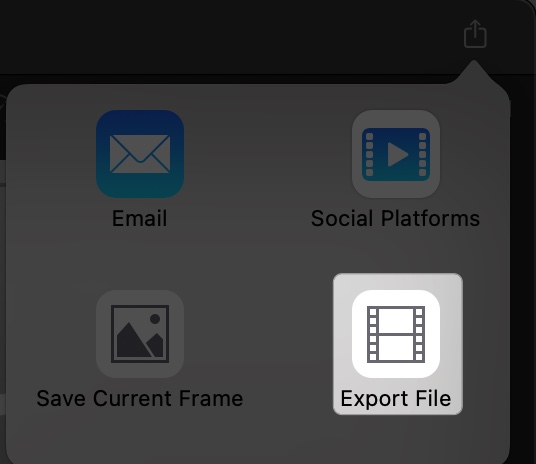
To export:
- Click the Share button in the top-right corner.
- Select Export File to save to your Mac or Email to send directly.
- Select Resolution (e.g., 1080p or 4K), Quality, and Compress to export a polished-looking video. Note that higher quality means a larger file size requiring more storage.
- Click Next to proceed.
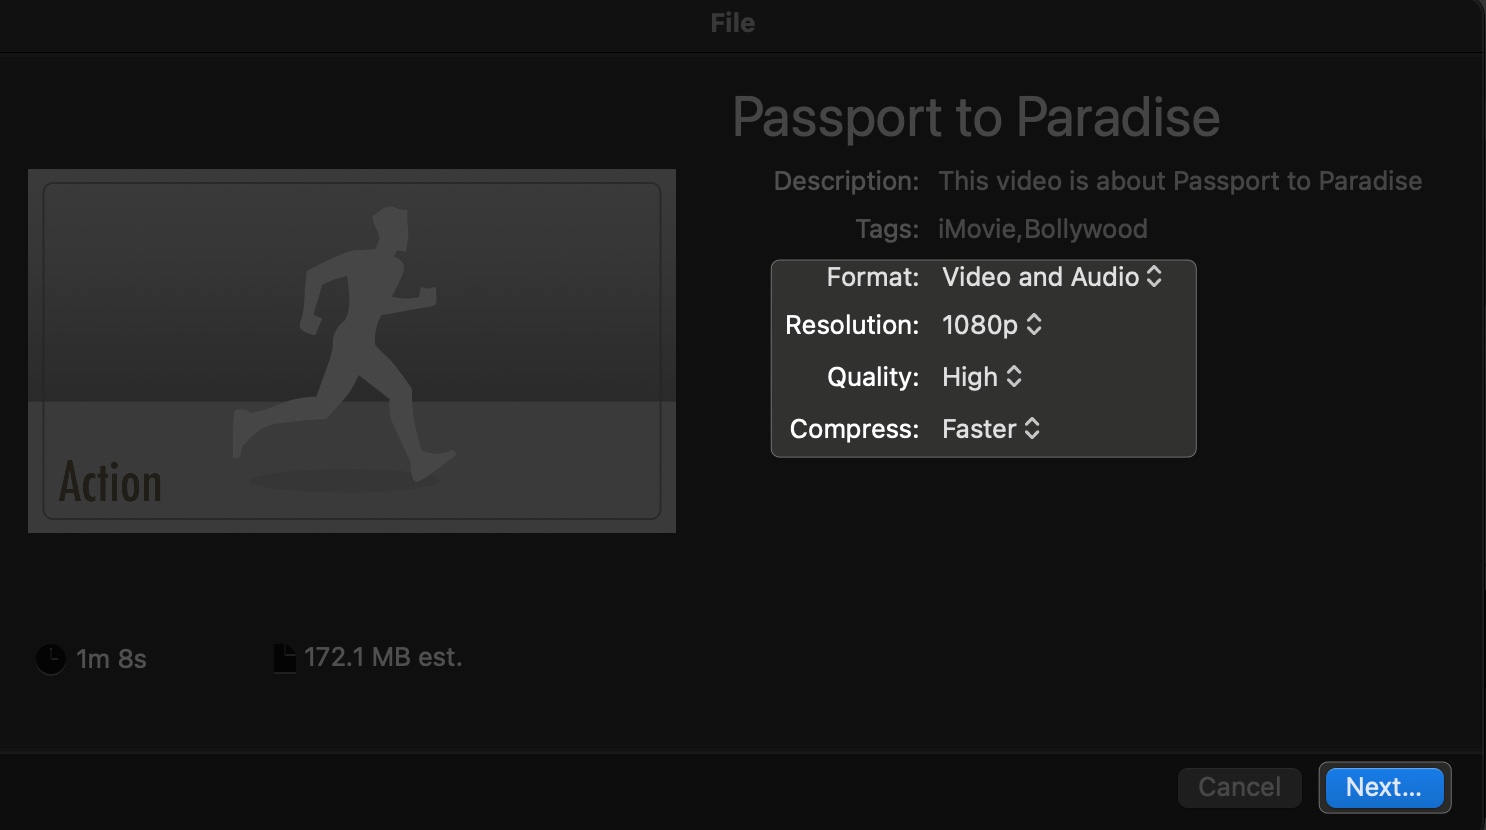
- Enter the video title, set the download location and click Save. Video rendering will take time according to its size.

Create an App Preview on iMovie for App Store
An App Preview is a short video showcasing your app for the App Store. To create one:
- Open iMovie, click File in the menu bar and select New App Review.

- Import screen recordings of your app (use QuickTime Player on Mac to record your iPhone/iPad screen).
- Add clips to the Timeline, keeping the video under 30 seconds (App Store requirement).
- Use Titles for text overlays (e.g., app features) and Transitions for smooth flow.
- Ensure the aspect ratio is 16:9 (e.g., 1920×1080), and no copyrighted music is used.
- Export via Share button > App Preview.
Adjust iMovie Settings for a Personalized Editing Experience
Customize iMovie in the Settings menu (iMovie in the menu bar > Settings) to tailor the app to your workflow, making video editing smoother and more efficient:
- Slow-Mo Clips: If you frequently work with high-frame-rate videos (over 30 frames per second), you can set iMovie to automatically apply a slow-motion effect upon import. It will match the standard playback speed.
- Photo Placement: When adding photos to your timeline, iMovie offers three default placement options: Fit, Crop to Fill, and Ken Burns.
- Photo Duration: Set a default duration for still photos added to your timeline. This saves time by eliminating the need to adjust each photo individually.
- Transitions: Define the default duration for transitions between clips. This will help maintain a consistent pacing throughout your video.
- Render Files: Delete your existing iMovie render files to free up your storage space.
How to Send iMovie Projects to Final Cut Pro on Mac
If you want to take your project to the next level with Final Cut Pro:
- In iMovie, open the project, click on the Timeline, and select File > Send Movie To Final Cut Pro.
- If Final Cut Pro is installed, it will open with your project imported, including clips, audio, and basic edits.
Note:
Some iMovie effects (e.g., themes) may not transfer fully, so check compatibility in Final Cut Pro.
Tips and Best Practices to Use iMovie on Mac
Here are some expert suggestions to help you make the most of iMovie:
- Before starting a project, organize your video clips, photos, and audio files into folders.
- Break large projects into smaller ones to avoid slowdowns.
- To save time, learn keyboard shortcuts like Command (⌘) + B (split clip) or R (record voiceover).
- Back up your projects to iCloud or an external drive to prevent data loss.
- Use Trailer templates to practice editing with pre-set structures.
- Ensure music doesn’t overpower dialogue or voiceovers.
- Keep iMovie updated to avoid bugs.
Is iMovie Not Working on Your Mac? Try These Fixes
- If you are facing slow performance, close other apps, reduce project size, or update macOS and iMovie via the App Store.
- To solve import issues, convert unsupported file formats to MP4.
- Are you experiencing app crashes? Restart iMovie, ensure your Mac has at least 10GB of free storage or reinstall iMovie.
- Fix audio sync problems by dragging audio or video clips to realign them manually in the Timeline.
- If your existing project does not open or show blank, click the three-dot icon next to the project title on the iMovie home screen and select Duplicate Project. Once it’s copied, select Delete Project from the context menu.
For further help, contact Apple Support or check forums like the Apple Community.
Create Professional Videos with iMovie!
iMovie on Mac is a powerful yet beginner-friendly tool for creating professional-looking videos. With its intuitive interface, you can import media, edit clips, add audio, and apply advanced effects like green screen or Cinematic Mode editing without needing prior experience.
By following this guide, you’ll be ready to start creating, experimenting with, and sharing your videos. Happy editing!
Check out these helpful guides too: