Key Takeaways
Is your MacBook struggling to access the internet, though your Wi-Fi or Ethernet works fine? This can be due to the self-assigned IP address error on your Mac. Worry not!
Here, I’ll share how to fix the internet not working due to a self-assigned IP address error on your Mac to regain a stable network connection. But before we jump into the troubleshooting steps, let’s understand what a self-assigned IP error is.
What does “self-assigned IP address” mean on Mac?
The “self-assigned IP address” error on Mac refers to a situation where your device assigns an IP address and sets up an ad-hoc network instead of obtaining one from the network router or DHCP (Dynamic Host Configuration Protocol) server.
This self-assigned IP address is not legitimate or acknowledged on the network. That’s why your Mac cannot connect to the internet or other devices on the network, resulting in limited or no network connectivity.
This issue occurs due to several reasons such as:
- Network configuration conflicts
- DHCP server unavailability
- Problems with Mac’s network
- Unstable Wi-Fi connection
- Wrong Firewall settings
- Outdated macOS
But you can fix the issue with a few simple methods. Let’s learn them!
How to fix “self-assigned IP address” error on Mac
There are 12 ways to fix the problem, from simple checks to more advanced changes. It would help if you tried them in the order provided.
1. Check your connection
Before diving into Mac-specific settings, ensure that your router is functioning correctly and located near your Mac to obtain a valid IP address. Besides, if you are using an Ethernet connection, plug in the cable snugly.
I also check to validate that the cable has no fault and is in good condition. Moreover, If you are using an old Wi-Fi router, discard it and get a new one to obtain a smoother connection.
2. Reboot your network devices
Restarting both your modem and router can often resolve temporary network glitches. Power off the devices, unplug the cables, and wait a few seconds. It will help them cool down, as excessive heat can cause malfunctions.
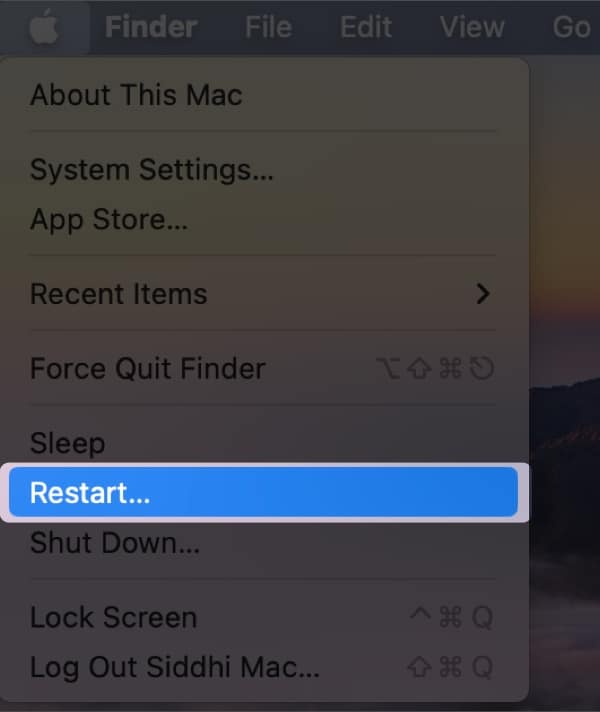
After that, plug all cables, connect them to the power outlet, and turn them back on. In the meantime, restart your Mac once to iron out any bugs in macOS.
- Click the Apple logo.
- Select Restart.
3. Renew DHCP Lease on macOS
This method is effective when the assigned IP address may have expired or encountered conflicts. When you renew the DHCP Lease, your Mac requests a new IP address from the DHCP server. It ensures a valid configuration and resolves connectivity issues.
- Open the same TCP/IP tab window from Wi-Fi Details, as shown above.
- Click Renew DHCP Lease.

- Select Apply.


After renewing the lease, check if you can connect to your network. If that doesn’t help, try creating a New Network Location and renewing the lease.
4. Rejoin your Wi-Fi network
Sometimes, simply forgetting and rejoining your Wi-Fi network can solve the self-assigned IP address error on your Mac.
- Click the Apple logo → System Settings.

- Select Wi-Fi → Click Details beside your Wi-Fi name.

- Select Forget This Network.

- Choose Remove.

- Turn off Wi-Fi for a few seconds and toggle it on.
- Click Connect beside your Wi-Fi name.

- Enter the password → Select OK.


5. Check your connection settings
Verify that your Mac’s network settings are configured correctly. You must opt for the appropriate network settings to obtain IP addresses and DNS information automatically.
- Go to your Wi-Fi Details.
I have shown the steps above. - Select TCP/IP from the left panel.
- Ensure Configure IPv4 is set as Using DHCP and Configure IPv6 is set as Automatically, respectively.


You may also try turning off the IPv6, as some users reported it conflicted with the IP address assigning procedure.
- Click on the drop-down arrow beside Configure IPv6.
- Select Link-Local Only.


6. Reset your Network Preferences on Mac
Resetting the network preferences can help eliminate IP address misconfiguration, causing the internet to not work. So, you must delete specific network connectivity-related files from your MacBook.
- Launch Finder.
- In the menu bar, click Go → Go to Folder.

- In the pop-up window, type
/Library/Preferences/SystemConfiguration/
- Delete these files:
com.apple.airport.preferences.plist
Networkinterface.plist
preferences.plist
- Enter your Mac password to authenticate the deletion.
- Restart your Mac.
It will automatically recreate the deleted files. - Log in and connect to your Wi-Fi network.
- Go to the TCP/IP setting again and check the router files.


7. Create a new network location
Creating a new network location lets your Mac start fresh with network settings and eliminate a self-assigned IP address.
- Click the Apple logo → System Settings.
- Select Network from the left panel → Click the three-dots icon.

- Select Locations → Choose Edit Locations.

- Click the plus sign (+) to add a new location.

- Name the new network location → Click Done.

- Wait for a few seconds until your Mac connects to your Wi-Fi.


Repeat the steps of renewing the DHCP lease on your Mac, and then try connecting to your network.
When you try to perform configuration changes to the system, your Mac’s firewall experiences configuration issues. Let’s fix this problem by resetting the Firewall.
8. Reset the Firewall on your Mac
- Launch Finder.
- In the menu bar, click Go → Go to Folder.
- Enter
/Library/Preferences→ Press the Return key.
- Delete the com.apple.alf.plist file.

- Restart your Mac.


After your system boots, it’ll ask you to allow access to numerous programs and services. Enable access depending upon your choice. Then, try connecting to your network and check if the self-assigned IP address error persists.
If you are unsure about deleting the Firewall files, you may temporarily disable it. Toggling off the Firewall on your Mac can help determine if it’s causing conflicts with network connectivity.
- Click the Apple logo → System Settings.
- Select Network from the left panel → Choose Firewall.
- Toggle off the Firewall.

- Restart your Mac and turn it on again.

9. Set Service Order from Mac’s network settings
Adjusting the service order can prioritize the network interface, ensuring your Mac connects to your preferred network.
- Click the Apple logo → System Settings → Network.
- Click the three-dots icon → Set Service Order.

- Drag services to the top of the list → Click OK.
If you’re using Wi-Fi, drag and drop Wi-Fi to the top.


10. Change DNS Servers on macOS
Discarding existing DNS and switching to alternative DNS servers can resolve DNS-related issues that may contribute to the self-assigned IP address error.
- Open System Settings → Wi-Fi → Click Details beside your Wi-Fi name.
- Select DNS from the left panel → Click the plus sign (+).

- Add these numbers:
8.8.8.8
8.8.4.4
1.1.1.1
9.9.9.9 - Click OK.


11. Check for conflicting IP address
Ensure that no other devices on your network use the same IP address as your Mac. Check your router’s DHCP client list and verify that all devices have unique IP addresses assigned.
12. Disable VPN
If you have a VPN service enabled, disable it temporarily to see if it resolves the self-assigned IP address error. Open your Mac’s VPN settings and turn off the VPN connection.
Bonus fixes
You may need to attempt more complex fixes if the troubleshooting techniques outlined above do not fix the self-assigned IP address problem on your Mac:
- Update your Mac to the latest OS version.
- Verify your Mac is not infected with any malware or viruses.
- Ensure your network devices are operating well and there are no hardware problems.
- Restart your router or modem
- Reset NVRAM or PRAM on Mac to clear up the system settings memory.
Tips to prevent self-assigned IP address issues on Mac
Self-assigned IP address error is indeed frustrating as it prevents your Mac from accessing the internet. So, you must take some precautions to avoid such a nuisance in the future.
- Regularly update your Mac
- Try to restart your Mac, router, or other network devices once in a while
- If your router or modem is outdated, replace it with a new one to get optimal performance. Also, configure the network with high-quality equipment.
- Connect your Mac to only one active network. I suggest using an ethernet cable for a stable connection.
- Don’t connect too many devices to your Wi-Fi at a time, as it may create network overcrowding.
Get back your smooth internet access!
Encountering a self-assigned IP address error on your Mac hampers your work, so you should address it ASAP. You can tackle the issue and restore a stable and reliable network connection using these troubleshooting techniques.
If the problem isn’t resolved, contact Apple Support and seek assistance.
Explore more…


