- Apple Music Favorites was introduced with iOS 17.1, iPadOS 17.1, and macOS Sonoma 14.1.
- To add an item as Favorite from the Now Playing screen, select the star or pick Favorite in the More menu.
- To see your Favorites, go to Library > Playlists > Check out the Favorite Songs playlist created for you.
You can have favorite contacts, websites, and locations, so why not music? If you subscribe to Apple Music, you can take advantage of the Favorites feature. Introduced with iOS 17.1, iPadOS 17.1, and macOS Sonoma 14.1 and then expanded, you can add songs, albums, artists, and playlists to your Favorites.
Here’s how to add and use Favorites in Apple Music on iPhone, iPad, and Mac, starting with a bit of information on the feature.
- How to add to Favorites in Apple Music on iPhone and iPad
- How to mark items as Favorites in Apple Music on Mac
- How to find Favorites in Apple Music on iPhone and iPad
- How to view Favorites in Apple Music on Mac
- Automatically add Favorites to your music library on iPhone and Mac
- Receive notifications for Favorite artists on iPhone and iPad
About Apple Music Favorites
When you mark Favorites in Apple Music, you have quick and easy access to them. Whether a song, album, artist, or playlist, your preferred music picks are always at your fingertips.
Additionally, you can:
- See a Favorite Songs playlist automatically created for you
- Filter your music library by Favorites
- Automatically add Favorites to your library
- Receive notifications when Favorite artists release new music
- Enjoy improved music recommendations in Listen Now
If you’re ready to put this new Apple Music iOS 17 feature to work, here’s how to use Apple Music Favorites.
How to add to Favorites in Apple Music on iPhone and iPad
You can easily add Favorites in your music library or if you find something you like while browsing Apple Music. So for that:
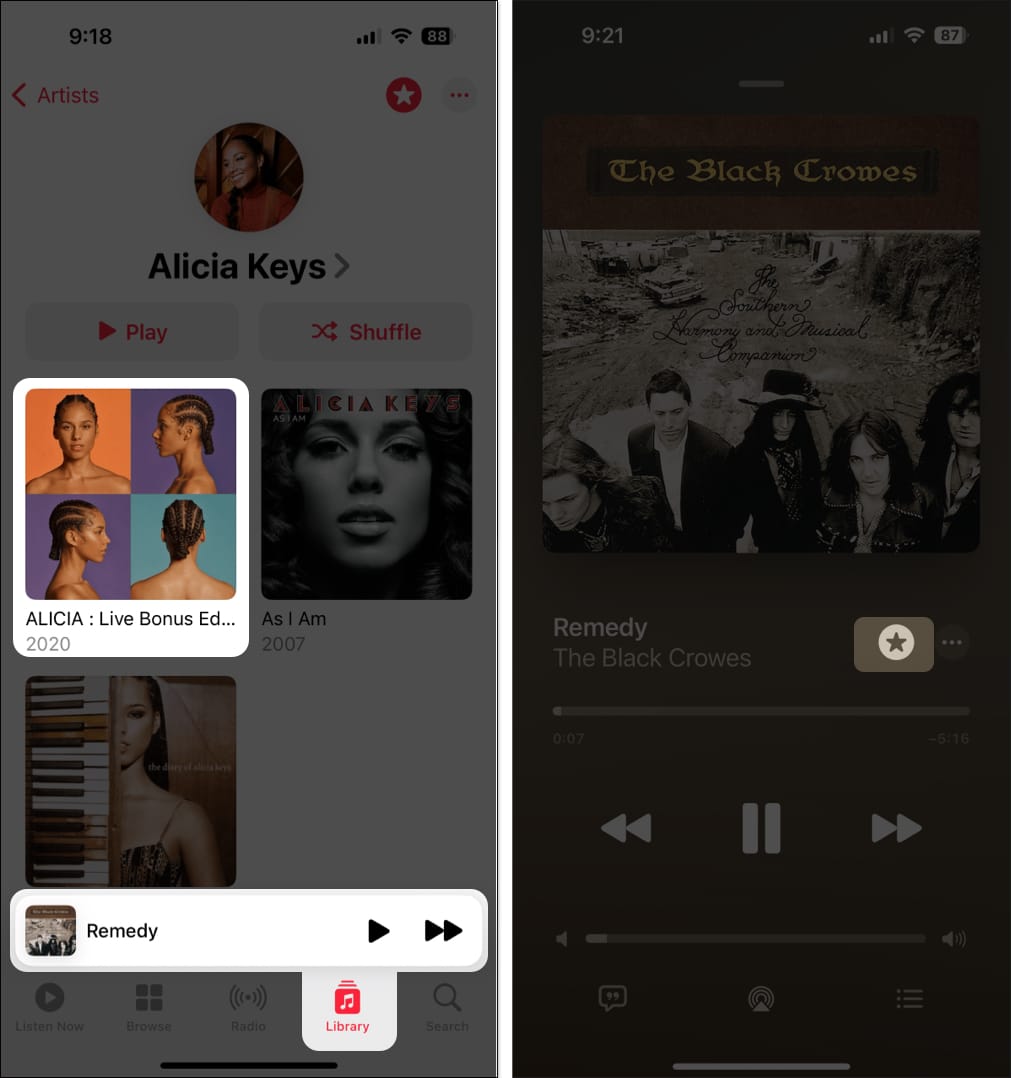
- Go to the Library tab on your iPhone.
On your iPad, open the sidebar → Choose Library. - Expand the screen if you’re listening to a song or select an item from either Artists, Albums, Songs, or a playlist.
- Tap the star to mark a Favorite.
- If the item doesn’t have a star, long-press or open the More menu (three-dot icon) → Pick Favorite.
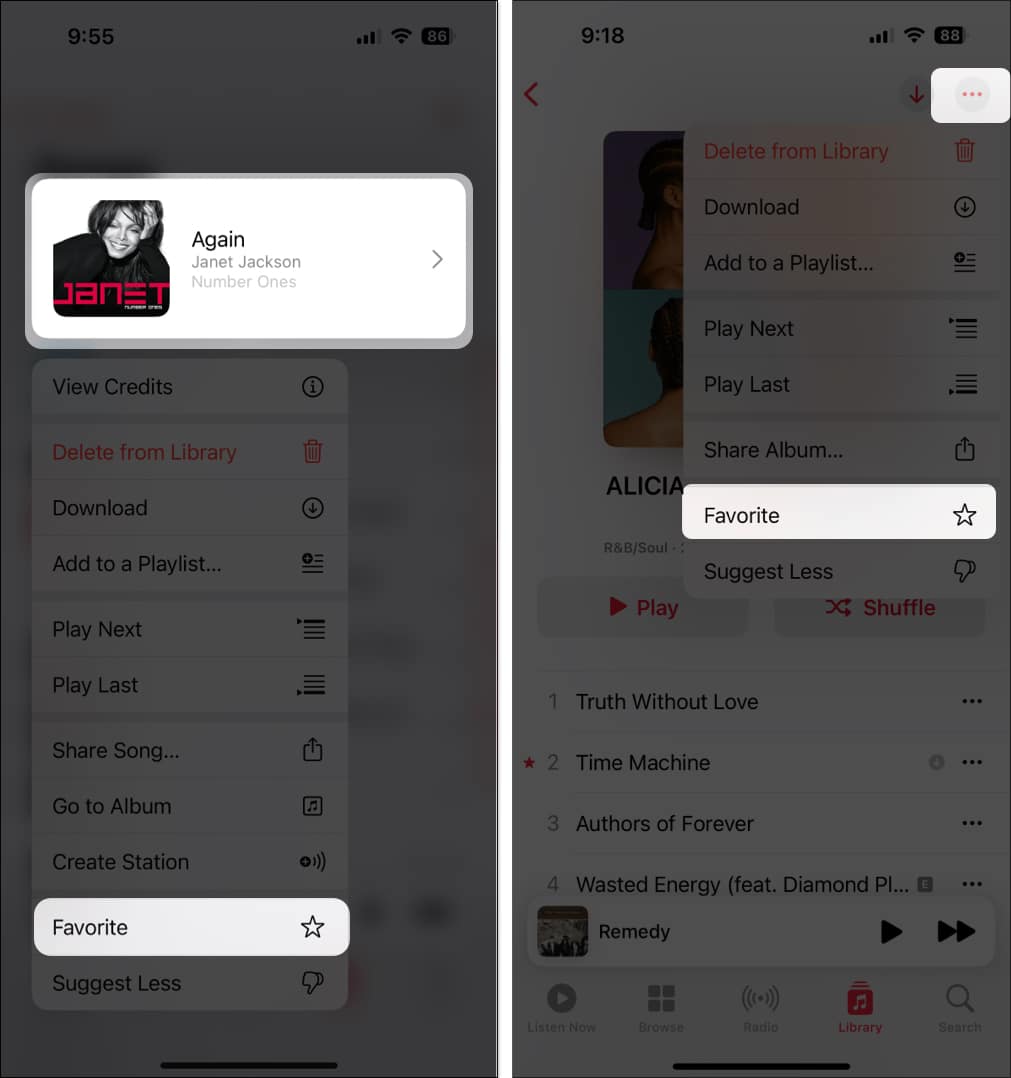
To remove an item from your Favorites, simply reverse the action by deselecting the star or unchecking Favorited in the More menu.
How to mark items as Favorites in Apple Music on Mac
Like on iPhone and iPad, you can mark Favorites for items in your library or when you’re browsing Apple Music on Mac.
- In your Library, select Artists, Albums, or Songs in the sidebar.
- Click the star in either the Favorites column, below the album artwork, or to the right of an artist’s name.
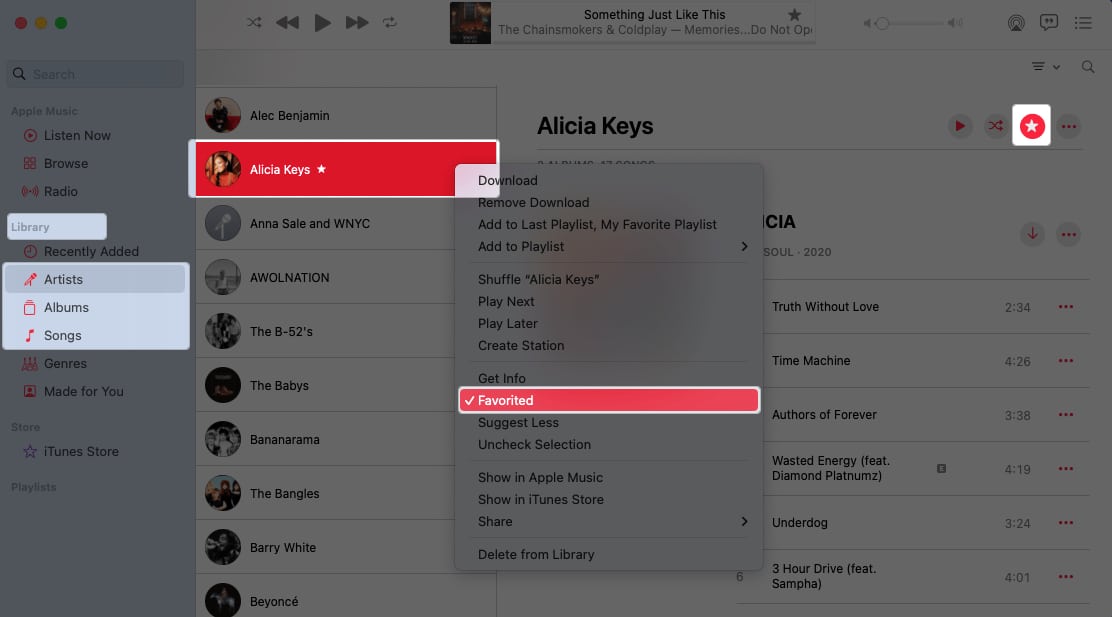
Alternate methods:
- If you want to Favorite a playlist, open the More menu (three dots) and pick Favorite.
- If you’re listening to a song or browsing Apple Music, select the star. You can also right-click or open the More menu and choose Favorite.
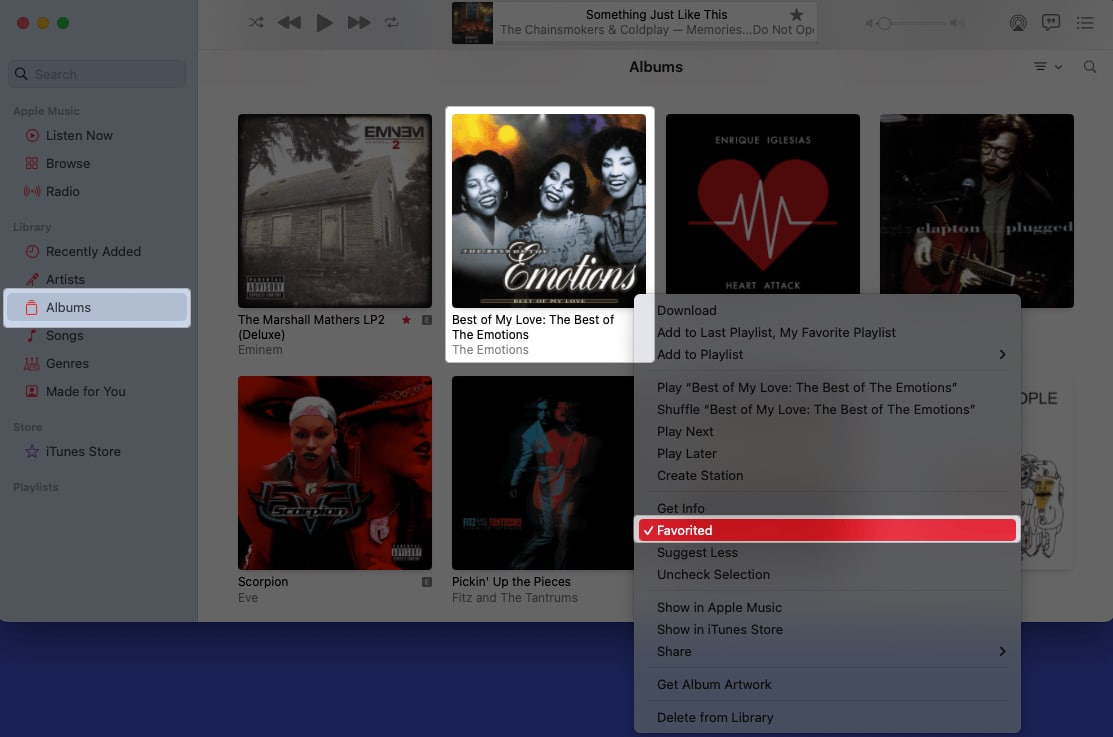
To remove a Favorite, undo the action by deselecting the star or unchecking Favorited in the More menu.
How to find Favorites in Apple Music on iPhone and iPad
You have a couple of ways to view your Apple Music Favorites on iPhone, iPad, or Mac. You can use whichever you like.
The easiest way to view your Favorite items is to go to Library → Playlists → Favorite Songs.
Below, I have mentioned the alternate methods.
- Go to the Library tab → Pick either Artists, Albums, Songs, or a playlist.
- On your iPad, choose one of the above options from the sidebar.
- Select the filter button on the top right → Select Favorites.
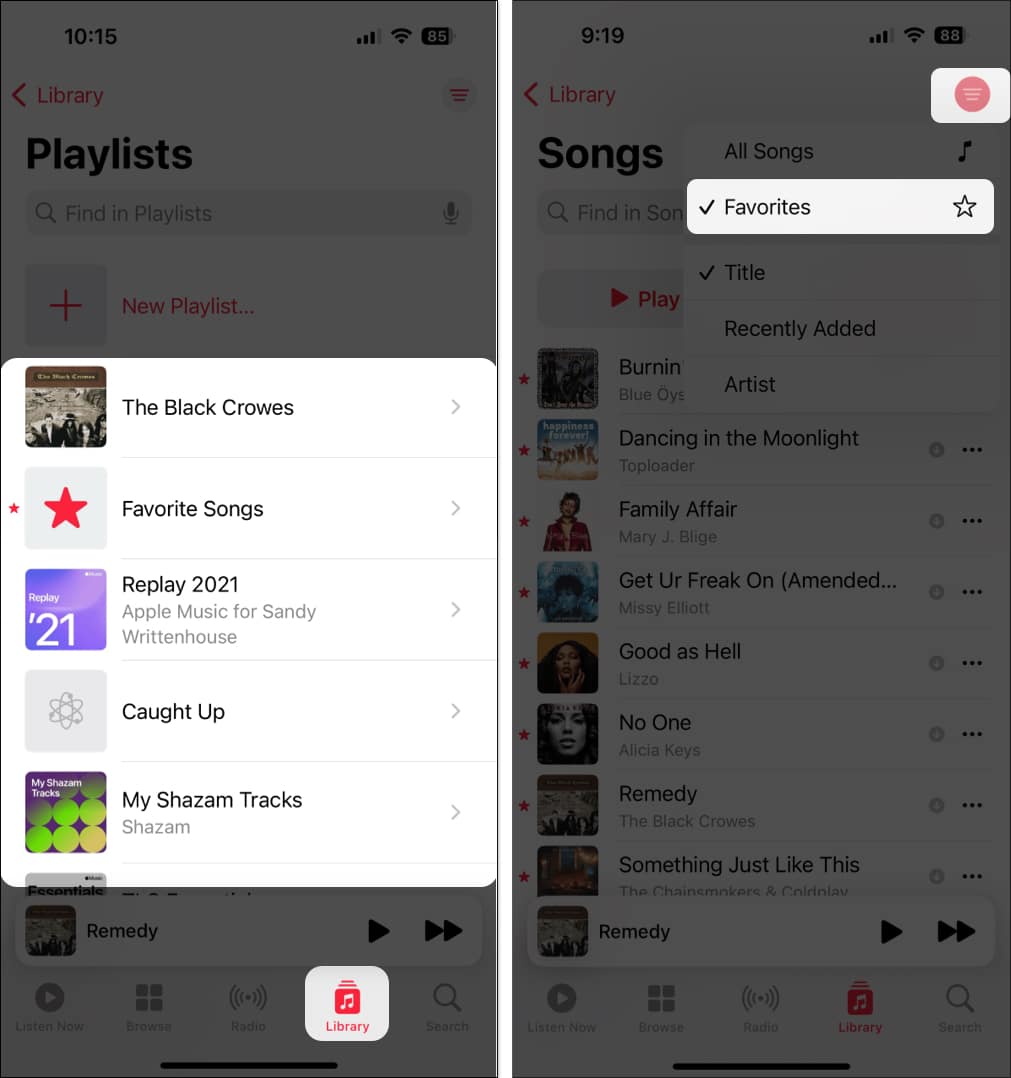
When you finish, you can remove the filter by selecting the Filter button → Pick the All [category] option.
How to view Favorites in Apple Music on Mac
- Go to Library from the sidebar → Pick either Artists, Albums, Songs, or a playlist.
- Select the filter button on the top right → Select Only Favorites.
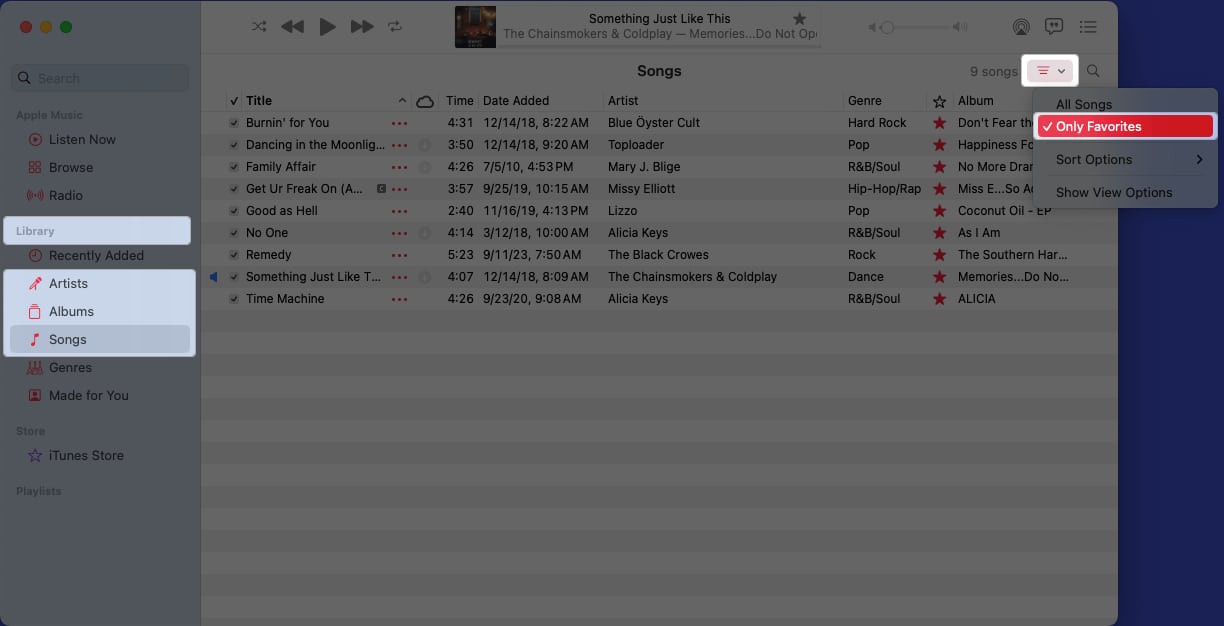
To remove the filter, select the Filter button → Pick the All [category] option.
Automatically add Favorites to your music library on iPhone and Mac
When you mark Favorites in Apple Music, those items automatically show up in your music library.
This is convenient if you find a new song or artist you like while browsing the Music app. While the feature should be enabled by default, here’s how to find it and double-check.
- On iPhone and iPad: Open the Settings app → Select Music → Toggle on Add Favorite Songs.
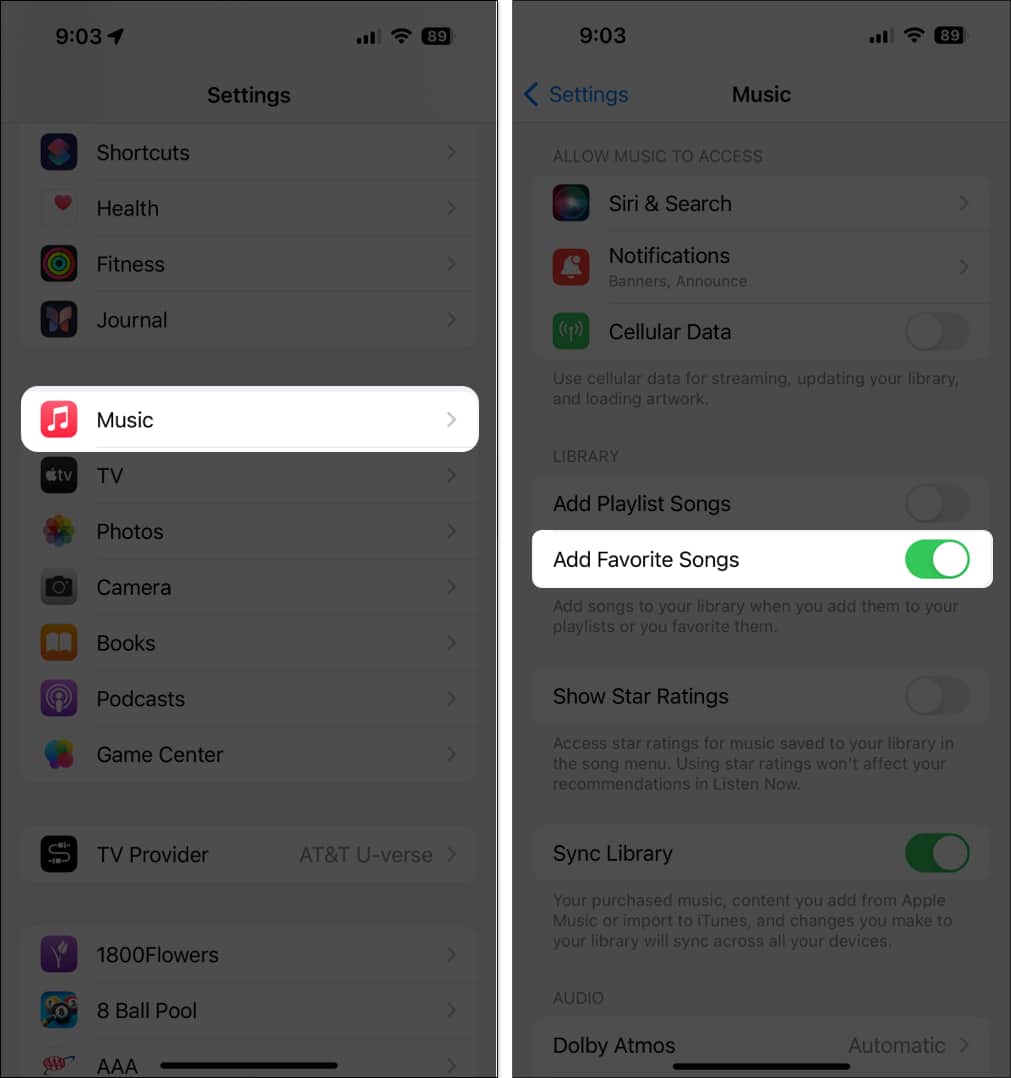
- On Mac: Open Music, and select Music → Settings in the menu bar. Go to the Advanced tab and check the box for Favorites below Add songs to Library when adding to.
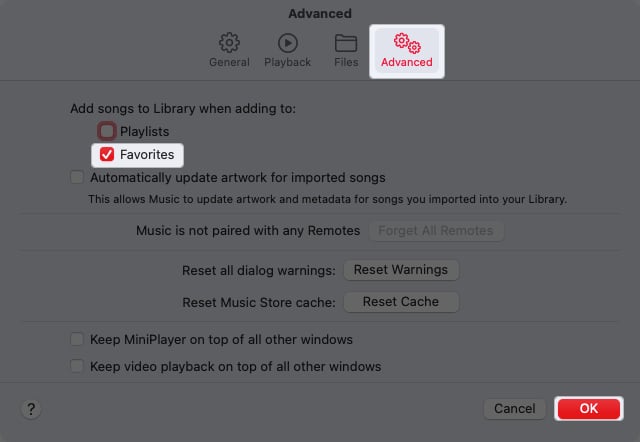
If you decide later not to use this feature, simply return to the Settings and turn off the toggle or uncheck the box.
Receive notifications for Favorite artists on iPhone and iPad
To keep up with artists you add as Favorites in Apple Music, you can receive notifications when they release new music.
The ability to enable or disable this feature is currently only available on iPhone and iPad.
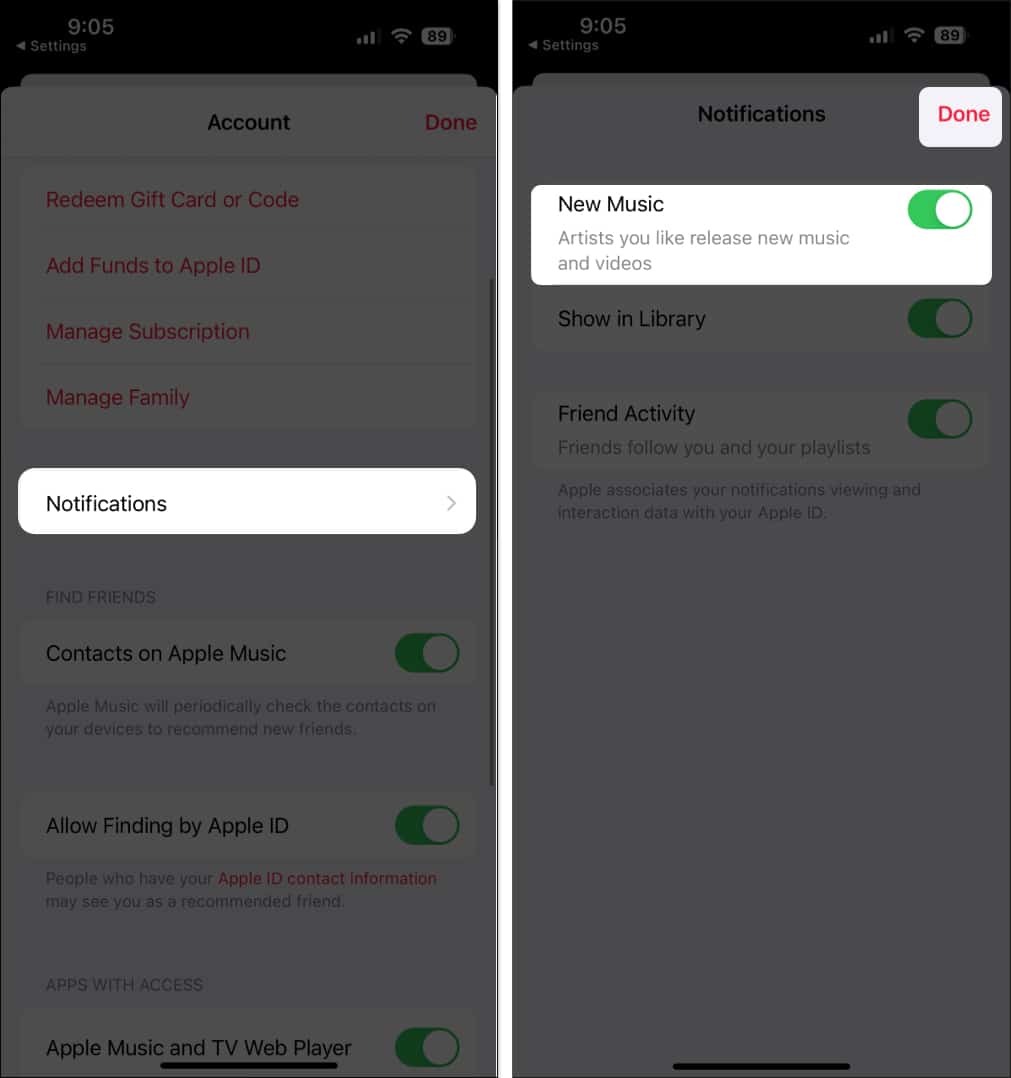
- Open the Music app → Select your profile icon on the top right.
- Choose Notifications.
- Toggle on New Music to receive the notifications.
- Tap Done to save your changes.
It’s a wrap!
You may not always want to create a specific playlist for your most loved songs, artists, and albums, especially if they change often. And with Favorites in Apple Music, you don’t have to! Just mark your Favorites and then listen to them with a tap or click.
Are you excited to see the Favorites feature come to Apple Music? Let us know in the comments below!
Read more:

