Key Takeaways
- The CCXProcess on Mac manages communication between the Adobe Creative Cloud Desktop app and the various Adobe apps you’ve installed on your Mac.
- If you’re experiencing excessive CPU usage due to CCXProcess, you may update the Creative Cloud app or uninstall ad-blocking apps and browser extensions on your Mac.
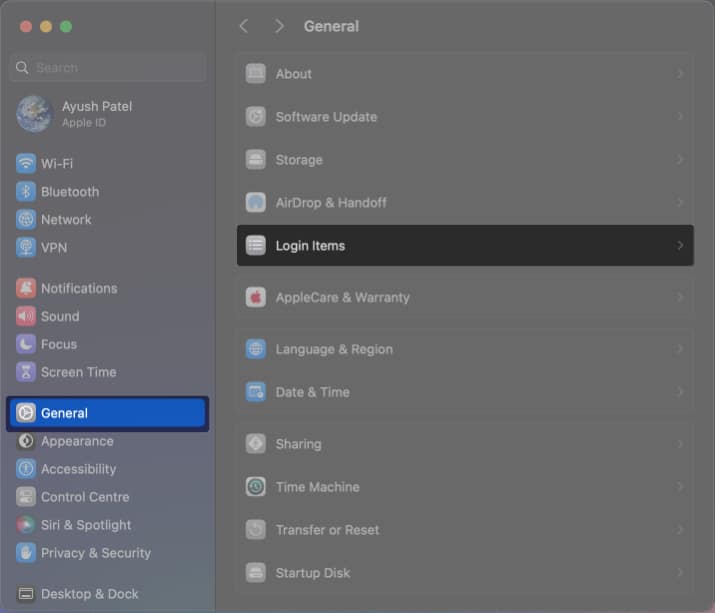
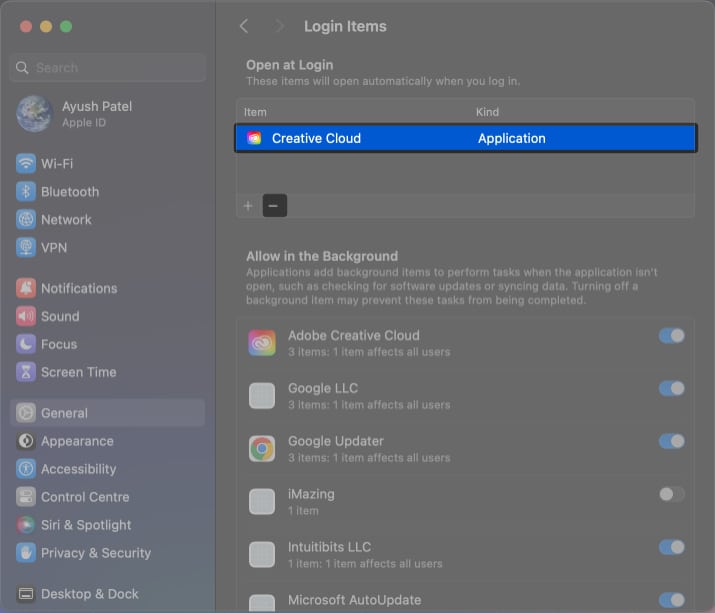
- You can disable the CCXProcess, go to Apple logo > System Settings > General > Login Items > Creative Cloud > Click the Minus icon (-).
Your Mac has a multitude of apps and processes running in the background at any given time, and CCXProcess is one such process that stems from Adobe Creative Cloud. However, a handful of Mac users are alarmed by the CCXProcess as they’re experiencing unusually high CPU usage due to it and are not able to remove it.
If you’ve run into this issue on your Mac, don’t worry! In this post, I’ll explain what CCXProcess is on Mac, how you can disable or remove it, and clarify any other doubts that you may have regarding it.
What is CCXProcess on Mac?
The CCXProcess is a background process that’s an integral part of the Adobe Creative Cloud suite. Its primary function is to manage communication between the Creative Cloud desktop app and the various other Adobe apps like Photoshop, Premier Pro, Lightroom, and more installed on your Mac.
More specifically, the CCXProcess handles all tasks related to synchronizing files, fonts, creative libraries, and settings between the Adobe apps installed on your Mac and Adobe Creative Cloud. This ensures that all your essential assets and custom preferences are available across all your connected devices and Adobe Creative Cloud applications, allowing for a seamless workflow.
In essence, CCXProcess is not a malicious program or a system file in macOS. It’s a minor background process designed to enhance your Adobe experience.
While the process is usually a well-behaved process with reasonable resource consumption, it can become problematic on some occasions and consume excessive CPU resources, slowing down your Mac.
In that case, you can try to troubleshoot the issues instead of fully removing the CCXProcess.
How to fix issues caused by CCXProcess
If your Mac is running slow due to the CCXProcess, you may follow the solutions listed below to fix common issues.
1. Update Creative Cloud app on Mac
The CCXProcess might be using a lot of CPU due to bugs in the current version of Adobe Creative Cloud.
Generally, the Adobe Creative Cloud app is updated automatically on your Mac. In case you’re unsure about this, you may follow the steps listed below to enable auto-update for Creative Cloud:
- Open the Adobe Creative Cloud app on your Mac.
- Click Creative Cloud on the menu bar → Then, select Preferences (or Settings).
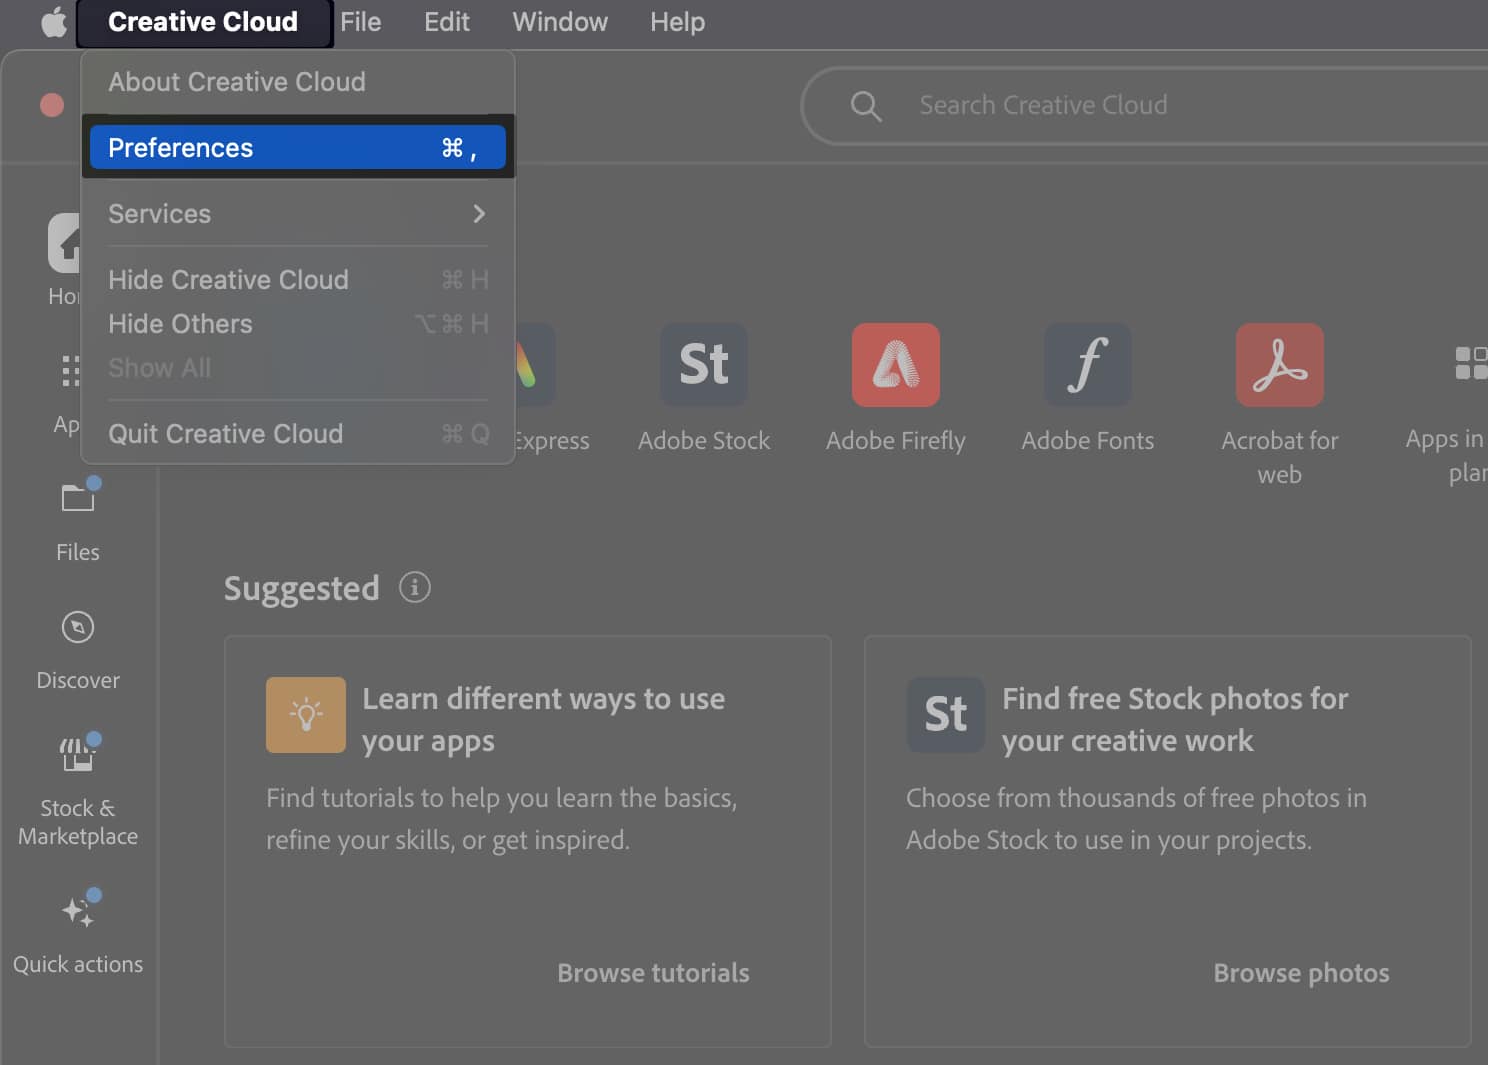
- Stay on the General tab → Toggle on Automatically keep Creative Cloud up to date.

2. Uninstall ad-blocking apps and browser extensions
Many users have noticed programs or extensions that block advertisements on Mac can interfere with the CCXProcess.
If you want to eliminate this issue, you must remove ad-blocking apps and browser extensions that you’ve installed on your Mac.
- Open the Finder on your Mac → Go to Applications.
- Right-click on the ad-blocking app → Select Move to Trash.
Older macOS might show Move to Bin.
Once you remove ad-blocking apps, follow these steps to uninstall Ad-blocking browser extensions:
- Locate and open Safari on your Mac.
- Click Safari on the menu bar → Then, select Settings.
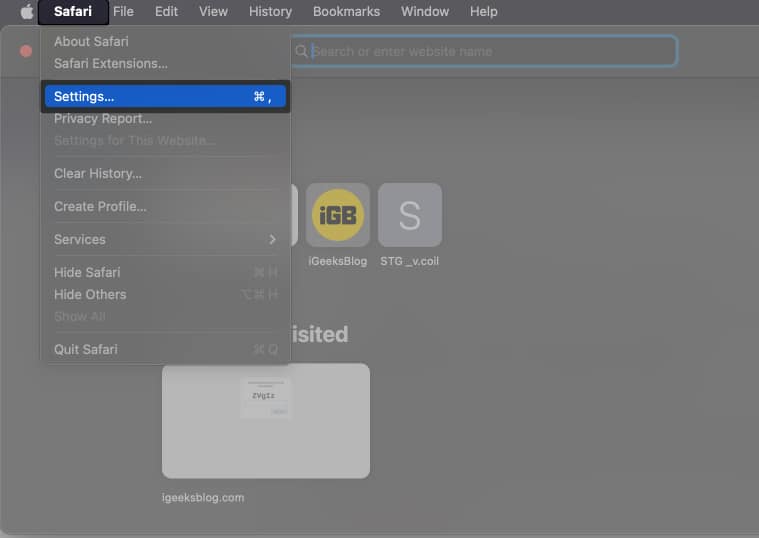
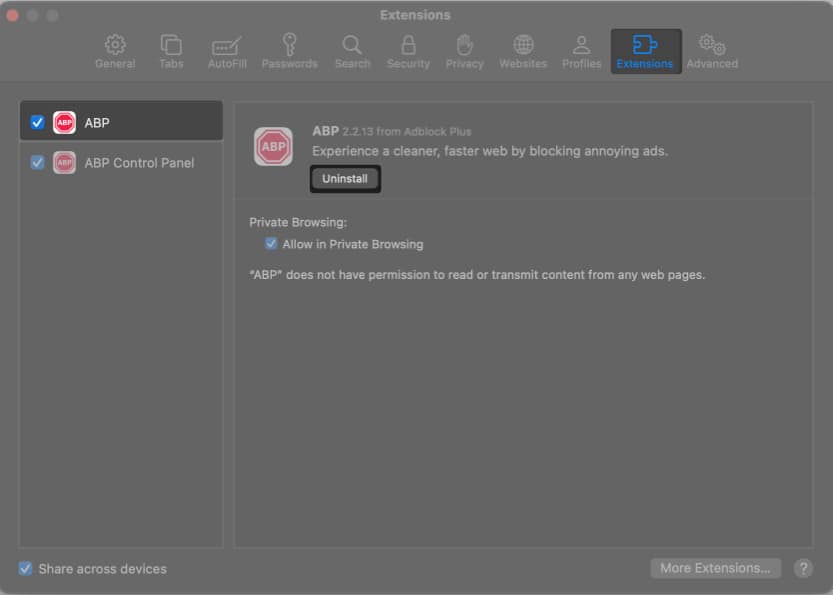
- Go to Extensions → De-select the box next to the extension you want to disable.
- To uninstall an extension, select it from the sidebar and click Uninstall in the right pane.
3. Temporarily turn off your antivirus software
Antivirus software can sometimes flag legitimate Adobe apps and processes like the CCXProcess as suspicious, leading to performance issues.
Therefore, you must see if temporarily disabling the Antivirus software on your Mac or white-listing the CCXProcess helps you reduce the CPU usage.
If you need help with removing the installed software, you can check out our guide on how to uninstall Mac apps.
Can I remove CCXProcess on Mac?
Given that all Adobe CC suite of apps, including Photoshop, Illustrator, After Effects, and more, rely on the CCXProcess to sync your projects and assets, you shouldn’t remove it if you use these apps regularly.
However, if you don’t plan on using any Adobe CC apps on your Mac and have uninstalled them, there’s no point in keeping the CCXProcess. You may remove it in that case.
Suppose you want to keep using the Adobe CC apps but don’t want the CCXProcess to affect the Mac’s speed. In that case, a more practical solution would be to disable the process from launching at startup.
How to disable CCXProcess on startup in macOS
If you disable CCXProcess on startup, it won’t affect the stability of installed Adobe apps; the process will only launch when you open any Adobe Creative Cloud app.
- Click the Apple logo in the menu bar → Select System Settings.
- Navigate to General from the sidebar → Then, select Login Items.
- Select Creative Cloud under Open at Login → Click the Minus icon (-).
How to completely remove CCXProcess on Mac
While it’s pretty easy to remove other Adobe apps, getting rid of CCXProcess can be tricky.
Fortunately, it’s possible to remove this process as long as you’ve killed all the background processes related to it. Here’s how it is done.
- Open Activity Monitor on your Mac using Spotlight or Launchpad.
- Search and select CCXProcess.app → Click the X button to quit it.
- Once you quit the process, open Finder from the dock on your Mac.
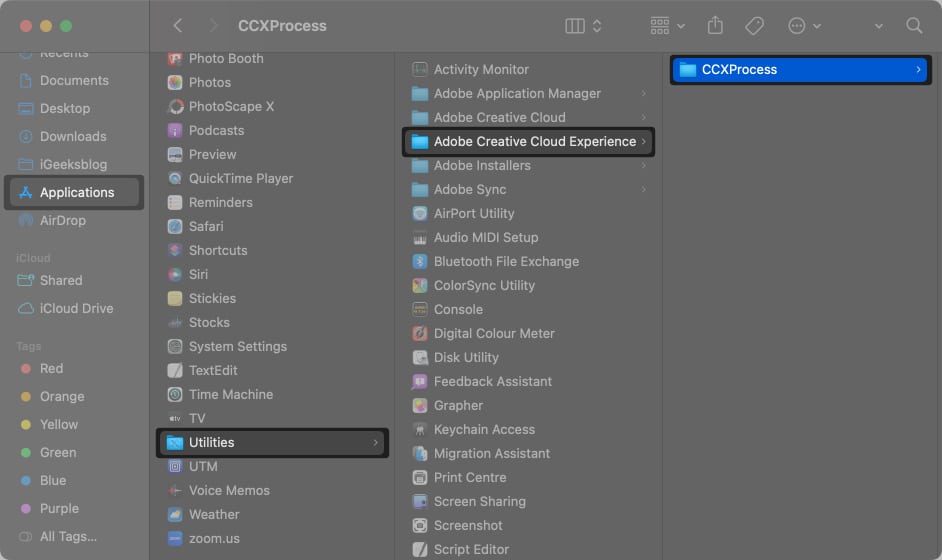
- Go to Applications → Utility → Adobe Creative Cloud Experience.
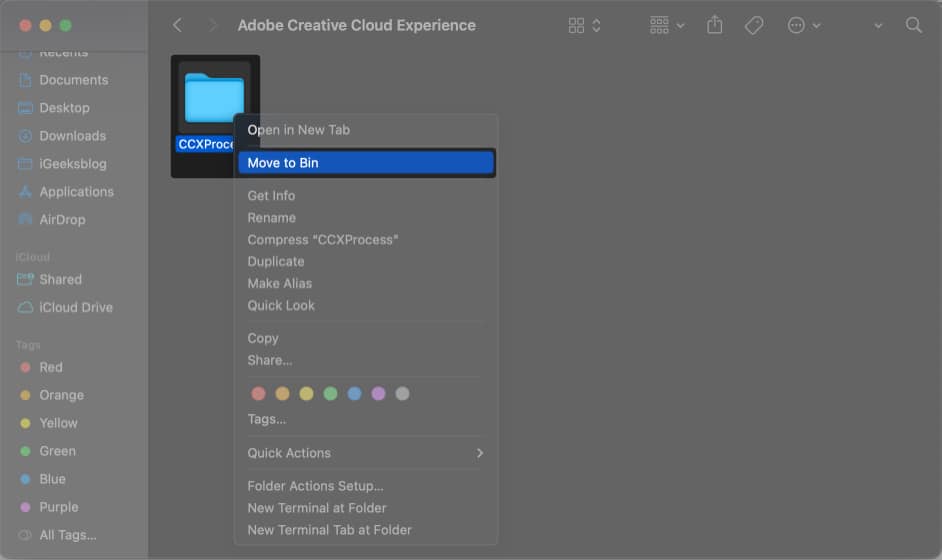
- Right-click on the CCXProcess folder → Then, select Move to Bin.
Wrapping up…
All in all, CCXProcess is a pretty common background process required for the smooth functioning of Adobe Creative Cloud apps on your Mac.
Even though you might sometimes face issues like high CPU usage due to the CCXProcess, it’s pretty easy to fix this issue. I hope this guide has solved your issues. If you have any further questions regarding this, feel free to drop them below. I’d be happy to help.
Also read:

