Let me guess… after years of use, your iPhone is starting to look a little dull. So, you’ve decided to sell it and upgrade to the newer model. But before selling your old iPhone, it’s wise to carry out a few simple procedures like backing up your data to a secure location and wiping out all existing settings and content.
This is done to ensure nothing is left on your device, and all of your personal data is secure. Follow along as I walk you through the 12 most important things you must do before selling your old iPhone.
What things to do before selling your old iPhone?
1. Create an iCloud or local backup
The first thing you must do before selling your old iPhone is create a backup of your data. And the quickest way you can do this is through iCloud.
However, if you’re running low on iCloud storage or not connected to the internet, you can create a local backup using Finder on macOS or iTunes on Windows.
If you want to create an iCloud backup of your iPhone, follow these steps:
- Open the Settings app on your iPhone.
- Tap the Apple ID banner with your name → Select iCloud.

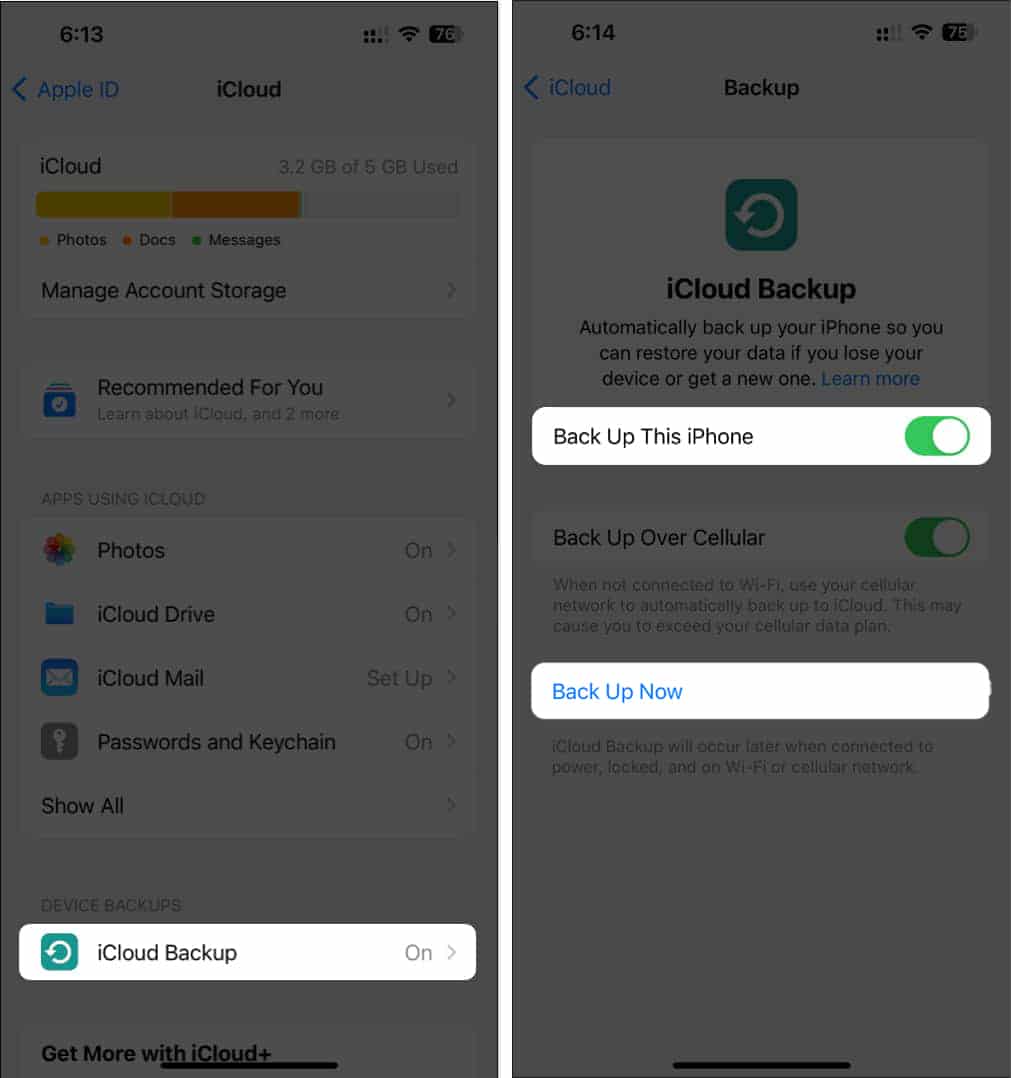
- Select iCloud Backup → Toggle on Back Up This iPhone.
On 5G–supported models, you can also turn on Backup Over Cellular. - Then, tap Back Up Now to create a iCloud backup.

If you want to create a local backup of your iPhone, follow these steps:
- Connect your iPhone to Mac or Windows computer with a USB cable.
- Open Finder on your Mac or iTunes on your Windows computer.
- Click the iPhone icon located on the left pane inside Finder.
The same option can be found in the top-left corner in iTunes. - Then, click Back Up Now to create a local backup.
2. Transfer contacts to iCloud or export them
Next up, you would want to ensure that all your contacts are stored safely. To do this, you can choose to either transfer all your contacts to iCloud or export them as a vCard file that can be stored on your Mac or Windows PC.
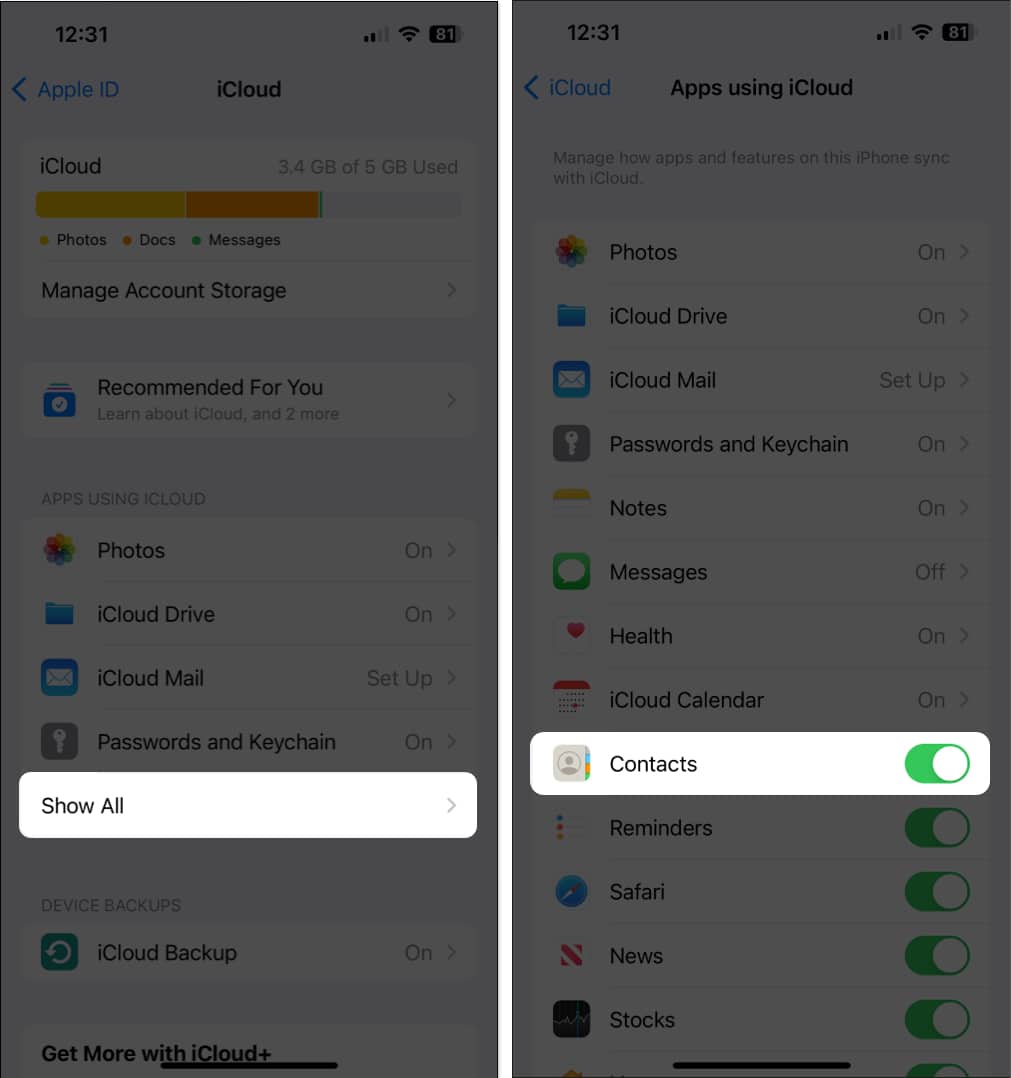
If you want to transfer your contacts to iCloud, follow these steps:
- Open the Settings app on your iPhone.
- Tap the Apple ID banner with your name → Select iCloud.
- Tap Show All under Apps using iCloud → Toggle on Contacts.
Further, if you wish to export contacts, you can follow our guide on how to export contacts as vCard.
3. Unpair iPhone from other devices
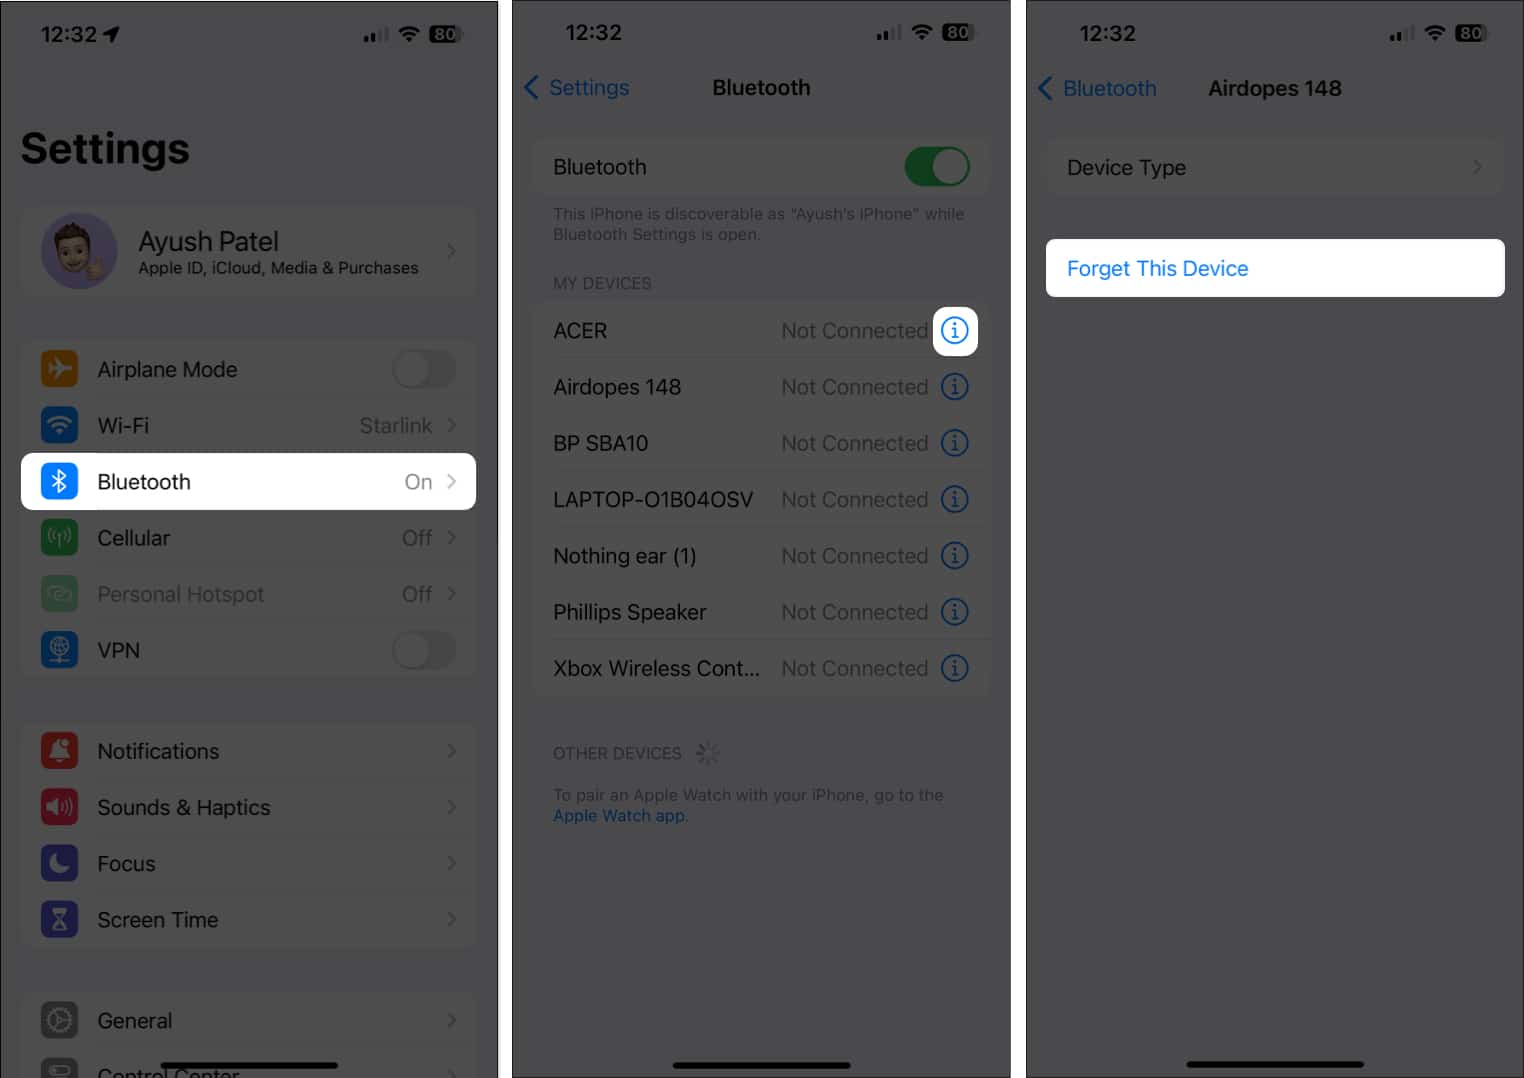
If you have paired your iPhone with several Bluetooth devices like AirPods, speakers, headphones, or your car’s infotainment system, you might want to unpair them from your iPhone. This ensures that your Bluetooth devices can easily connect with another device without searching for your iPhone.
- Go to Settings → Bluetooth.
- Tap the blue info button next to a paired device.
- Then, select Forget This Device to unpair it from your iPhone.

Apart from other Bluetooth devices, if you have an Apple Watch paired to your iPhone, you’ll have to unpair it via the Watch app. If you need help with the same, you should check out this guide on how to unpair Apple Watch.
4. Cancel your AppleCare plan
If you have an active AppleCare plan for your old iPhone, it’s important to terminate it to avoid unnecessary charges. You can easily cancel monthly or annual plans directly on your iPhone by navigating to Settings → Apple ID Banner → Subscriptions.
But, If you are unable to locate your plan or if you paid for the plan upfront, you will need to reach out to Apple Support.
5. Delete photos
Since you have already taken a backup of your Photos to iCloud, you can delete them from your iPhone storage.
Now, a general reset will clear all your photos, but it’s always safer to delete them individually. That way, you are clearing out traces (making it better than what a general reset will do).
Clearing out photos includes clearing out albums. Unfortunately, since the iPhone/iOS doesn’t come with an option to delete multiple photos at once, you’ll have to resort to a little trick to delete them in bulk.
In your album, pinch the screen to zoom out. Now tap Select in the top right (if you don’t see Select, you’ve zoomed out too far and need to zoom back in). Drag your finger across the rows or columns of photos you want to delete.
Tap the trash can icon and watch your photos disappear. Well, to the ‘Recently Deleted’ album.
7. Sign out of apps and remove accounts
As a precautionary measure, it’s recommended that you sign/log out of all third-party banking and conferencing apps on your iPhone that have access to your sensitive data.
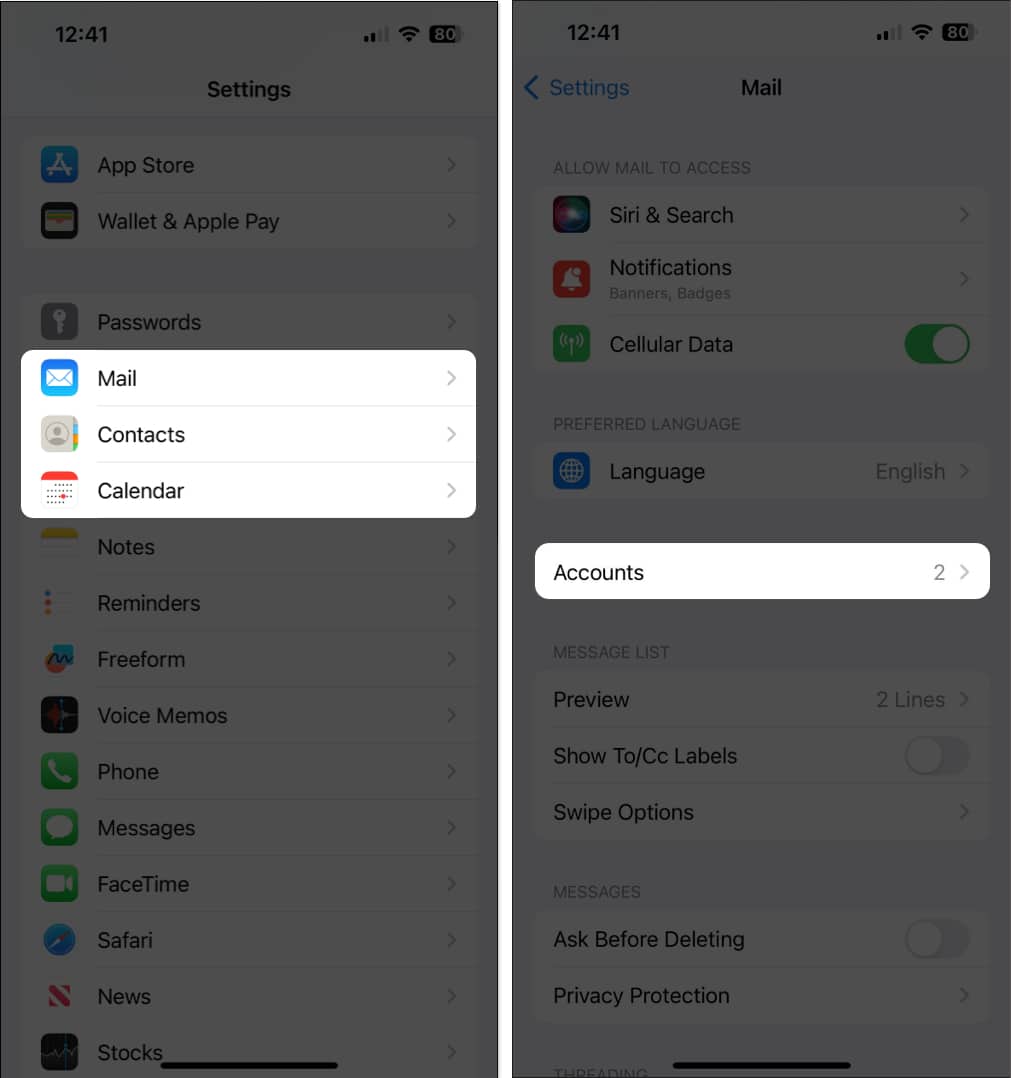
Furthermore, you should disconnect any synchronized email or calendar accounts from Apple Mail, Calendar, and Contacts.
- Open the Settings app on your iPhone.
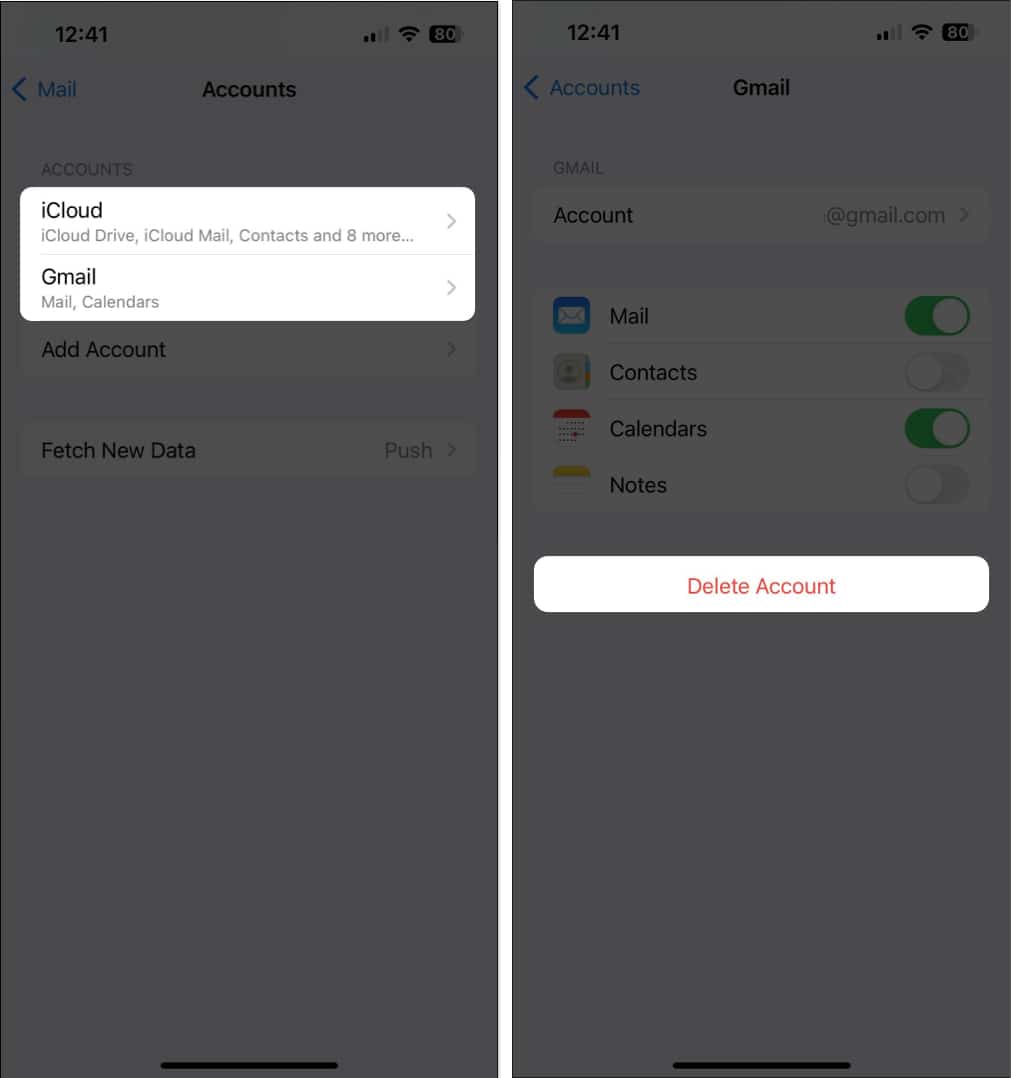
- Select either Mail, Contacts, or Calendar → Tap Account.
- Select an account you want to remove → Tap Delete Account.
6. Delete apps
Once you’re done deleting photos (which is some of the most personal stuff you’d have on your old iPhone), you can start clearing out the apps.
Why delete apps when a reset clears them out? Just an extra precaution. Deleting apps will delete most caches associated with these apps. It’ll also delete any traces of login/personal information that the apps might’ve stored on your iPhone. (I’m thinking of Facebook, Twitter, Instagram, etc.)
8. Remove your SIM card or eSlM
Next up, if your iPhone has a physical SIM card slot, you’ll have to remove the SIM card from your iPhone. On the other hand, if you have a dual SIM iPhone or iPhone without a SIM card slot, you’ll have to delete the eSIM.
- Use the SIM ejector tool to remove a SIM card from your iPhone.
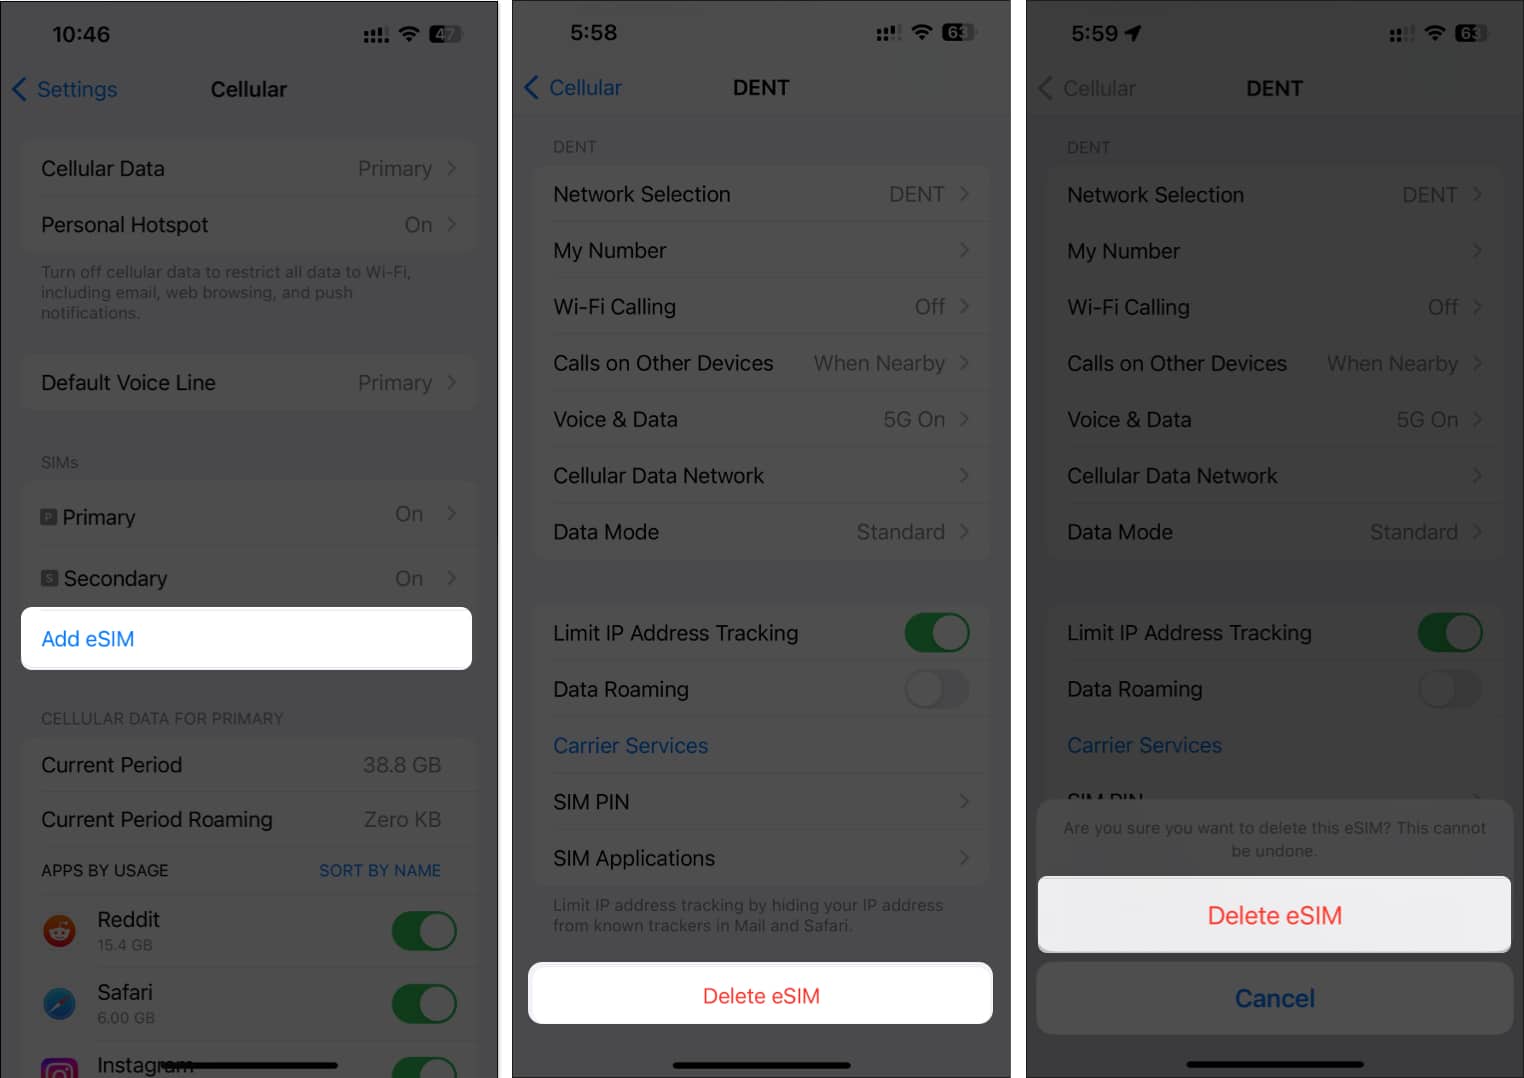
- If you need to delete an eSIM, go to Settings → Cellular.
- Select the eSIM you want to delete → Tap Delete eSIM.
- Tap Delete eSIM again to confirm your action.
9. Turn off Find My and Sign out of Apple ID
Once you complete the previous steps, you’ll have to turn off Fing My on your iPhone to disable the Activation Lock and Sign out of your Apple ID. Even though you can always turn off Find My manually, Signing out of your Apple ID will automatically do this for you. Here are the steps for the same:
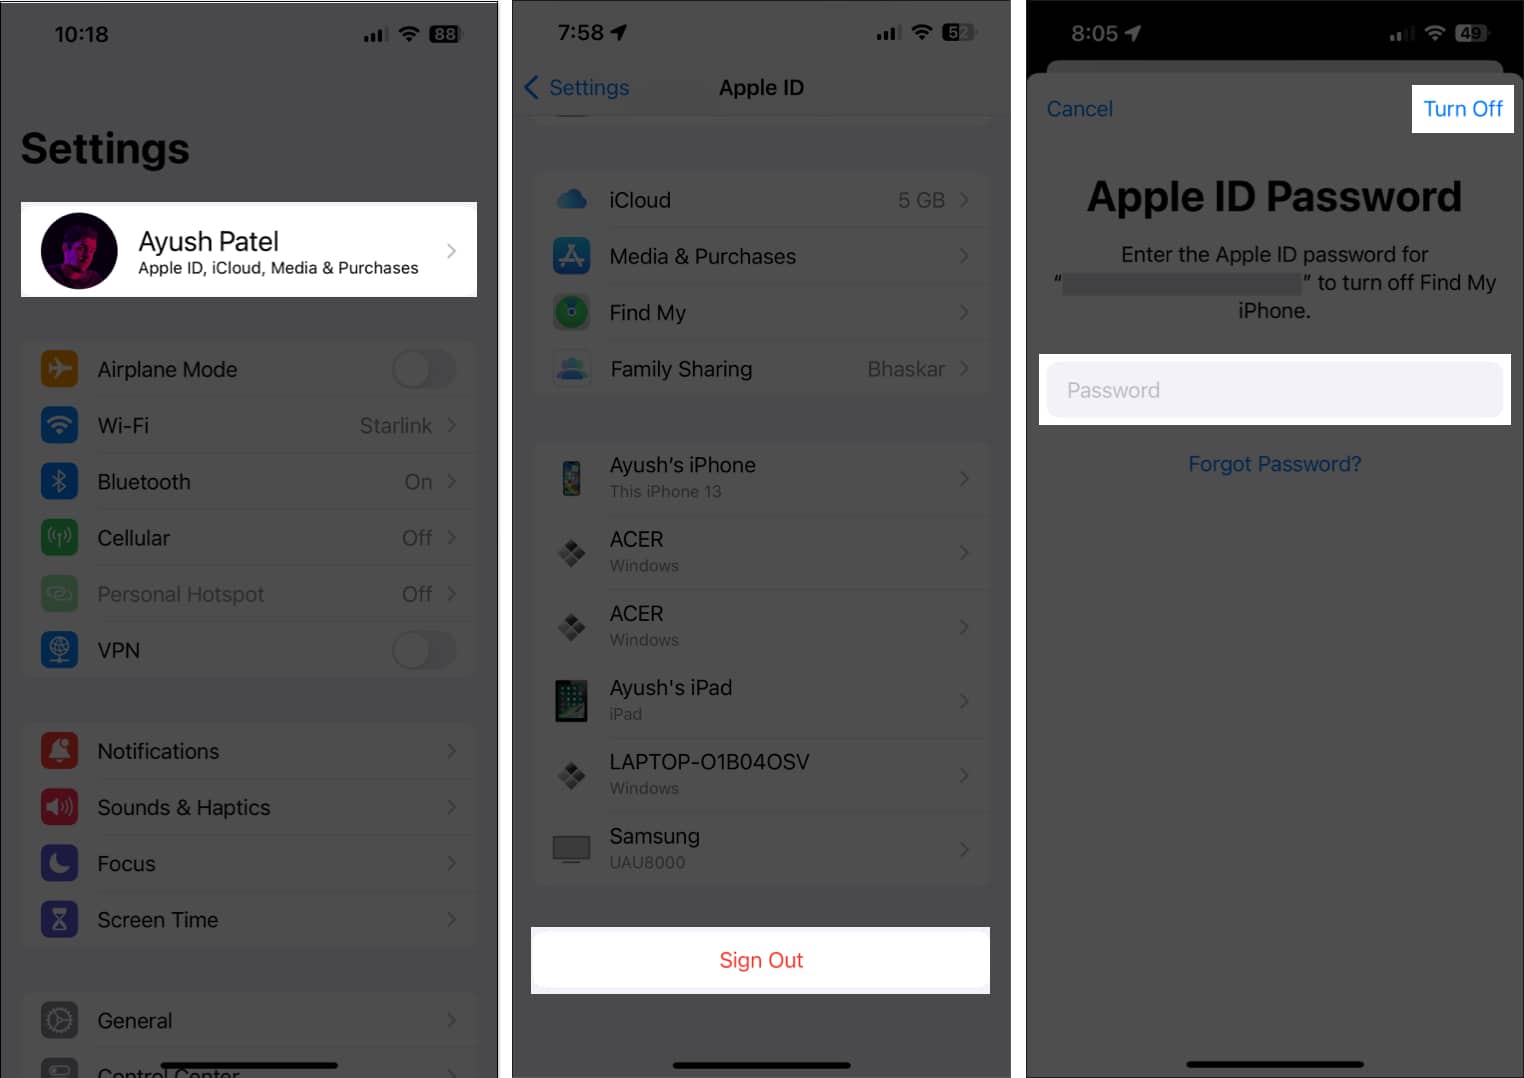
- Launch the Settings app → Tap the Apple ID banner.
- Scroll down and tap Sign Out.
- Enter your Apple ID’s password → Tap Turn off.
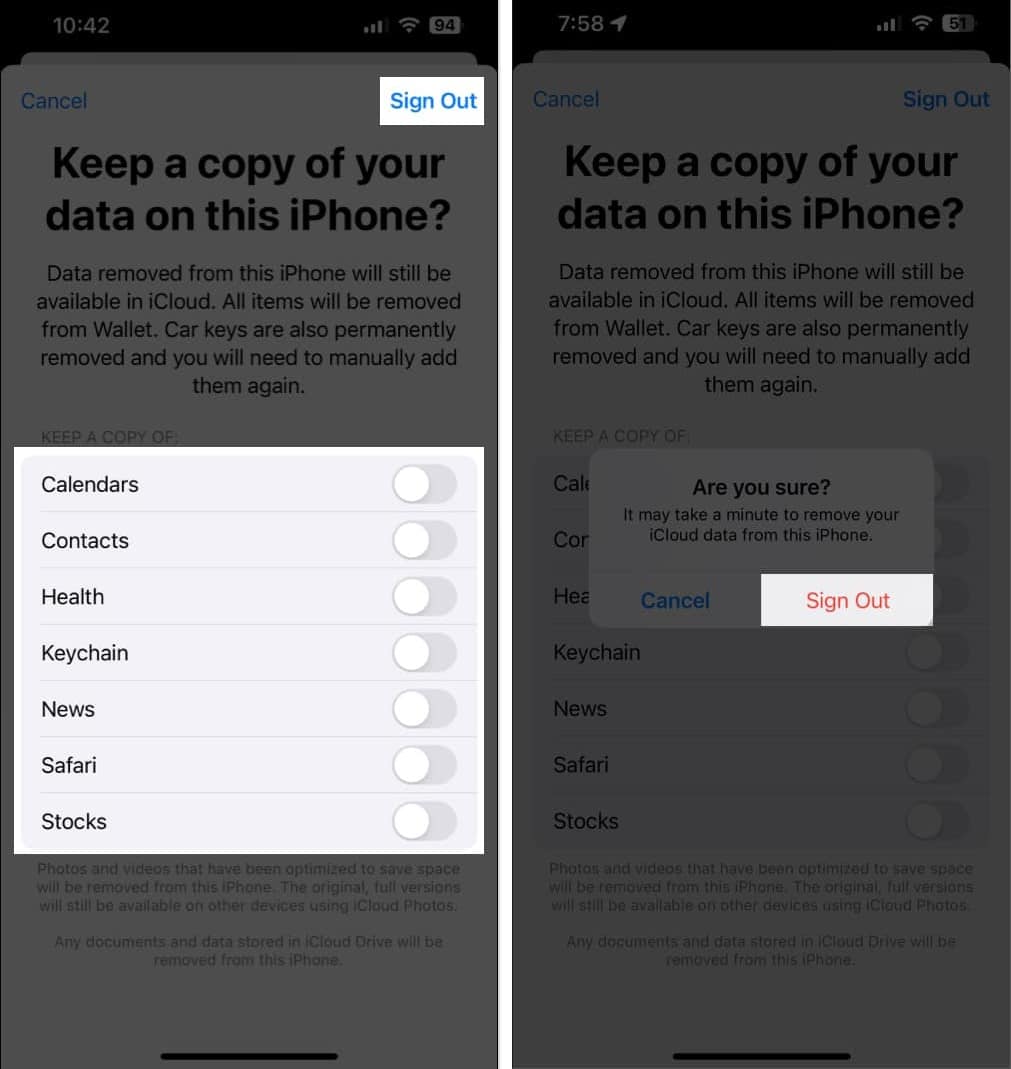
- Select the content you want to store offline. Then, tap Sign out (twice).

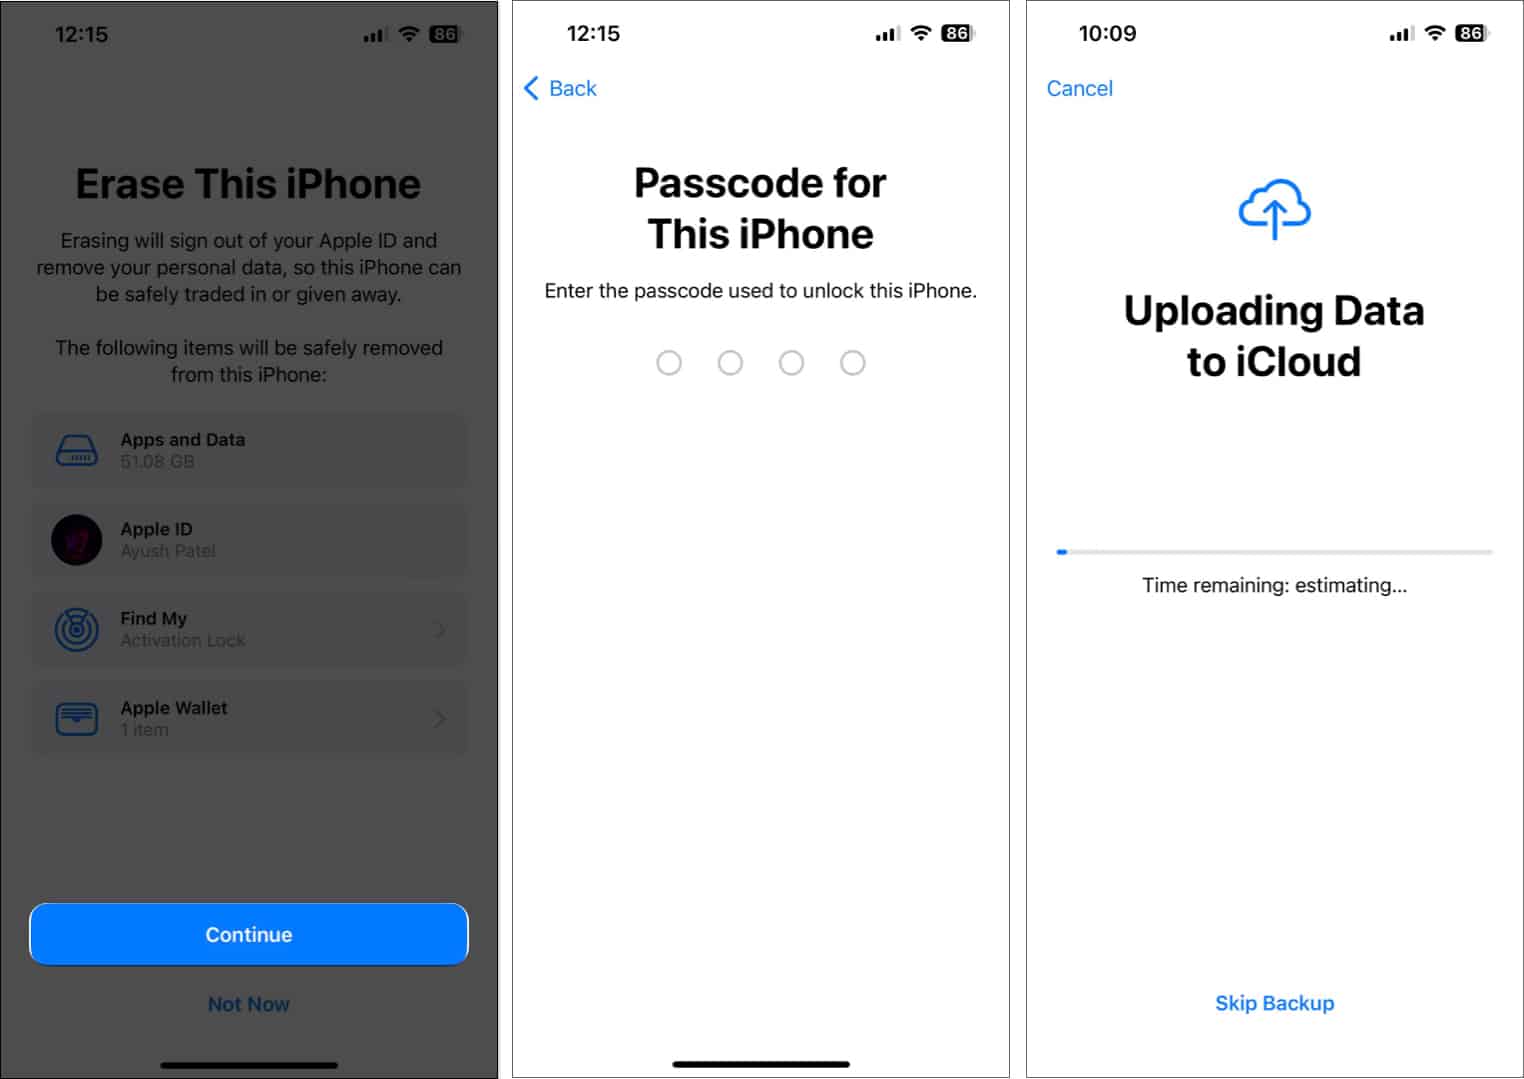
10. Erase all content and settings on iPhone
Now that you’ve created a backup of your crucial data, disabled iMessage and FaceTime, removed any connected accounts, and signed out of your Apple ID, you can finally Erase all content and settings on your iPhone.
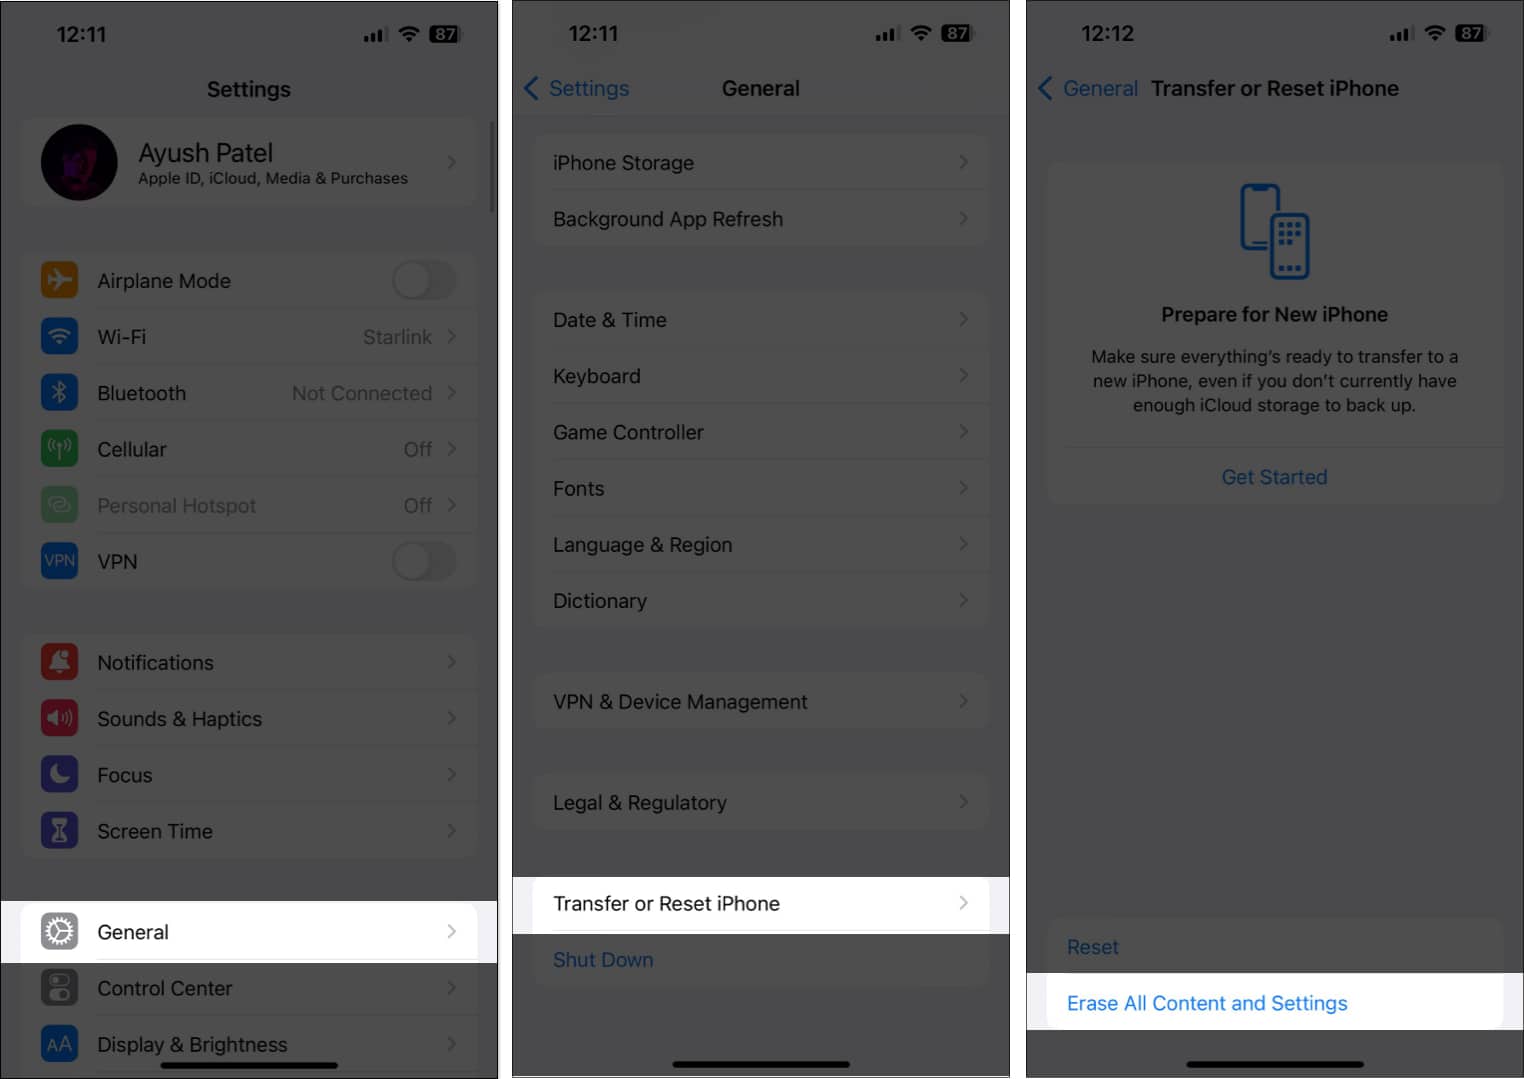
- Go to Settings → General → Transfer or Reset iPhone.
- Choose Erase All Content and Settings.

- Tap Continue → type the iPhone Passcode. Then you may follow the on-screen instructions once the automatic iCloud backup completes.
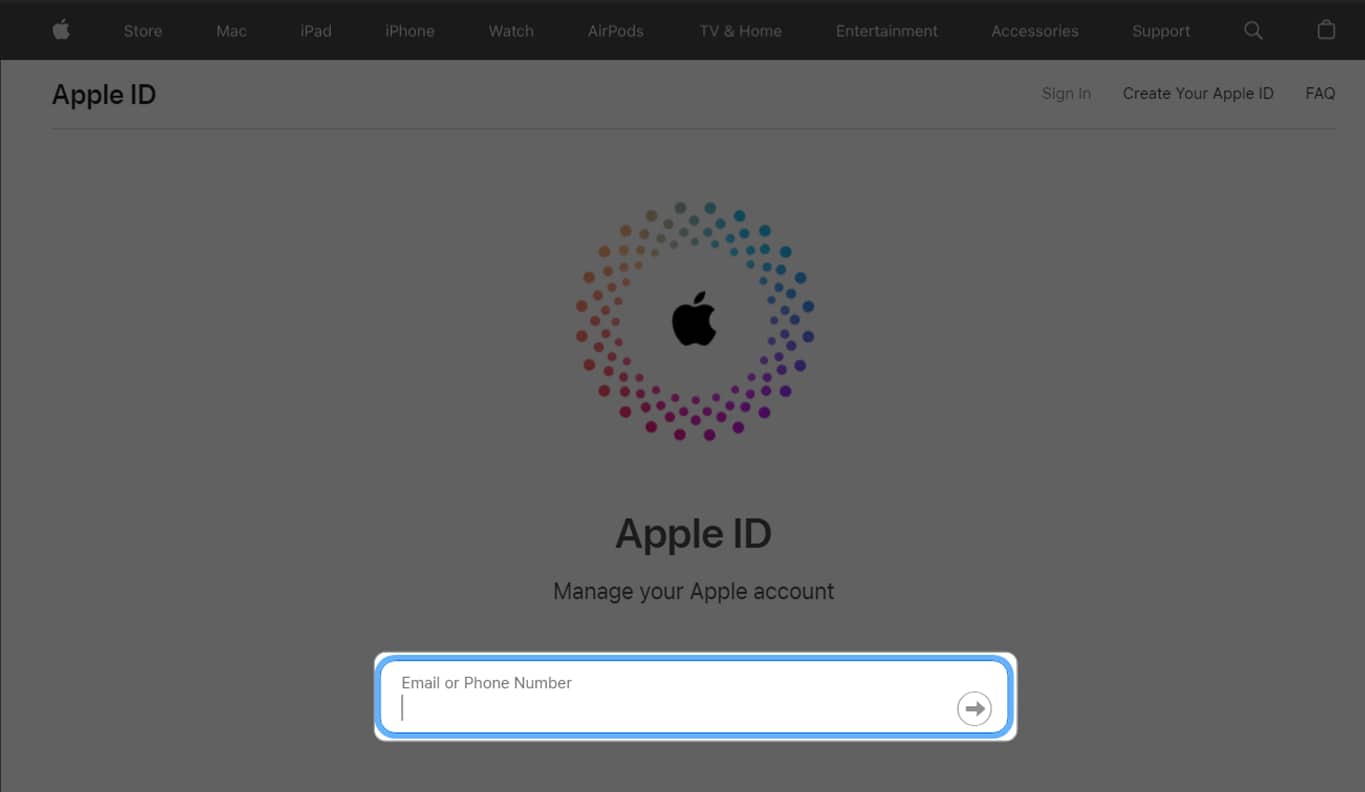
11. Remove iPhone from list of trusted devices
Once your iPhone is ready to be sold, one last thing you should ensure is that it still doesn’t show up in your list of trusted devices. If you happen to have another iPhone, iPad, or Mac, you can remove a device from your Apple account from the Settings app. Alternatively, you can follow these steps:
- Go to appleid.apple.com → Enter your credentials → Hit Enter/Return.

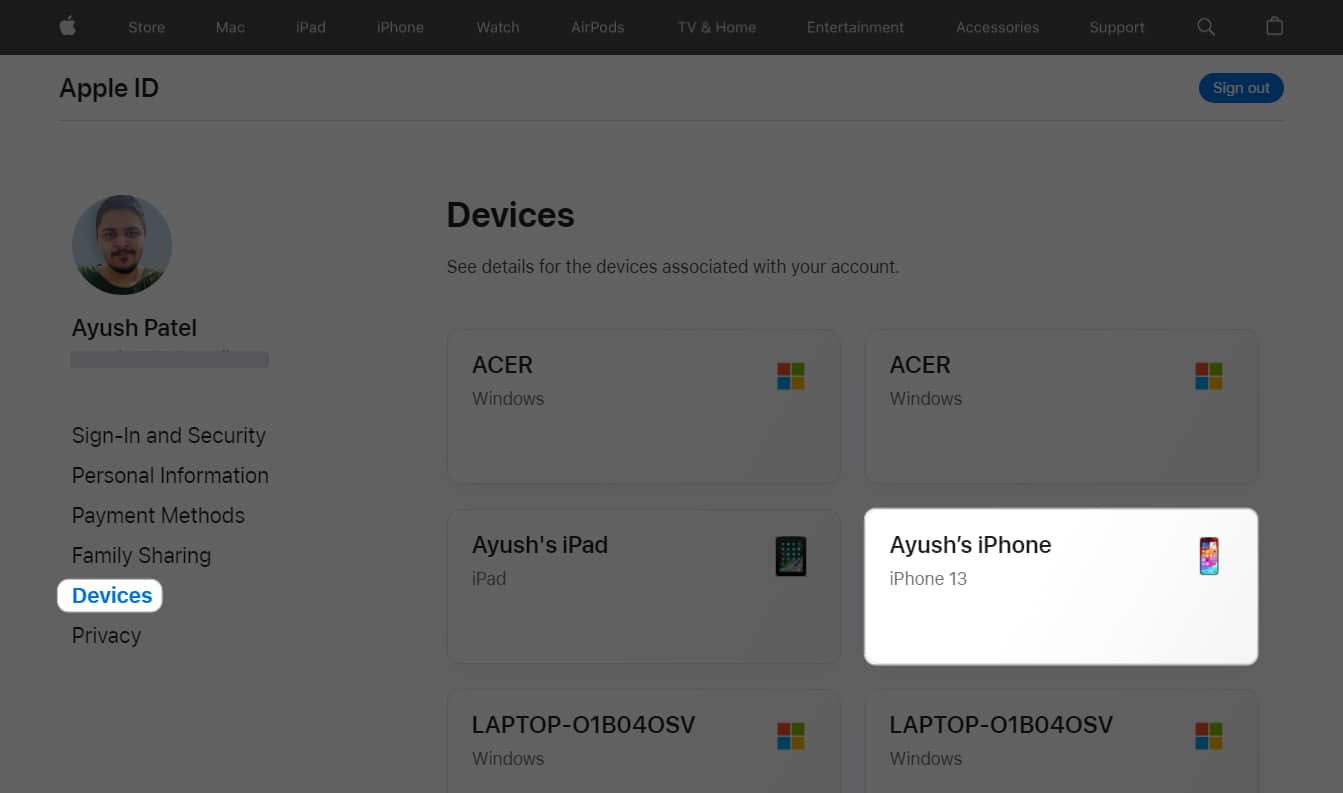
- Select Devices from the list of options available on the left.
- Select iPhone from the list of trusted devices.

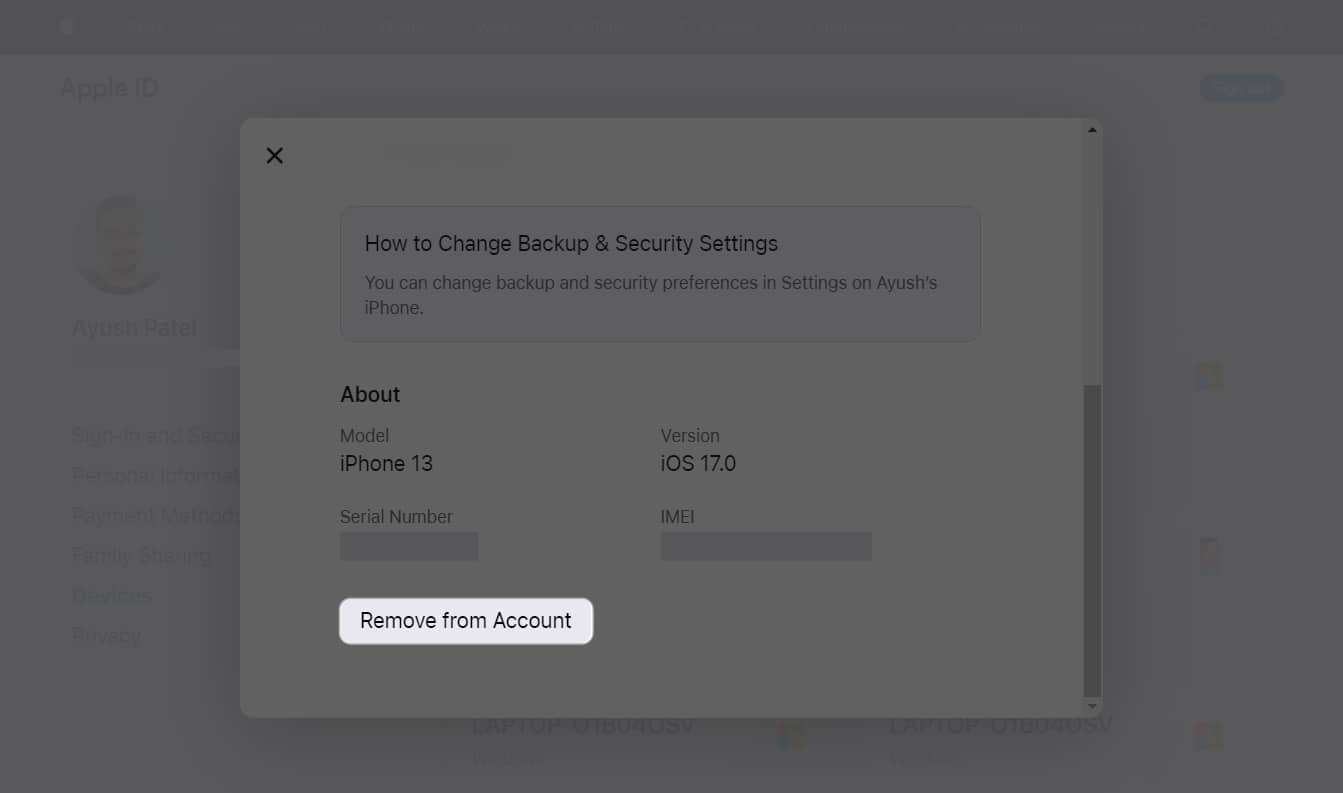
- Scroll down and click Remove from Account.
12. Clean the iPhone and inspect it for damage
Once you complete the steps that I’ve mentioned above, you may want to clean your iPhone with a soft, damp cloth and inspect it for damage. This will ensure that you can get the maximum value out of your old iPhone.
If your iPhone is somehow damaged beyond cosmetic blemishes in a way that affects its function, you might want to get it fixed by a professional. Even though you can always sell your old iPhone without fixing anything, I won’t recommend this as it might significantly reduce the resale value.
13. Find the original accessories and box
Apart from cleaning your iPhone and inspecting it for damage, you must also ensure that you gather all the original accessories and packaging before selling it to the new owner. iPhones with original accessories and undamaged boxes sell at a much higher value than the ones without them.
Wrapping up…
So, these are some of the essential things you must do before giving away your device to anyone (or selling it). Of course, it’s a little time-consuming. However, it’s better to go through the grind in order to keep your precious data as safe as possible.
So, which device are you planning to switch to?
Also read:
- Best buyback services to sell your iPhone
- Best places to buy refurbished iPhones
- How to change iPhone backup location on Mac and Windows
🗣️ Our site is supported by our readers like you. When you purchase through our links, we earn a small commission. Read Disclaimer.