Wi-Fi is the preferred medium to connect with the amazing world wide web. After updating the latest macOS, you may face some Wi-Fi issues like no internet, frequent disconnection, failure to join a network, low net speeds, and many more. Thankfully, these problems can be addressed successfully by following one or a combination of the solutions mentioned below. Let’s jump right in and fix Wi-Fi not working issue.
- Reboot your router
- Reboot your Mac
- Forget the Network and reconnect your it
- Update Software on your Mac
- Try using the 5GHz band
- Run Apple Diagnostics
- Use Apple’s Wireless Diagnostics
- Check out the DNS Settings
- Change the DNS Setting for Your Network
- Reset your SMC, PRAM or NVRAM
Keep in mind:
- Make sure the router is not overheating. Ensure that it hasn’t been covered or placed at a location where there isn’t much ventilation
- Be sure not to put the router on or near the large metal surfaces. For instance, if it’s placed on a filing cabinet or near the radiator, it won’t work properly
1. Reboot your router
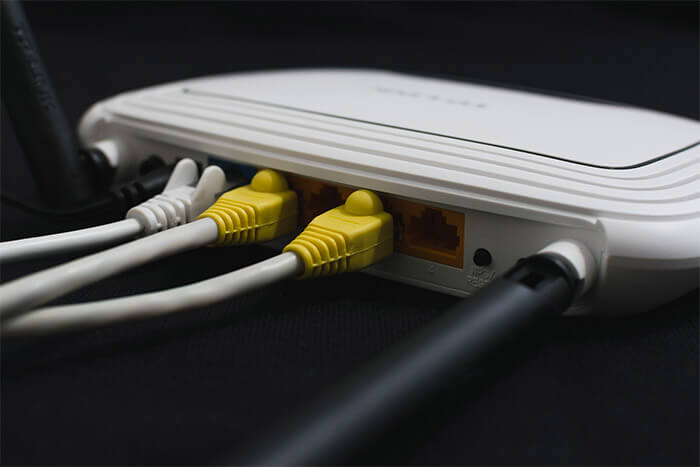
One of the first things you should try to resolve the Wi-Fi issues is to restart the router. To do so, disconnect the router from power for a few seconds and then plug it back in. More often than, it can get your job done.
2. Reboot your Mac
Believe me or not, this little trick has worked several times for me. Therefore, I would suggest you try it out as well. Click on the Wi-Fi menu and turn it off. Now, click on the Apple menu and select restart.
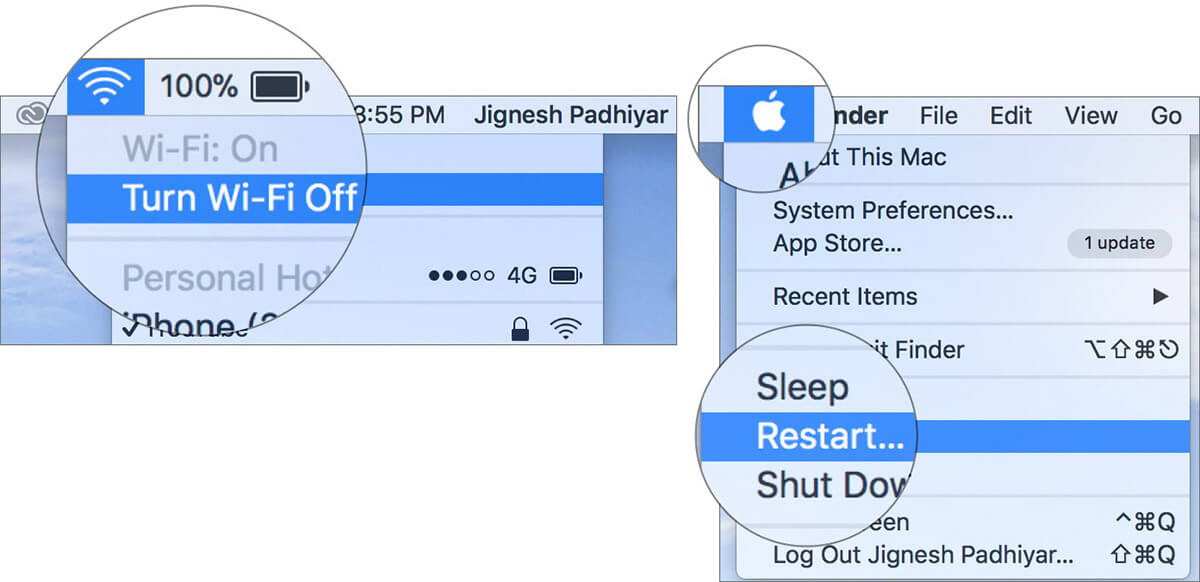
Once your computer has rebooted, turn on Wi-Fi. It should start working now. If it has, wonderful! But if it’s not the case, move on to the next solution.
3. Forget the Network and reconnect MacBook to it
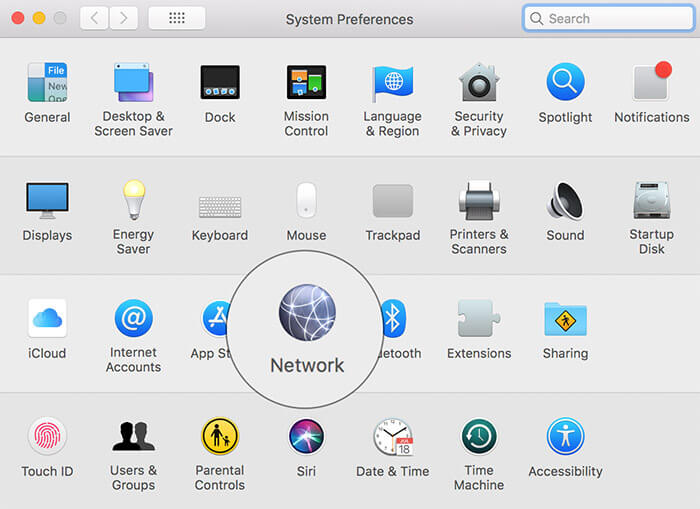
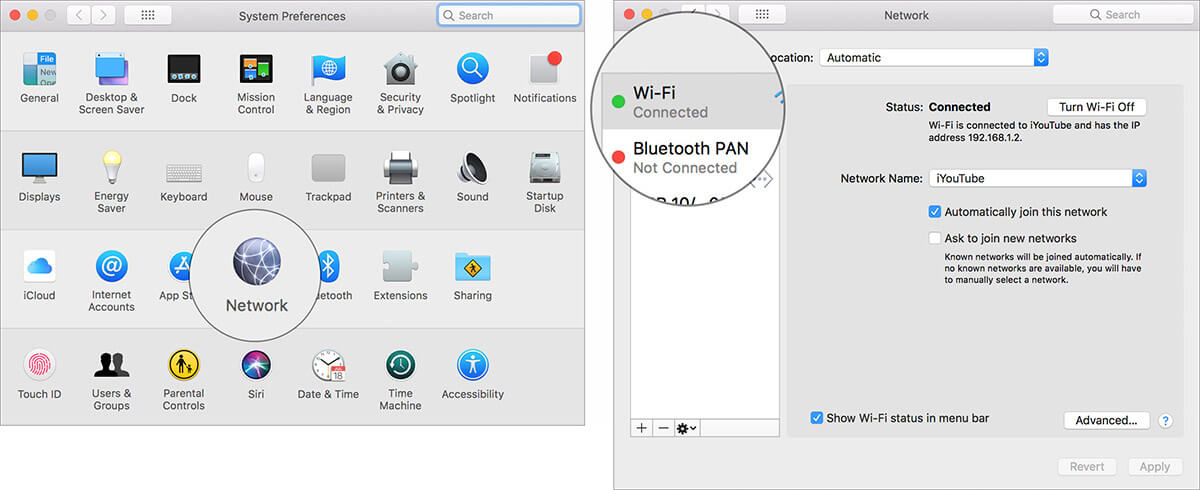
- Open System Preferences and click on Network.
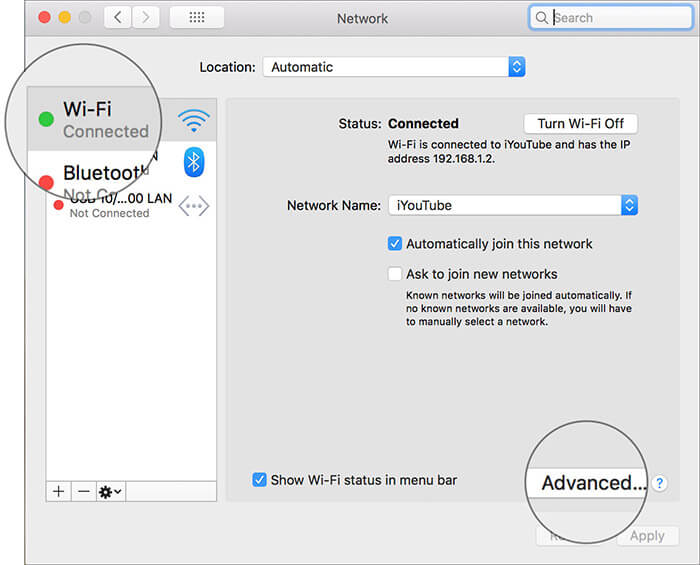
- Now, choose Wi-Fi in the list on the left and click Advanced.
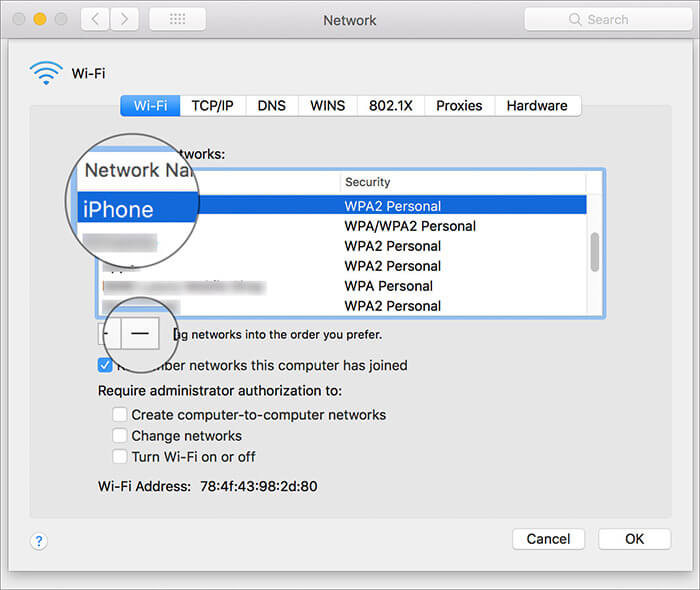
- Next, choose the network you want to forget and then click on (-) to remove.
- Now, try to reconnect to the network.
4. Update Software on your Mac
“Software Update” has always been one of the most trusted solutions for fixing common or miscellaneous issues. Moreover, Apple keeps on releasing update with several bug fixes and performance improvements. So, give it a chance as well.
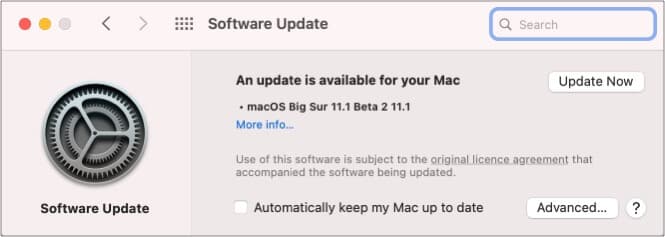
To download and install the latest version of macOS, open System Settings, click on Generat, and finally click on Software Update Now.
5. Try using the 5GHz band
If you are still struggling to fix the problem, try switching to the 5GHz band, if it’s available. The reason why I suggest you give it a chance is that it provides more bandwidth as compared to the 2.4GHz band. Moreover, it’s more efficient.
To get started with the 5GHz band on your dual-band router, make sure to separate the 2.4GHz and 5GHz networks on router. It would be better to give them different names.
You can set your Mac to join 5GHz. To do so, head over to the System Preferences → Network pane. Then, click on Wi-Fi and select the Advanced button. Finally, you have to drag the 5GHz network to the top.
6. Run Apple Diagnostics
“Apple Diagnostics” can help you discover the root of the issue. So, run them on your notebook to find out the issue.
- First off, disconnect all the external devices. I mean, if you have connected your Mac to earphones, disconnect them.
- Now, shut down the Mac.
- Next, turn on the computer while pressing and holding the D key.
- Next up, you would be asked to choose Wifi network and then your language.
Now, wait for a few minutes to allow Apple Diagnostics to find out the issues. Once done, it will offer suggestions for fixing them.
7. Use Apple’s Wireless Diagnostics
macOS comes with a Wireless Diagnostics utility that can let you detect common Wi-Fi issues. Moreover, this app can also help you monitor wireless connections for intermittent connectivity failures. It also notifies you when a connectivity failure is detected.
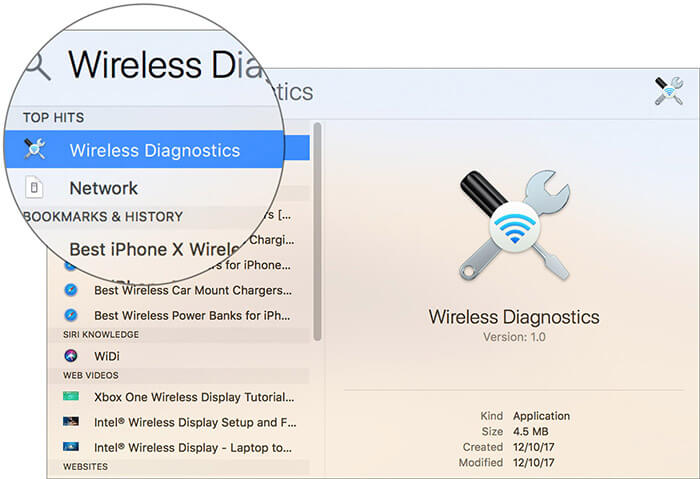
- Open Wireless Diagnostics on your Mac. You can take the help of Spotlight to open it quickly.
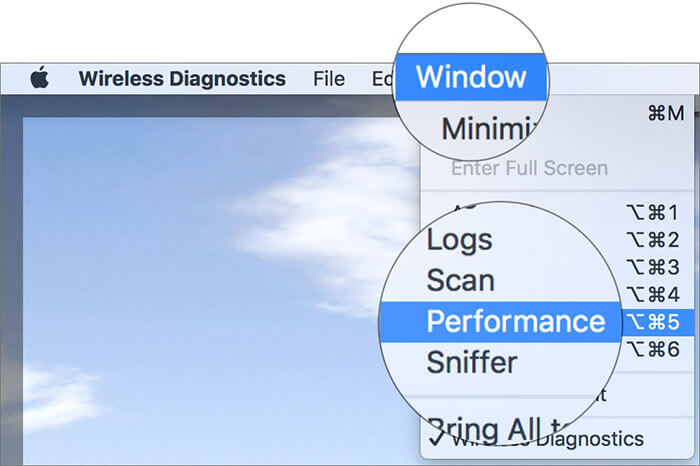
- Now, click on the Windows menu and select Performance.
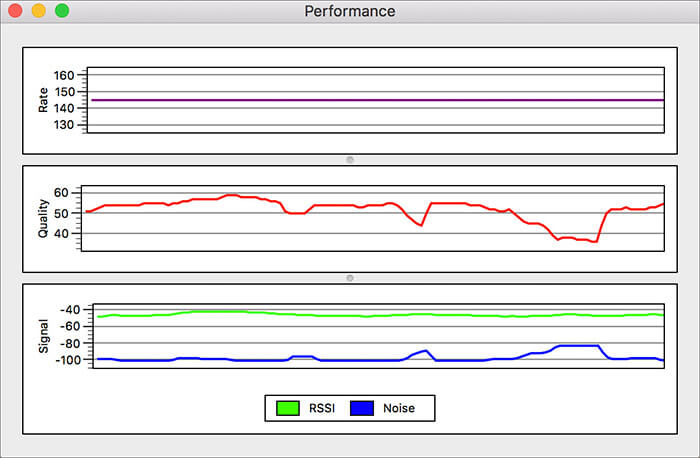
- Next, you should see three graphs, showing the transmission rate, signal quality, and signal and noise levels.
It shows the data rate of your network in Mbps. In most cases, the data rate is consistent. However, if you find it below par, it means something is wrong.
Check out the middle graph, which is named Quality, which shows the ratio of signal to noise. If it has a bit straight line with tiny spikes, it means it’s up to the mark. But if it’s not the case, something is coming in the way of the signal.
There is a bottom graph called Signal. It shows the signal strength and measured noise and is displayed as dBM or Decibel-milliwatts. If you are wondering what they are, let me tell you that they are the commonly used unit of the power of radio signals.
If the signal strength is between 60 and -10dBm and a noise level below -75dBm, it’s pretty good. Keep track of the graph to figure out when the signal dips below the expected level.
8. Check out the DNS Settings
Now that you have tried out all the above options, it’s time to give a close look at DNS Settings. Wondering what it is meant for? Well, let me clear it to you. It stands for Domain Name System and helps your Mac convert domain names such as apple.com into IP addresses. And just in case the DNS server, which the computer is using, is at fault, you can’t connect to any site by that name.
So, how do you find out whether the DNS is working or not? It’s quite simple. Open your web browser and enter the following URL:
https://17.172.224.47
Now, you should see the Apple website. If it’s the case, then the Internet connection is working properly and the problem could be with the domain names.
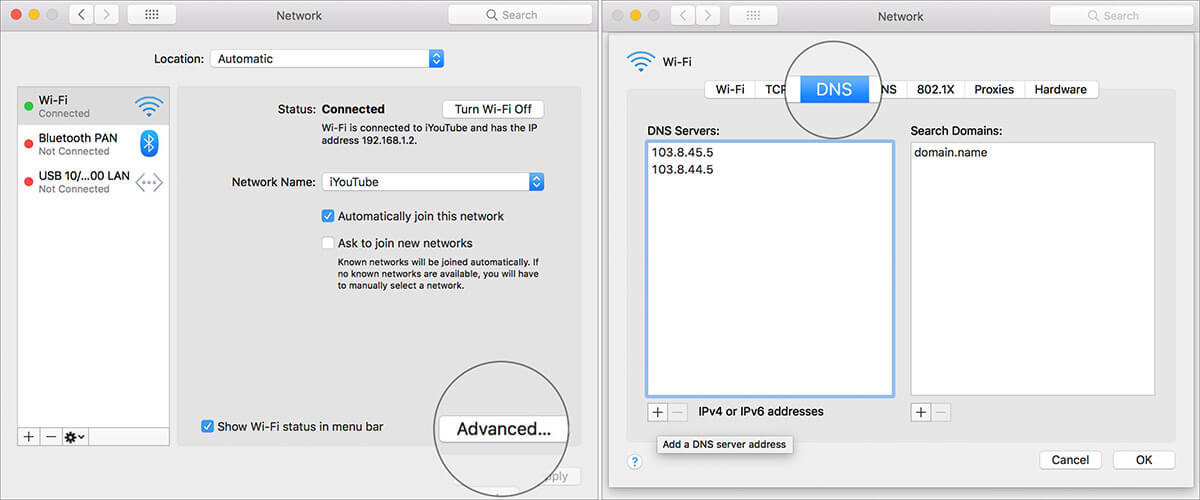
- To get rid of this issue, open the System Preferences → Network pane → choose your network connection in the list on the left.
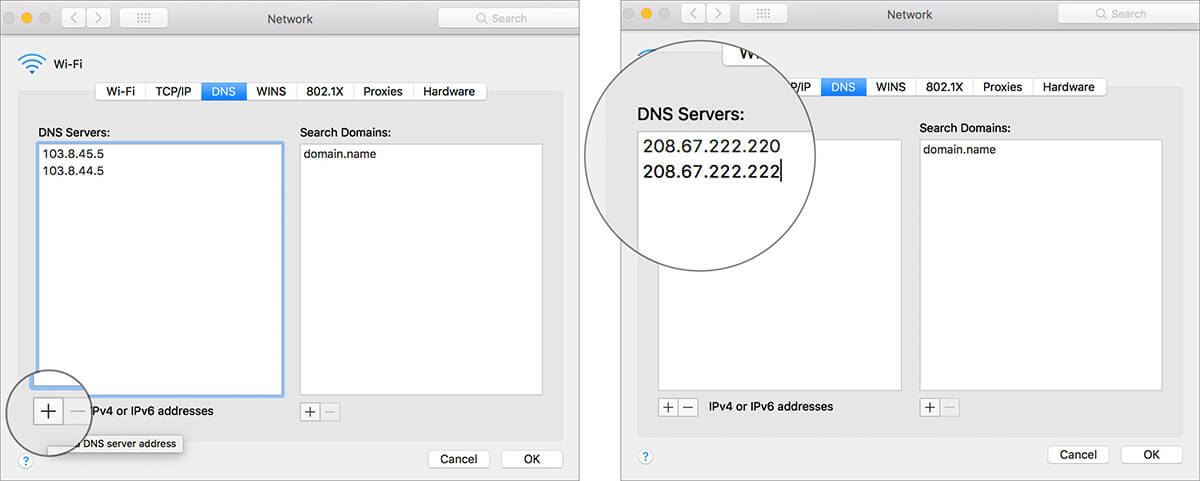
- Next, Click Advanced and select DNS. In DNS Servers field, IP addresses will appear.
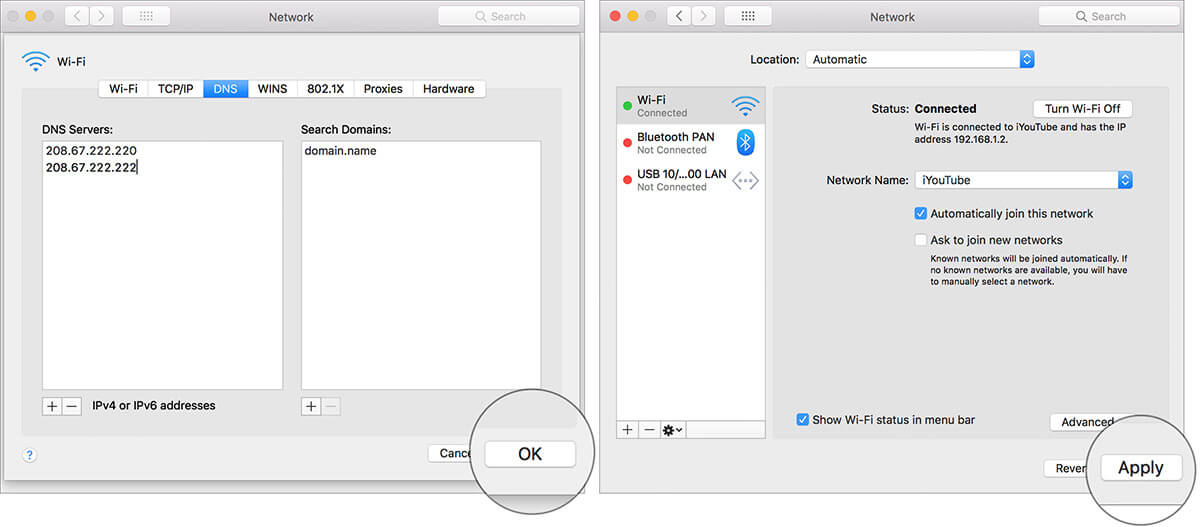
- Now, you need to click the plus-sign (+) button and enter 208.67.222.220. You have to repeat the same process using 208.67.222.222.
Important: These addresses are known as OpenDNS. As compared to the default servers, this free DNS service is considered to be more functional. - Up next, click OK → Apply.
9. Change the DNS Setting for Your Network
If none of the tricks have solved the problem, it would be worth changing the DNS setting for the network. Do note that you will have to delete your Wi-Fi preference file. Therefore, make sure to back them up.
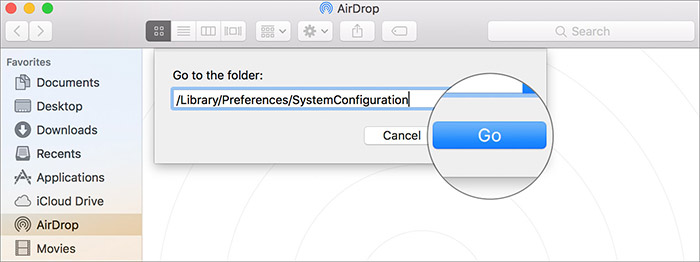
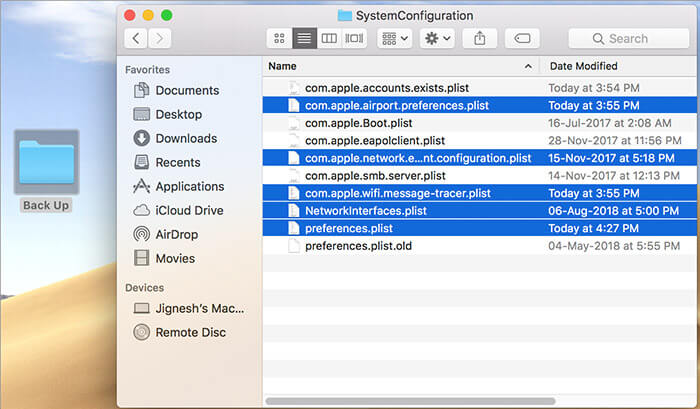
- Open Finder → Go → Go To Folder.
- Then enter the following code and then click on Go.
/Library/Preferences/SystemConfiguration/ - Now, locate the files mentioned below and then you need to drag them into a backup folder on your Desktop:
- com.apple.airport.preferences.plist
- com.apple.network.identification.plist
- com.apple.wifi.message-tracer.plist
- NetworkInterfaces.plist
- preferences.plist
Just in case, this trick doesn’t solve the problem, try creating a new Wi-Fi network location by adding custom MTU and DNS details.
Make sure to close all apps that may be using the Wi-Fi.
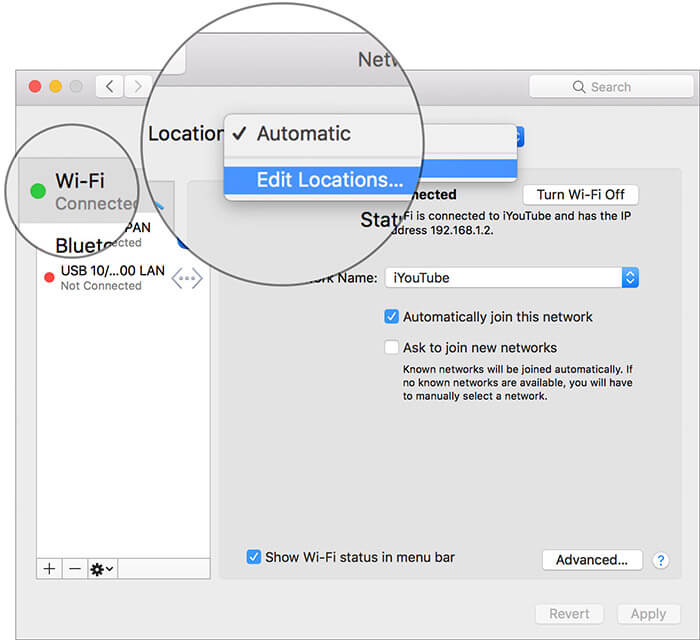
- Open System Preferences and click on Network.
- Now, click on Wi-Fi. Then, you need to click on the drop-down menu next to Location and select Edit Locations.
- Then, click the “+” to create a new location and then name it. Click Done.
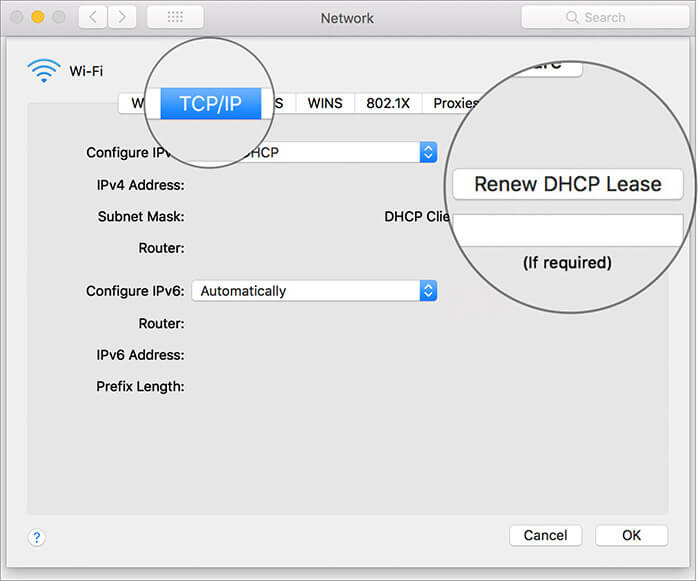
- Next, click on Advanced.
- Under TCP/IP tab, you need to select Renew DHCP Lease.
- Now, you will get a warning saying “Renewing DHCP lease will cause any unsaved changes to be lost. Would you like to apply your changes before renewing the DHCP lease?” Click on Apply.
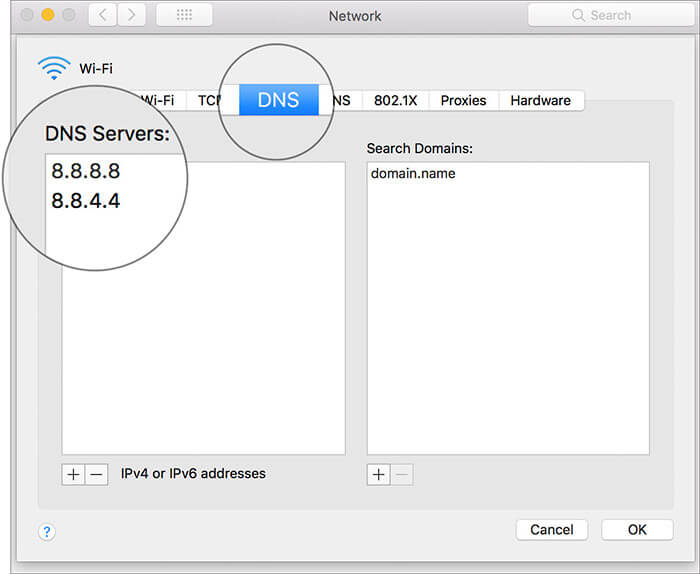
- Head over to DNS tab and add 8.8.8.8 and 8.8.4.4 to the DNS Servers list.
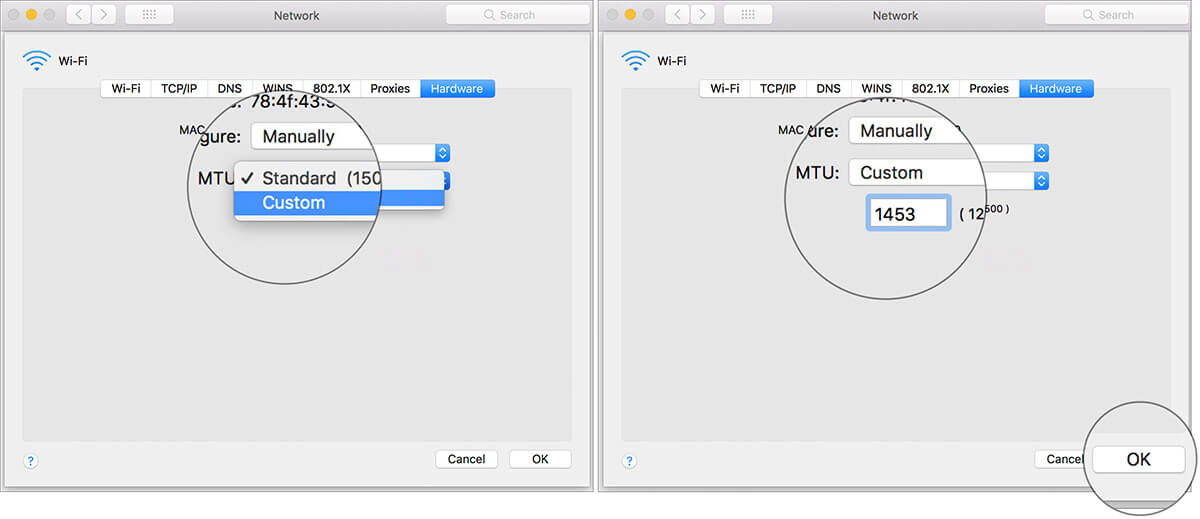
Note: For those unfamiliar, they are Google DNS that is considered to be faster and more efficient. - Up next, select Hardware and Configure Manually.
- Then, you need to change MTU to Custom and set it to 1453 and click OK.
- In the end, click on Apply.
10. Reset your SMC, PRAM or NVRAM
On a few occasions, I have succeeded in fixing the Wi-Fi problem by resetting the PRAM/NVRAM and the SMC. If you are unfamiliar with them, let me tell you that they are known as System Management Controller and can help you in getting rid of this issue.
That’s it!
FAQs
When router settings are incorrect, the DNS is altered, there is a fault on the Internet service provider’s end, or due to macOS Software bugs, misbehaving apps, and externally connected devices, your Mac may be connected to Wi-Fi but not work.
The solutions in this article help you address all these issues.
When the Mac and Wi-Fi router are placed at a distance, signal strength is low. As a result, your Mac may often drop the connection. Similarly, when you have not restarted your router and Mac in a long time, such issues may creep in.
Quit all open apps first. Then, try joining a Wi-Fi network, if you aren’t already. Next, press the option key and click on the Wi-Fi icon in the top menu bar. Finally, click on ‘Open Wireless Diagnostics’ and follow the on-screen instructions.
Hopefully, you have finally gotten the better of the issue. Let me know which one of the above solutions worked for you.
You might want to read these posts as well:
- How to change the system accent color on Mac
- Create a Bootable macOS Mojave USB Install Drive
- How to find a router IP address on Mac (Easy ways)
- How to fix IP address conflict on Mac: Simple solutions to fix it!
🗣️ Our site is supported by our readers like you. When you purchase through our links, we earn a small commission. Read Disclaimer.

