
A digital calendar is a must-have if you juggle multiple commitments and deadlines — or maybe even to aid poor memory. If you’ve never used your iPhone’s built-in Calendar app other than for checking the day’s date, you’re missing out on a lot. The Apple Calendar has pretty nifty features that’ll make your life much easier.
Here are some useful tips and tricks that will help you master iPhone Calendar app in no time!
1. Create reminders and set alerts
Adding your following appointments and schedules is one thing, but it’s useless if you don’t look at them. Setting alerts and reminders ensures that your iPhone reminds you of an upcoming event a week or a few days before.
First, you’ll have to create an event if you haven’t done so yet.
- Open the Calendar app.
- Tap the Add (+) button at the upper right
- Add a title to your event.
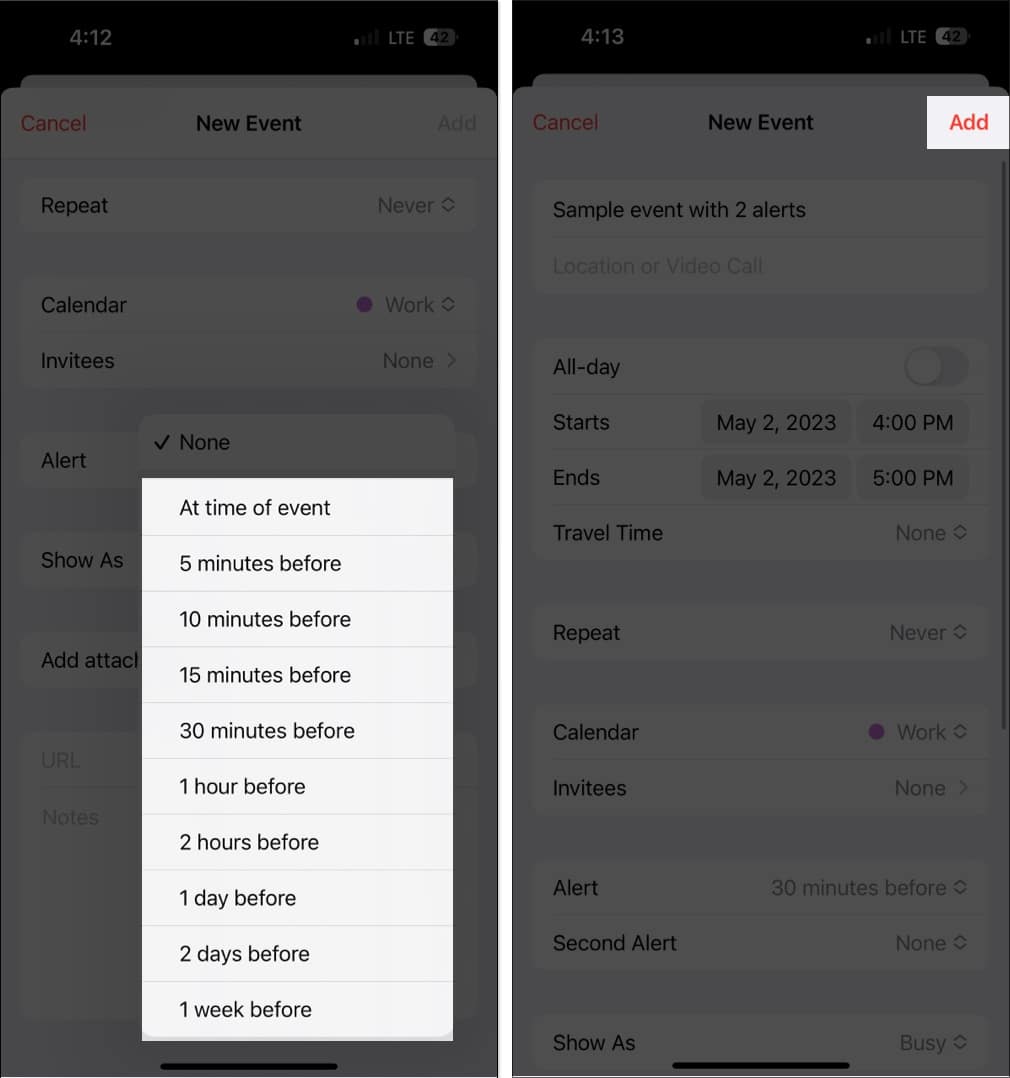
- Then scroll down and tap Alert.
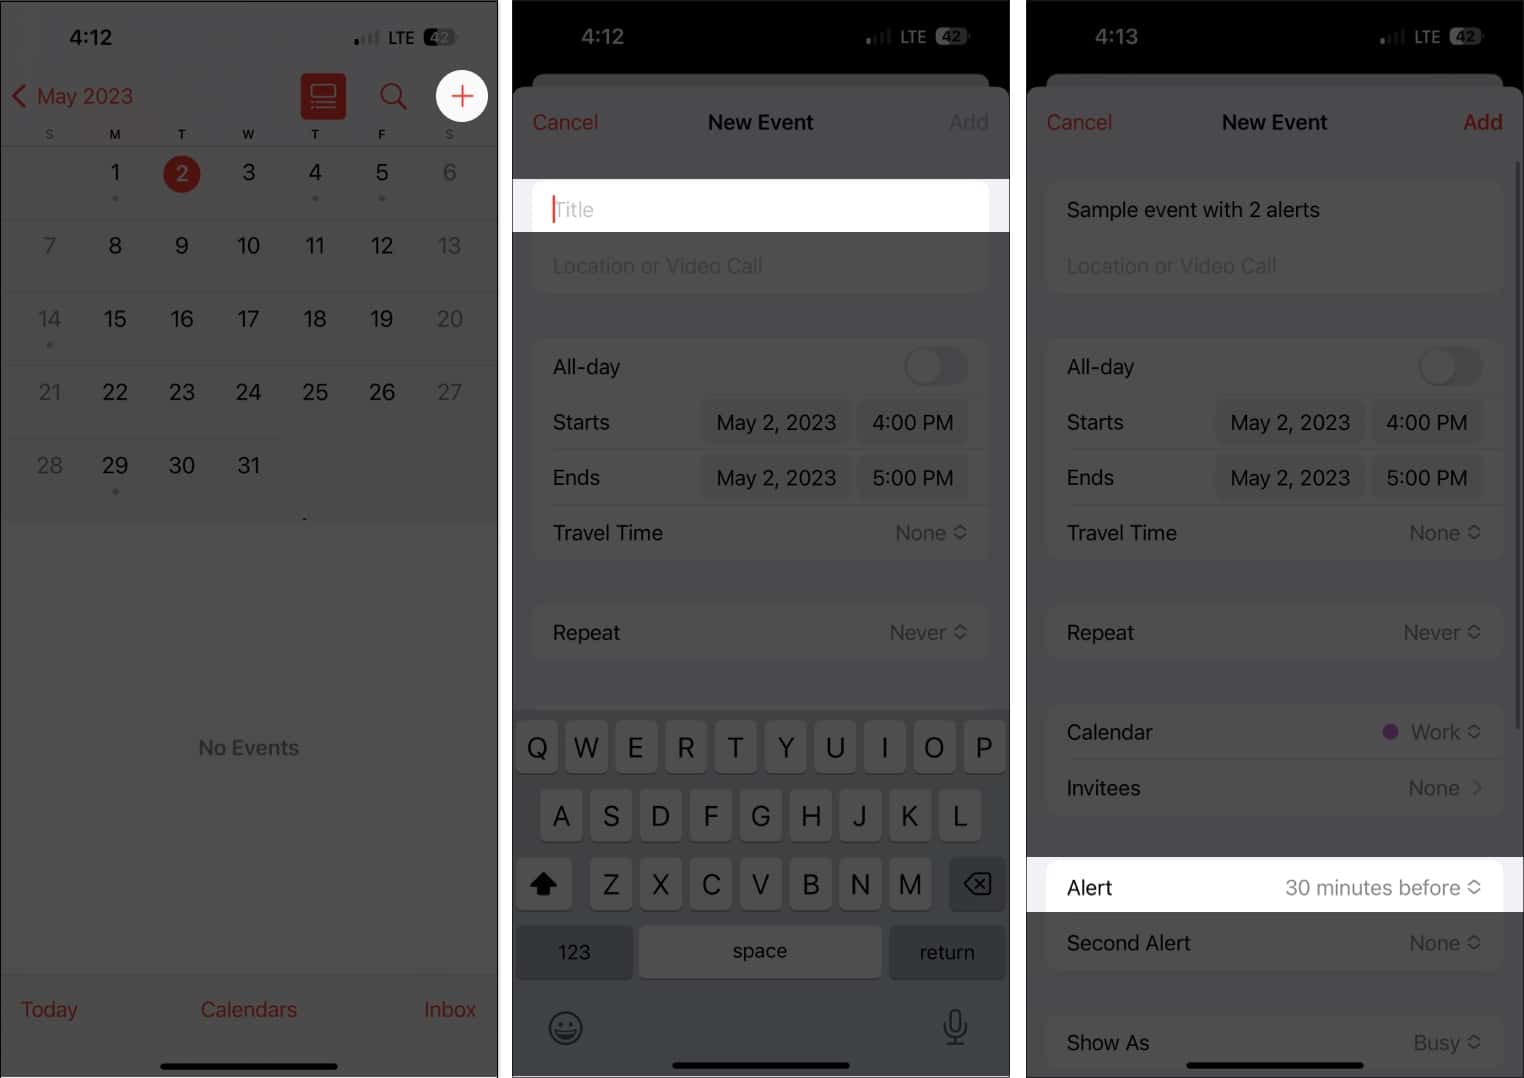
- Select from the options from 1 week before to At the time of the event.
- Select Add.

If you’re the forgetful type, you can add another alert by tapping the event → Edit. Select Second Alert and choose a time for the alert.
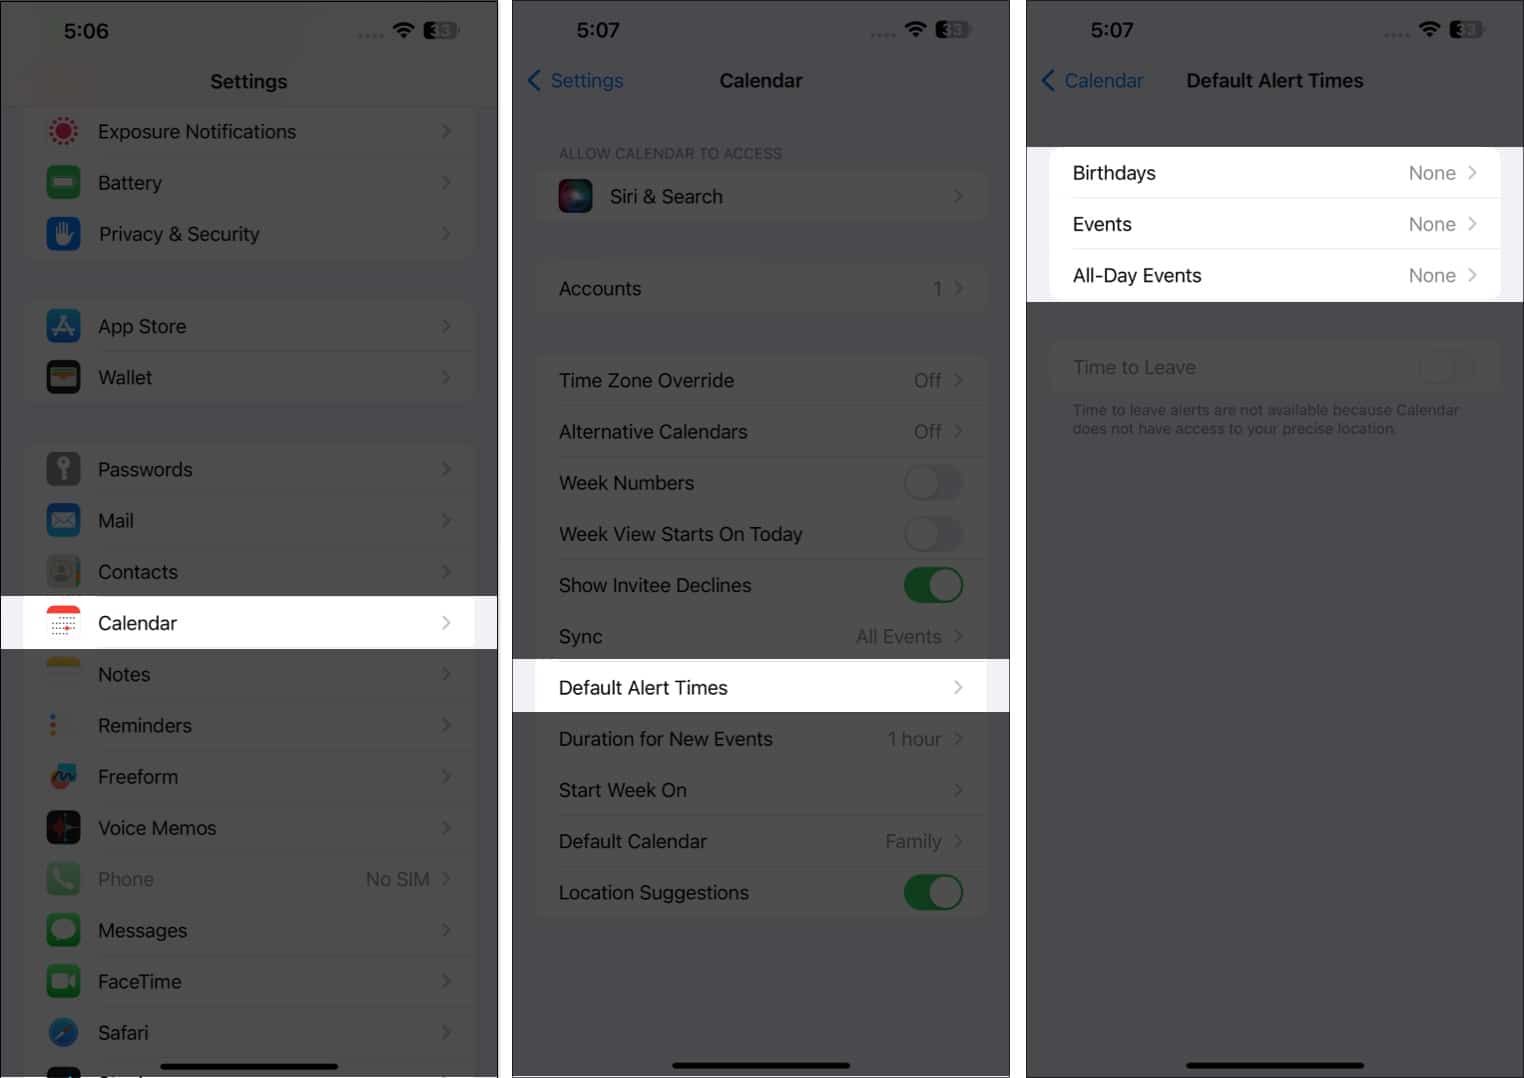
You can also set up a default alert time for all your appointments instead of wasting precious time setting up an alert every time you create a new event. To do this:
- Head to Settings.
- Select Calendar.
- Scroll down to Default Alert Times.
- Set up default alert times for Birthdays, Events, and All-Day Events.

2. Select your preferred calendar view
There are different ways to view your calendar — from a general year view to a more detailed day view.
- Yearly view: To view the entire year, just tap the month at the top left of the calendar to zoom out to the year. You can swipe up and down to see the previous and future years ahead.
- Monthly view: From the year view, tap a month to switch to a monthly view. A monthly view lets you view days with schedules — symbolized by grey dots under them. You can also swipe up and down to view other months.
- Weekly view: To see an overview of your weekly schedule, turn your screen sideways and view your calendar. This format will also show hourly breakdowns for each day.
- Day view: Tap Today to see your day’s hour-by-hour schedule. Tap another day or swipe sideways to see your schedule for a different day.
- Tap the List button on top of the screen beside the Search button to see all your upcoming schedules for the day in a list.
- You can always head back to the present day by tapping Today at the bottom of the screen.
3. Create or add a new calendar
Managing multiple aspects of your life on a single calendar can be perplexing. With Apple Calendar, you can create separate calendars to have a dedicated calendar for your work, personal life, and much more.
For example, if you have multiple projects, having a calendar for each one can help you sort out your schedules and commitments much more efficiently and prevent overlap.
It’s also color-coded, so you’d know at a glance where the event of schedule plotted in your calendar belongs.
To create a new one:
- Open the Calendar app → Tap Add Calendar at the bottom.
- Tap Add Calendar on the popup menu. Choose any of the following:
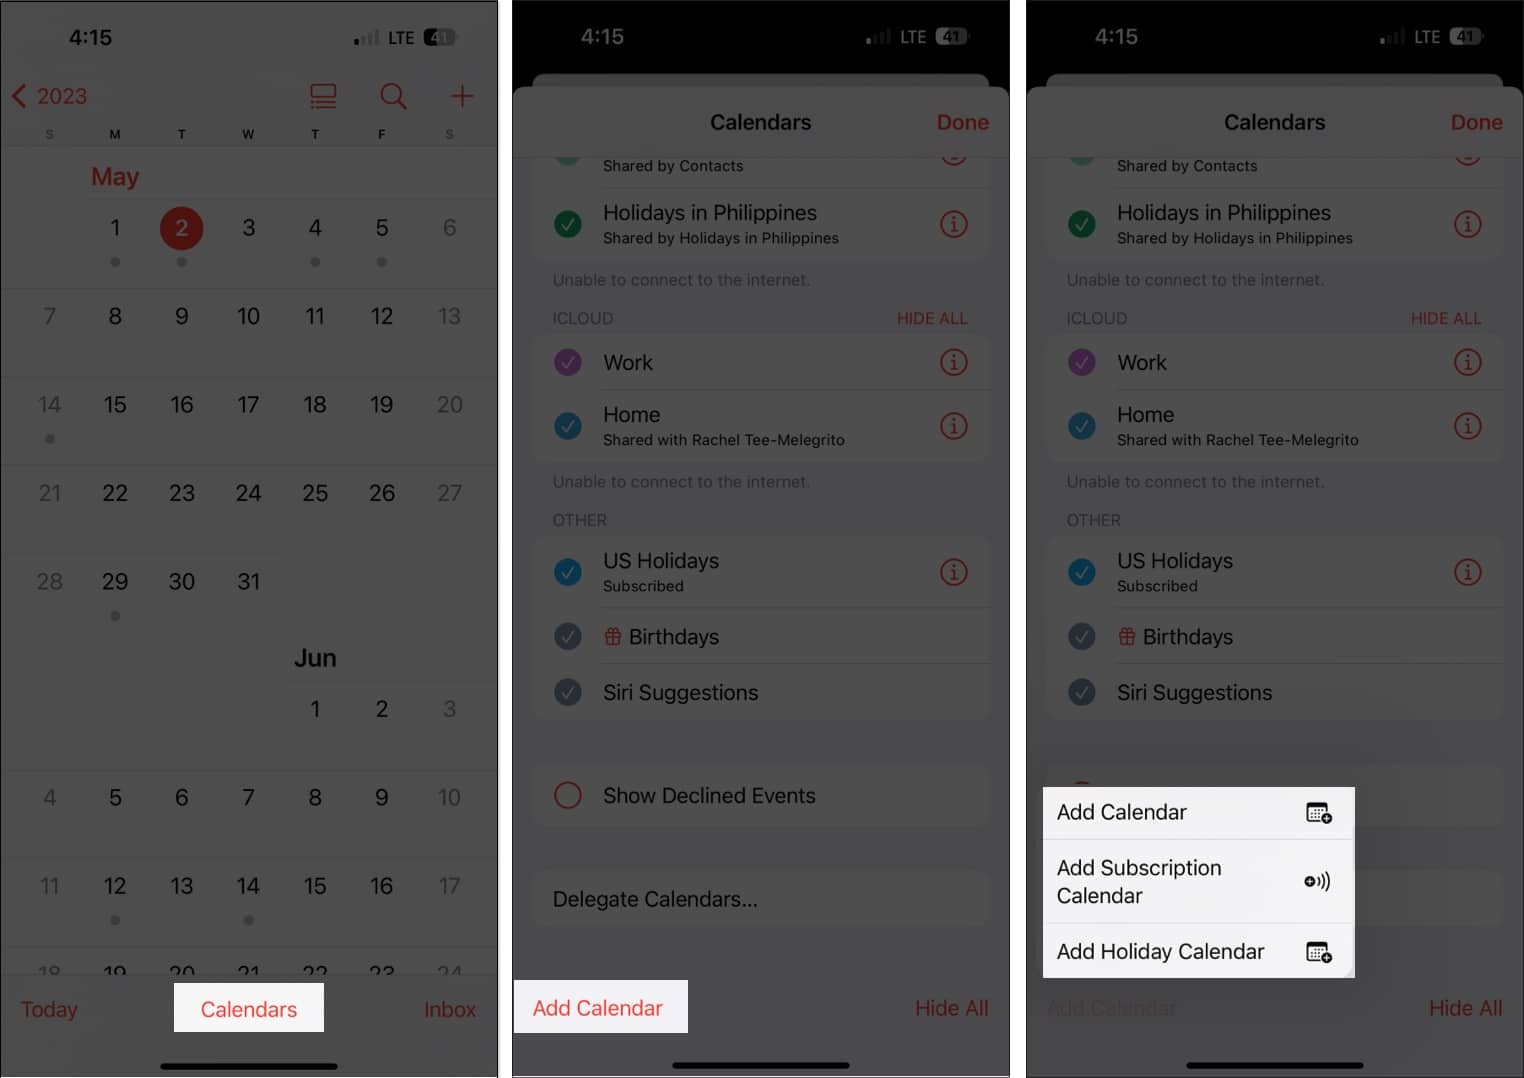
- Add Calendar: You’ll need to input a calendar name, the email address you want to use, and the color you want to assign for the calendar.
- Add Subscription Calendar: You’ll need to enter the link to the calendar you want to subscribe to. Subscription Calendars are read-only data feeds that keep you updated on events as the data provider updates them.
- Add Holiday Calendar: Choose the country you want to add to add their holiday to your calendar.

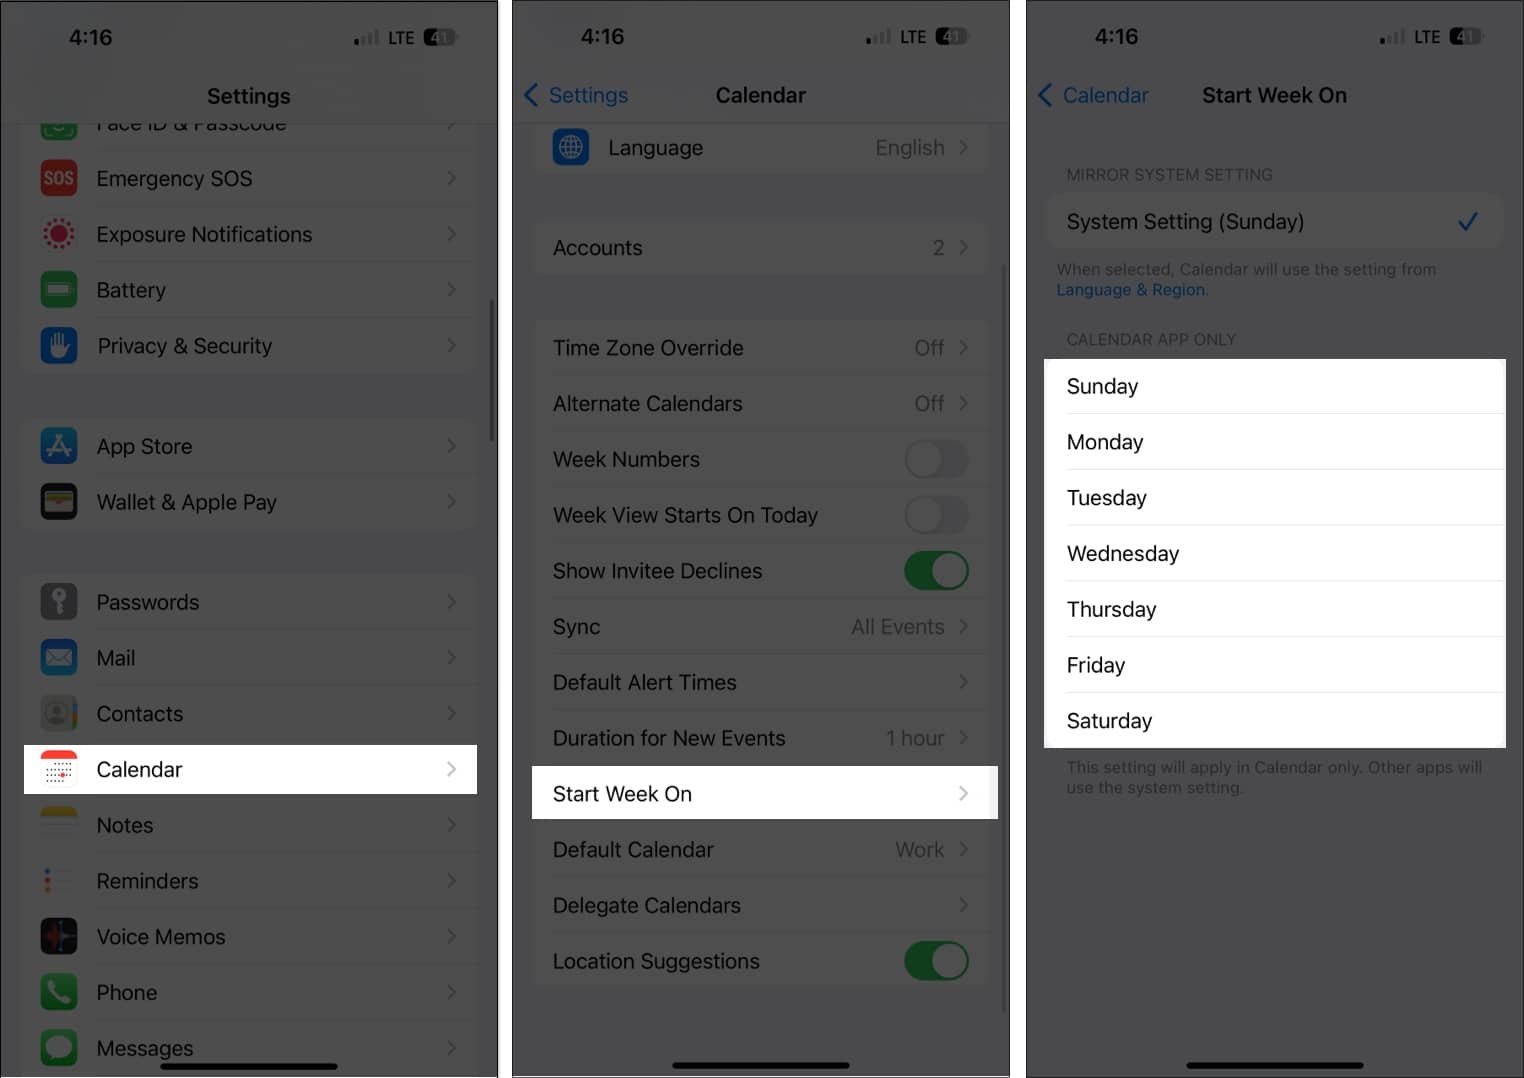
4. Control when you want to start the week
For some, the week starts on a Sunday, while others begin their week on a Monday. The iPhone Calendar starts the week on a Sunday by default, but you can choose a different day.
To do this:
- Go to Settings → Calendar.
- Scroll down and tap Start Week On → select the day you prefer.

5. Open or share files before a meeting
You can add attachments to your calendar invite to easily access or share them with your invitees.
- Go to your event.
In any Calendar view, tap on a particular day to see the events for the same. - Tap Edit → Add Attachment.
- Locate the file you want to add. Use the search bar or the Browse tab to look for it in other locations.
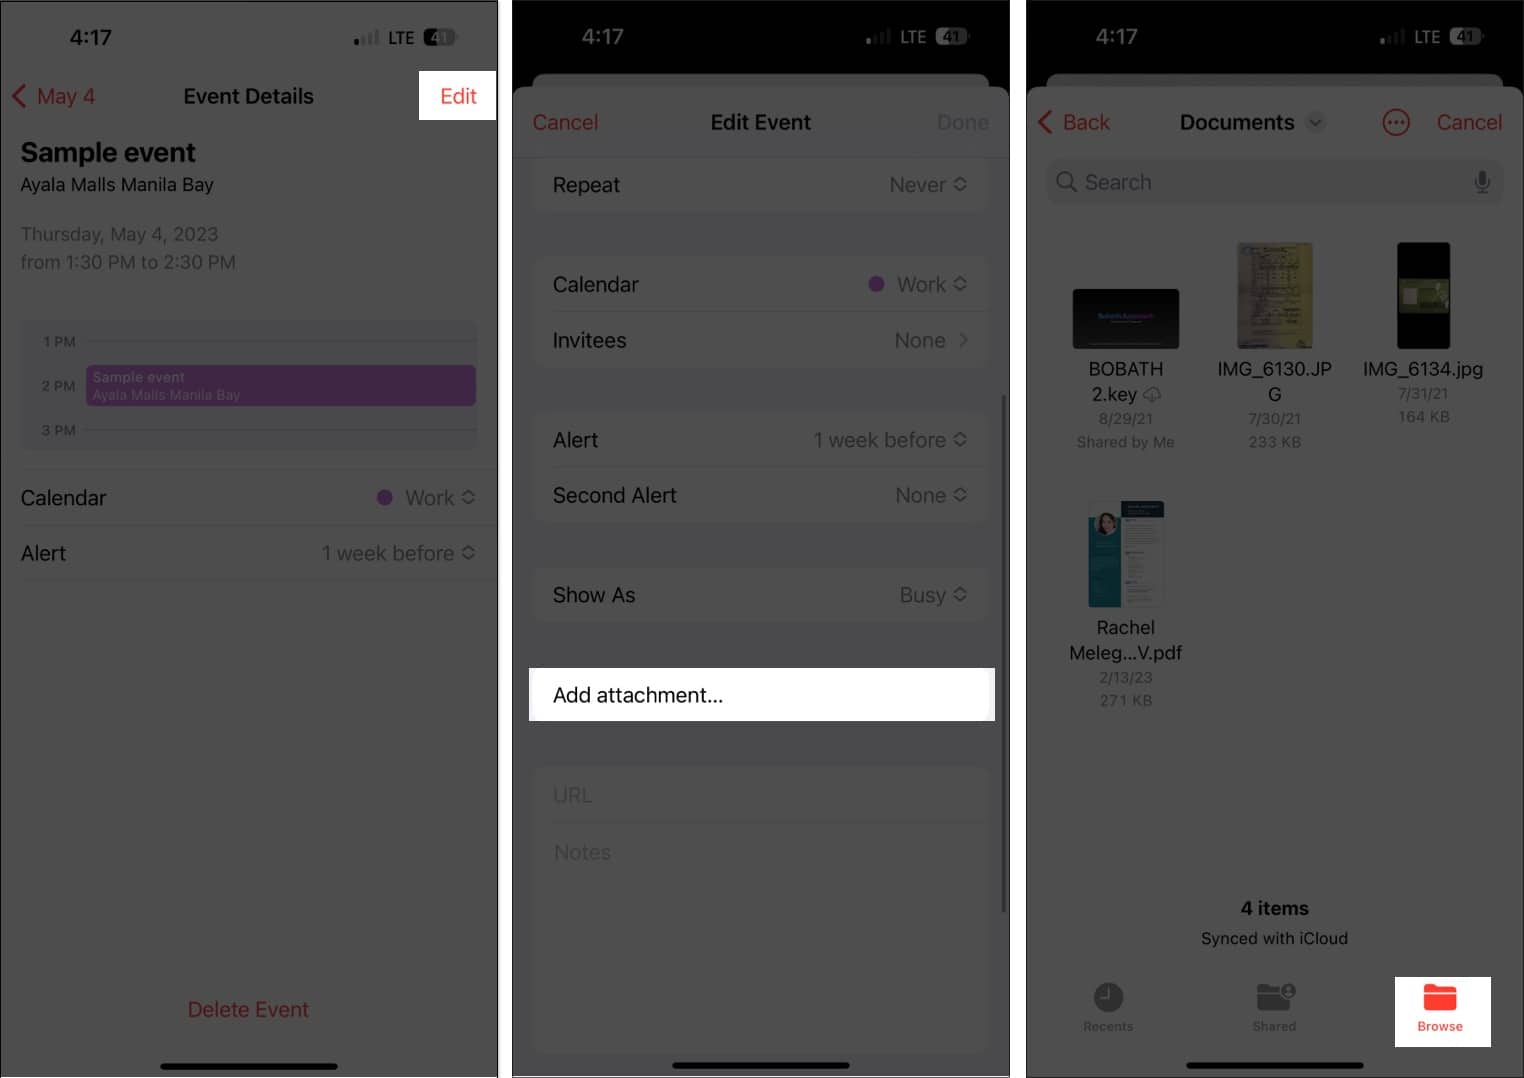
- Tap Done.

To remove the attachment from the event, just go to the event, tap Edit, then swipe left over the attachment and select Remove.
6. Let Siri add events from other apps
Siri can also check your activity from other apps like Messages, Mail, and Safari to update your calendar with other events, such as an online meeting sent through your email, a hotel booking, or a flight reservation.
To let Siri do this:
- Go to Settings → Calendar.
- Select Siri & Search.
- Turn on Show in App.
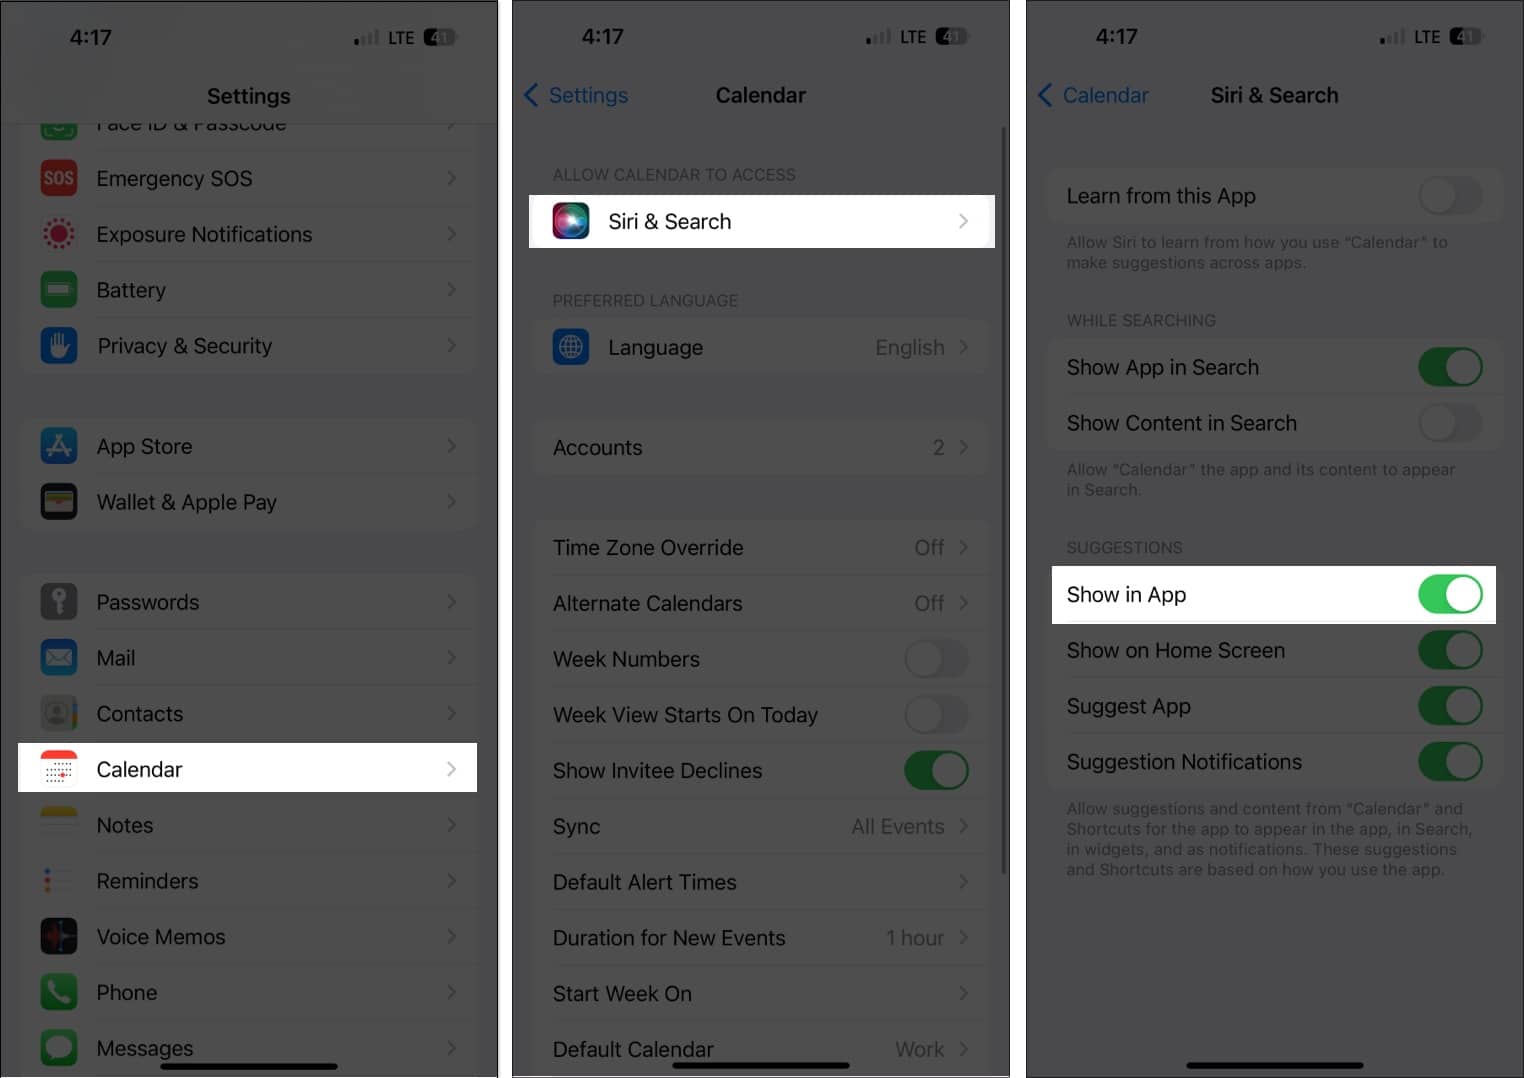

This enables Siri to suggest events it finds in other apps.
7. Drag and drop an event to organize your schedule
The Calendar list view not only lets you see your daily schedule’s overview, but it also allows you to quickly organize and move your schedule to another day.
Just select an event and drag it to another time slot. You can do this either in your weekly or daily view.
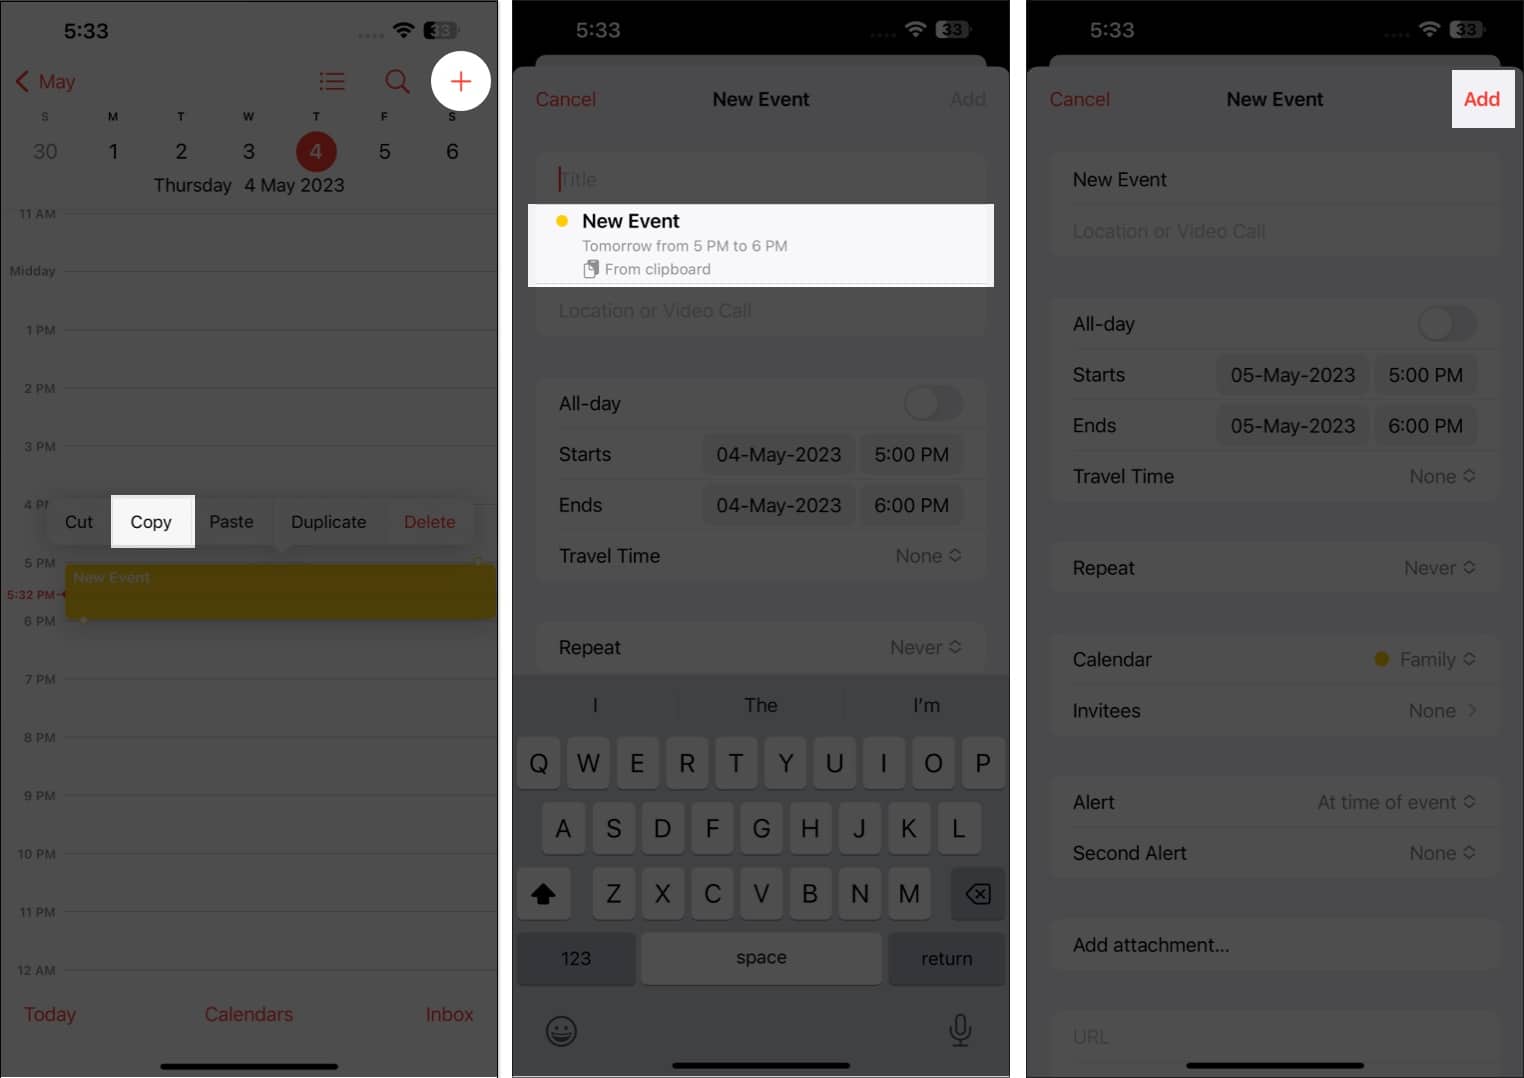
8. Copy and paste events
If an event is recurring, you can easily copy-paste them into your calendar. Just touch and hold the event and select Copy.
- Tap and hold the timeslot where you want to paste the event. This will create a new event.
- The copied event will appear below the Title, along with other details. Tap it and select Add.

9. Maximize Siri
You can also use Siri, the trusted Apple digital assistant, to create events in the Calendar for you. Just say, “Hey Siri, create a new event in my Calendar,” and fill it in with all the details.
For any changes in the event, just say something like, “Can you change an event in my schedule on [date]?” Select the event you want to edit and inform Siri of the changes you want to make.
10. Delegate your calendar to others
Another great Calendar feature is the ability to delegate your calendar to others. You can let an assistant or a family member manage your schedule, including adding, editing, responding to, and deleting invites. To do this:
- Open the Calendar app → Choose Calendars at the bottom.
- Tap the info (i) button beside the calendar you want to share.
- Select Add Person.

- Enter the email address of the person.
- Tap Add.
- Tap View & Edit beside the person’s name and toggle Allow Editing. Don’t toggle it if you only want to share a read-only view of your schedule.
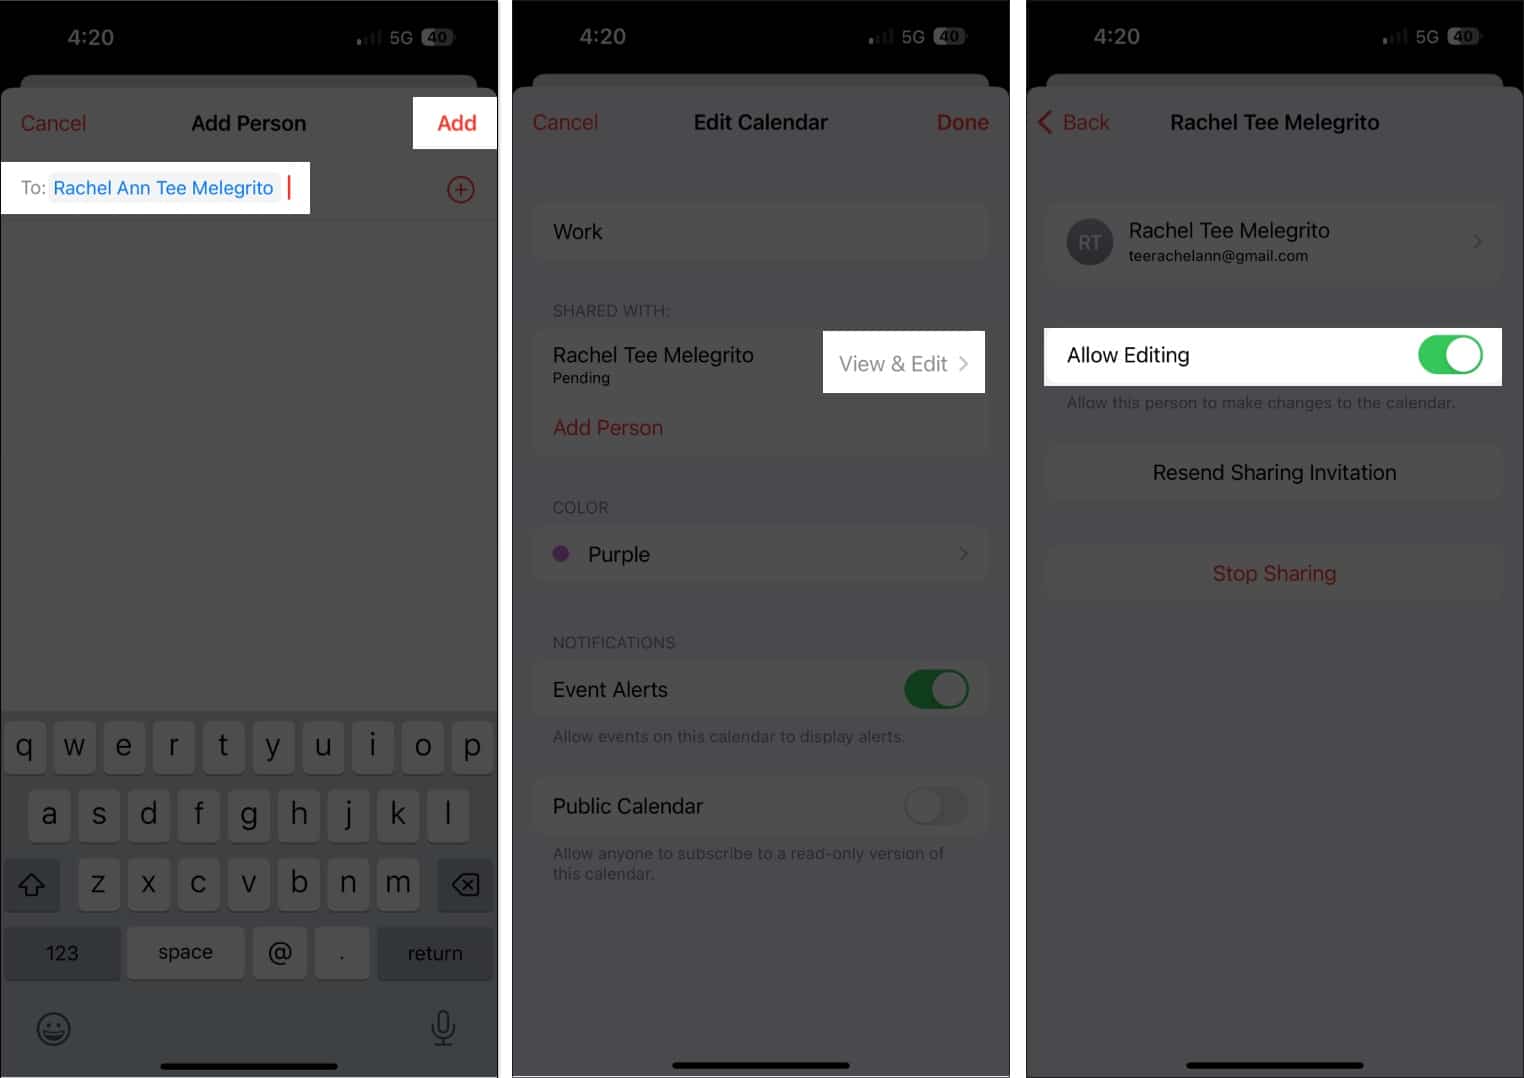

If the person didn’t receive your invitation to share your calendar, tap Resend Sharing Invitation. You can cancel sharing anytime by tapping Stop Sharing.
Note that you’ll be receiving notifications and alerts whenever the person you gave editing privileges to add, edit, or modify your calendar. You can toggle off Show Changes to turn off alerts and notifications about the shared calendar.
11. Access your calendar through any device
Placing all your schedules in the Calendar ensures you can easily access them when needed — except when you leave your iPhone behind. Don’t worry, though; you have the option to sync your Calendar across your Apple devices.
This feature is turned on by default, but if you turned this off in the past, then:
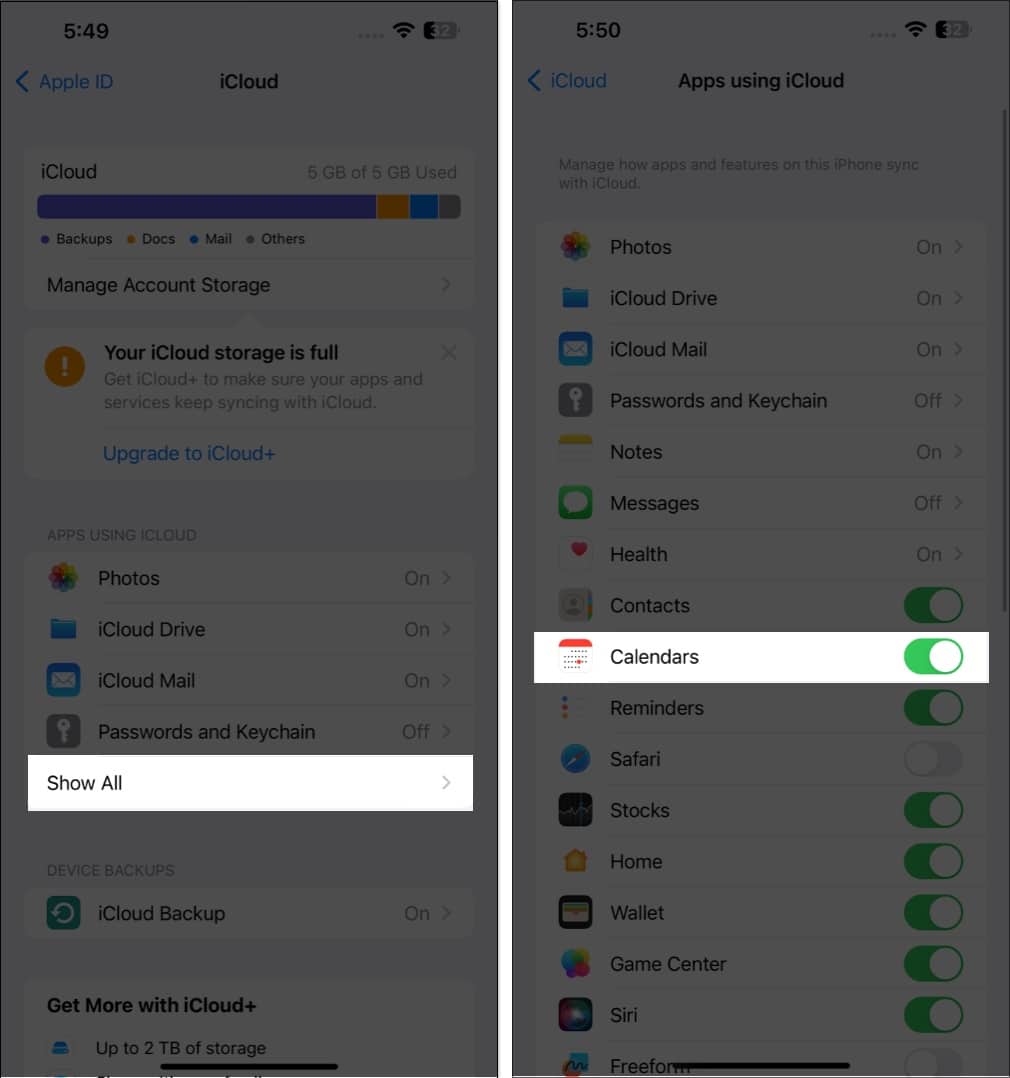
- Go to the Settings app → iCloud.
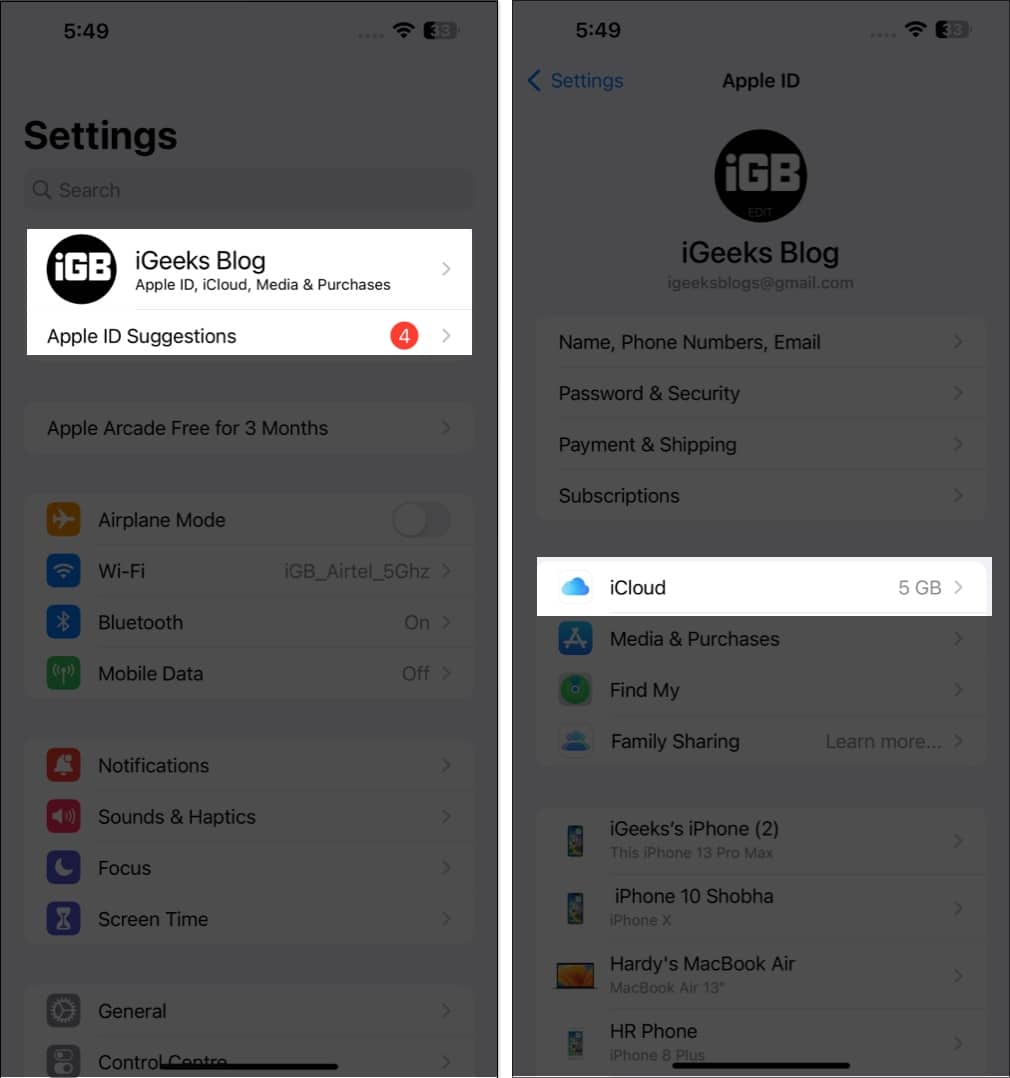
- Tap Show All → Toggle on Calendars.


Because it’s synced with your iCloud, you can go anytime to iCloud.com to access your calendar there.
12. Add a travel time
Adding an appointment to our calendars helps ensure we don’t miss them. But this doesn’t take into account factors like traffic jams and location. With Calendar, your iPhone will automatically notify you when it’s time to leave based on where you’re coming from and where you’re going.
Once done creating your event, tap Edit → select Travel Time. If you entered a location in the event, enter your starting location. If not, you can choose as little as 5 minutes to two hours as leeway for your transit to your scheduled event.
13. Sync events with CarPlay
Surprised? Don’t be. If you’re using Apple CarPlay, you can also see upcoming calendar events on your dash.
This can also display directions to the location if you’ve added an address to the event.
14. Show or hide individual calendars and all-day events
A cluttered calendar is counterproductive and can be a nuisance instead of helping you organize your life. That said, you have the option to view and hide individual calendars as well as all-day events.
15. Add your contacts’ birthdays
Are you the type who forgets birthdays? Then worry no more! Just input your contacts’ birthdays in their contact information and add them to your Calendar to receive a reminder on their birthday.
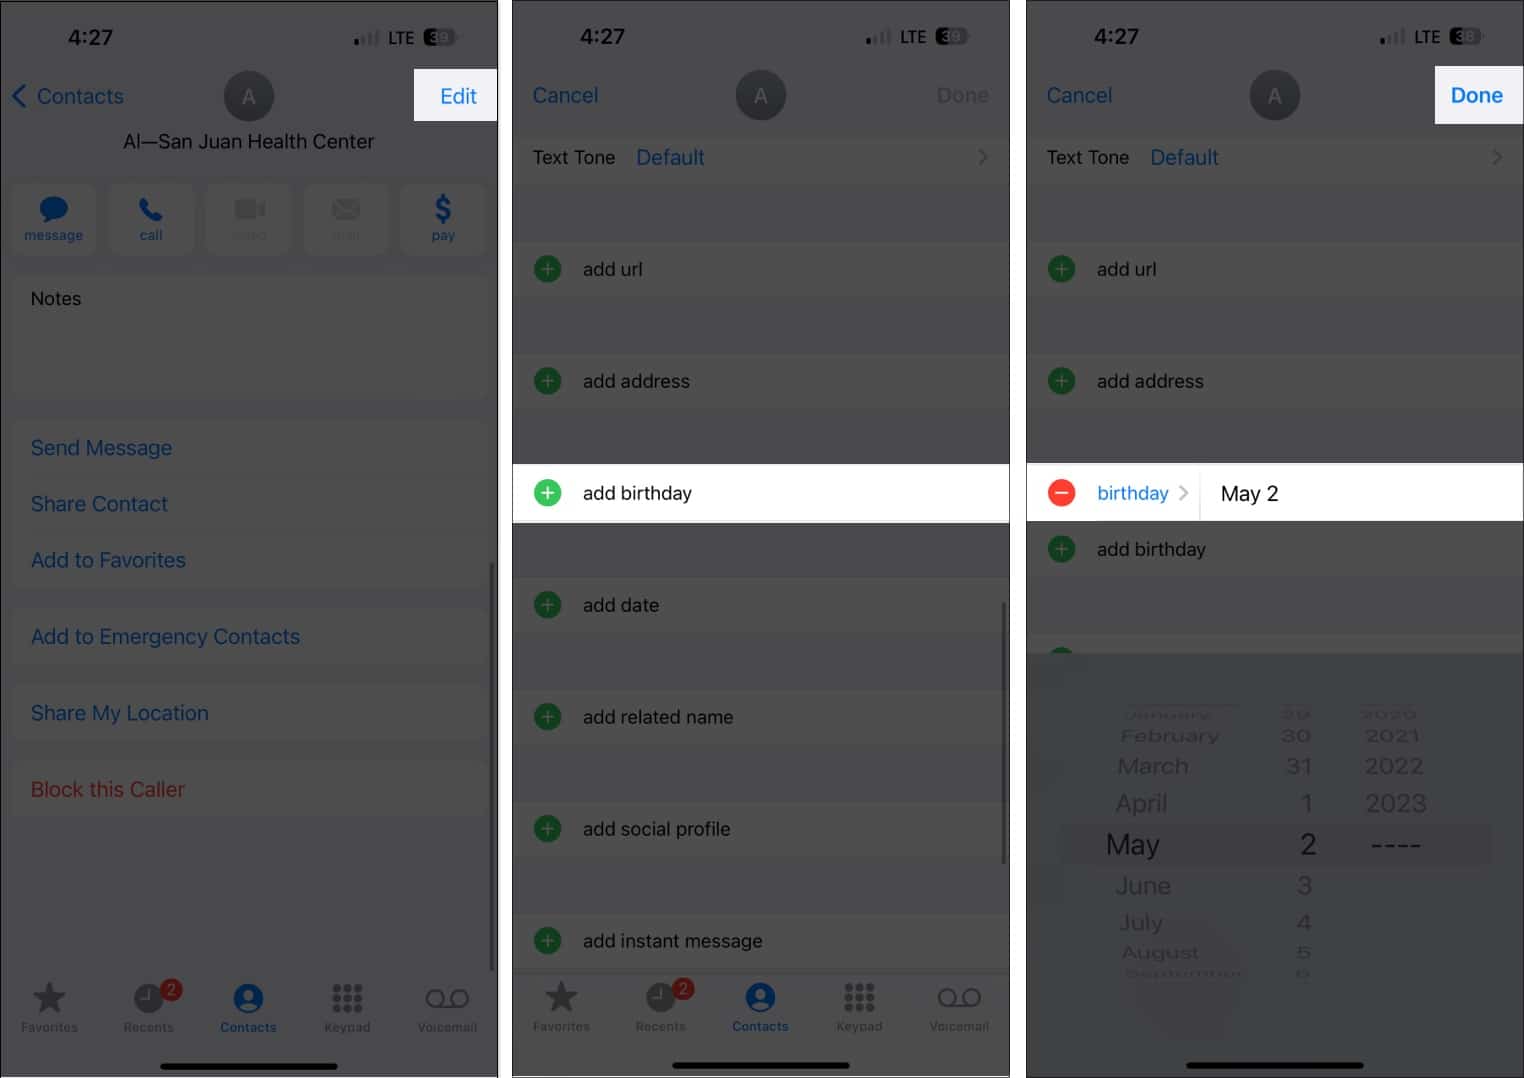
- First, head to Contacts.
- Tap a contact → Edit.
- Scroll down and select (+) add birthday → Tap Done.
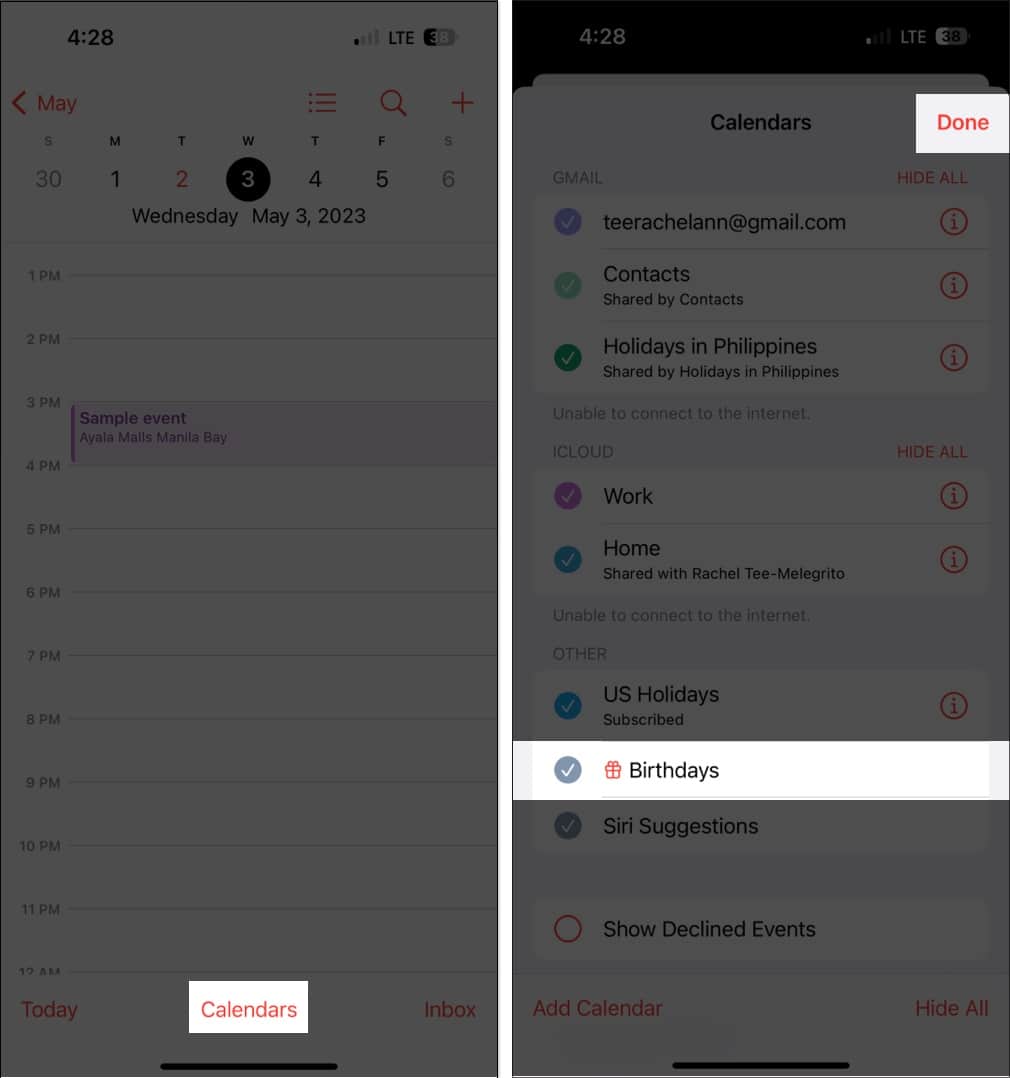
- Then open Calendar.
- Tap Calendars → Tick Birthdays → Select Done.


Here’s a more comprehensive guide on viewing birthdays on Calendar.
Wrapping up…
The Calendar app is a powerful tool to help you stay organized. You can use the above tips to optimally use all of its features.
What’s your favorite Calendar feature? Please share in the comments below.
Read more:
- Apple Calendar vs. Google Calendar: Which one is better?
- Best Calendar Apps for iPhone to Stay Organized
- How to create Public Calendar on iPhone and iPad
- How to sync Google Calendar with iPhone
Author
🗣️ Our site is supported by our readers like you. When you purchase through our links, we earn a small commission. Read Disclaimer.