Over the period of time, we have a lot of pictures, files, documents, and many other things on our Mac. We keep getting new stuff and delete the old ones. Everything seems to be working fine, until one day, when you realize that you deleted something important. Also, you also haven’t backed it up anywhere else.
At this point, you need a life savior; Wondershare data recovery software for Mac is to your rescue. It’s the single software to recover all your deleted data on Mac. The features of the software are not limited to retrieve data from your Mac hard drive. It can also recover data from your SD card, digital camera, and much more.
Wondershare Mac Data Recovery Software
User Interface
The user interface of the software is quite simple to use, and anyone with just a basic knowledge of Mac operating can use it like a pro at the very first time.
Free Trial
Wondershare Data Recovery for Mac offers a trial version, to make you acquainted with the interface. If you are happy with its job, you can then purchase the full version. In the trial version, you can use all the features of the software. The only limitation is that you’ll not be able to recover files more than 100MB. It will scan every lost file on your Mac and display you on the screen, but won’t let you recover more than 100MB. For trial version, the limit is pretty good to help you make a purchase decision.
Mac Data Recovery
Apart from recovering lost files on Mac, you can also perform partition recovery, which is quite impressive. One of the interesting parts of using this software is that it lets you see a preview of the file before you decide to recover it. In addition, you can select which files you wish to recover and discard the rest.
Another great feature of this software is that you can even pause the scanning and recovery process, which you can resume it later. This comes to help when you have huge data to recover. When it comes to supported file formats, Wondershare can recover all document formats, almost all video formats, image formats, audio formats, emails, and archive as well.
Even though the recovery process using Wondershare is quite simple, we thought to present you the entire guide that will help you understand and use the product well. And that’s the reason we have mentioned step-by-step guide for using Wondershare data recovery software.
How to recover lost files using Wondershare data recovery for Mac
Step #1. Open the Wondershare application on your Mac.
Step #2. You’ll see four different recovery options. Out of them, click on the first one and that is, “Lost File Recovery“.
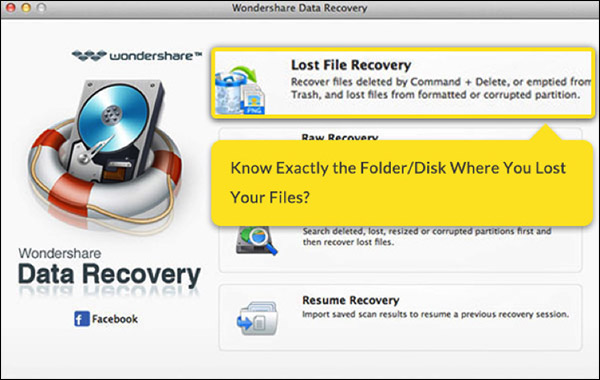
Step #3. Next screen will ask you to select the drive from which you wish to scan and recovery files. So select the partition. Below that, you’ll see an option asking to choose the File type. If you are looking for a specific file, for example, video or image, then select that. Below that, “Enable Deep Scan” option will be checked. This option performs an extensive scan for files that have been deleted a very long time ago. It takes more time to scan, so if you have recently deleted the file, uncheck it.
Step #4. Now that you have done the major configurations click on the “Scan” button above the partition selection area.
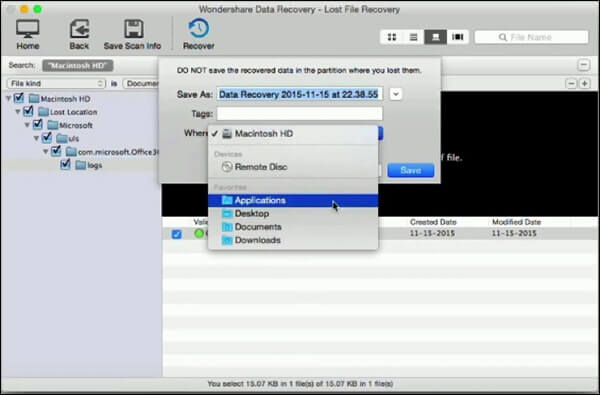
Step #5. After the scanning is finished, you’ll get a list of files and folders that can be recovered. You can select an entire folder or individual files by checking the box near them. Once you are done with the selection process, click on “Recover” button on the top and specify the path where you want the files/folders to be recovered.
Wasn’t that simple? Now you have got the basic idea of operating Wondershare; things will be much easier for using other options of the software. Simply go through the guide below to learn using other recovery options of Wondershare.
How to use Partition Recovery feature of Wondershare on Mac
Step #1. You should have the Wondershare software open already, if not, then launch it on your Mac.
Step #2. This time, click on Partition Recovery from the four options available.
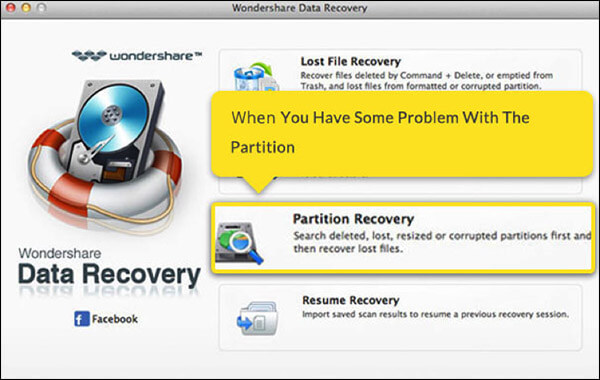
Step #3. In case you have multiple hard drives, select the one from which you wish to recover deleted partition. You can select quick search or complete search. A comprehensive search will scan a lot deeper and takes much more time.
Step #4. Next step is to select the partition, so click on “Search Partition” button. You can enable “Raw File Recovery” if you wish to specify file types. This takes, even more, time to scan but works efficiently to recover deleted photos.
Step #5. After you have done the tedious tasks, click on the “Scan” button.
Step #6. Now select files folders that you wish to recover, just like we did earlier.
Step #7. All you need to do now is to click the “Recover” button and specify the location.
How to resume the recovery process of Wondershare on Mac
Step #1. After performing the scanning option, you have the option to decide whether to recover files instantly or later. For this, you’ll need to save the scan info of Wondershare data recovery on your Mac, to resume it later.
Step #2. Once you have reached the list of files and folders that can be recovered, you’ll notice a button on top saying “Save Scan Info,” click on it.
Step #3. Next step will ask you to specify a path where you wish to save the scanning information. So select the folder where you want to save it.
Step #4. Now anytime in future, when you wish to recover the files, launch the software and on the main screen, select “Resume Recovery” and specify the path where we saved the scan information. The recovery process will then initiated.
How to recover files from Memory card using Wondershare on Mac
Step #1. Just like we did earlier, the basic thing is to launch the software on your Mac.
Step #2. Next step is to connect the memory card to your Mac using a card reader.
Step #3. Now on Wondershare software, click on “Lost File Recovery.”
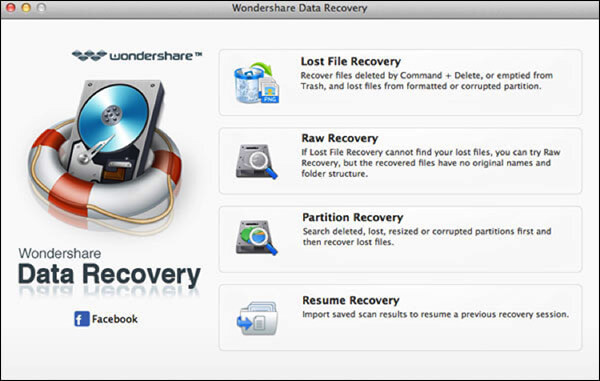
Step #4. On the next screen, select the memory card. You can also specify file types, deep scan options like we did in the first guide.
Step #5. Click on the “Scan” button and wait till the process is finished.
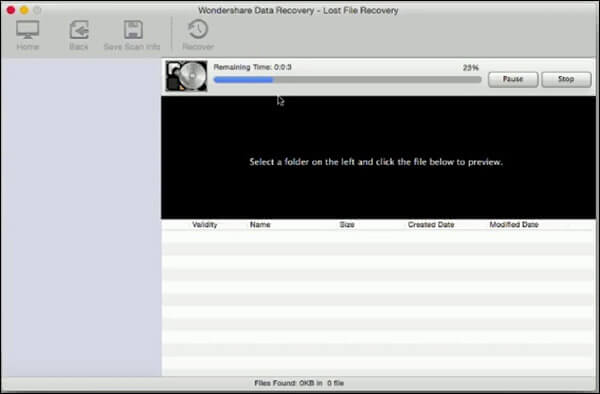
Step #6. Just like all other options, here too, select files/folders that you wish to recover and then click on “Recover” button and specify the path.
How to recovery files from Digital Camera using Wondershare on Mac
Step #1. Connect your Digital camera to your Mac.
Step #2. Launch Wondershare application and select “Lost File Recovery.”
Step #3. On the next screen, instead of selecting the hard drive, select your Digital Camera. Similar to the memory card, here too, you can select file types and other scanning options.
Step #4. Hit the “Scan” button and grab popcorn until the process is completed.
Step #5. Select the files/folders you wish to recover and click on “Recover” button at the top.
That’s it; apart from recovery data from Digital Camera and Memory Card, you can also recover lost data from an external hard drive. You’ll have to select “Lost File Recovery” and then select the external hard drive. Rest of the configuration remains the same.
As said earlier, the trial version comes with a limitation, and that’s why it is called a trial version. If you are impressed with the product, you can buy the full version for $79.95 for one year on one Mac. If you are impressed too much, you can go for the lifetime membership for one Mac for $89.95.
Buy Wodershare Data Recovery for Mac.
🗣️ Our site is supported by our readers like you. When you purchase through our links, we earn a small commission. Read Disclaimer.


