The Continuity Camera on Mac allows users to click images, scan files, create sketches on iPhone, and add them to Mac. You can even use the iPhone as a webcam to compensate for the mediocre cameras on MacBooks and iMacs. I love the seamless process and the utility of using your iPhone to click pictures or scan documents to share them on the go. Read along to learn how to carry out all these functions and master the Continuity Camera feature on Mac.
- How to use Continuity Camera on Mac to take photos, sketch, or scan
- How to use your iPhone as a Mac webcam
How to use Continuity Camera on Mac to take photos, sketch, or scan
I’m certain you’ve heard high praise about how seamless Apple’s ecosystem is. The Continuity Camera is yet another feature that contributes to this well-deserved fame. Before proceeding, let’s take a look at the requirements for the feature and the apps that support it.
Requirements to use Continuity Camera
- Devices should be near each other.
- Mac and iPhone or iPad should be connected to Wi-Fi, and Bluetooth should be enabled.
- Both devices should be using the same Apple ID with two-factor authentication enabled.
- A Mac device running on macOS Mojave or above.
- An iPhone or iPad running on iOS 12 or iPadOS 12 and above, respectively.
Apps that support Continuity Camera to take photos, sketch or scan documents
- Finder
- Keynote 8.2 or later
- Messages
- Notes
- Numbers 5.2 or later
- Pages 7.2 or later
- TextEdit
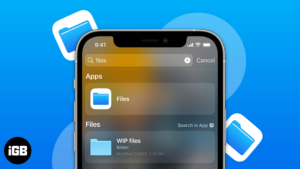
Take photos, sketch, or scan documents with Continuity Camera
The steps to click images, create and add sketches or scan documents are the same. Apart from the supported apps, you can also insert images or scan documents on the desktop. Here’s how:
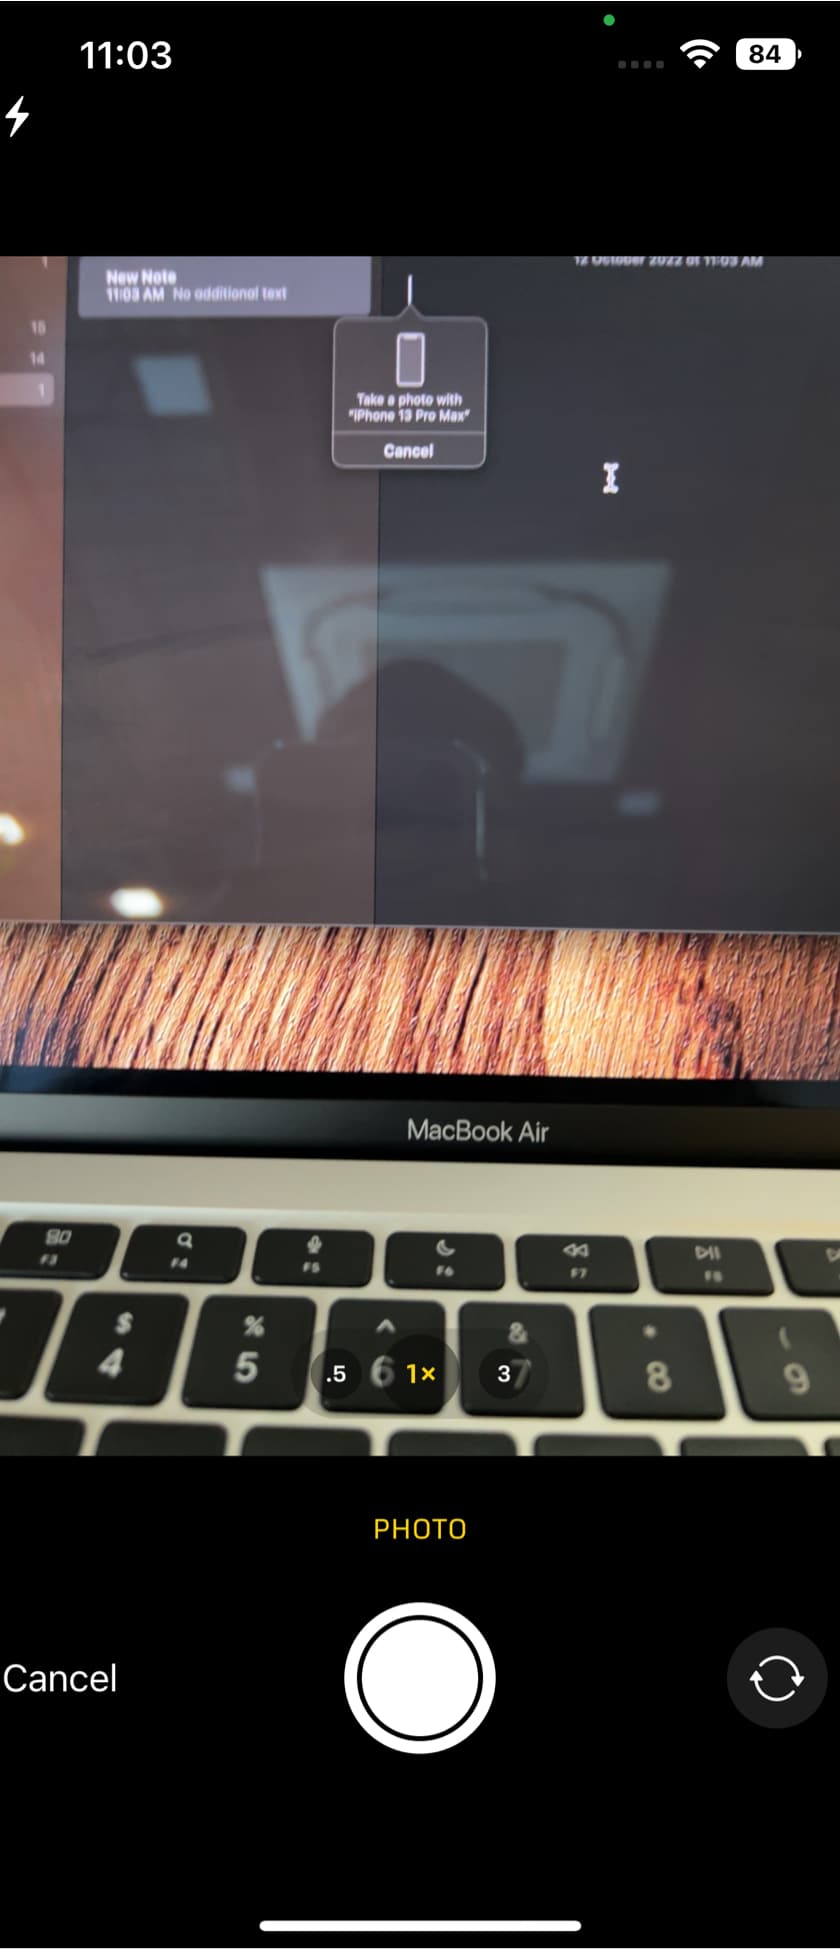
- Open a supported app on Mac.
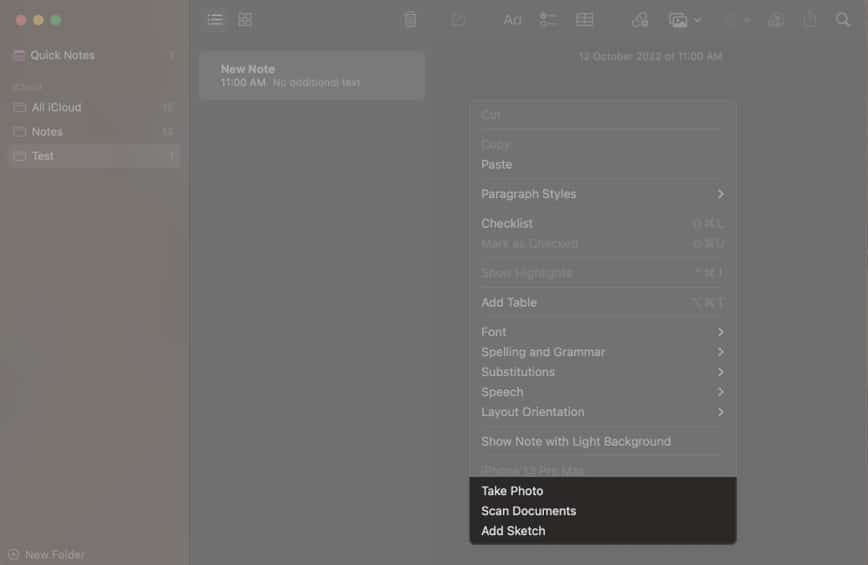
- Now, Control-click or double-tap the trackpad wherever you want to insert an image, sketch, or scan document.
- Select Take Photo, Scan Document, or Add Sketch according to your needs from the shortcut menu.


You can now click an image, sketch to your heart’s content or scan a document through your iPhone.
- The image, document, or sketch will be inserted at the location you initially clicked on.
As mentioned earlier, you can also do the same on the desktop. The process is familiar.
- Control-click or double-tap the trackpad.
- Click Import from iPhone on the shortcut menu.
- Now, select Take Photo, Scan Document, or Add Sketch.
- Once you’ve clicked the image, document, or sketch, it will be saved on the desktop.
How to use your iPhone as a Mac webcam
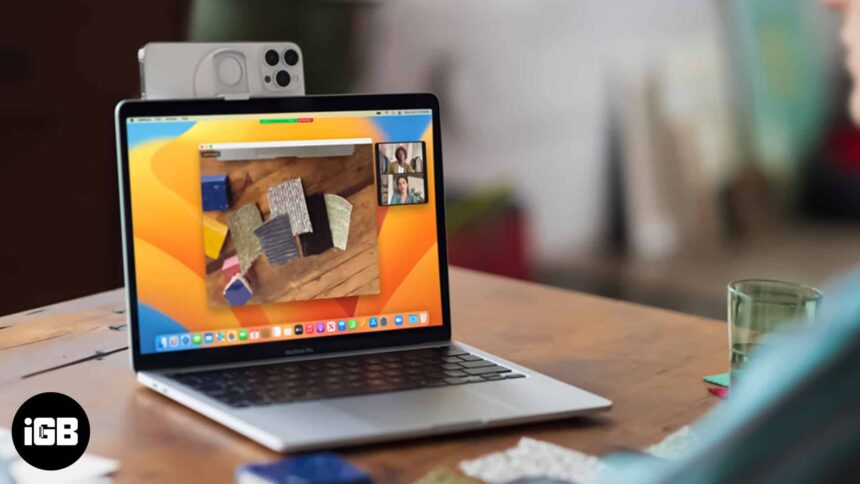
The cameras on the MacBooks and iMacs are nothing to write home about, and the video quality is just mediocre. On the contrary, the iPhone features an excellent set of cameras. To utilize the hardware capabilities of the iPhones fully, Apple has introduced a new feature in Continuity Camera that allows you to use your iPhone as a webcam.
This feature was recently introduced with Apple’s recent software updates, wiz., iOS 16, and macOS Ventura. It is a minor change capable of making a huge difference in day-to-day usage. Read along to know the requirements, supported apps, and all you can do while using your iPhone’s camera as a webcam.
Requirements to use an iPhone as a webcam in macOS Ventura
- A Mac device updated to macOS Ventura.
- An iPhone updated to iOS 16 (iPhone 8 and above).
- Both Mac and iPhone should be logged in with the same Apple ID.
- Bluetooth and Wi-Fi should be enabled on both devices.
- Only iPhone 11 and above support Desk View and Centre Stage features.
- Only iPhone 12 and above support the Studio Light feature.
How to turn on Continuity Camera webcam on iPhone
While the Continuity Camera is enabled by default in iOS 16, it’s wiser to check the setting for a seamless experience.
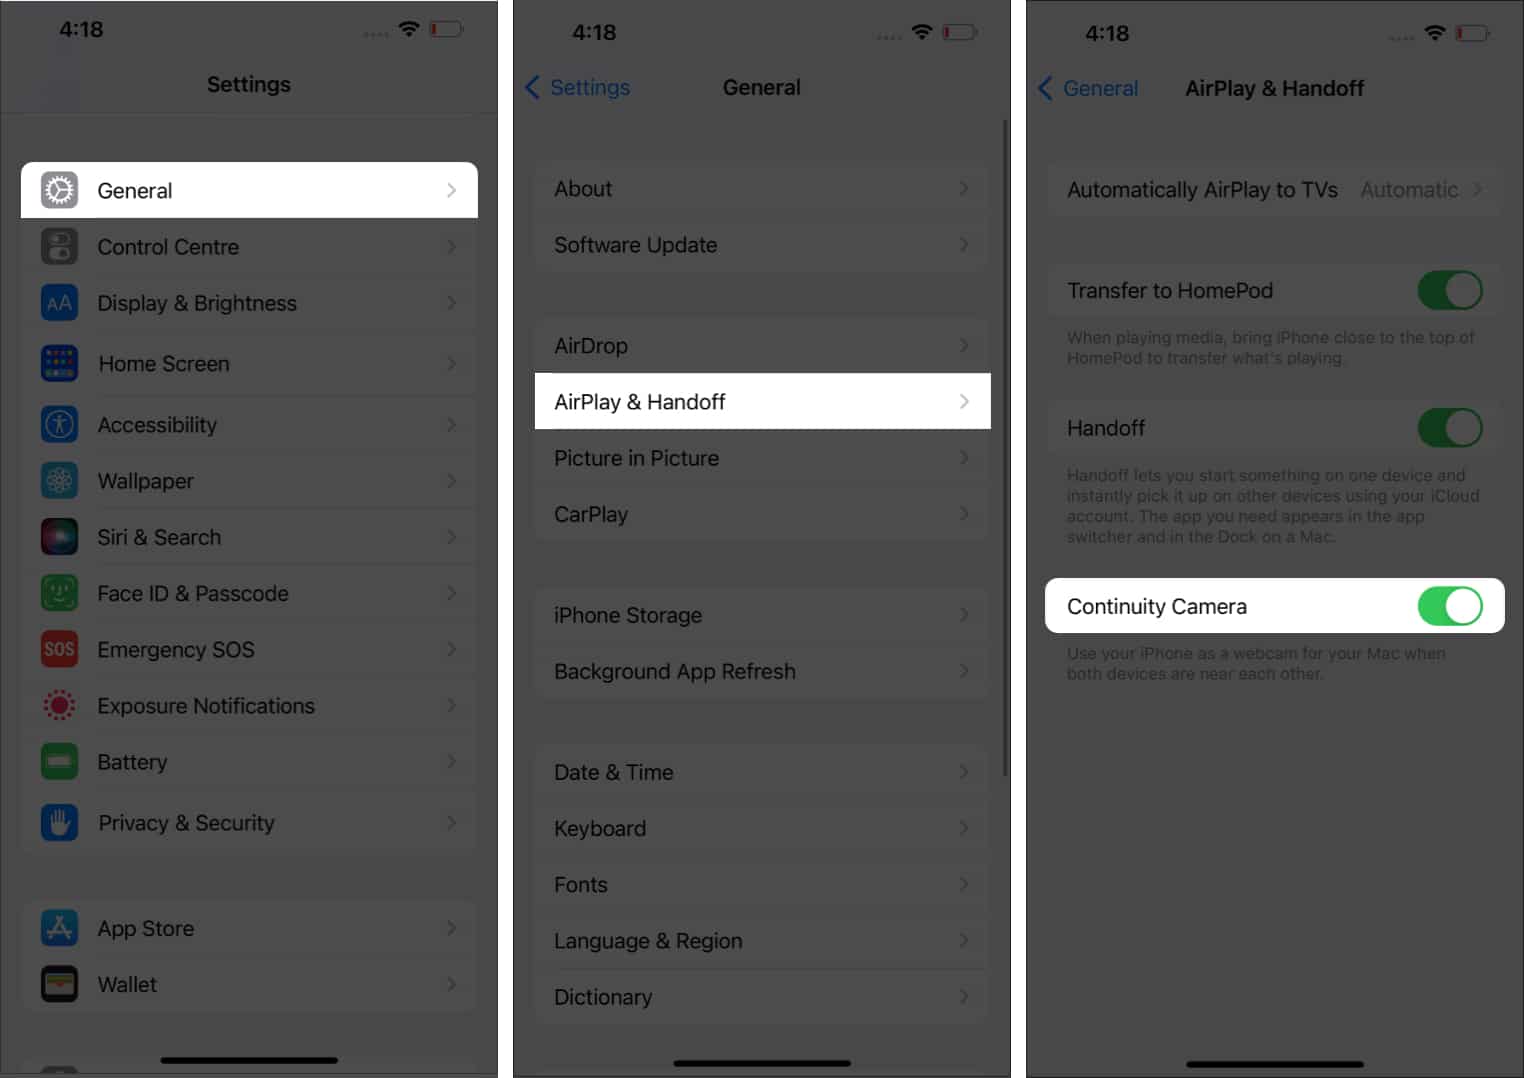
- On your iPhone, go to the Settings app.
- General → AirPlay & Handoff.
- Here, toggle on Continuity Camera.

Now, your iPhone is ready to function as a webcam for your Mac. It can capture video as well as audio. So you get an upgrade in terms of video quality and improved audio input thanks to microphones on your iPhone.
However, only the rear camera can be used as a webcam. Also, keep your iPhone near your Mac so it is within range.
Now, you can use the Continuity Camera feature within apps downloaded on your Mac or video calling/conferencing websites. We have listed step-by-step guides for both methods.
Use Continuity Camera in any video calling app on Mac
You can use Continuity Camera with any app that supports video calling on your Mac; FaceTime, Zoom, Skype, etc., are some examples.
We have used FaceTime as an example. There is a chance that the exact titles might differ in the Menu Bar, but the steps below should give you a rough idea of how to navigate your way around enabling Continuity Camera.
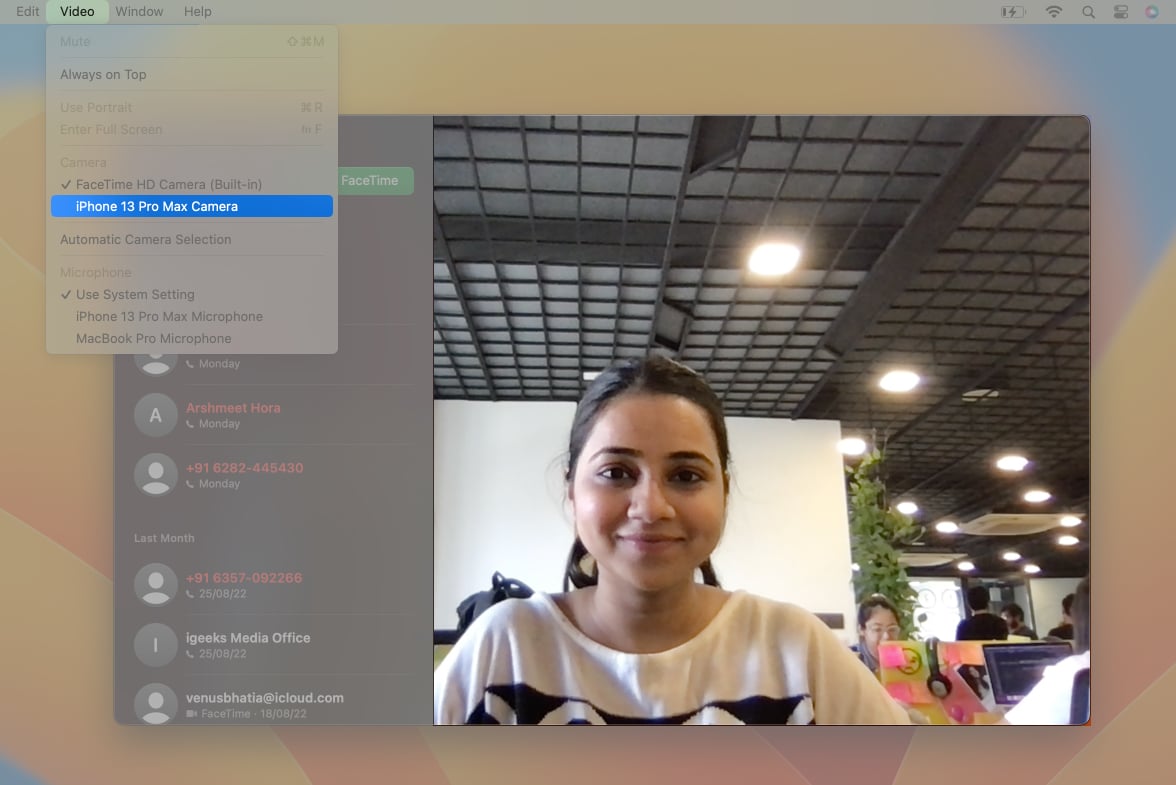
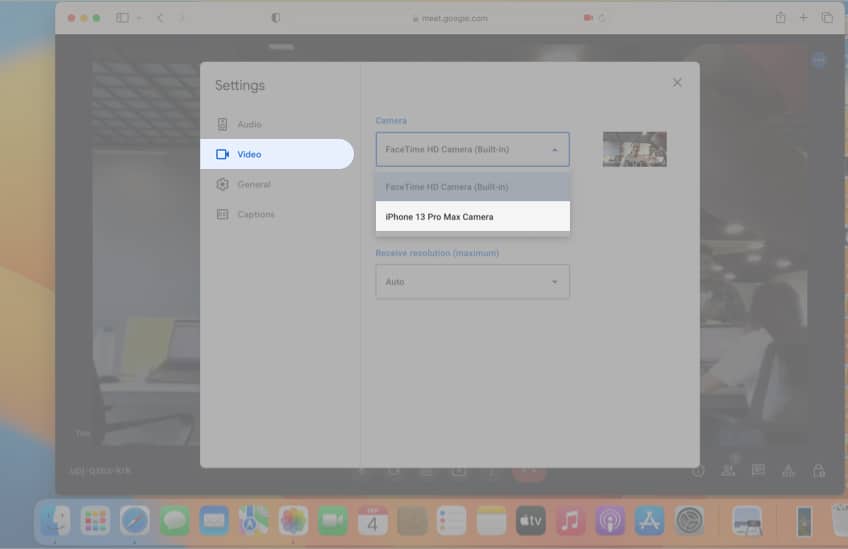
- Open FaceTime (or the app of your choice) on Mac.
Ensure both the iPhone and Mac are connected to Wi-Fi and Bluetooth. - Click the Video tab located in the Menu Bar.
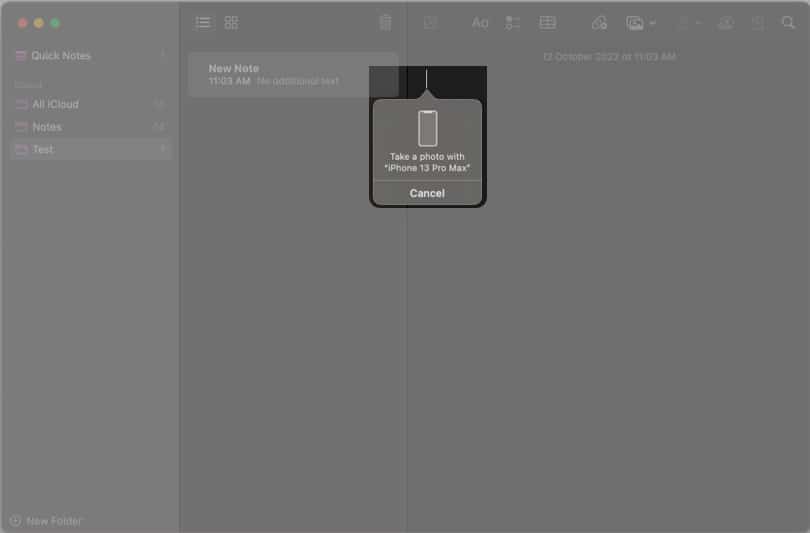
The Title might differ based on which app you’re using. - Select your iPhone from the list of available devices.
(For example, “iPhone 13 Pro Max Camera”)
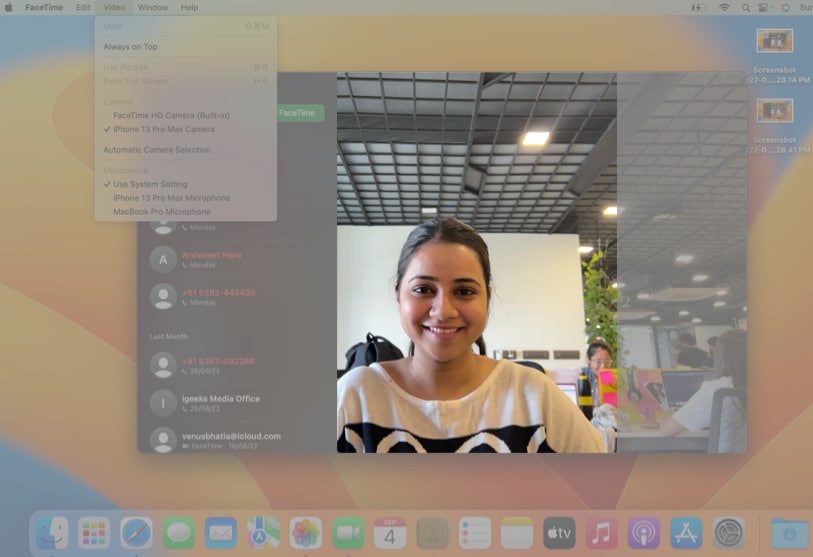
- Your iPhone will now function as a webcam.

You can view the difference in image quality between the Mac’s 720p camera and the iPhone’s camera in the images above.
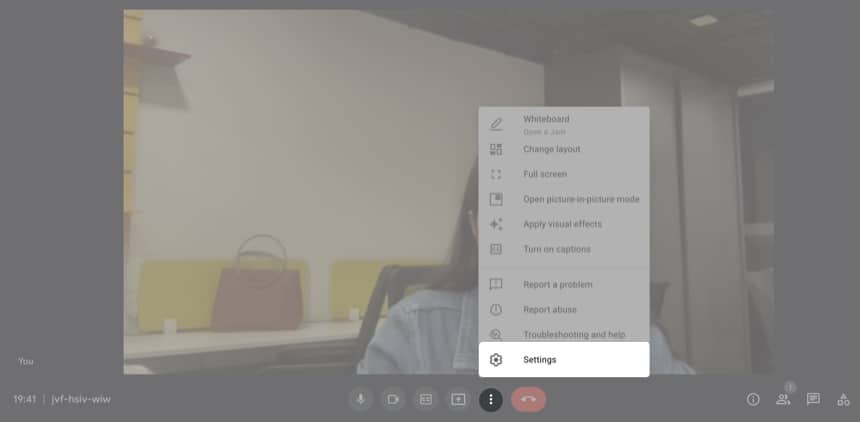
Use Continuity Camera on video conferencing websites
As of writing this article, the feature works flawlessly on Safari and Chrome web browsers, and we expect it to support most web browsers.
- Open Google Meet (or the video calling website of your choice) on Mac.
(Google Meet, Zoom, etc., are some examples). Ensure both the iPhone and Mac are connected to Wi-Fi and Bluetooth. - Navigate to Settings.

- Click Video. (Select Video input settings of the website)
- Under the camera section, select your iPhone from the list of available devices.
(For example, “iPhone 13 Pro Max Camera”)
- Your iPhone will now function as a webcam.
Do note that you cannot use your iPhone when it’s being used as a webcam. If you want to stop using your iPhone as a webcam, tap Disconnect on your iPhone.
It’ll automatically be locked, and the screen will display a message similar to “Connected to iGB’s MacBook Pro.” You also have the option to Pause using your iPhone as the camera.
How to use Portrait Mode, Centre Stage, Studio Light, and Desk View on Mac
Apple has done a great job at utilizing the iPhone’s camera hardware. One of the benefits of using your iPhone as a webcam is you get access to several features that wouldn’t have been available otherwise.
Portrait mode, Centre Stage, Studio Light, and the newly introduced Desk View are the available features, and here’s what they offer:
- Portrait Mode: The camera focuses on the subject (the person attending the call) and applies a bokeh (blur) to the background of the video. It functions similarly to Cinematic Mode found while recording videos on the iPhone.
- Centre Stage: It uses machine learning and adjusts the ultrawide lens on the iPhone to track your movements. If you move from one side to another, this feature helps keep you in the center of the frame. Suppose more people enter the frame while on a call; the lens will zoom out and adjust to accommodate the extra people.
- Studio Light: It brightens up the subject and darkens the background.
- Desk View: The implementation of Desk View feels like some sort of sorcery by Apple. It uses machine learning and the ultrawide sensor on the iPhone to capture your desk video. Only iPhone 11 and above with ultrawide lens support this feature. So, iPhone SE 2nd and 3rd generations do not support this feature.
With all that said, here’s how you can use these features.
How to manage video effects in Continuity Camera
- Open Control Centre on Mac.
- Click the Video Effects tab.
This tab is only available when using the Continuity Camera feature. - Choose from Centre Stage, Portrait, or Studio Light.

- Click Desk View to use the feature.

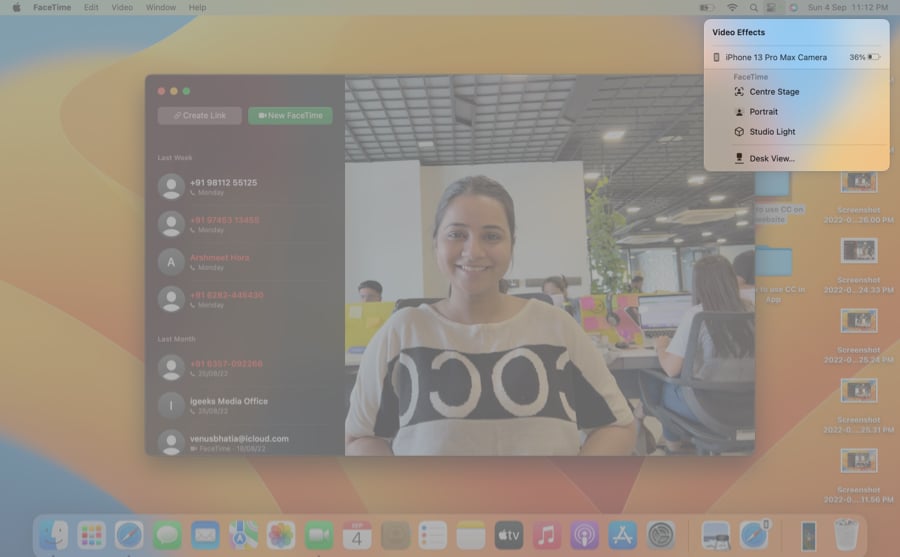

Note: You will need to mount your iPhone on your MacBook to use the Desk View feature.
Wrapping up…
If you use an iMac or a MacBook, the Continuity Camera feature helps you upgrade the video quality of video calls, conferences, etc. But it’s most useful for people using a Mac mini, Mac Studio, or other Mac devices that do not have a built-in camera.
Have you used Continuity Camera? And, if you have, what are your thoughts on the video quality and the overall implementation of the software? Let me know your thoughts in the comments below.
Read more:
- 14 Finder tips and tricks every Mac user must know.
- How to use iCloud Shared Photo Library on iPhone, iPad, and Mac.
- 10 Tips to fix MacBook overheating issue.
- How to fix “Charging On Hold” warning on iPhone
🗣️ Our site is supported by our readers like you. When you purchase through our links, we earn a small commission. Read Disclaimer.