Your valuable Mac data is at risk of being completely obliterated in a matter of moments. A mere hardware failure, an unforeseen power surge, or even a simple accidental spill could spell disaster for your data. Isn’t it a heart-stopping thought? That’s why backing up your Mac is a necessity. In this guide, I’ll show you all the methods to easily back up your Mac.
Note: The methods mentioned here are valid for all Macs running macOS Ventura or later.
Why is it important to back up your Mac?
- Data Loss Prevention: Backing up your Mac helps safeguard your data in situations like hardware failures and more.
- Hardware Failures: By having a backup, you can mitigate the risk of losing important files and documents in case your Mac experiences a hardware malfunction.
- Software Corruptions: Backing up your Mac ensures that you have a copy of your data if any software issues arise, such as system crashes or software conflicts.
- Theft Protection: In the unfortunate event of your Mac being stolen, having a backup allows you to restore your files onto a new device without losing valuable data.
- macOS Updates: When updating your Mac’s operating system, there’s always a possibility of data loss. Creating a backup beforehand ensures that your files are secure and can be easily restored if any issues occur during the update process.
How to back up your Mac with Time Machine
Before we learn how to use the Time Machine to back up your Mac, let’s first get familiar with the process. To start off, I’ll walk you through what Time Machine is and how you can set it up.
What is Time Machine?
Time Machine on Mac is a utility tool that enables you to effortlessly and promptly generate backups of your files, guaranteeing the ability to retrieve them in case of unintentional data loss. These backups are stored on an external hard drive or network-attached storage (NAS) device.
Additionally, the utility performs incremental backups that only include the changes since the last backup, saving storage space. What makes Time Machine exceptional is its capability to restore individual files or complete systems from specific moments in the past, presenting a convenient solution for data recovery.
Note: You must create a disk partition if you want to use an external drive for both regular use and backup.
Before using Time Machine you should have…
How to use Time Machine to back up your Mac
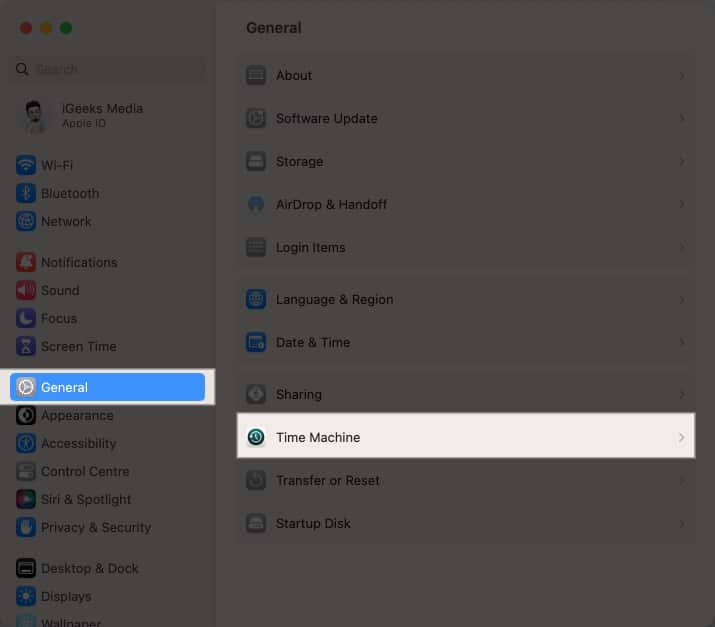
- Click on the Apple logo () → Head to System Settings.

- Select General → Choose Time Machine.

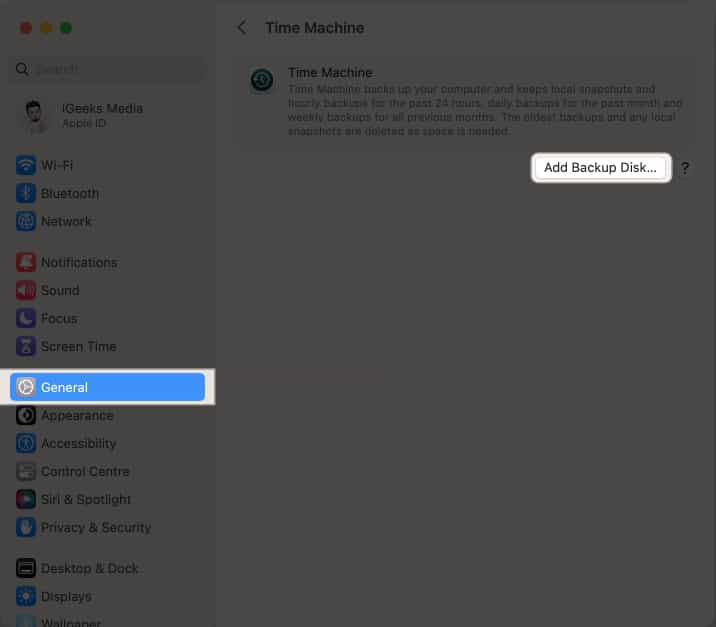
- Click Add Backup Disk.

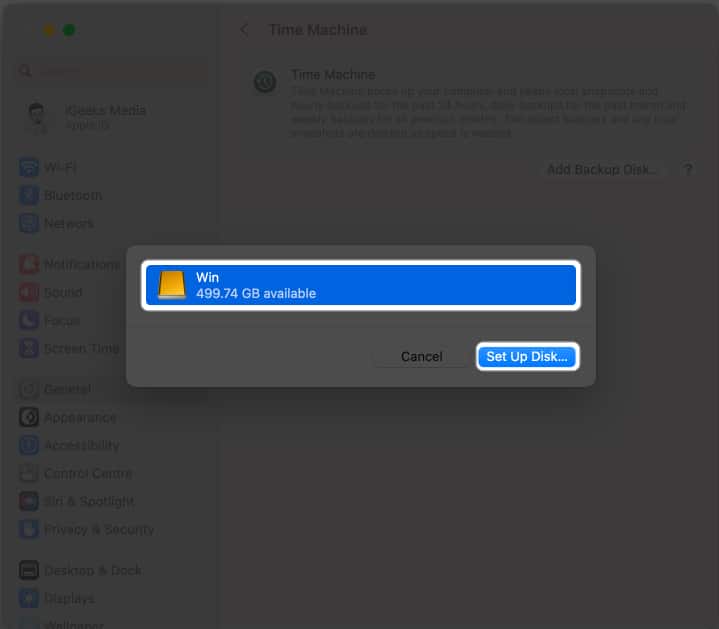
- Select your disk → Choose Set Up Disk.

- Enter a Password to safeguard your backup disk → Choose a Disk Usage Limit → Select Done.
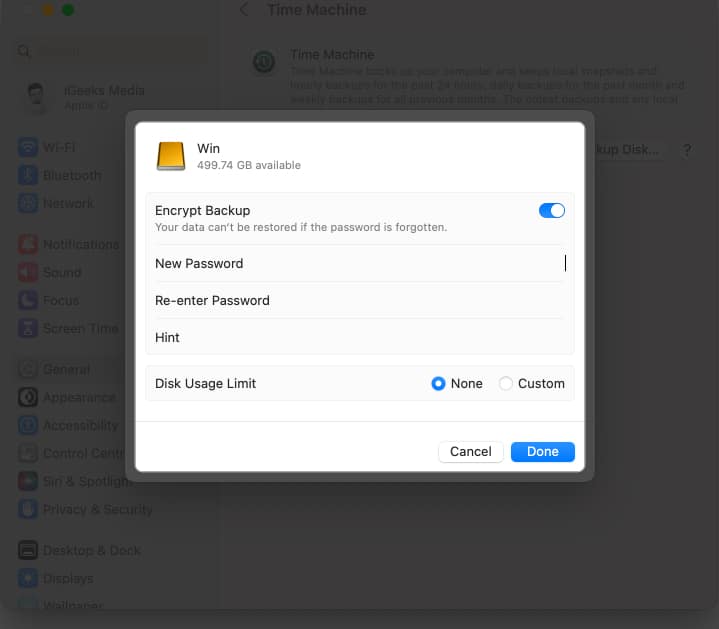
The backup procedure will commence shortly.
Additionally, the length of the backup can vary from a few minutes to several hours, depending on how much data is stored on your Mac.
How to back up your Mac to iCloud
A simple and trustworthy method of protecting your important data is to back up your Mac to iCloud. Before we get started, let’s first clarify what iCloud is.
What is iCloud?
Apple offers cloud computing and storage services called iCloud and iCloud+. These services let you store your data like photos, videos, documents, and more on remote servers that happen automatically in the background.
You can access your data easily because the synchronization is accessible from various gadgets, including iPhones, iPads, Macs, and Windows computers.
How to set up iCloud
Make sure you meet the conditions mentioned below before moving forward with backing up your Mac to iCloud.
- A Mac with macOS Catalina or later.
- An active internet connection (high-speed).
- The amount of free storage in iCloud must match the size of your Mac backup.
How to sync Mac to iCloud
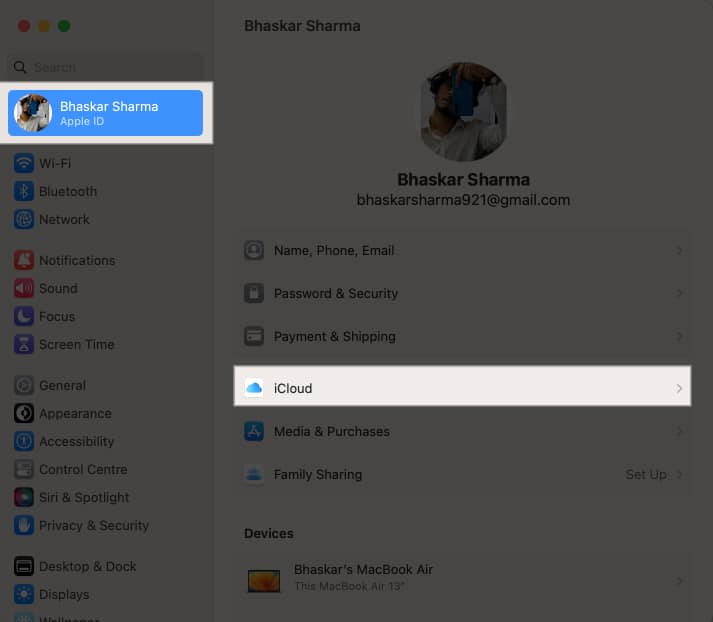
- Go to the Apple logo () in the menu bar → System Settings.
- Head to your Apple ID → Click iCloud.

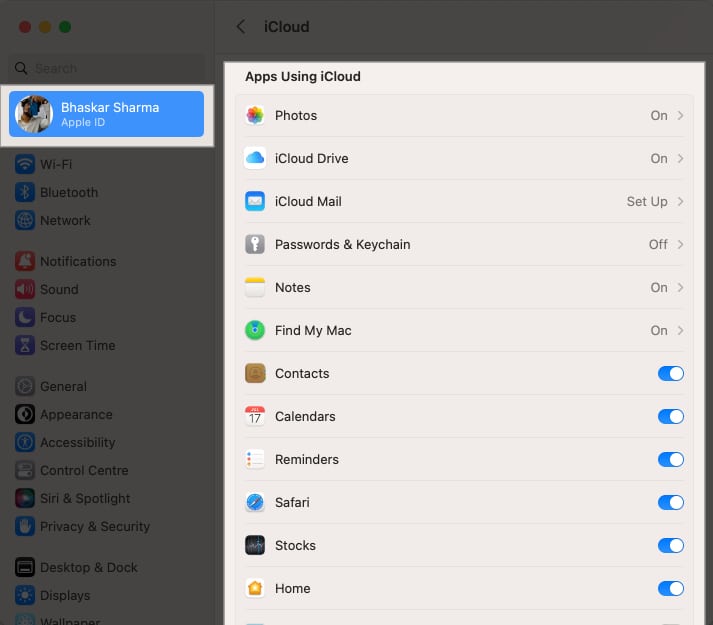
- Enable all the apps you want to sync to iCloud below Apps Using iCloud.

Use iCloud to back up your Mac
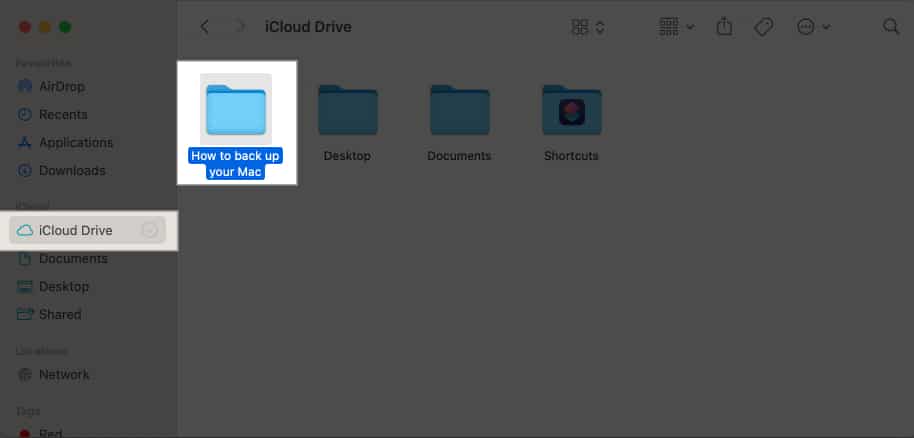
- Launch Finder → Go to iCloud Drive on the left pane.
- You can drag and drop folders or files that you wish to back up to this folder.

How to back up Mac to Google Drive, OneDrive, or Dropbox
Some of the most popular online storage services include Dropbox, Google Drive, and One Drive. These platforms make it extremely convenient to upload and save files from your Mac. It’s important to note that using these services for storage is different from Time Machine backup or cloning.
Cloud storage services allow you to store your important files in the cloud securely. Once your photos, music, and documents are safely stored, you can access them from any mobile device or computer. The amount of free space offered by these services varies.
Use a cloud backup solution
The process of using these services is quite similar across the board.
- All you need to do is register and create an account on any of the said platforms.
- After that, you can sign in to manually back up your files.
- Additionally, most of these services provide a Mac app that you can install if you do not prefer using the browser.
- After installation, you can drag and drop files into the corresponding folders, and those backups will happen automatically.
How to clone your Mac to use it as a backup
Cloning your Mac and using it as a backup allows you to protect your data and, if necessary, switch to a new system without a hitch. The steps involved in the process of cloning your Mac differ depending on factors like your backup software, Mac model, and macOS version.
Nevertheless, I’ve outlined a general procedure to accomplish this task.
- Connect your external hard disk to your Mac.
- Head to Disk Utility → Select your hard disk beneath the External section.
- Click on Erase in the title bar → Select Erase.
- Now, launch your cloning software.
- Locate and select the option to Copy the contents of your Mac.
Ensure that you select all files to create a bootable clone. - Click OK to finish the process.
The cloning process may take a significant amount of time, that depends on the size of data available on your Mac.
Third-party apps to back up your Mac
How to restore Mac from a backup
Restoring your Mac from a backup is a straightforward process that can help you recover your files, settings, and applications in case of data loss or system failure.
If you’re having trouble, you can use our straightforward guide to restore your Mac.
The frequency with which you should back up your Mac depends on how important your data is to you. For example, you can opt for a daily backup if you’ve important files, like irreplaceable photos, videos, or documents.
There are no such best methods when deciding how to back up your Mac. Your choice can be based on your individual requirements and personal preferences.
Yes, you can use your Mac while a backup is running. However, you might experience some slowdowns, especially if you’re writing or reading a lot from the hard drive.
No more excuses!
Backing up your Mac data has never been easier. With numerous options at your disposal, there’s simply no reason to neglect regular backups. To enhance your backup experience, I recommend exploring our curated collection of the best Mac backup software.
If you have any queries regarding backups, please don’t hesitate to ask in the comments section below.
Read more:
- How to Delete Time Machine Backups on Mac
- Best Accessories for MacBook Air 11-inch and 13.3-inch
- How to Backup and Install iPhone Apps from Mac/Windows Without iTunes
- 13 Ways to fix Unable to check for updates on Mac
🗣️ Our site is supported by our readers like you. When you purchase through our links, we earn a small commission. Read Disclaimer.