The average battery life of a MacBook after a full charge ranges from 10 to 17 hours. However, you may observe that the MacBook battery drains too fast in certain situations. But worry not; it’s common and can easily be fixed.
In this blog, I have discussed tried and tested solutions that will help you fix your MacBook battery drainage problem. Moreover, I have prescribed a few tips and tricks to improve your MacBook battery life. Let’s begin!
Why is my MacBook battery draining so fast?
If you are facing a sudden and significant battery drain issue on your MacBook, you’re not alone. Many users have reported that their MacBook battery is draining fast after the Sonoma update.
I updated my Mac from macOS Ventura to Sonoma and I am facing battery problem issues, it drops like 1% in every 3 to 4 minutes on average.
Apple Community
The reason behind this occurrence could be anything, such as:
- Intensive usage
- High display brightness
- Wrong battery settings
- Poor network recipience
- Software issues
- Degraded battery
Make a note of the battery level. Keep the laptop open and check the battery level after 30-40 minutes. Don’t worry if the battery level has been depleted by a few points. It is perfectly normal.
On the other hand, if the battery level has decreased to a huge extent, you are in the right place. Read on to learn more.
10 Ways to fix MacBook battery drain too fast
If your MacBook can barely make it through the day even after a complete charge, follow these tried and tested solutions listed below.
1. Monitor MacBook battery usage
MacBooks often result in draining battery quickly due to heavy apps running in the background. Sometimes, even users are not aware of such resource-intensive apps.
By tracking which apps and processes consume the most power, it becomes possible to pinpoint the root cause of excessive battery drain. So, locate such resource-hogging apps and close them.
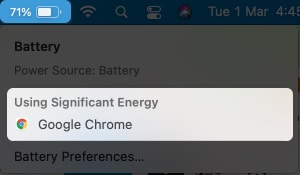
- Select the battery icon from the menu bar.
- Check for apps listed under Using Significant Energy.

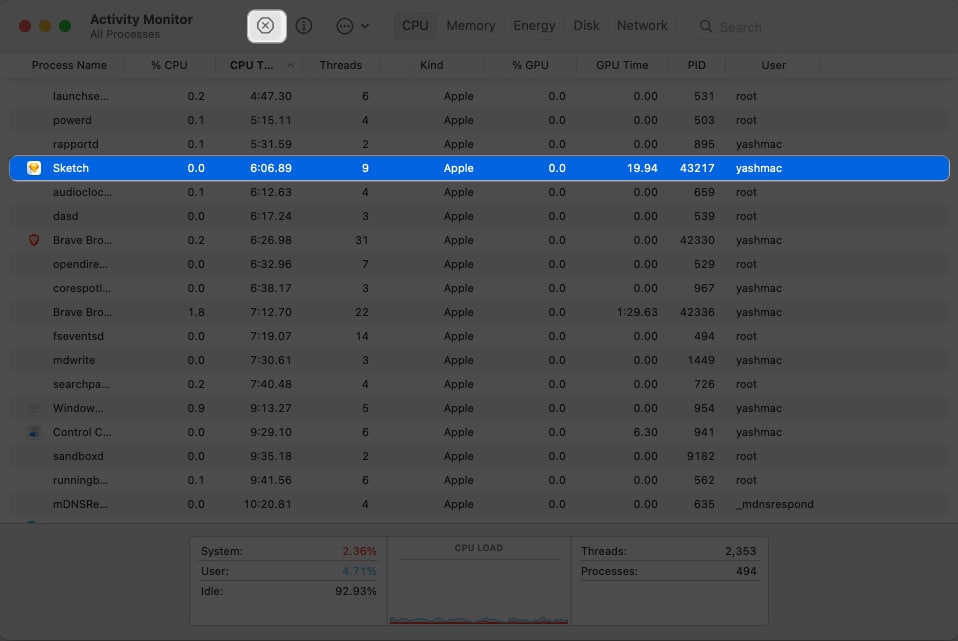
- Next, access Activity Monitor on your Mac.
I have opened the app via Spotlight. - Go to the Energy and CPU tab.
It will show detailed insights into battery usage for each app running on your MacBook. - Select the app that is consuming more resources → Press the close icon.

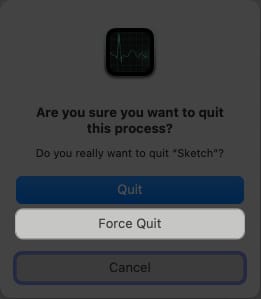
- Finally, hit Force Quit to conclude the process.

Moreover, if you suspect that your MacBook is draining fast even in sleep mode, there may be an app or process responsible. The Activity Monitor can help you determine which app on your Mac is consuming battery in sleep mode.
- Launch Activity Monitor on your Mac.
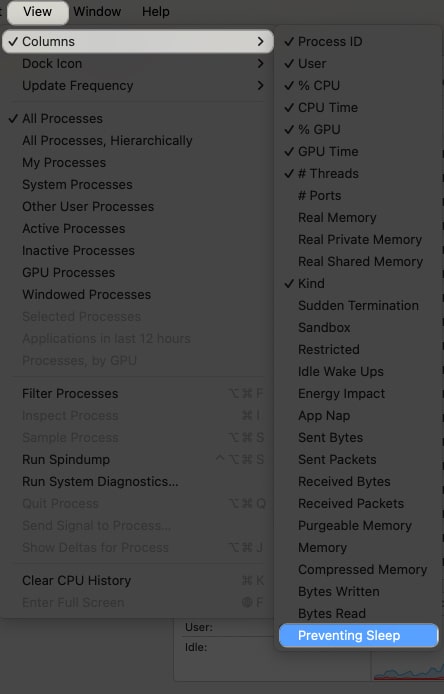
- Click View from the menu bar.
- Choose Columns → Preventing Sleep.

- Here, the Activity Monitor will show a new section titled Preventing Sleep.
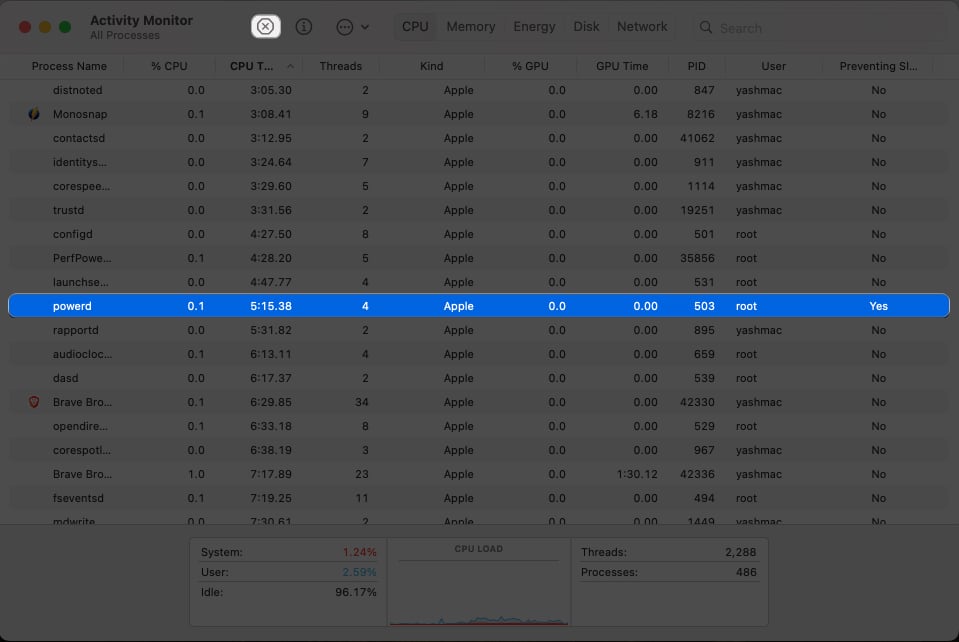
- Select any app or process that indicates Yes.
- Now, ensure the respective app or background process is not a part of the system.
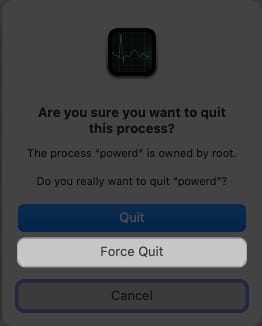
- If no, press Quit.

- Select Force Quit to kill the same.

Note: Practice some caution while undertaking these steps, as few services are essential for the overall efficiency of the system.
Regularly monitoring battery usage will ensure efficient power management and help mitigate any potential drain issues on your MacBook.
2. Enable Low Power mode on Mac
Another effective solution to address the MacBook drain issue is to enable the Low Power mode. This feature will optimize the performance of your device and maximize the battery duration by limiting background activities.
To enable Low Power mode,
- Click the Apple logo () → System Settings.

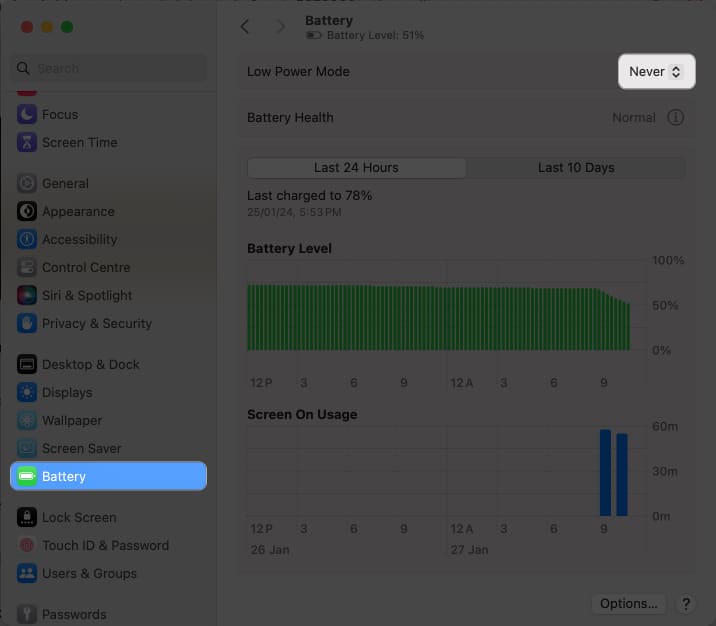
- Navigate to Battery.
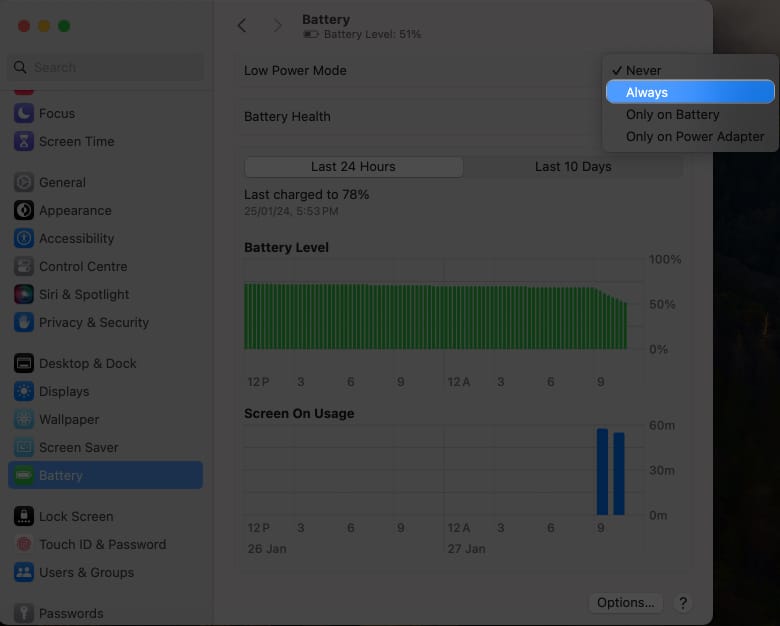
- Access the drop-down menu against Low Power Mode.

- Select Always.

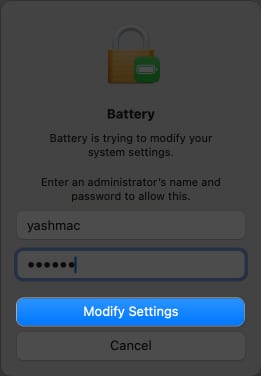
- Enter your system’s username and password when prompted.
- Click Modify Settings, and you’re good to go.

It is important to note that while Low Power mode significantly extends battery life, it may also slightly affect certain functionalities such as automatic updates or email fetch frequency.
3. Check battery health of your MacBook
If your MacBook battery drains faster than charging, then you must ensure your device’s battery health is stable. There may be a high chance that the battery of your MacBook is no longer at its fullest.
Don’t wait to think; here’s how you can check the battery health status of your MacBook.
- Click the Apple logo () → About This Mac.

- Select More Info.

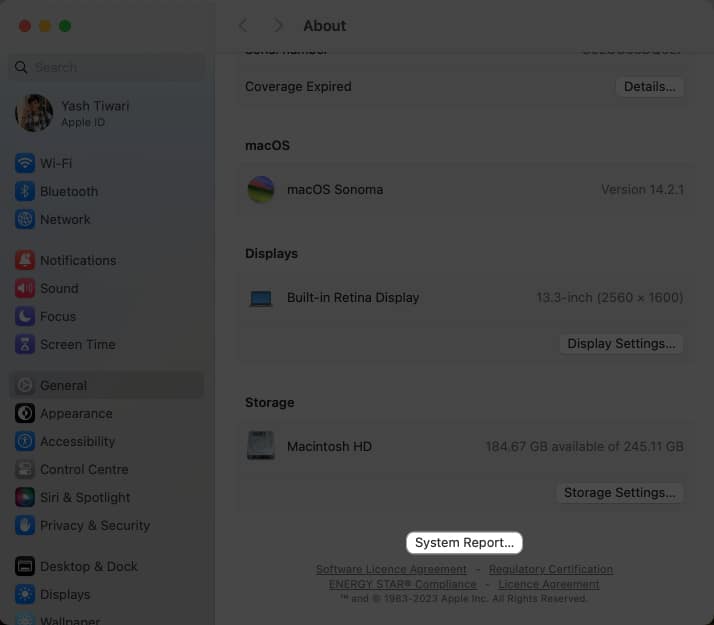
- Scroll to the bottom in the About menu and hit System Report.

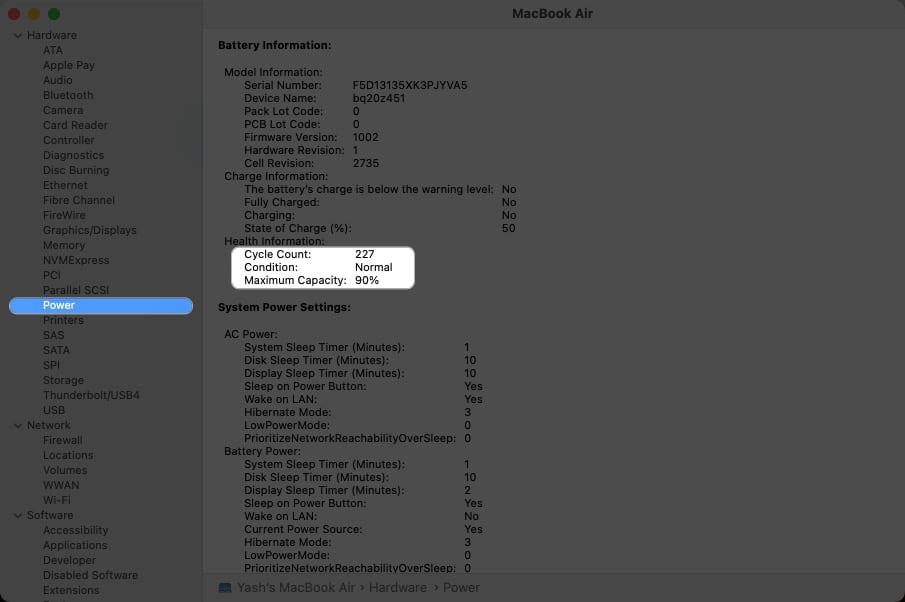
- As the new window appears, choose Power.
- Here, under Health Information, you will find detailed information about your MacBook’s battery health, cycle count, and maximum capacity.

- Pay attention to the Condition parameter. You’ll see any one of the following:
- Normal: Your MacBook battery is doing fine.
- Replace Soon: The battery is working but holds less charging capacity than before.
- Replace Now: The battery is completely degraded and must be replaced urgently.
- Service Battery: The battery is not authentic or poses harm to the system. It must be replaced as soon as possible.
- Based on the alert, you must act accordingly.

Note: On average, a Mac can go swiftly through 1000 charge cycles. This also should give you some idea about the battery condition of your MacBook.
By monitoring these metrics regularly, you can identify any potential issues with your battery that may cause excessive drain.
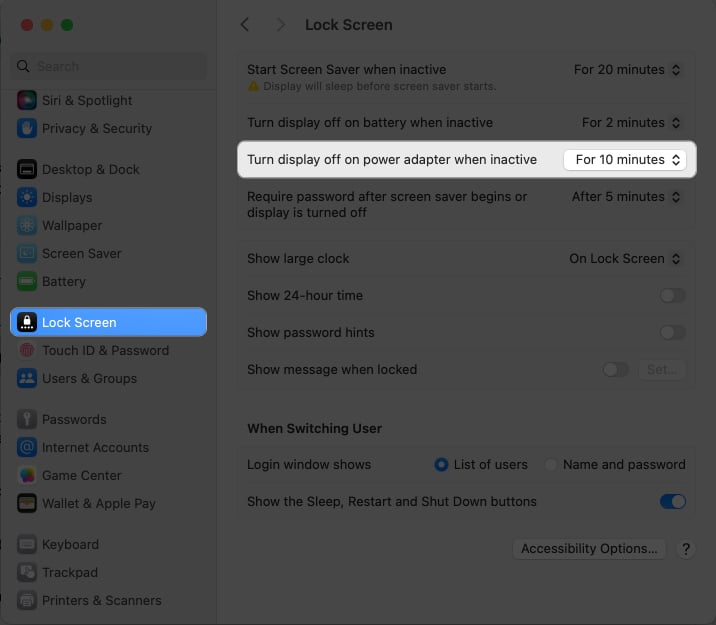
4. Manage power adapter preferences
Occasionally, I leave my MacBook on charging and forget about it, so the device remains up until I return. This carelessness can severely harm the battery of your MacBook.
However, you can prevent such abuse by changing your MacBook’s power adapter preferences.
- Go to Apple logo () → System Settings.
- Select the Lock Screen menu.

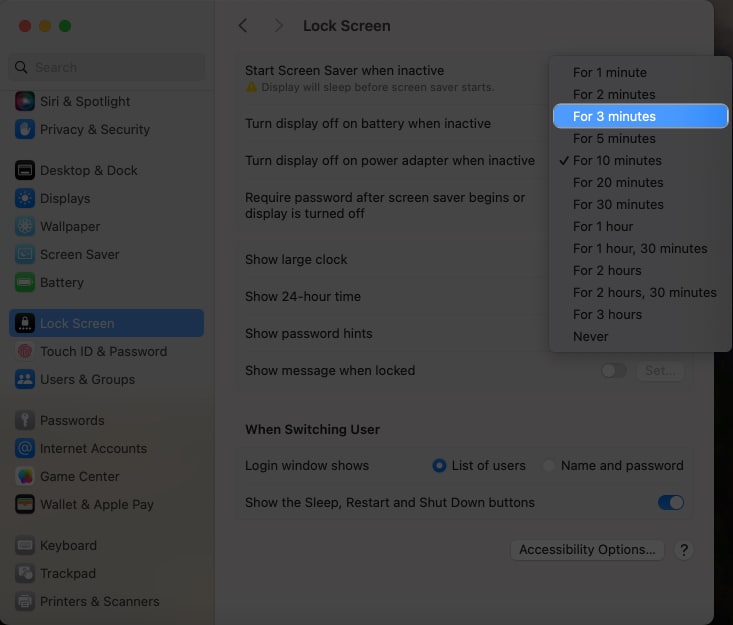
- Now, set the Turn display off on power adapter when inactive in a way that is optimal for you.
I have set it for 3 minutes.
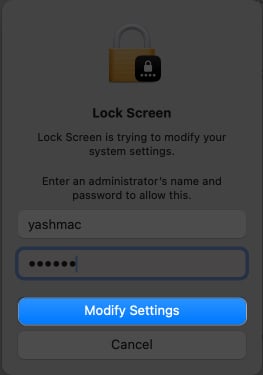
- Enter your system username and password → Click Modify Settings.

- This will allow you to extend your MacBook’s battery in case of emergencies.
In my opinion, it is a small but essential personalization factor that poses many advantages.
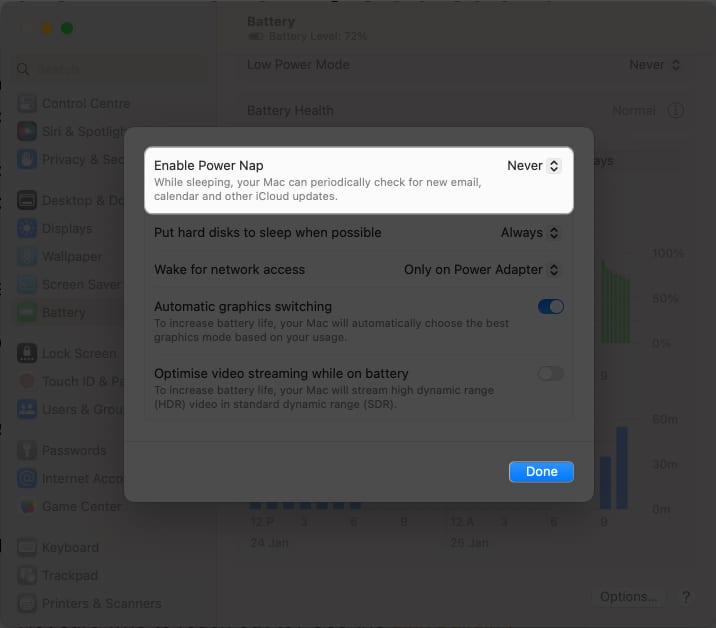
5. Disable Power Nap (Only for Intel-based Mac)
Users who are experiencing MacBook battery drain in Intel-based Macs can address this issue by disabling Power Nap.
When enabled, this feature regularly updates background activities like fetching emails or updating iCloud files. However, it can significantly impact battery life. To disable this:
- Go to Apple logo () → System Settings.
- Access Battery menu → Click Options to proceed.

- Finally, set Enable Power Nap to Never → Done.

This will prevent your MacBook from performing these tasks when it’s in sleep mode and help conserve battery power.
6. Customize Display settings
Adjusting your display settings can turn out to be beneficial when you’re experiencing a major battery drop on your MacBook, even when not using it.
- Access Apple logo () → System Settings.
- Select the Displays option.
- Here, you can change the settings according to your preferences.
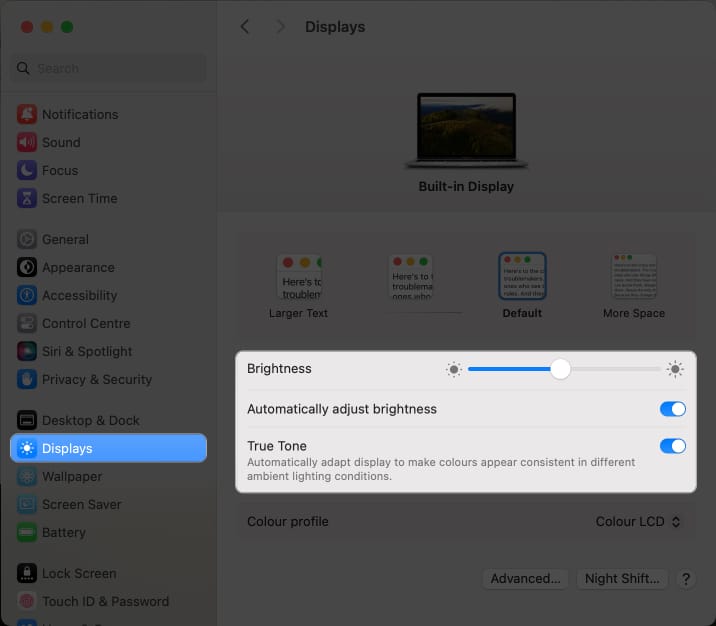
If you want to reduce power consumption using display settings on your Mac, here’s what you need to do:
- First, dim the screen brightness to a level comfortable for you. This alone can improve the battery life of your Mac.
- If desired, you can enable Automatic adjust brightness to let your MacBook adjust the brightness according to ambient lighting conditions as needed.
- You can even enable Night Shift mode on your Mac. It will automatically adjust the colors of your display to a warmer tone at night.
- Moreover, consider enabling dark mode whenever possible as it uses less energy compared to light mode.
With these display customizations in place, your MacBook will optimize energy and consume less battery effective immediately.
7. Disconnect Bluetooth accessories
Bluetooth devices can consume a significant amount of power, particularly if they are constantly syncing or engaged in high-energy operations, such as transferring large files.
Disconnecting these accessories when not in use can help preserve battery life. To do so,
- Access Bluetooth settings on your Mac.
- Now, you can either turn off Bluetooth or disconnect any paired devices.
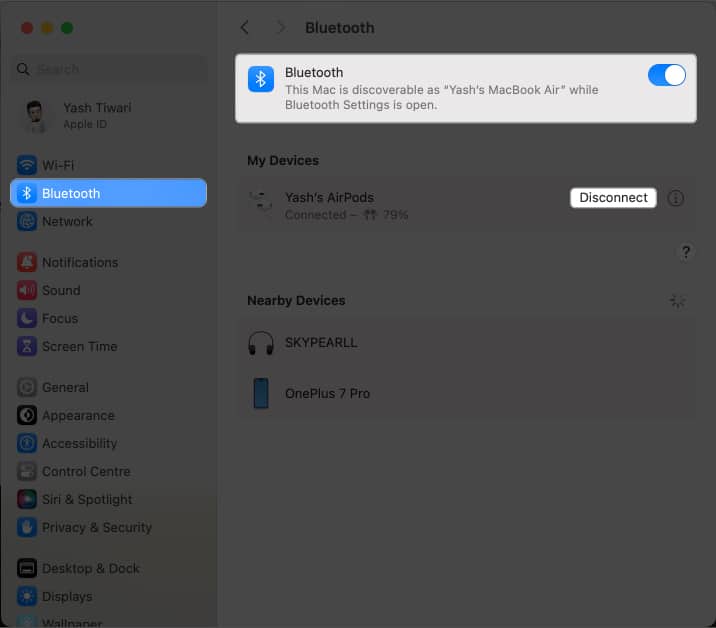
In case you’re using add-ons like AirPods, unpair them when you’re done. This will avoid automatic pairing when such devices are near your Mac.
Moreover, if you’re fond of using Bluetooth accessories like a mouse or keyboard, disconnect them while not in use. We often tend to leave the devices connected and run out of battery for both the Mac and the accessory.
8. Disable Startup apps on Mac
Another practical solution to fix MacBook’s battery drain issue is to disable startup apps. When a MacBook starts up, it usually launches several applications simultaneously, contributing to unnecessary battery consumption.
However, you can take control of this occurrence and disable some of these apps. But be cautious while undertaking this process so you don’t disable necessary system software or essential utilities required for the device’s operation.
By disabling the redundant startup apps, your MacBook can conserve battery for longer periods without compromising functionality. It may look like a simple adjustment, but it will help you manage the power of your MacBook in the long run.
9. Enable Optimised Battery Charging on Mac
Charging habits also play a prominent role in managing the overall health of the MacBook battery. Hence, use the Optimized Battery Charging feature to slow down the aging process of the battery and maximize its lifespan.
To enable Optimized Battery Charging on your MacBook,
- Navigate to the System Settings.
- Access Battery.
- Click the info icon next to Battery Health.
- Toggle on Optimised Battery Charging.
- Press Done to exit the interface.

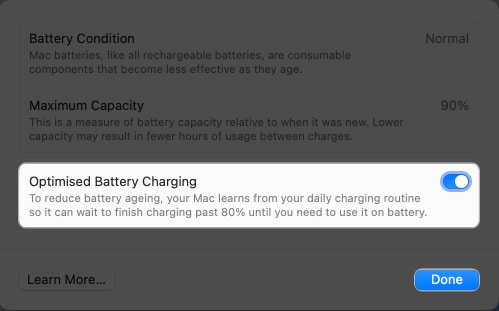
Once set up, this feature will learn your charging patterns and adapt accordingly. It will prevent the battery from constantly undergoing a high charging state.
Note: You may experience slight delays in charging your MacBook to 100% during active usage periods.
10. Consider battery replacement
Finally, if none of the above-discussed solutions have helped you so far, it’s safe to assume that your MacBook battery needs experts’ assistance.
Over time, lithium-ion batteries can degrade and lose their ability to hold a charge effectively. Hence, you should pay a visit to the nearest Apple store or make a Genius Bar appointment.
They possess the expertise required to diagnose the problem accurately and determine whether a battery replacement is necessary. If so, they will offer genuine replacement options that adhere to Apple’s quality standards, ensuring compatibility and optimal performance.
Overall, this professional approach will thoroughly address your MacBook’s battery issues, resulting in longer-lasting power without compromising safety or performance.
Tips to improve the battery health of your MacBook
Now that you’re well-versed with the methods to fix the battery drain issue of your MacBook, here are a few tips and tricks that will help you in maintaining a healthy battery life for your MacBook.
- Develop a habit of regularly cleaning the cache memory of apps and updating them. It will help you eliminate in-app bugs and errors that could harm the battery. There are a ton of Mac cleaner apps that will help you with the same.
- If your system starts malfunctioning for no apparent reason, consider resetting SMC on your Mac. This action will bring the system back to its original state in no time.
- Your Mac may lose battery because of power-consuming apps or background processes. So, force-quit unnecessary apps always.
- Make sure that your macOS is updated to the latest version to rectify system bugs causing battery issues.
- Chrome browser is known to have a significant impact on Mac’s battery life. Try switching to Safari. It is a better choice for optimized performance in Apple devices.
- MacBook battery runs out of charge quickly when it turns excessively hot. So, avoid placing Mav on a cushion or sofa to ensure air can circulate and dissipate heat. Keep your MacBook on a flat surface or a laptop stand.
- Also, try to practice a good charging habit. Avoid overcharging your device. Once your MacBook is charged to 100%, unplug the charger and use it normally. This small practice will decrease the chances of battery health degradation.
There could be several reasons behind the quick battery drain in your MacBooks. From power-hungry apps to software glitches, even your charging habits could impact the battery health of your device.
The lifespan of a Mac battery is typically around 3-5 years. However, this can vary depending on usage and charging habits. You can prolong the battery life by adjusting settings and avoiding extreme temperatures.
On average, the cost can range from $100 to $300. It’s recommended to get the battery replaced by an authorized Apple service provider to ensure proper installation and to maintain the warranty.
Lock and load the power!
Desperate time calls for desperate measures. However, that does not validate every situation. Before you jump to a conclusion, make sure to try out a combination of different approaches we’ve discussed so far.
With these solutions, you can improve your MacBook’s battery life and ensure that it lasts longer without any unexpected shutdowns. If nothing works for you, only then approach Apple Customer Care.
Thank you for reading. If you have any, do not hesitate to drop your thoughts in the comment section below.
Read more:
- MacBook not charging when plugged in? Real fixes
- How to show battery percentage on Mac
- MacBook battery draining in sleep mode? 9 Ways to Fix it!
🗣️ Our site is supported by our readers like you. When you purchase through our links, we earn a small commission. Read Disclaimer.