
A screenshot is a great way to capture what is displayed on your screen. It can be used to document an error or collaborate with your team. However, even a screenshot sometime needs editing to convey the message accurately.
Thankfully, iPhone’s inbuilt screenshot tool, Markup, comes to the rescue! First introduced with iOS 10, Markup lets you edit images, insert text and shapes, sign PDFs or documents, alongside many other great features.
Let us learn more about how to use Markup to edit screenshots on your iPhone and iPad to get the most out of it.
- How to sketch the iPhone screenshot using Markup
- Zoom in your iPhone screenshot
- Add text and caption to screenshot
- How to annotate a screenshot on iPhone
- How to add a signature to the image
- Use the eyedropper tool to match the color
- How to use the ruler tool
- Create hand-drawn shapes
- Blur or hide sensitive information
- How to revert changes made to a screenshot on iPhone
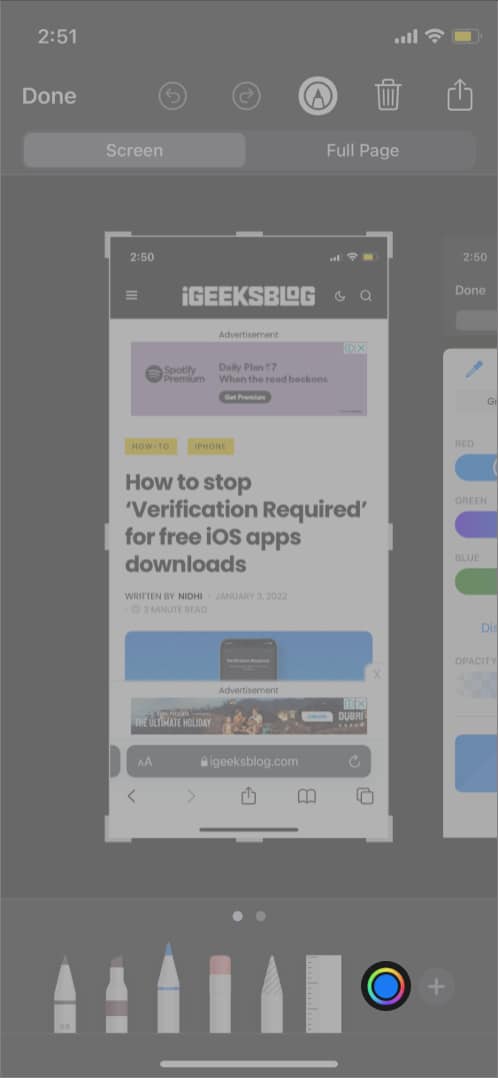
How to sketch the iPhone screenshot using Markup
After taking a screenshot on your iPhone or iPad, follow the steps below:
- Tap the small image at your screen’s bottom left.
Now, you will see the Markup screen with some tools at the bottom. - Tap the tools you want to use.
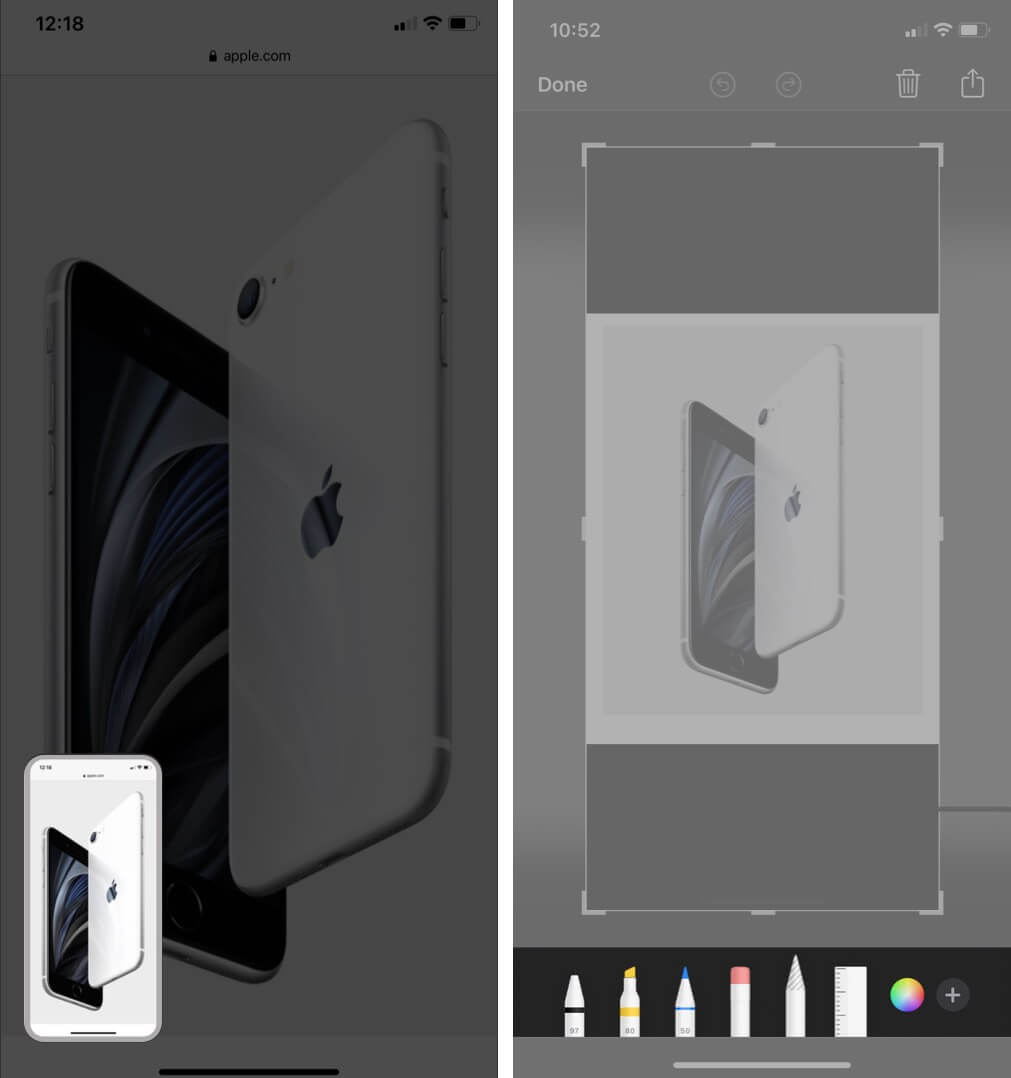
- Choose a pencil or colored pencil to draw or write something on a specific screenshot.
- To drag a particular object you’ve drawn, use the Lasso tool.
What’s more, we even have a guide to help you capture screenshots without using the physical buttons on your iPhone, do check it out.
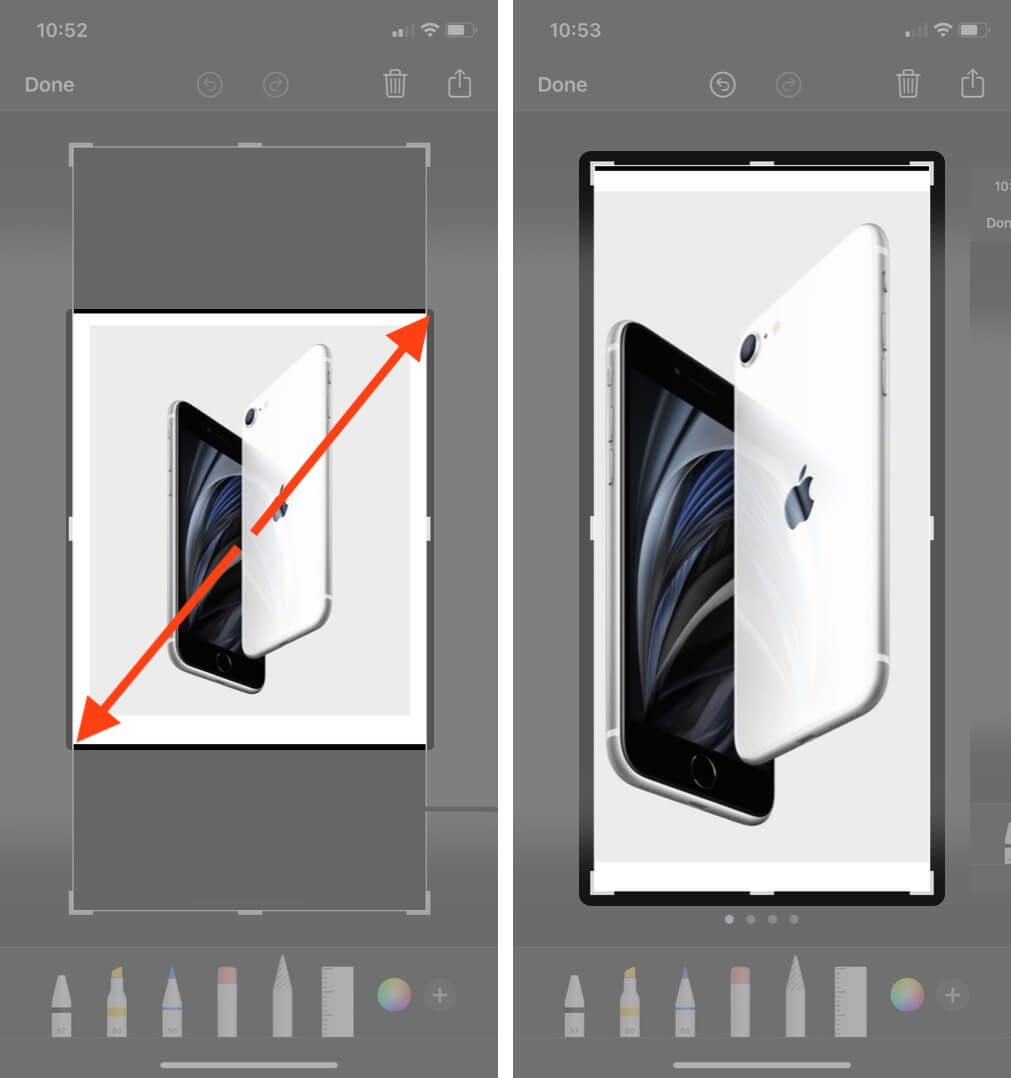
Zoom in your iPhone screenshot
You can directly pinch in or out and adjust your screenshot after repeating the steps mentioned in the above pointers.
Add text and caption to the screenshot
Adding text to images is helpful in many ways. You can use the iOS screenshot tool to add a description and caption. You can add text to an image by following the below steps.
- Click the Pen icon at the top to open the markup menu.
- Tap + button at the bottom right.
- Select Text from the pop-up menu.
A text box will appear on the screenshot.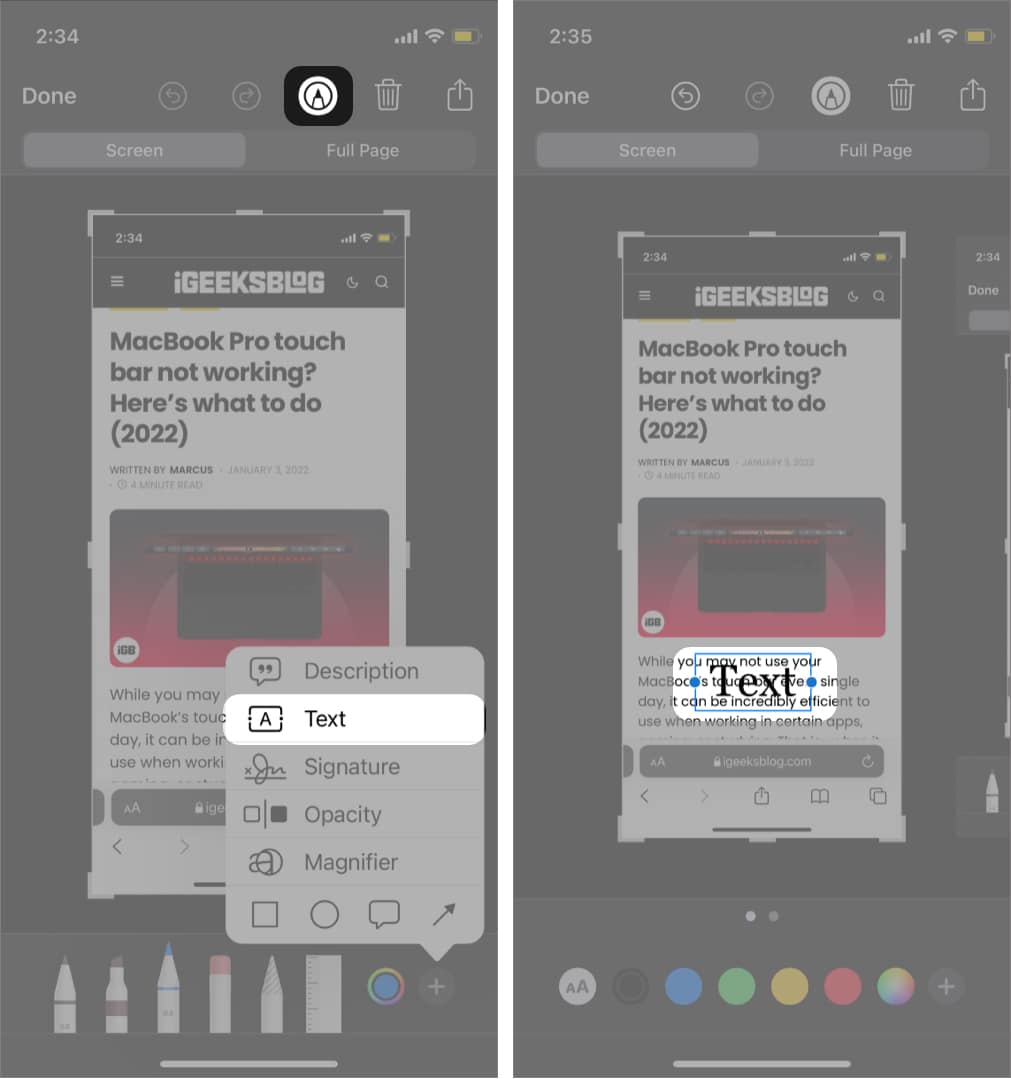
- Customize the text box by changing the background color, font, resizing font, and text color.
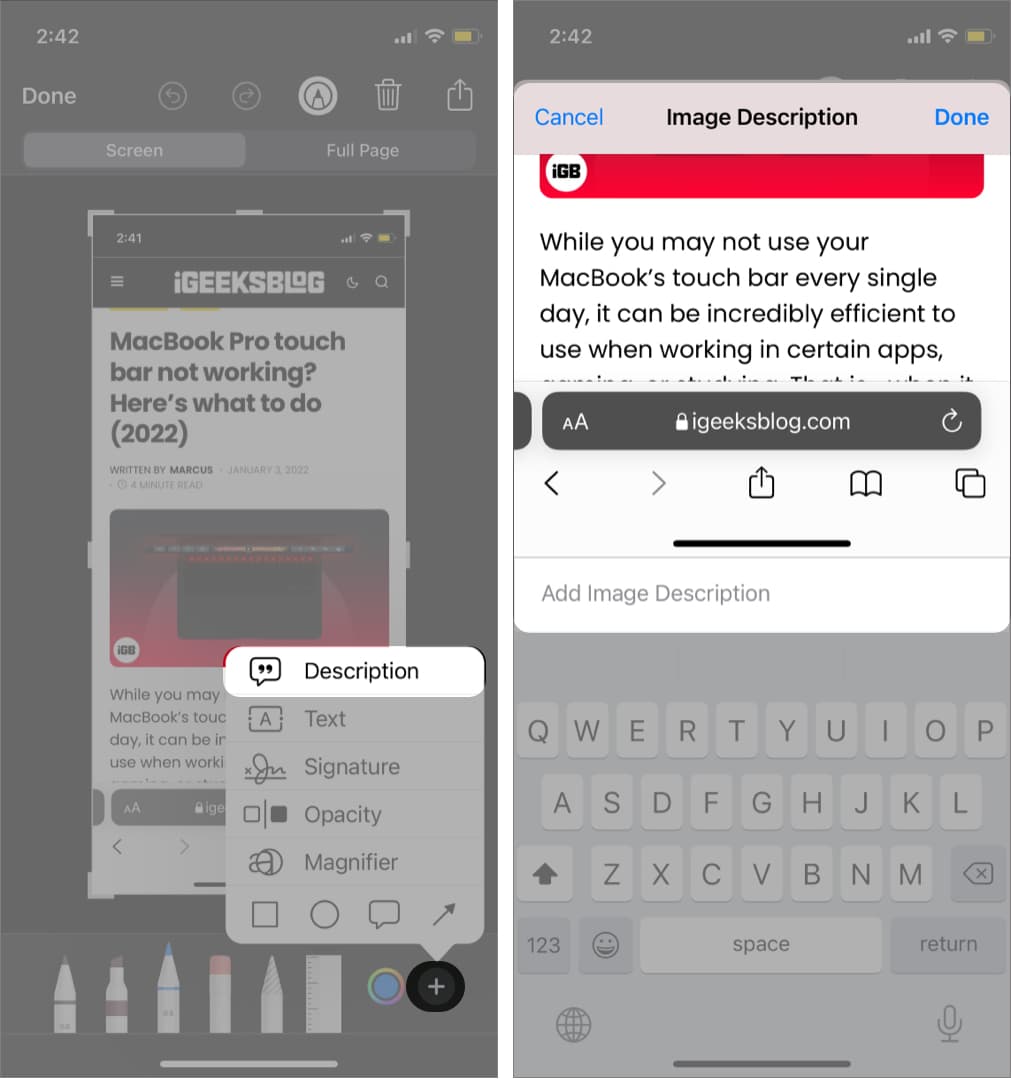
Add screenshot description
- Tap + button at the bottom right.
- Select Description from the pop-up menu.
- Add image description.
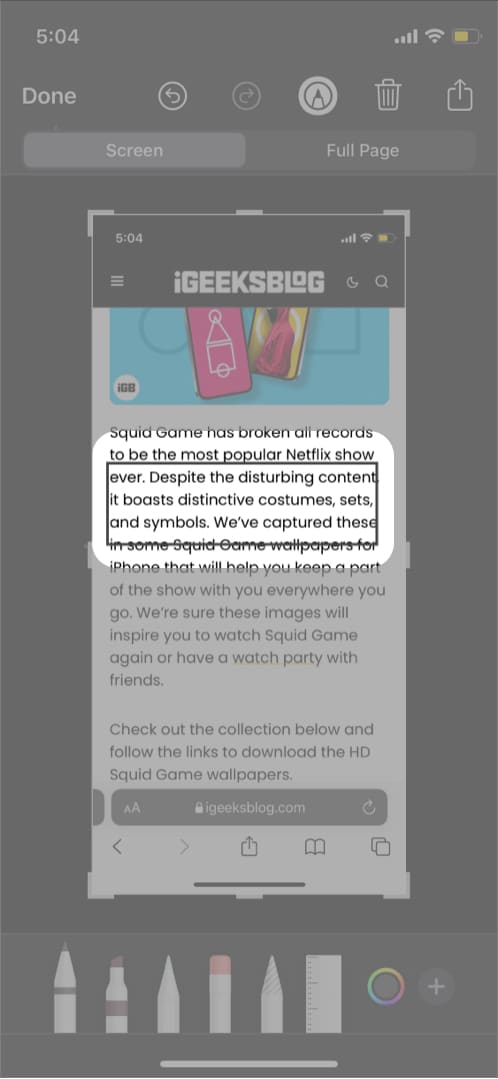
How to annotate a screenshot on iPhone
- Pencil or Highlighter can be used to annotate the text. If you wish to hide the annotated text or permanently delete it, both can be done.
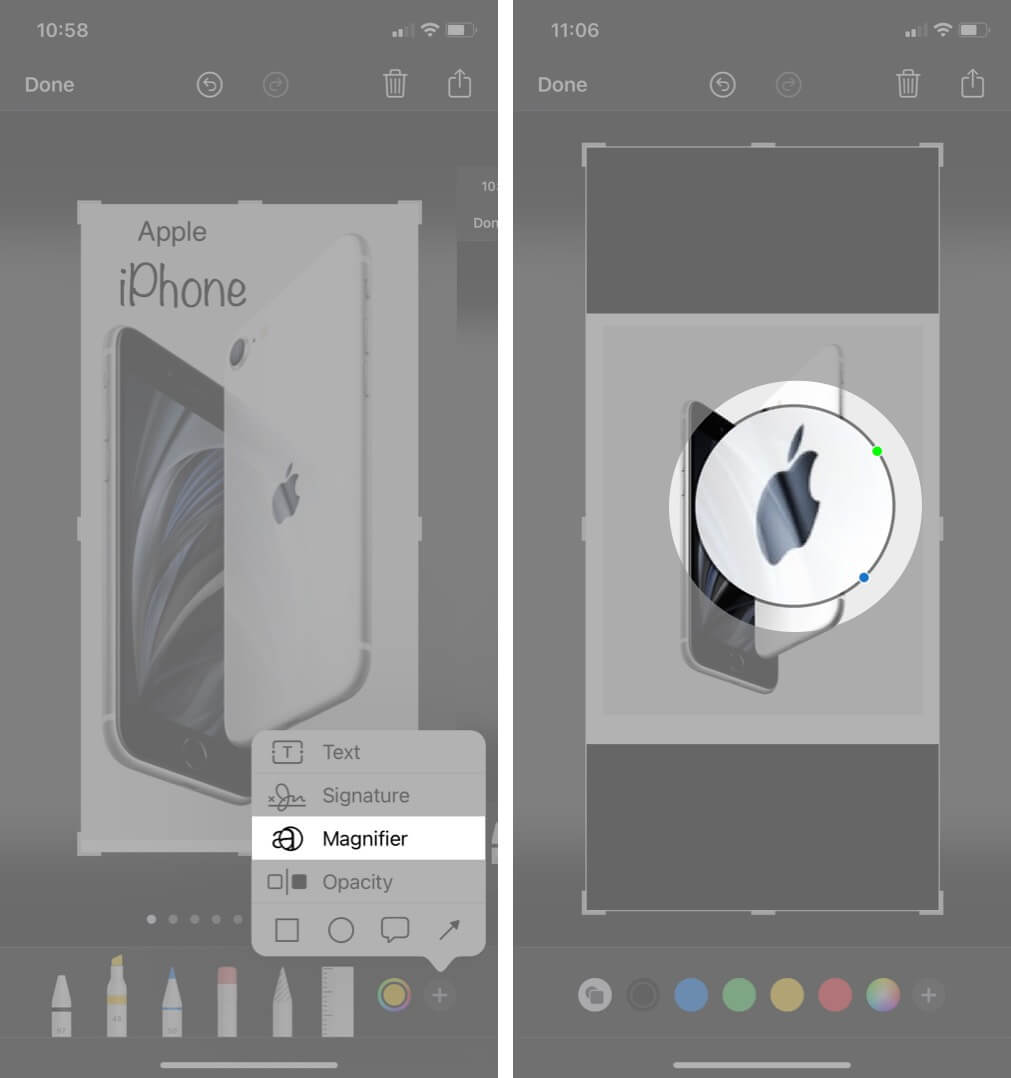
- Magnifier is used to enlarge a particular area that has to be highlighted in a particular screenshot for which different color options are available in Markup.
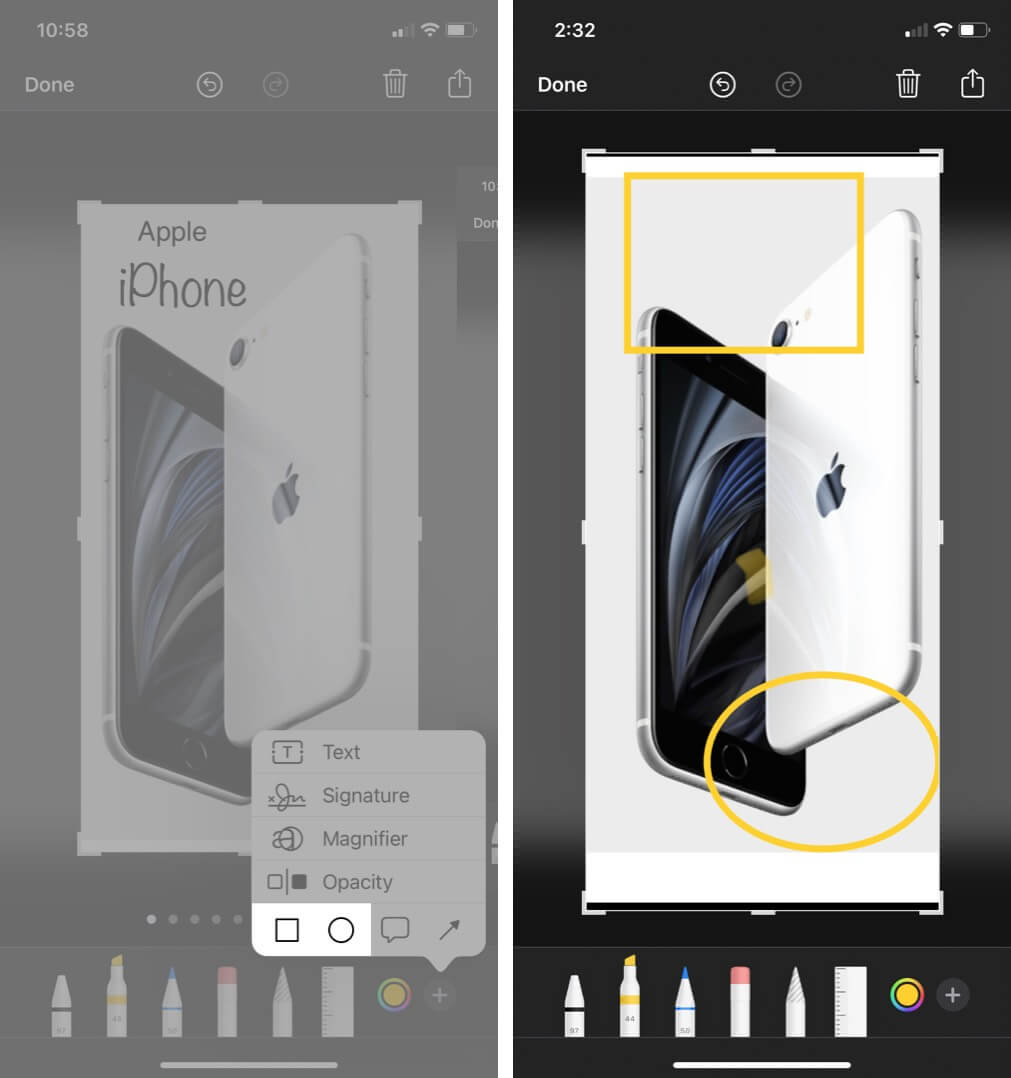
- Shapes are useful to highlight a particular area in a rectangular and circular figure.
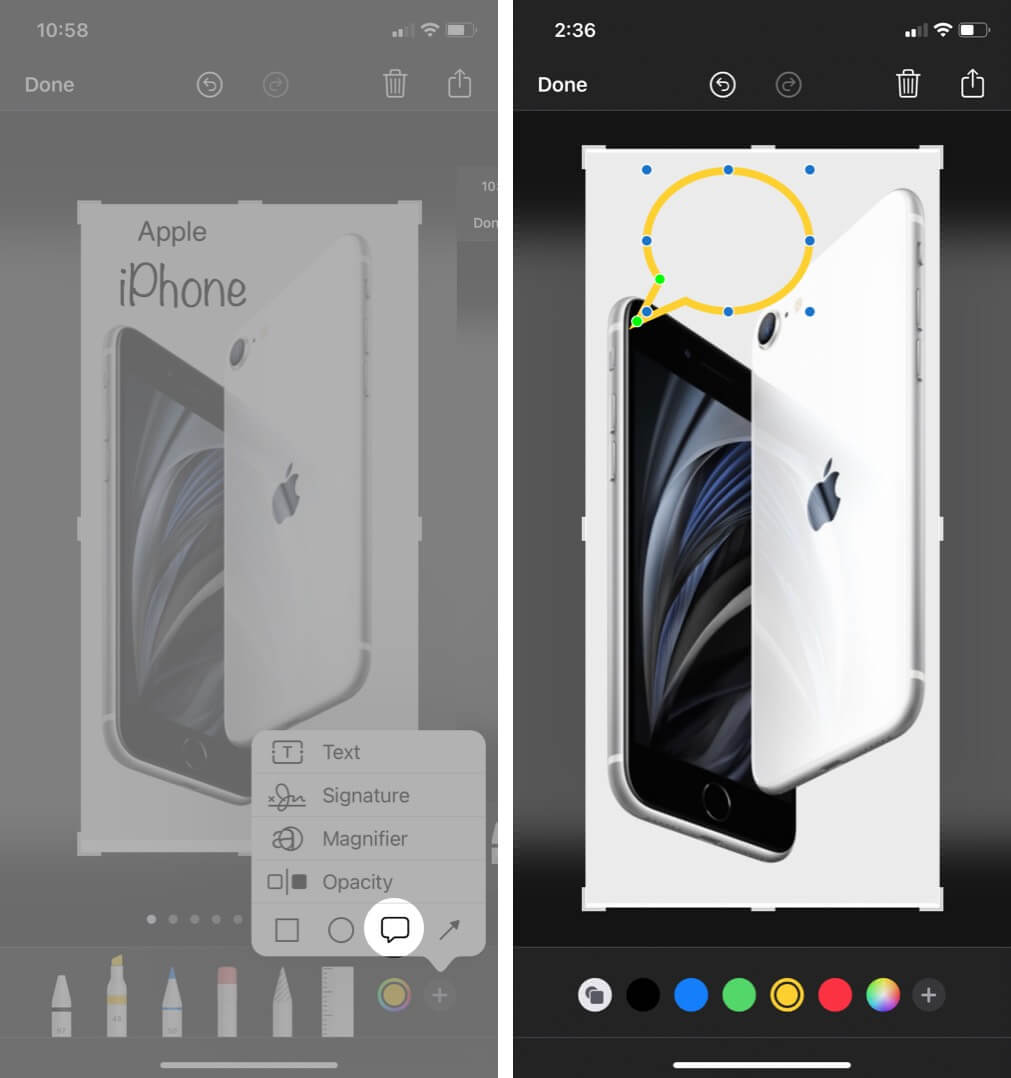
- Speech Balloons can be used mostly for graphics and mostly used in comic books, memes to express the thoughts of a particular character.
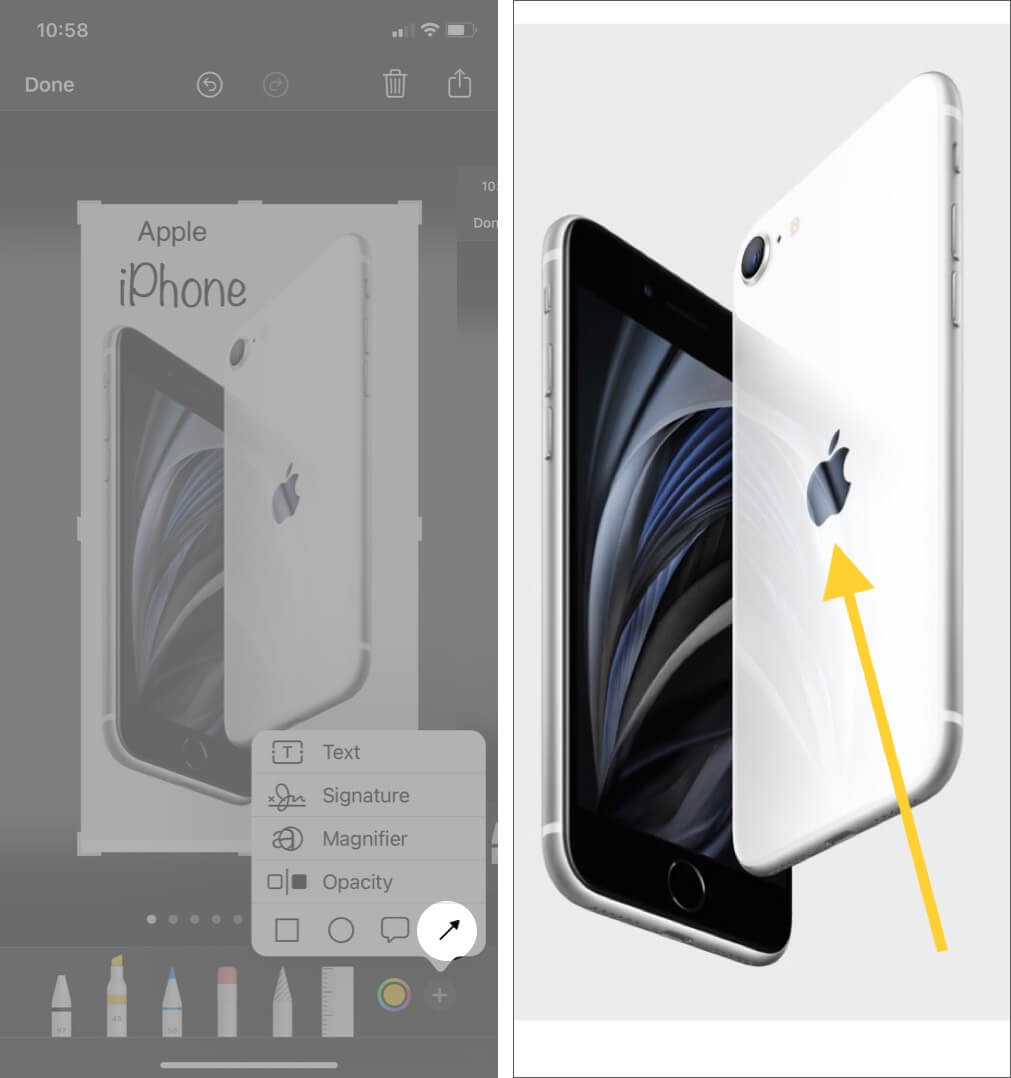
- Arrow is mostly used to point to a particular direction showing the user to move their concentration to the designated area.
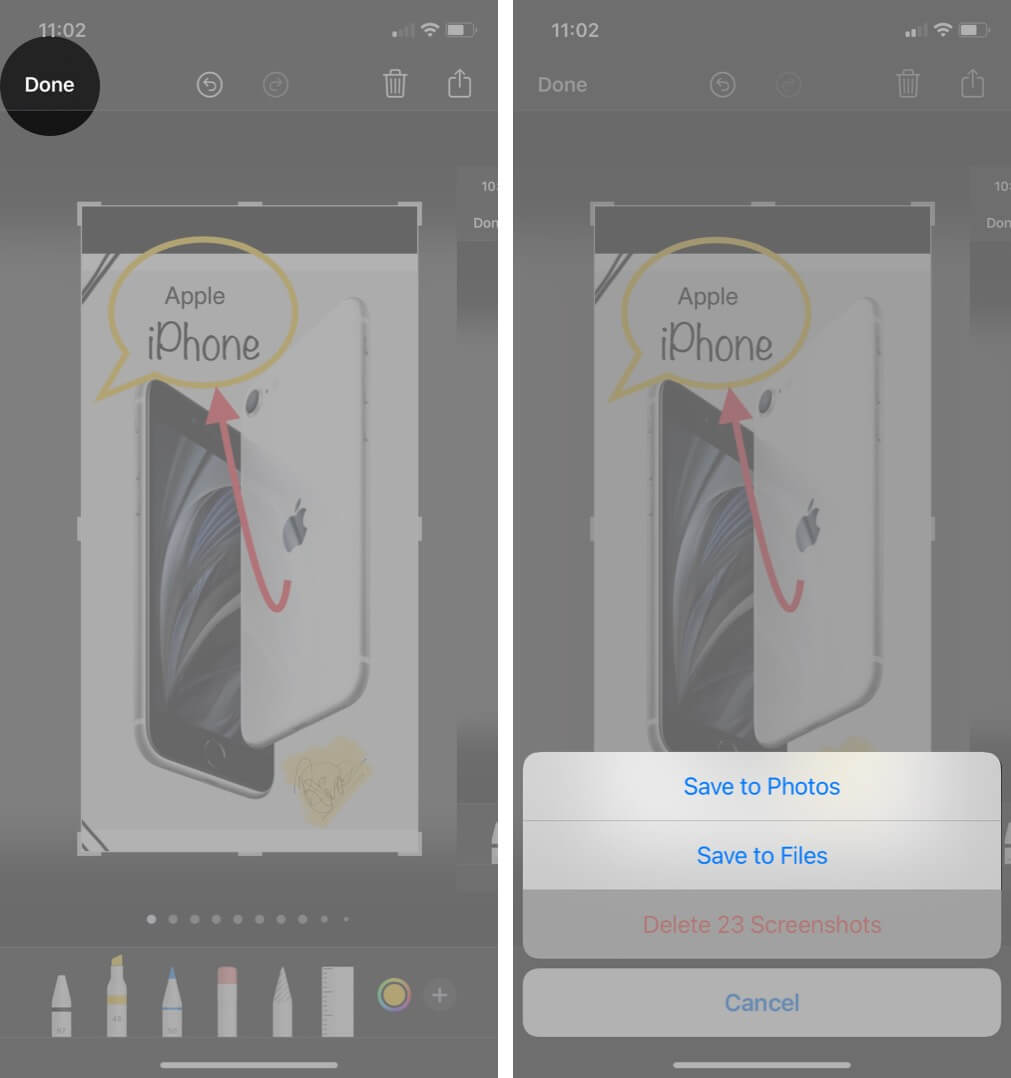
Now, you can finally tap Done to save your existing changes, after which you can choose if you wish to save your edited snapshot to Photos or Files.
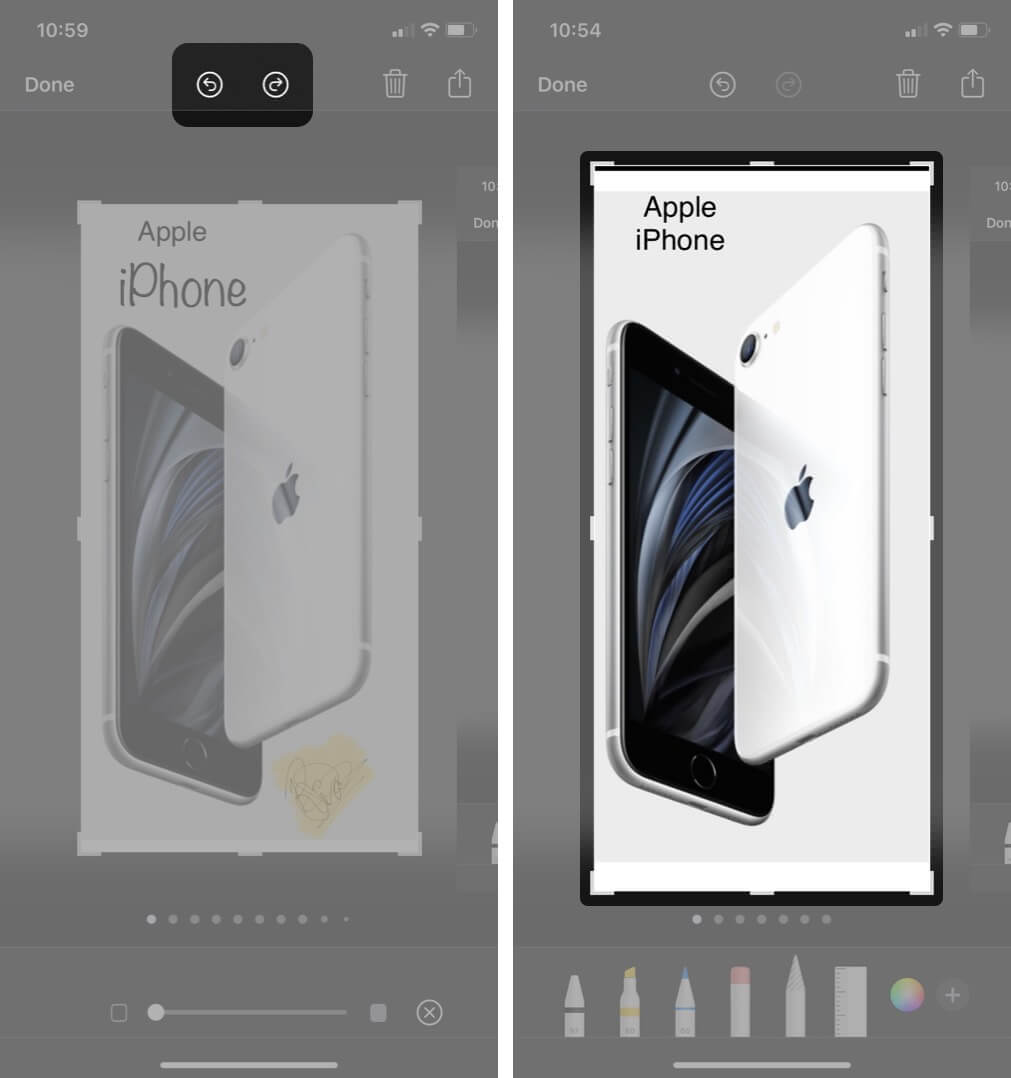
If you made a mistake and wish to undo or redo the changes, tap the background arrow. It will undo the changes one by one. Alternatively, tap the forward arrow to redo.
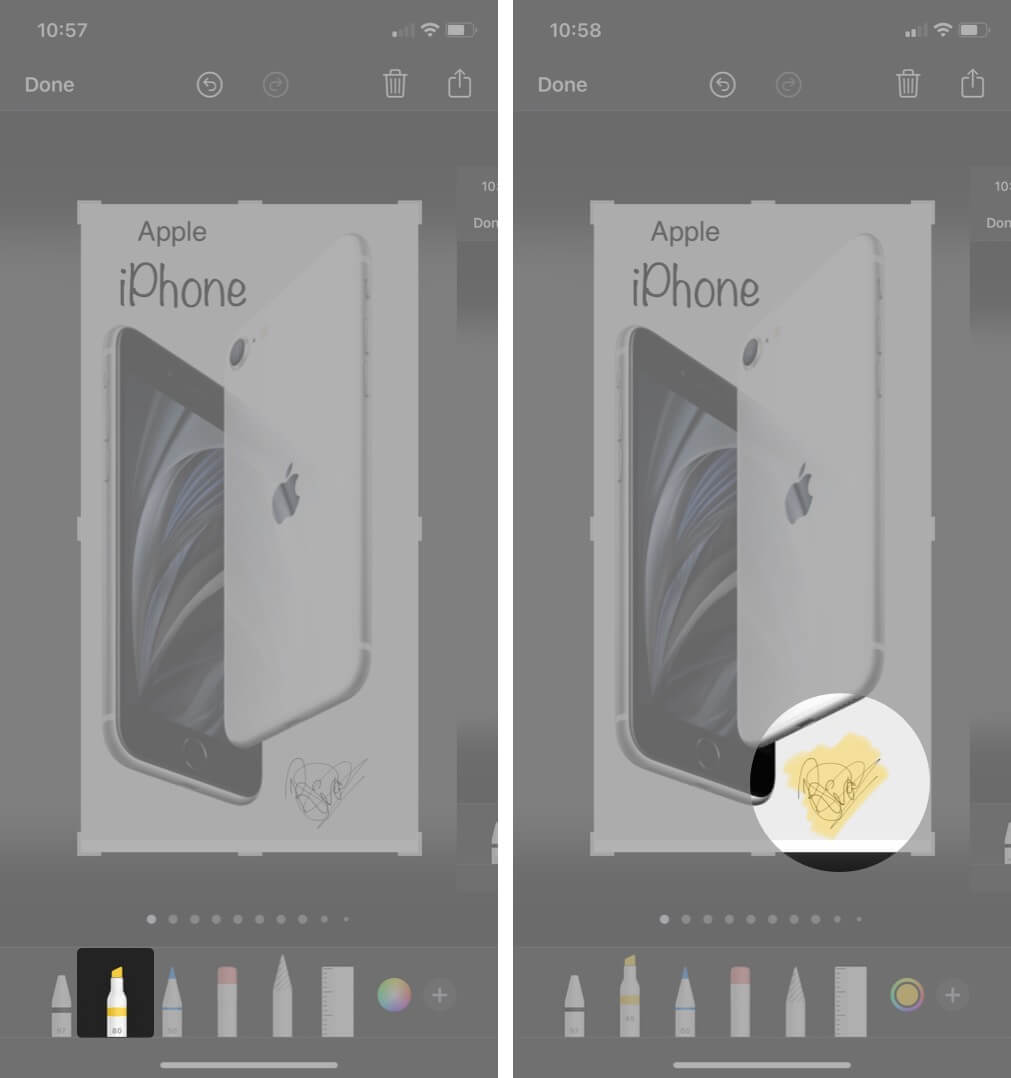
How to add a signature to the image
I feel this is one of the easiest ways to sign documents. Simply take a screenshot and use the Signature tool. I have used this tool to add signatures to invoices and other documents. You can also use it as an alternate to watermarking.
- Tap + button at the bottom right.
- Select Signature from the pop-up menu.
- Tap Add Signature to create a new signature.
- Sign your name using fingers.
- Tap Done to add the signature.
You can change the size and move the signature across the screenshot.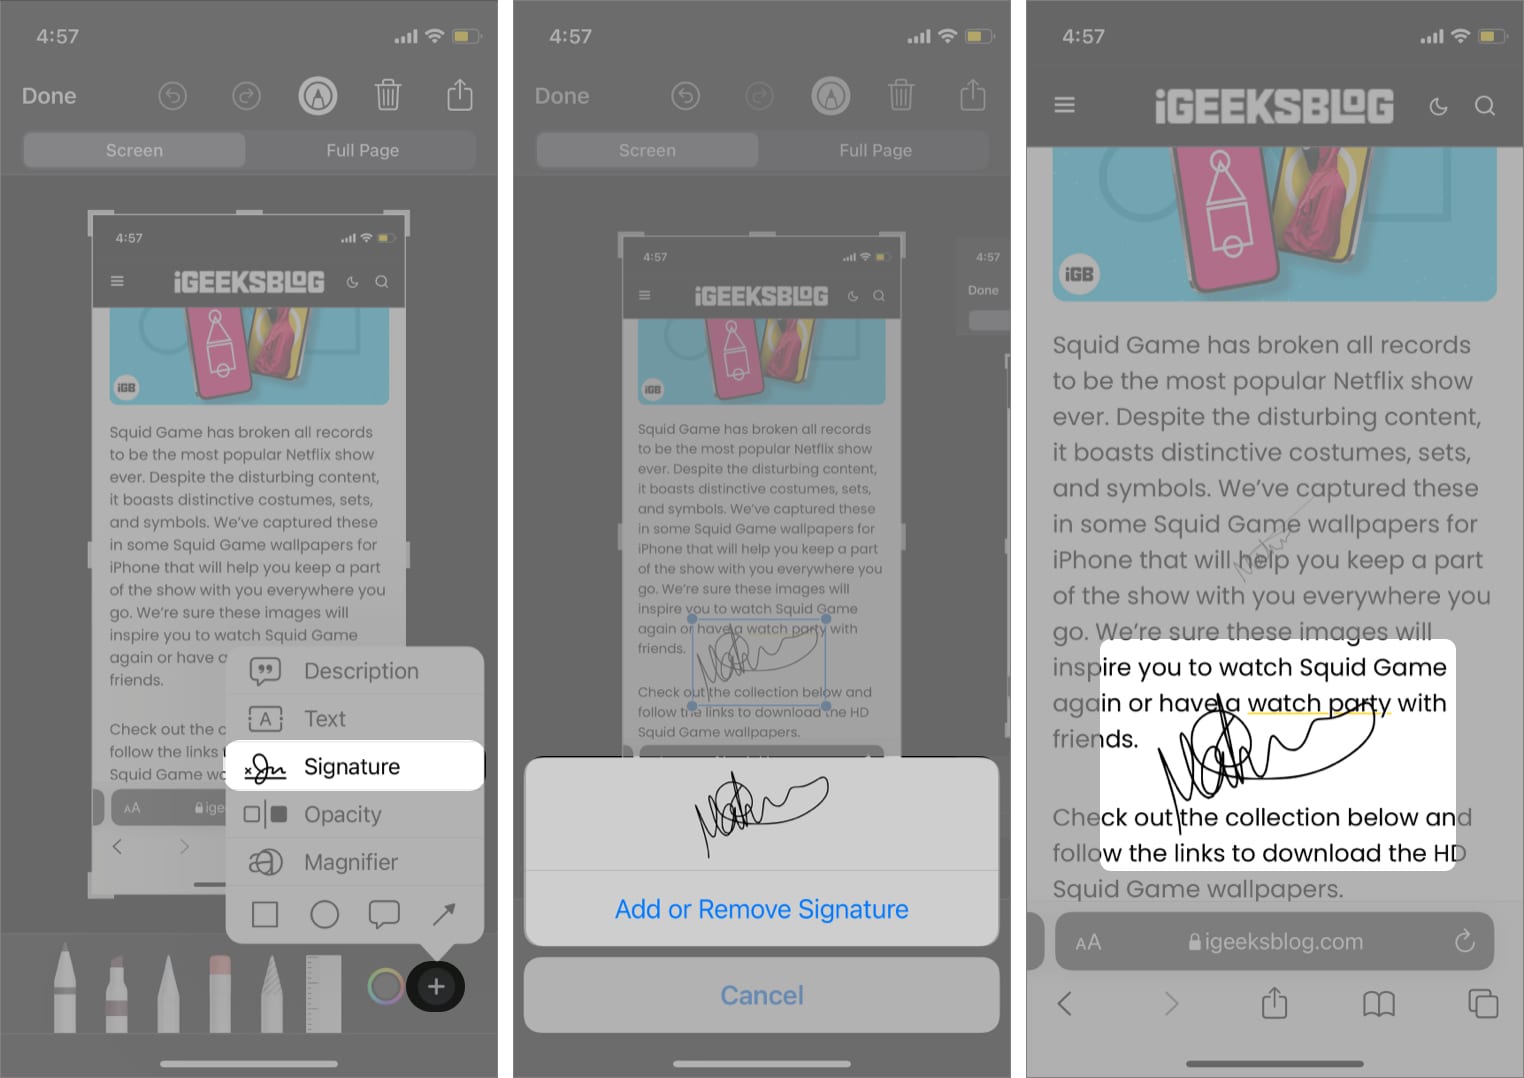
Use the eyedropper tool to match the color
Getting hold of your favorite color in the exact shade can be daunting. The eyedropper feature lets you match color with a great deal of accuracy.
- Click the Pen icon on the top to open the markup menu.
- Tap the eyedropper icon (multi-colored circle) at the bottom.
- Select the Inkfiller icon on the top left corner.
- Move the magnifier to where you want to pick the color from.
The color picker matches the color.
How to use the ruler tool
You can take the help of a ruler tool to draw straight lines on a screenshot. The tool is also useful for drawing lines inclined to a specific angle. Select the ruler icon from the bottom menu bar.
The ruler tool displays angles in real-time for your reference. You can change the angle by rotating the ruler. Use two fingers and twist on the opposite side to change the angle.
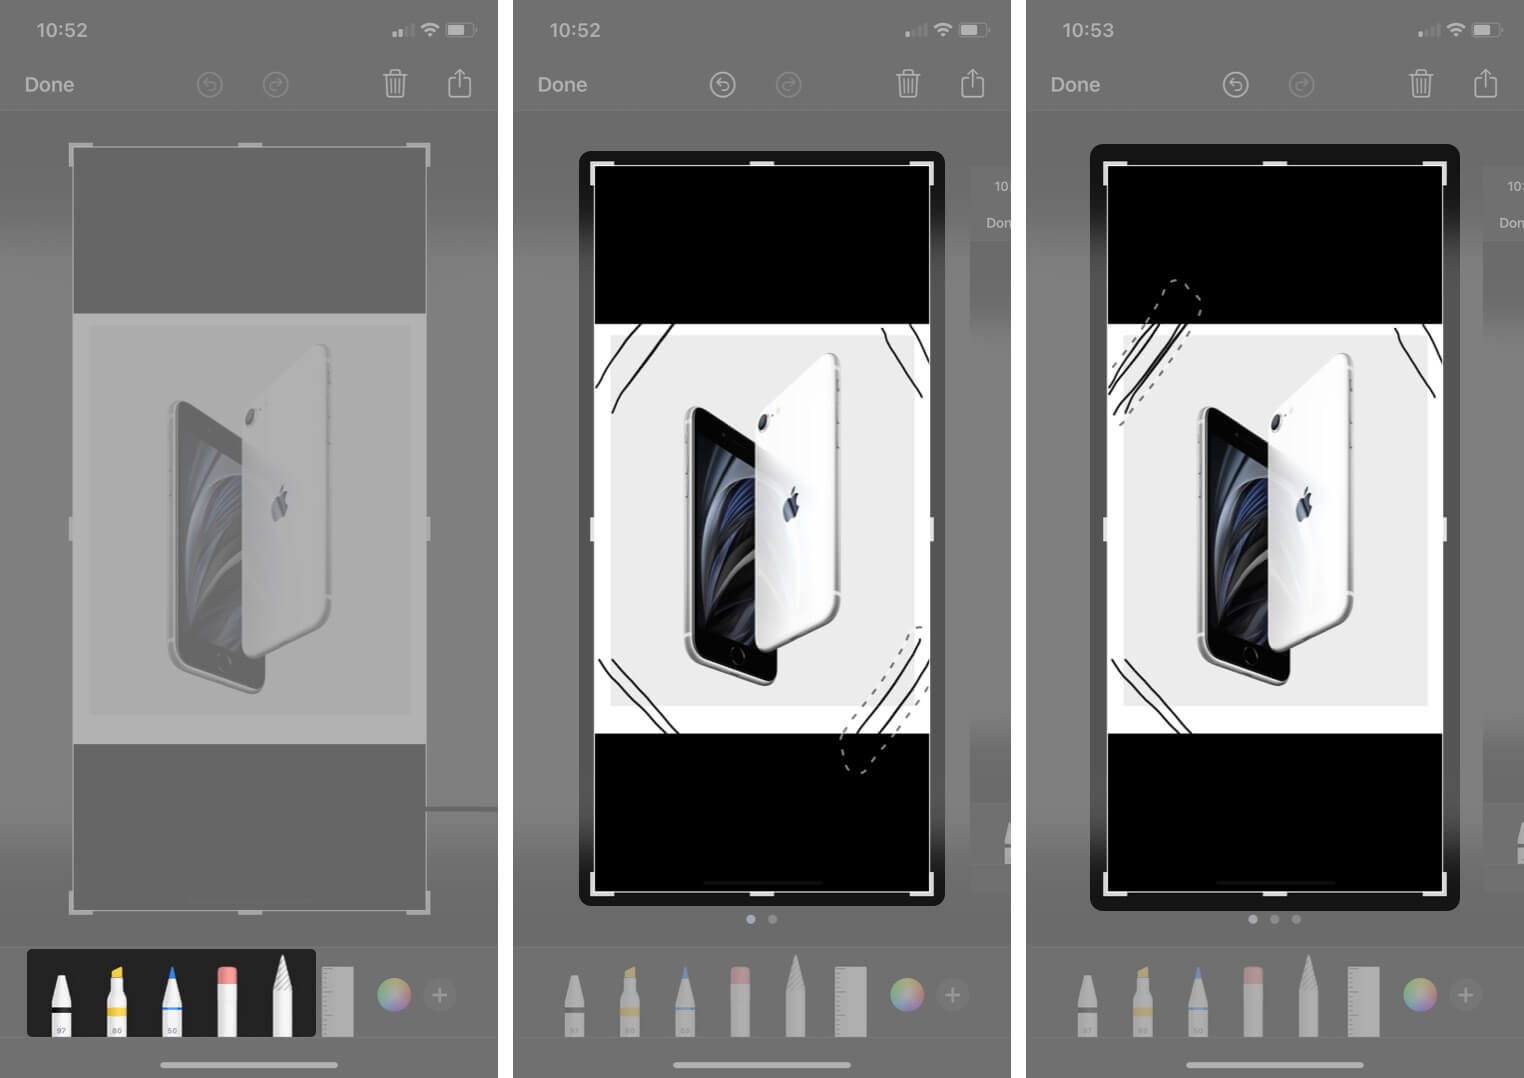
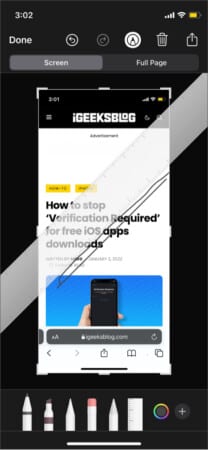
Create hand-drawn shapes
If the preset shapes are not enough, you can always create hand-drawn shapes.
- After taking a screenshot, draw a basic shape.
It could be anything ranging from a triangle, circle, or square. - Now, press and hold the screen for a few seconds.
- The screenshot tool will automatically convert it into a geometrical shape.
Blur or hide sensitive information
Many times, a screenshot has sensitive information. It could be our email address, device IMEI, contact details, etc. In such cases, we can blur the sensitive information before sharing the screenshot on the internet or with friends.
The most effective way to mask sensitive information is to use an opaque tool. Tap the square icon and place the shape on sensitive information.
- Tap the pen icon to open the markup tool.
- Select Shape.
- Tap the first icon from the left in the bottom pane.
- Choose the opaque square.
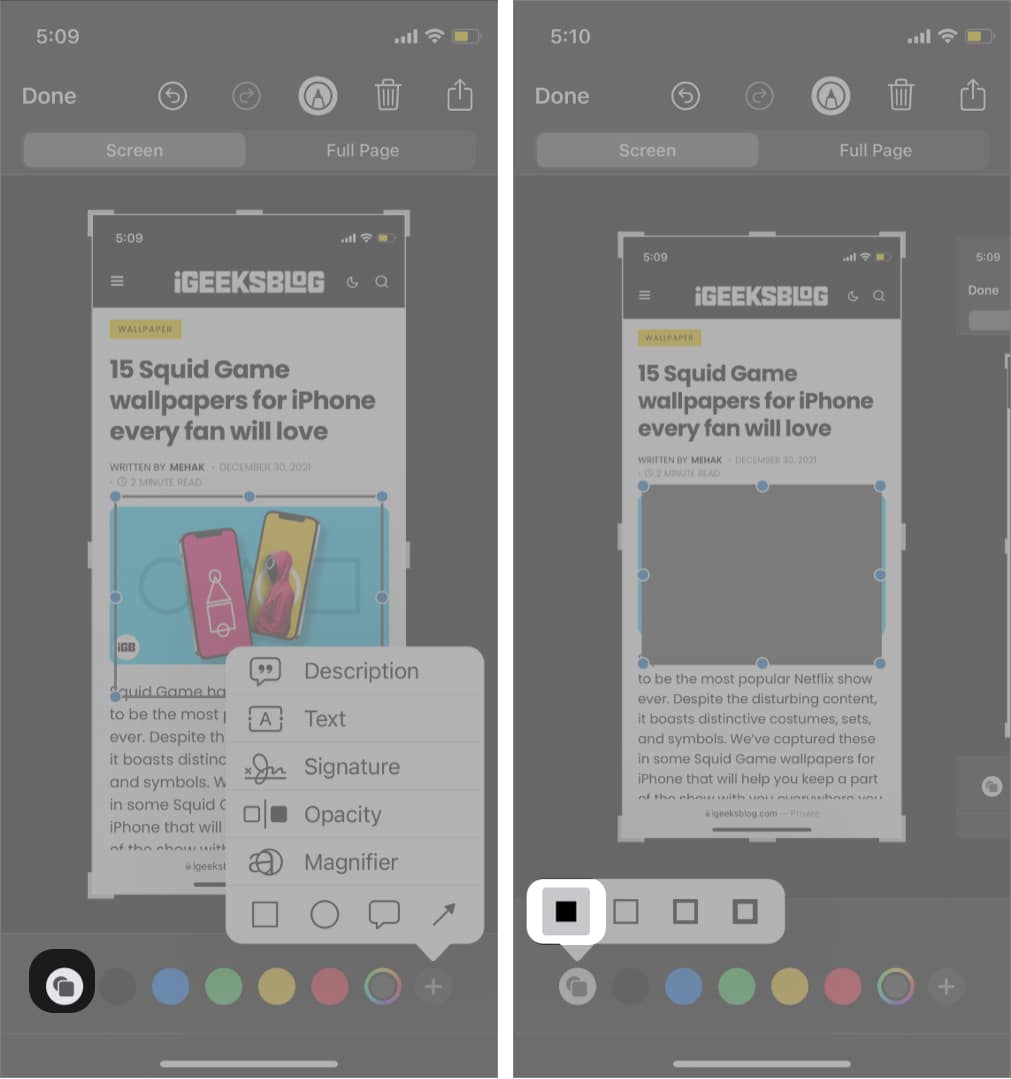
- Change the background color to your liking.
How to revert changes made to a screenshot on iPhone
- Open the Photos app and select the screenshot.
- Tap Edit.
If you can undo it, a Revert option will appear in the bottom right. - Tap Revert.

Summing Up!!
Well, congrats! You are now a certified iPhone screenshot wiz! That’s how you can use Markup on iPhone and iPad to edit your screenshots. Do you know any cool iPhone screenshot tricks? If so, share it with us in the comments below.
Related posts:
- How to take screenshots on iPad using gestures
- Take a screenshot on Apple Watch
- How to print from iPhone and iPad
- 4 Ways to take a scrolling screenshot on iPhone
Author
🗣️ Our site is supported by our readers like you. When you purchase through our links, we earn a small commission. Read Disclaimer.