Is your iPhone memory filled with your photos collection, but you want to keep them? Transferring your photos from your iPhone to the computer (whether Mac or Windows PC) is the best solution. But if you are looking for the easiest way to import photos, this article is for you! I will be taking you through 5+ straightforward methods one by one. So let’s get started with the easiest one.
- How to import photos from iPhone to Mac wirelessly
- How to transfer photos from iPhone to Mac via USB cable
- How to transfer pictures from an iPhone to PC
How to import photos from iPhone to Mac wirelessly
Follow the methods mentioned below to transfer photos from your iPhone to Mac wirelessly.
1. Using Airdrop
This is one of the easiest ways to transfer photos from your iPhone to Mac without any hassle of plugging in a USB cable. Let’s have a look at how to use Airdrop to transfer photos to your Mac.
Note: Ensure that you have toggled on Bluetooth and Wi-Fi on your iPhone and Mac.
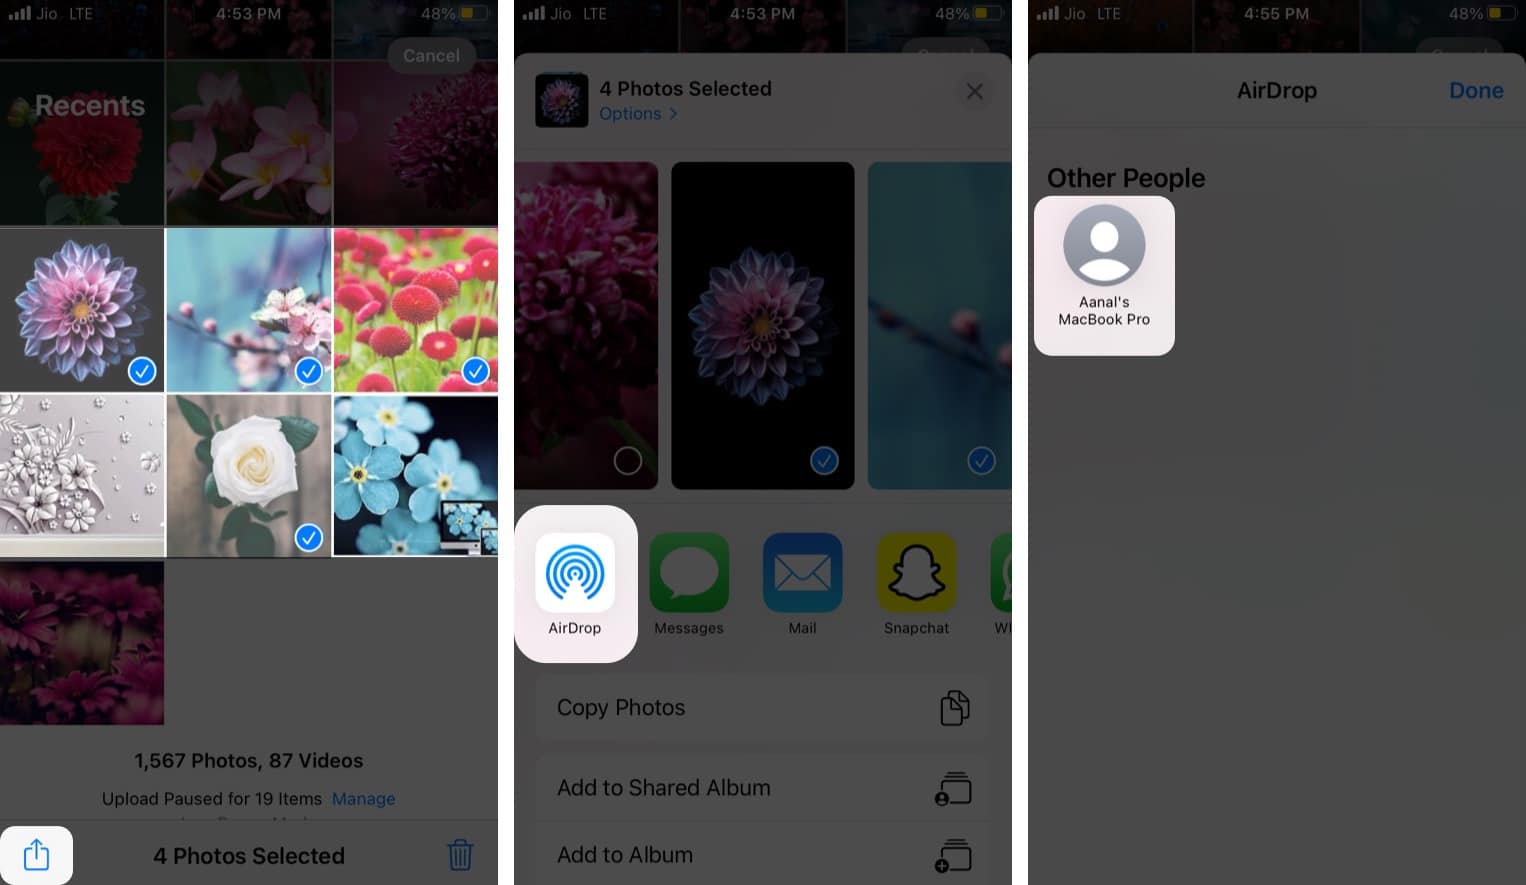
- Open the Photos app on your iPhone.
- Select the photo or video to transfer and tap Share.
Tap Select at the top right to select multiple photos at once. - Now, select AirDrop.
- Choose your Mac from the list.

- The shared photo(s) will appear in your Finder window.
2. Using iCloud Photos
- Sign in to your Apple ID on devices you want to sync your data.
- Go to iPhone Settings.
- Tap your name → iCloud.
- Choose Photos and toggle on iCloud Photos.
Next, follow the below steps on your Mac:
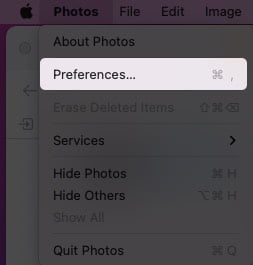
- Launch the Photos app on your Mac.
You can find it in the Dock, by Spotlight search (command + space bar), or in the Launchpad. - Click Photos at the top left and select Preferences.

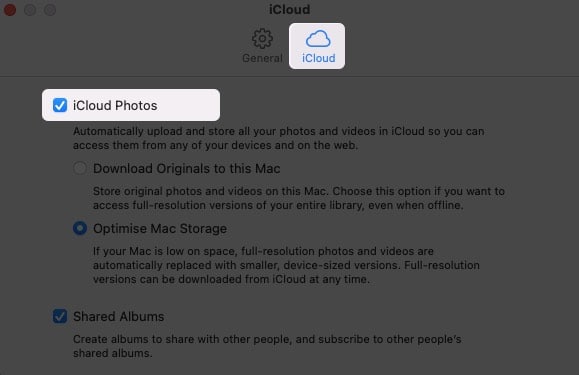
- Go to the iCloud tab.
- Next, check iCloud Photos.

- Alternatively:
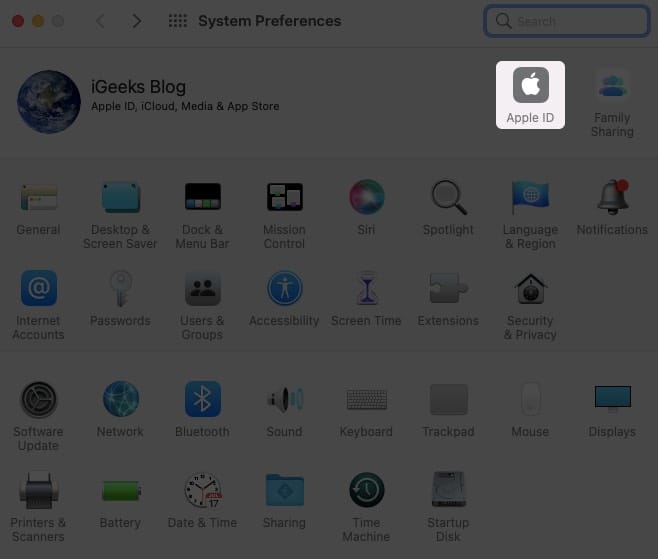
You can also follow the below steps:- Click the Apple logo at the top left
- Select System Preferences.
- Tap Apple ID.

- On the left menu, select iCloud.
- On the right, check Photos and iCloud Drive.


Enabling iCloud Photos on your Mac and iPhone will automatically sync photos and videos between iPhone and Mac without using USB. However, it could take up to 24 hours to complete syncing once enabled.
iCloud Photos always saves photos and videos in their full resolution, and you can download them on your Mac anytime using the Photos app.
How to transfer photos from iPhone to Mac via USB cable
Don’t want to sync your iPhone photos to Mac? Follow the methods mentioned below, which include the use of good old USB cables.
1. Import to the Photos app
- Connect your iPhone to Mac using a USB or USB-C cable.
- Now, open the Photos app on your Mac.
- Click your device’s name in the sidebar.
- If prompted, unlock your iPhone and tap Trust to continue.
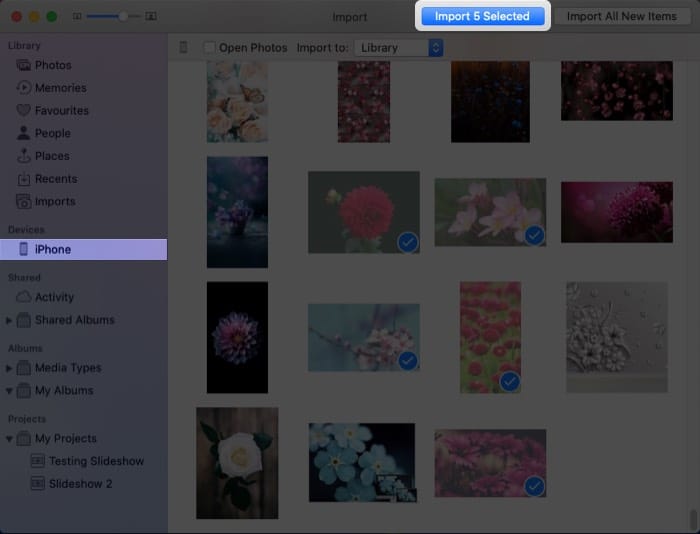
- Now select the pictures or videos you want to import to your Mac, then click Import x Selected.
- You can also click Import All New Items to transfer the recent pictures and videos to your Mac that are not there on your Mac.
Now you can disconnect your iPhone and use the same steps mentioned above whenever you want to transfer photos from your iPhone to Mac.
2. Using Finder
Did you know that you can use Finder to transfer photos from your iPhone to Mac using USB? No, then follow the steps to transfer photos between your iPhone and Mac through Finder.
Note: For this method, you must turn off iCloud Photos.
- Connect your iPhone to Mac using a USB cable.
- Open Finder on your Mac.
- Click your iPhone under the devices tab in the sidebar, then click Trust.

- Now click Photos, and check Sync photos to your device from:
- By default, pictures will be synced from the Photos app.
- You can also select a specific folder you want to sync photos from.
- You can also choose to sync all photos or selected albums.
- Finally, click Apply.

These were some of the easiest ways to transfer photos from your iPhone to Mac. But what if you got a Windows PC? Don’t worry; we have you covered.
How to transfer pictures from an iPhone to PC
Transferring photos and videos from iPhone to a Windows PC isn’t as seamless as transferring it to Macs. But there are a few straightforward methods. Let’s have a look at them.
1. Using iTunes
- Open iTunes on your Windows PC.
- Connect your iPhone using a USB cable.
- Unlock your iPhone and click Trust to continue.
- Now click Photos in the left sidebar.
- Select Sync Photos from → Done → Apply.
Now all your photos will be synced with your Windows PC whenever you connect your iPhone with PC.
2. With Windows Photos app
- Connect your iPhone with Windows PC using a USB cable.
- Click the Start button → Photos.
- Now select Import → From a USB device.
- Select the files to import to your PC and click Continue.
Note: You may need to enter the password of your iPhone and tap Trust when prompted.
3. Using iCloud
- Install iCloud on your PC from the Windows Store.
- Now, open iCloud.
- Enter your Apple ID and password and click Sign In.
- Click Options… in the Photos section.
- Check the box for iCloud Photos.
- Enable Download new photos to my PC to download.
You can choose to disable Upload new photos from my PC and Shared Albums according to your preferences. - Finally, click Done → Apply.
Now photos from your iCloud will be downloaded to your PC without any hassle.
Do you know any other method to transfer photos from iPhone to PC? Tell us in the comments below.
Also Read:
- How to transfer data from your Windows PC to a Mac
- How to recover deleted photos from iPhone or iPad
- Find and delete duplicate files on Mac
- How to recover deleted photos on Mac
🗣️ Our site is supported by our readers like you. When you purchase through our links, we earn a small commission. Read Disclaimer.