
The capability to share folders via iDevices has been a long-requested functionality. With iOS 13.4, Apple finally introduced a feature in iCloud Drive, which lets you securely share folders instead of individual files. Let me show you how to share iCloud Drive folders and edit permissions.
- How to Share Folders with iCloud Drive from iPhone and iPad
- Editing Permissions of Shared iCloud Folders on iPhone or iPad
How to Share Folders with iCloud Drive from iPhone and iPad
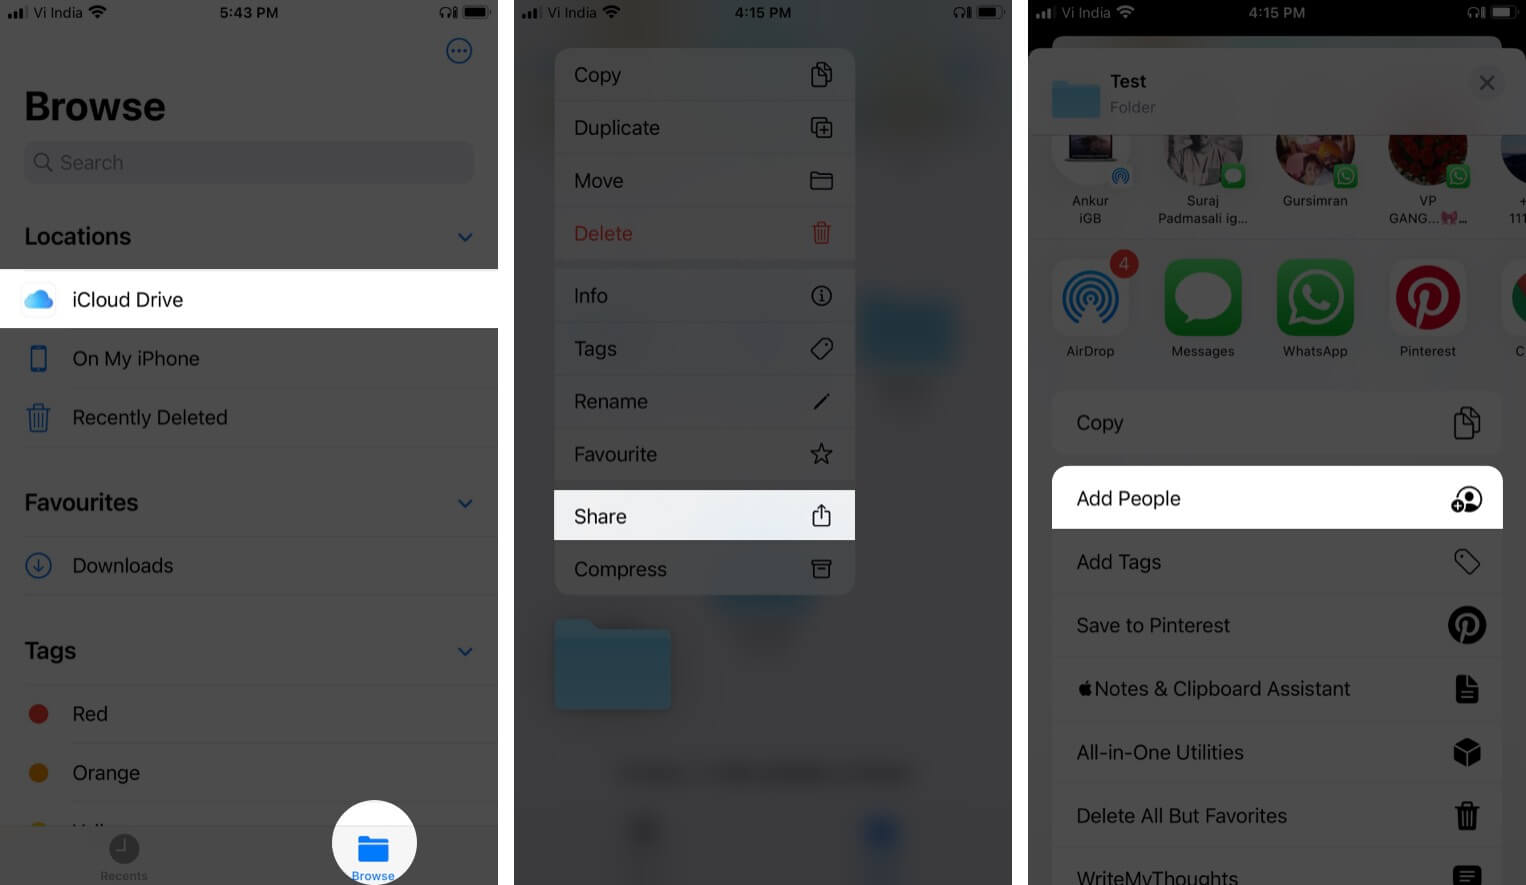
- Launch the Files app on iPhone or iPad.
- Select iCloud Drive in the Browse tab.
- Long-press on the folder you wish to share.
- Tap on Share from the pop-up menu.
- Tap on Add People.

- You can also tap on Share Options to edit the access and permission of the folder.
- Now go back, and select the Sharing Option as per your preferences.
- Type the name of the person you want to share the folder with.
- Tap on the arrow icon to share.
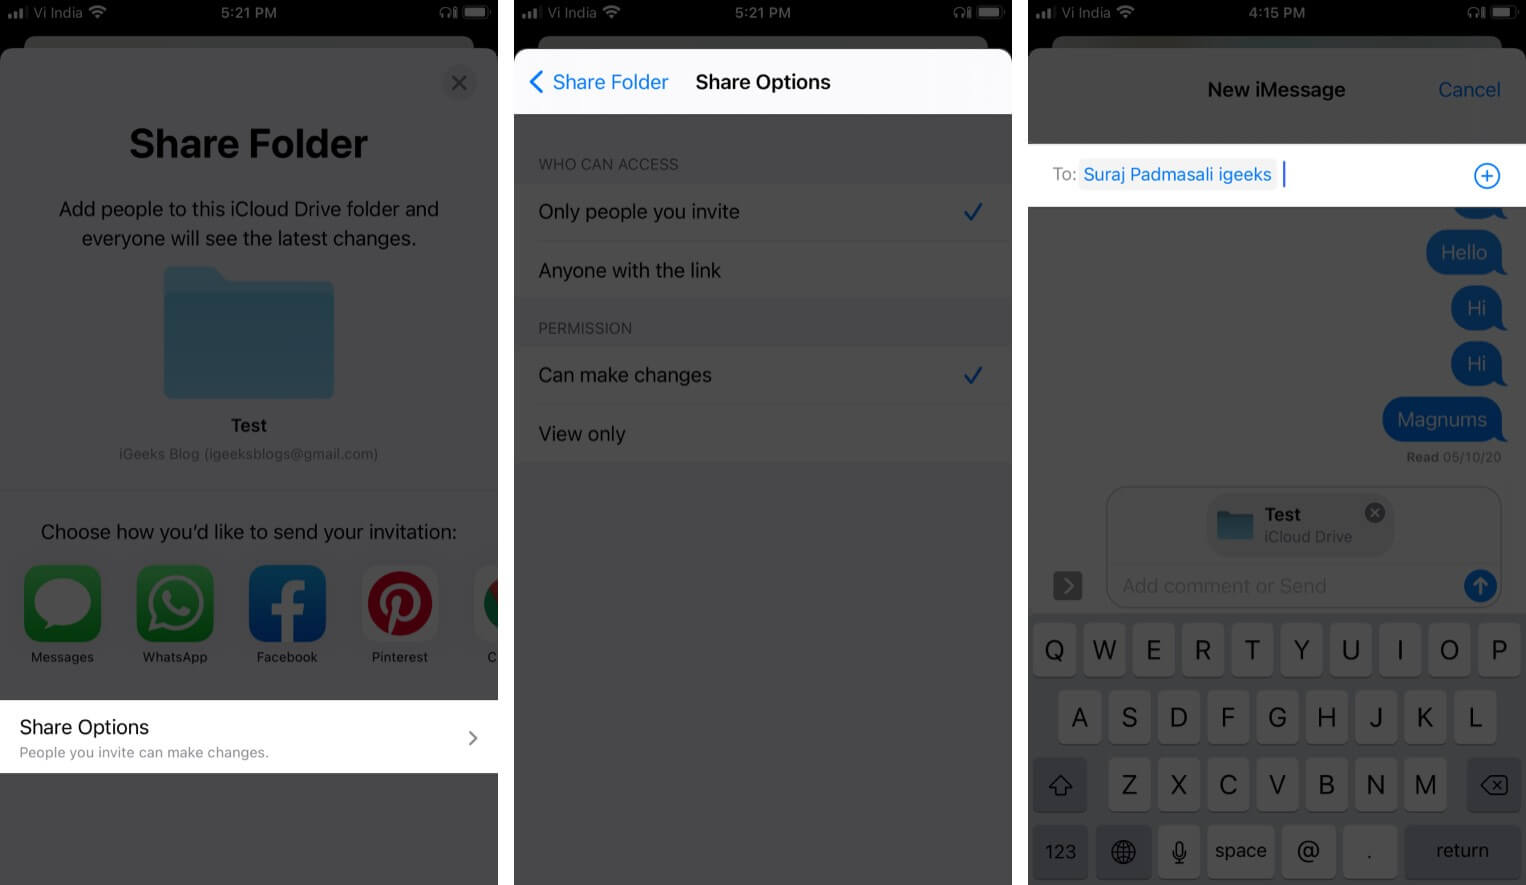
Keep in mind: If you are on iOS 14.2 or above, you may see the “Share on iCloud” option instead of “Add People.”
Note: You can also tap on the three-dotted icon in the upper right corner, tap on select, and then select the folder you wish to share.
Now that you have shared the folder, you may also wish to change its permissions at a later stage. Here’s how you can do that.
Editing Permissions of Shared iCloud Folders on iPhone or iPad
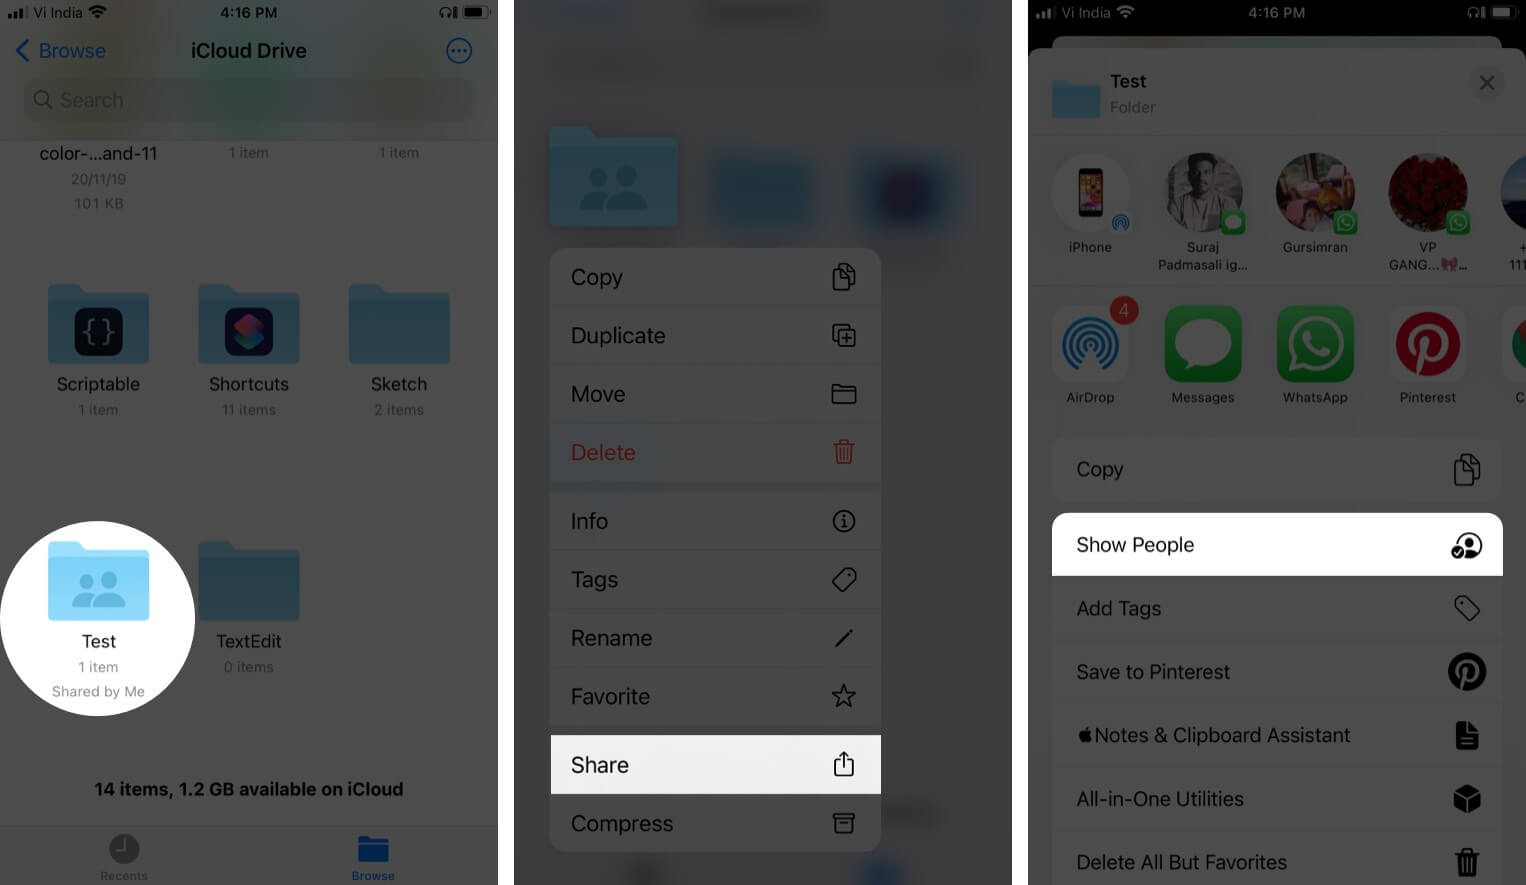
- In the Files app, long-press the folder you shared.
- Tap on Share.
- Tap on Show People.
- From here, you can edit the folder’s permissions.

Know the Permissions:
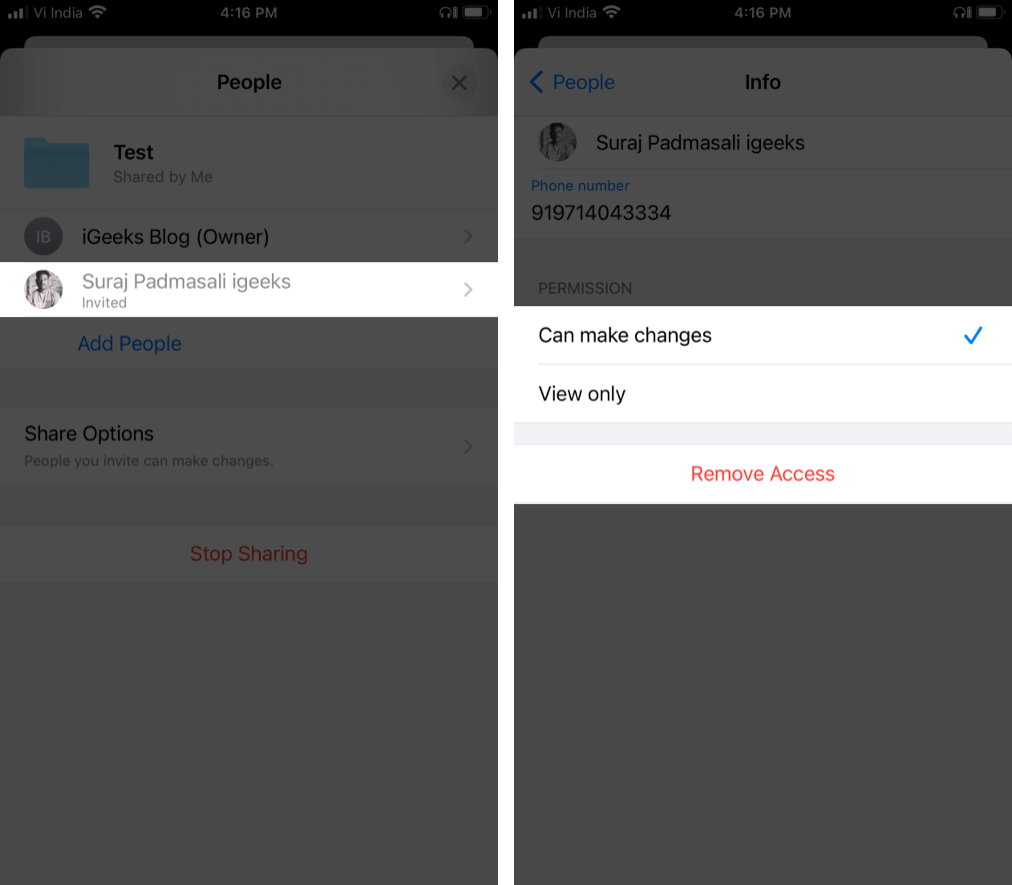
- Invite Participants: Tap on Copy Link or Add people and select how you want to send the invitation. You will also see the option ‘Send Link’ if you have chosen “Anyone with the link” in the sharing options.
- Remove Participants: If you have set “Only people you invite” as your sharing option, tap on the participant’s name, click on ‘Remove Access,’ and select Ok to confirm. You can also change the access you have given to that participant.
- Change Sharing Options: When you go to ‘Share Options,’ you can select who you want to give access to. The options include – ‘Only people you invite’ or ‘Anyone with the link.’ You can also select whether you want people to view only or make changes to the folder. Thus, leaving the power to you.
- Stop Sharing: You can tap on ‘Stop Sharing’ and select Ok to confirm. You can also move or delete the folder from iCloud Drive to revoke their access to the shared files.
Share iCloud Drive Folders from iPhone!
I hope this tutorial was helpful, and you uncovered a new, productive trick.
Before you get busy sharing data with your friends, tell us, what do you think about iCloud Drive in general? Do you think it has a chance to stand against established players like Google Drive, Dropbox, One Drive, Box, etc.? Share your opinion in the comment section below.
Also, Take a look at:
- How to Save Email Attachments to iCloud Drive on iPhone
- Create Dropbox-like links in iCloud Drive on iPhone and iPad
- How to Use iCloud Music Library – An Ultimate Guide
- How to block someone in Google Drive on iPhone
🗣️ Our site is supported by our readers like you. When you purchase through our links, we earn a small commission. Read Disclaimer.