
When you encounter an iTunes error like 3194, network failures, or connectivity issues, it is recommended to edit the hosts file. If you have updated the file many times, the original version is gone. Of course, you would have ideally created a backup copy of the original, but in the event that you didn’t, here’s how to reset the hosts file to default in macOS and Windows.
- What is the Hosts File?
- How to Reset the Hosts File Back to Default in macOS
- How to Restore the Hosts File Back to Default in Windows
What is the Hosts File?
The simplest explanation is that it is a text file used by your computer to map a connection between an IP address and domain names. It can be edited to test certain network aspects or to troubleshoot connectivity issues. Of course, you should keep a backup of it before editing. But in case you do not, you can still recover the original version as explained below.
How to Reset the Hosts File Back to Default in macOS
On a Mac, the hosts file mostly contains nothing more than a couple of lines of active code. The rest of the stuff is just commented out (description of the hosts file itself).
To reset, we are going to open the hosts file in a text editor, replace the entire file with the default text and save it. That’s it.
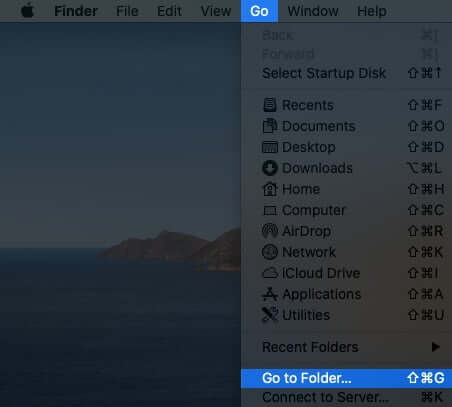
- From the Finder, navigate to Go → Go to Folder.

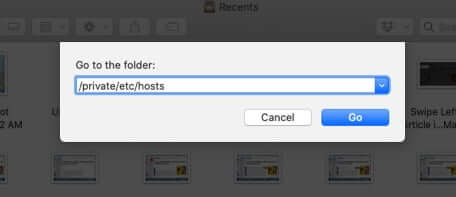
- Type this in the Go to Folder window:
/private/etc/hosts
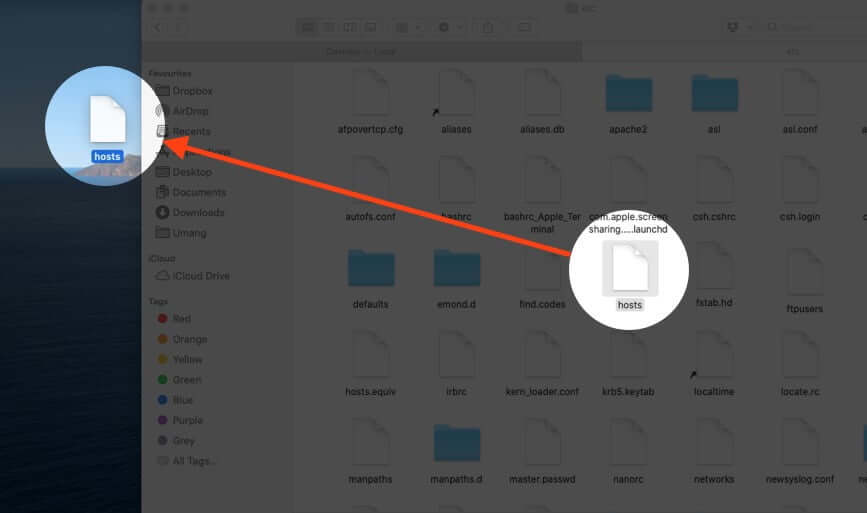
- From the finder window, click and drag the hosts file to the desktop. (We are doing this because we can’t open directly and edit it.)

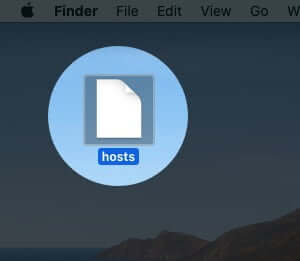
- Double-click the hosts file (on the desktop), and it will open in TextEdit (or any default text editor on your Mac).

- Erase everything in it by pressing Command + A to select all and then press the delete key.

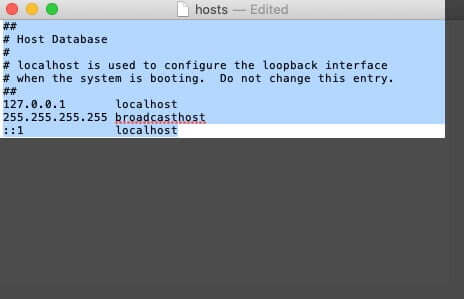
- Copy the following piece of text and paste it into the hosts file.
##
# Host Database
#
#
# localhost is used to configure the loopback interface
# when the system is booting. Do not change this entry.
##
127.0.0.1	     localhost
255.255.255.255	broadcasthost


::1		    localhost
- Save this file by clicking on the red close button. Or, click on File from the top menu bar and then select Save.
- Open the Go to Folder window and open /private/etc/hosts again.
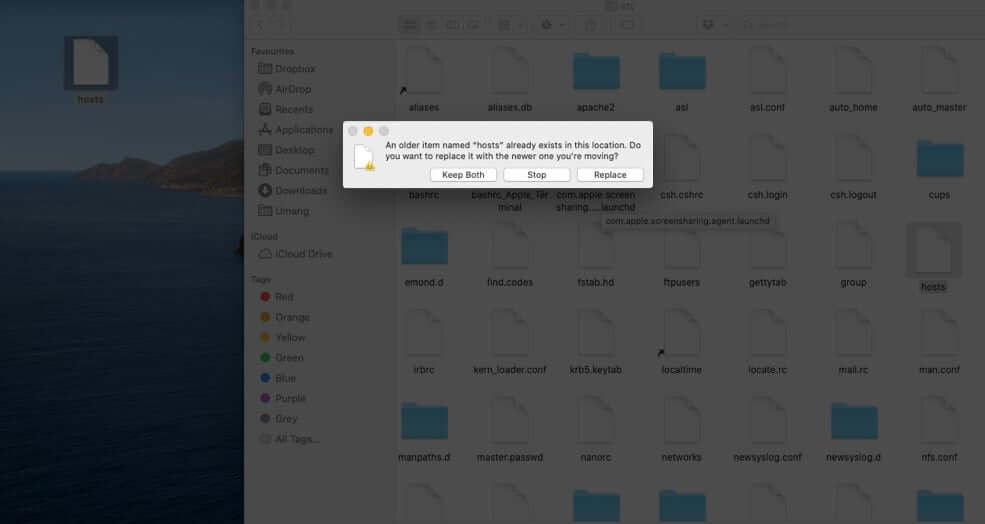
- Step #9. Drag the hosts file from the desktop back to the /private/etc/ folder.

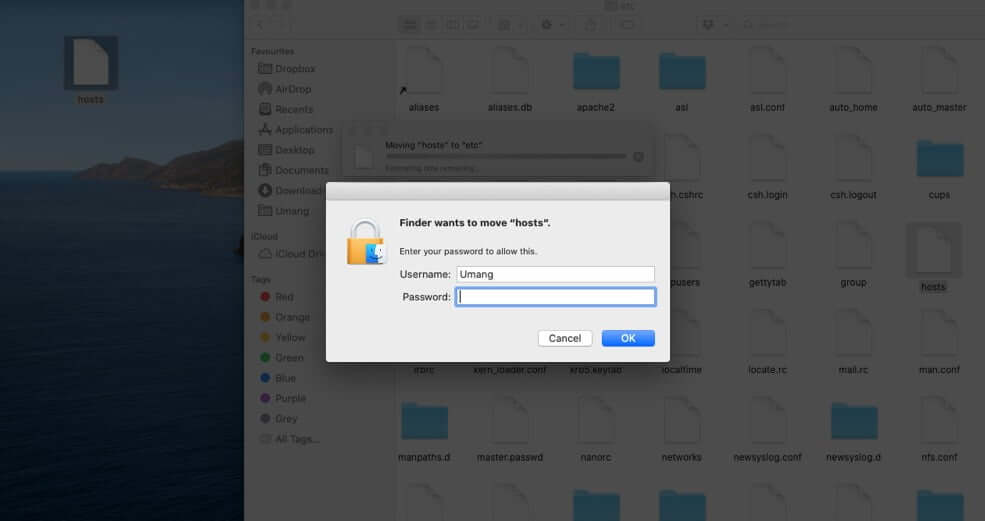
- You will be asked about the existing hosts file. Choose Replace and authenticate with the admin password when asked for it.


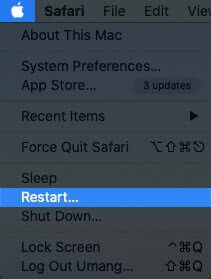
- Restart the Mac to get things rolling again.


How to Restore the Hosts File Back to Default in Windows
- Open Notepad on your PC
- Go to this page and copy the text of the hosts file for your OS version. Different hosts file contents exist for different Windows versions (although they vary slightly)
- Once you’ve pasted the text into Notepad, save the file as “hosts” – include the quotes. (this is because you don’t want to save the file as a .txt file). Save it on the desktop so that you can easily access it in the next few steps
- Now, open this location:
%WinDir%System32DriversEtcYou can do this by opening Run and pasting the location here - Once the folder opens, drag and drop the hosts file from the desktop into the folder. You will be prompted to replace the file and then prompted for the admin password
With this huge update to the hosts file, you might want to restart your computer.
The hosts file is usually used just to map web addresses to specific IP addresses and to block websites (by re-directing/mapping them to invalid/incorrect IPs).
Signing off…
This is how you can reset hosts file to default. Once you change it to default, it may resolve some connectivity problems that you have with your computer.
You may like to check:
- How to Restore your Mac from a Backup
- How to Restore Previous Versions of your Files on Mac
- 4 Ways to Backup Your Mac
🗣️ Our site is supported by our readers like you. When you purchase through our links, we earn a small commission. Read Disclaimer.


Works great. The ad blocking huge list worked well for a while, but it started breaking good websites too so I reset Hosts back as per article.