FaceTime makes it easy to connect with family and friends or even conduct quick interviews or other professional work. However, Apple does not have native support for recording FaceTime calls. Thus, people often wonder if they can record FaceTime on their iPhone. The short answer is yes!
Whether for saving memories or for the guest video podcast, here are the working ways how you can record FaceTime audio and video calls on iPhone and Mac.
- How to record a FaceTime video call on iPhone
- Record a FaceTime call with audio on iPhone
- How to record a FaceTime call on Mac
- Is it legal to record FaceTime calls?
How to record a FaceTime video call on iPhone
Pros
- Quick and easy
- Doesn’t require additional cable, accessories, etc.
Cons
- Does not record audio
If not recording the audio is not a major concern, you can follow the steps below.
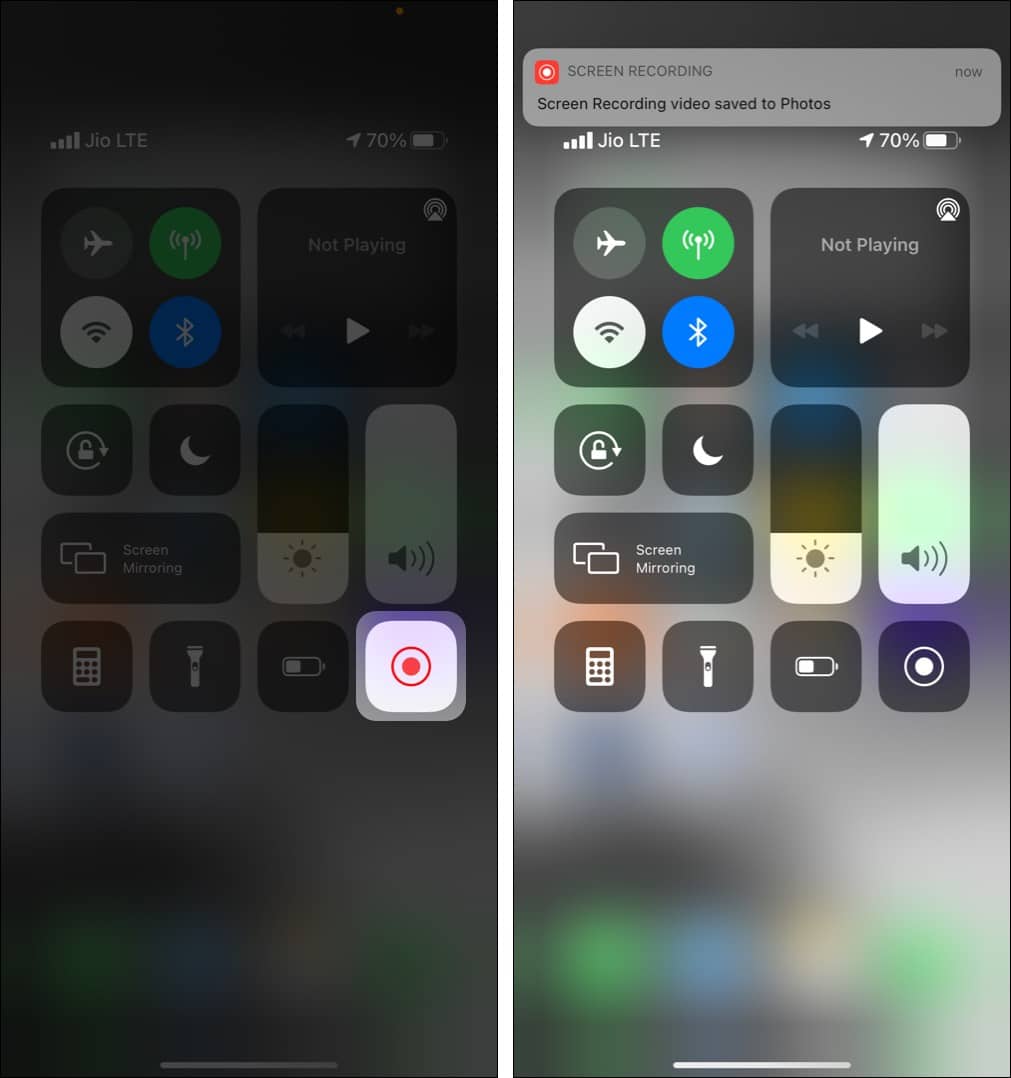
- Open Settings and tap Control Center. Tap + next to Screen Recording.
If it is already listed under INCLUDED CONTROLS, skip this step.
- Make or receive a FaceTime call.
Or, you can start screen recording first and then start or join the call. - Open Control Center.
- On iPhone with FaceID, swipe from the top right (where the battery indicator is).
- On iPhone with a Home button, swipe up from the bottom of the screen.
- Tap the screen recording icon. The recording will start after three seconds.

- Continue your FaceTime call.
- When you finish talking, open Control Center and tap the red screen recording icon. The recorded file will be saved to the Photos app.


Record a FaceTime call with audio on iPhone
Pros
- Records audio
Cons
- Requires a Mac and Lightning cable
- The recorded file size is huge
If you wish to record an iPhone FaceTime call with sound, you need a Mac. The steps involve connecting the iOS (or iPadOS) device to your Mac and using the QuickTime Player‘s movie recording feature. It may sound a lot, but it is reasonably straightforward.
Before you begin: This method requires a Mac. If you already have a Mac, you can FaceTime on it and record it following the steps below. But if you must use an iPhone or the Mac (say your office Mac) has a different Apple ID, you may follow the steps below to record FaceTime calls from your iPhone with two-way audio.
- Unlock and connect your iPhone to the Mac using the Lightning cable.
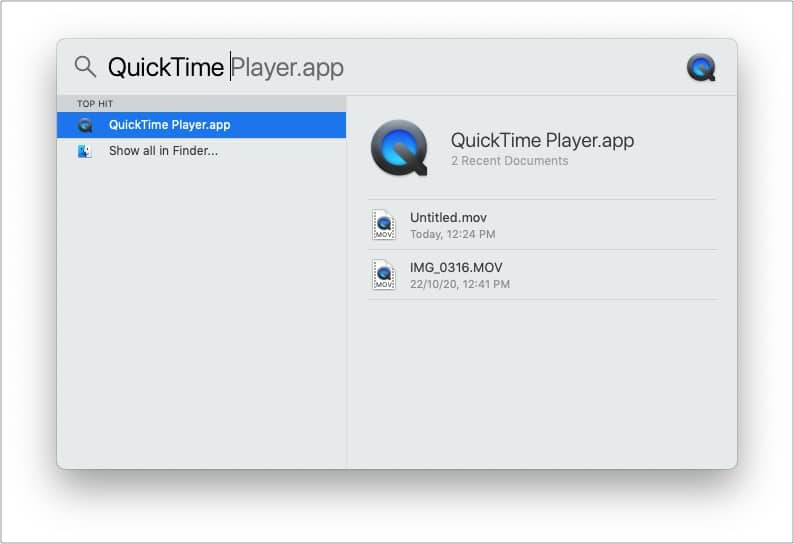
- On Mac, press Command + Space bar and type QuickTime to open it.

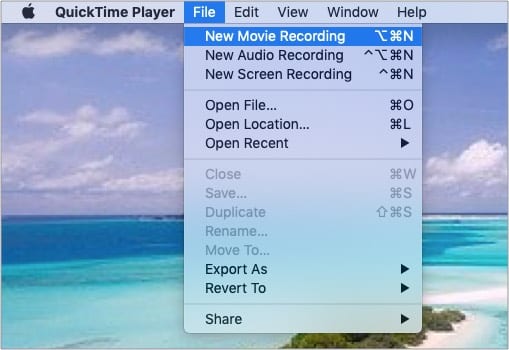
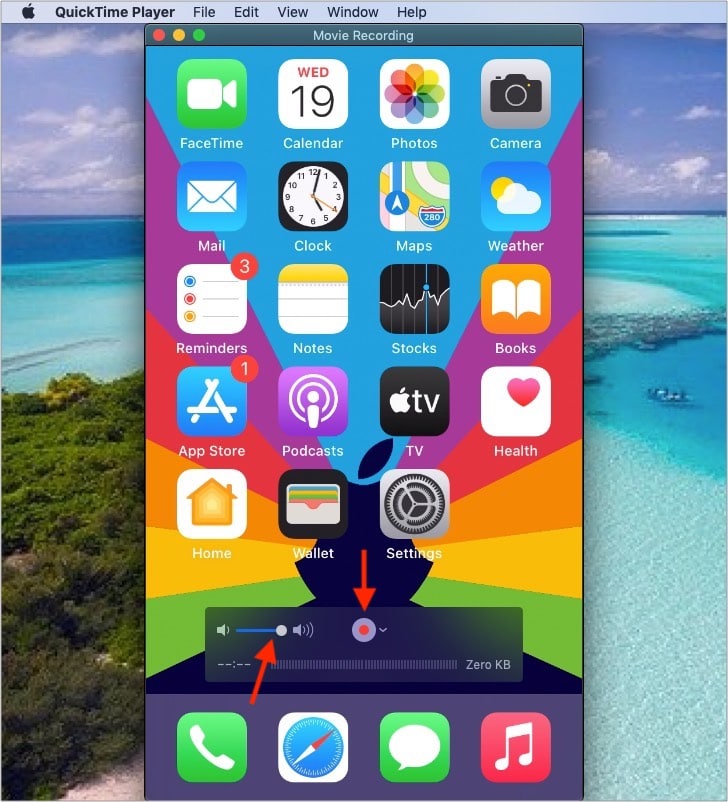
- Click File at the top menu bar and select New Movie Recording.

- Click the tiny downward arrow next to the red record button.
- For the Camera, choose iPhone. For the Microphone, stay with the built-in option.

- Do not forget to drag the speaker slider to the right.
- Next, click the record button to start the recording in the QuickTime Player.

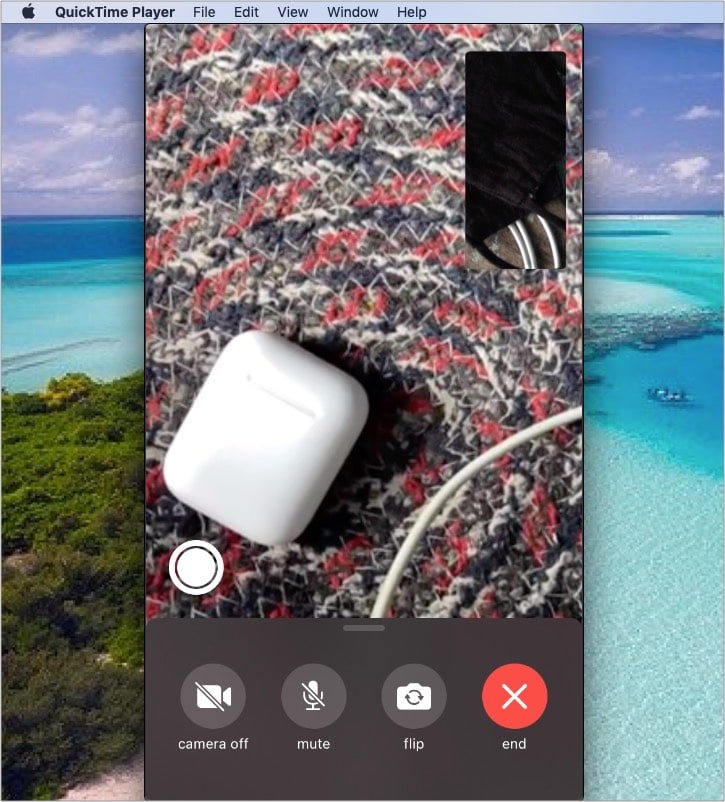
- Now, make a FaceTime call on your iPhone. It will be recorded on your Mac.

- Once the FaceTime call is done, click the stop button in the QuickTime Player.
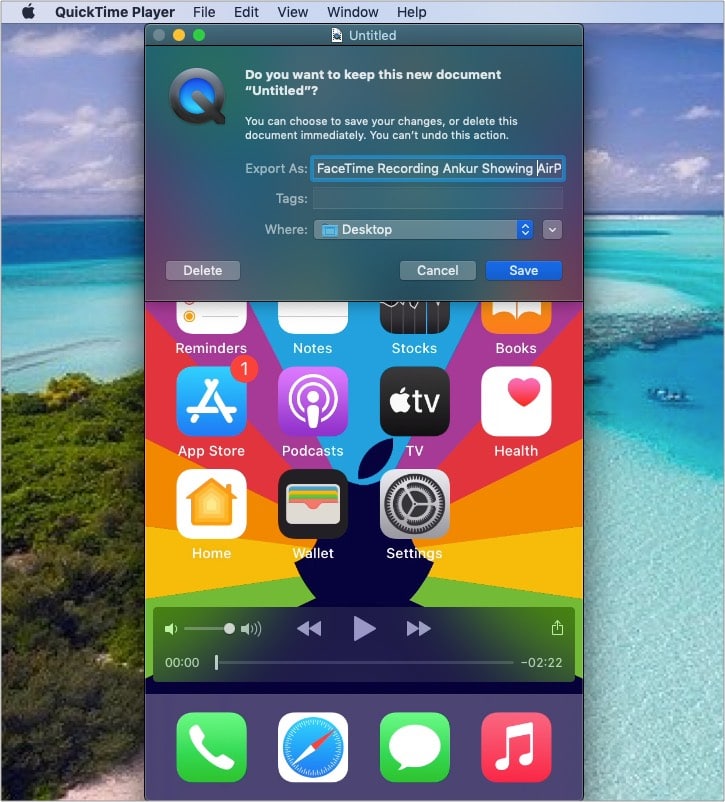
- To save the FaceTime call, click the red close button of the QuickTime window.
- Rename, choose the location and click Save.


How to record a FaceTime call on Mac
Pros
- The easiest way
- Does not require additional accessories
Cons
- No substantial con
To record FaceTime calls on Mac, you can use the QuickTime Player (steps similar to above). But if you are on a newer version of macOS, here is the quickest way to record FaceTime calls with audio on Mac.
- Press Control + Shift + 5 to bring the screen capture tool.
- Click Options and ensure you have selected Built-in Microphone under Microphone. You may also change the save to destination, etc.
- Next, choose if you wish to record the entire screen. Or, if you want to keep a small FaceTime window in a corner, you may select to record only that portion of the screen.
- You are all set. Click Record to start screen recording.
- Now, begin a FaceTime call. It is being recorded.
- Once done talking, click the tiny stop icon in the top menu bar to save the call recording.


This is how you can record FaceTime calls with audio using one or more Apple devices. I hope this brief guide was helpful. If you face any issues on Mac, restart it and then follow the above recording steps.
Is it legal to record FaceTime calls?
Not all countries (and state governments in powerful federal countries) permit phone recording. Since FaceTime is also a form of calling, the same rules most certainly apply to it. You can learn about laws on recording conversations for all 50 U.S. states in this PDF. And for other countries, take a look at this Wikipedia page.
The consensus is that it is better to inform the other person before recording their calls (especially if you plan to use it for non-personal purposes!). You won’t want your private calls to be recorded without your information. The same applies when the roles are reversed.
More helpful FaceTime posts:
- How to take a Live Photo in FaceTime on iPhone
- FaceTime is not working on Mac? Here’s why and fixes
- How to do group FaceTime on iPhone and iPad
- How to blur the background in FaceTime video calls in iOS 15
🗣️ Our site is supported by our readers like you. When you purchase through our links, we earn a small commission. Read Disclaimer.