Things you should know
- In some countries or regions, your carrier may permanently delete the message. This means you may not be able to recover a deleted voicemail.
- If you don’t use Visual Voicemail on your iPhone, allowing you to follow the steps below, you might need to contact your carrier for assistance in deleting and retrieving your messages.
- If you change your SIM card, voicemail messages might also be deleted.
- The time that voicemails remain on your device depends on your carrier.
Voicemails, just like emails, can build up over time. Before you know it, you have tons of voicemails that you simply don’t need. If you’re ready to perform some cleanup on your iPhone, we’ll walk through how to delete individual and multiple voicemails on your iPhone.
How to delete voicemail messages on iPhone
You may have a single voicemail that you want to delete or plan to go through your voicemail list and only remove those you no longer need, one at a time.
- Open the Phone app → select the Voicemail tab.
- Then, do one of the following to delete a voicemail:
- In your voicemail list, swipe the message from right to left and tap Delete.
- Select the voicemail to display the details and tap the Delete icon (trash can).
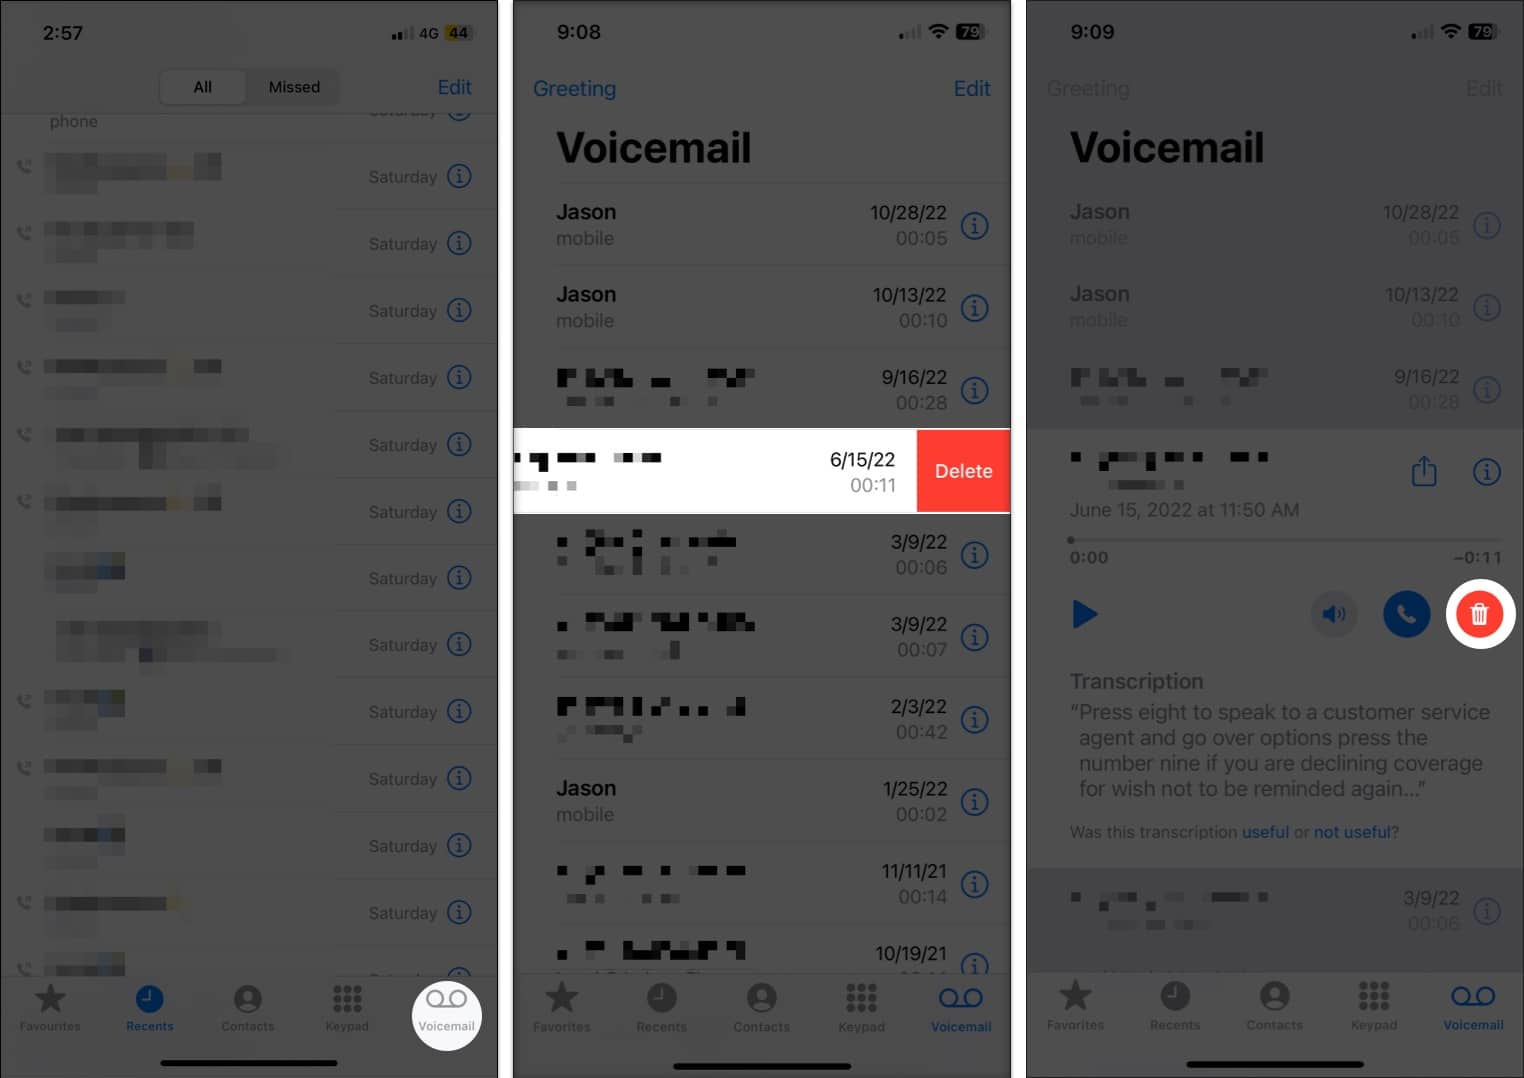
You will not be asked to confirm when you delete a voicemail. The message simply vanishes from your voicemail list.
If you have multiple voicemails that you wish to delete, you can do it in one swoop.
How to delete all the voicemails on your iPhone at once
- Open the Phone app.
- Go to the Voicemail tab → select Edit on the top right.
- Tap to mark the circle next to each voicemail you want to remove.
- Select Delete at the bottom right.

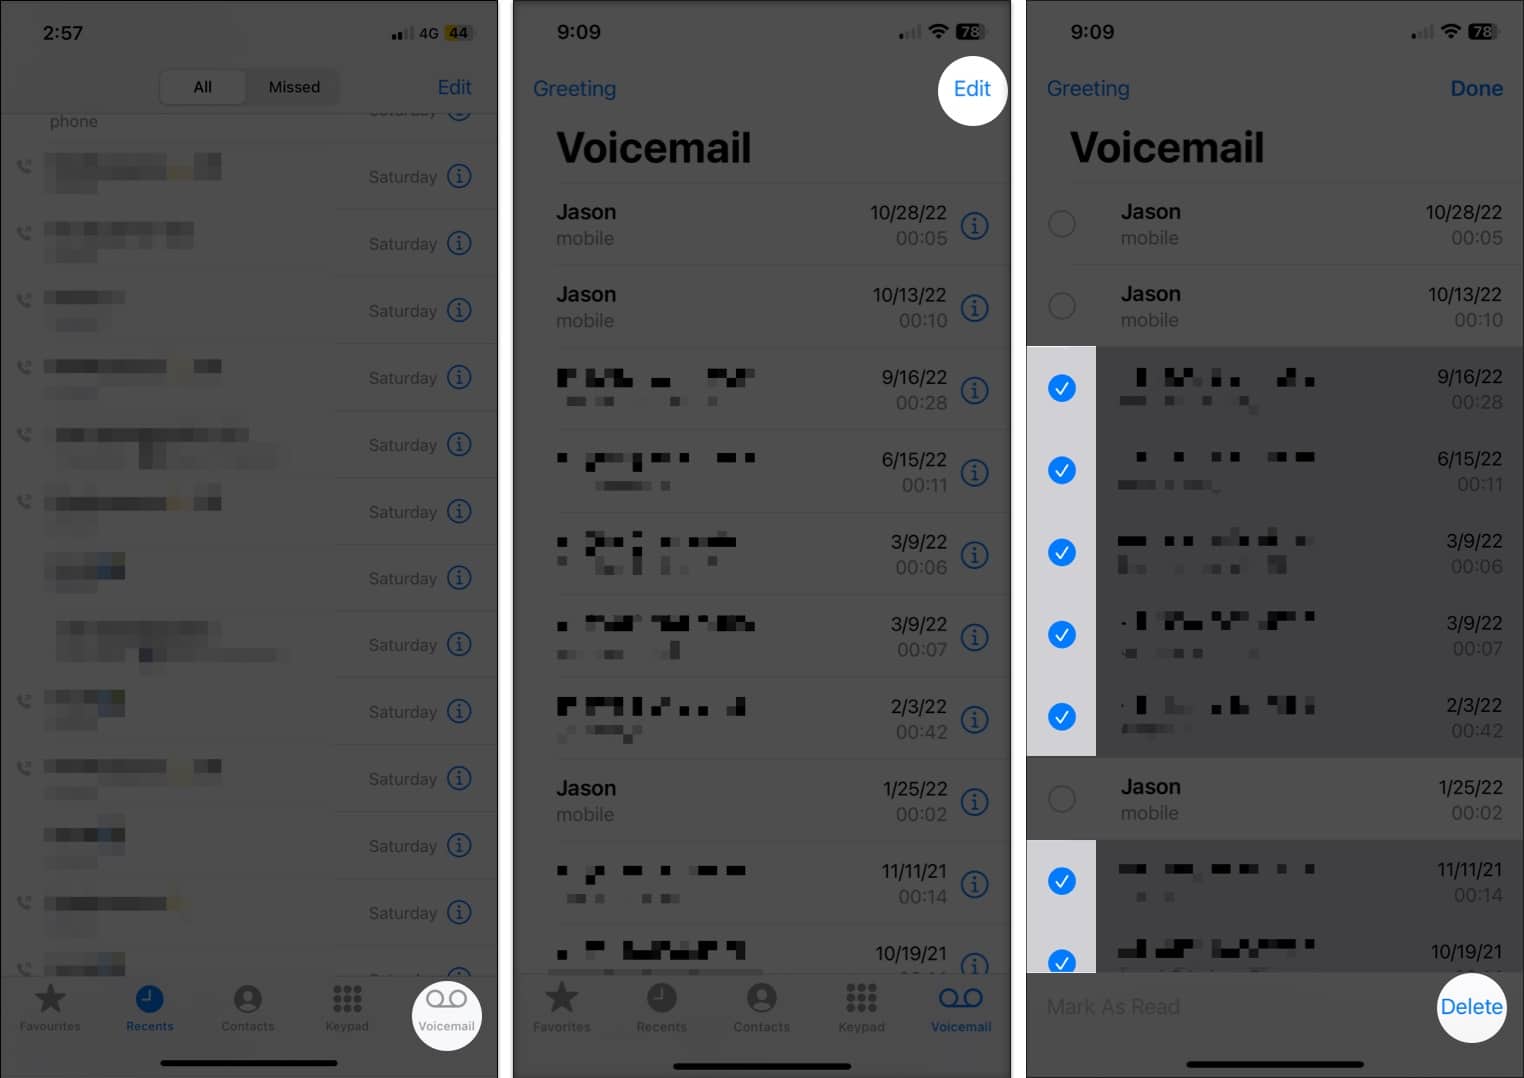
Again, you won’t be prompted to confirm the action. The messages will just be removed from the voicemail list.
How do I recover deleted voicemail on my iPhone?
Now that you know how to get rid of voicemails, you may be wondering how to retrieve accidentally deleted voicemails on your iPhone. Maybe you removed a message and discovered later that you need it again.
Remember, you can only recover a voicemail on your iPhone that hasn’t been permanently removed (described below).
- Open the Phone app → select the Voicemail tab.
- Scroll to the bottom of the message list and tap Deleted Messages.
Note: You will not see the Deleted Messages option if no recently deleted voicemails exist. - Select the voicemail you want to recover → tap the Undelete icon (trash can with a line through it).
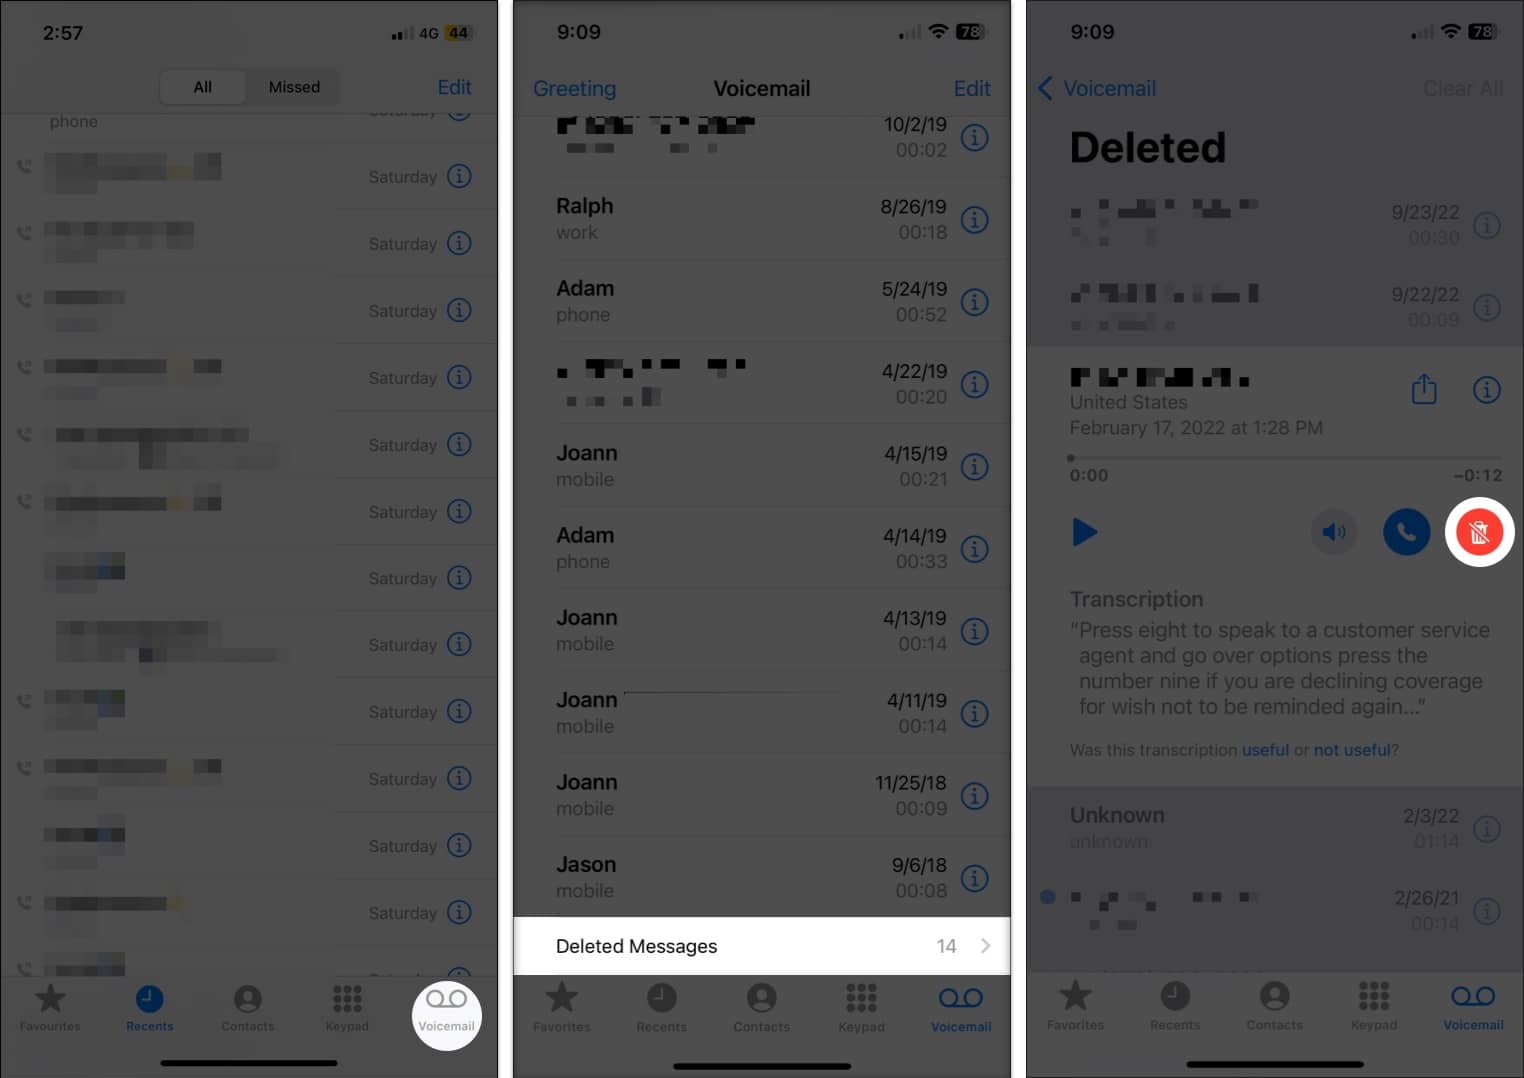
The message then returns to your voicemail list.
How to permanently delete voicemails on iPhone
- Open the Phone app → select the Voicemail tab.
- Scroll to the bottom of the message list and tap Deleted Messages.
- On the top right of the list, select Clear All.
- Confirm you want to permanently delete the voicemails by tapping Clear All at the bottom of the screen.
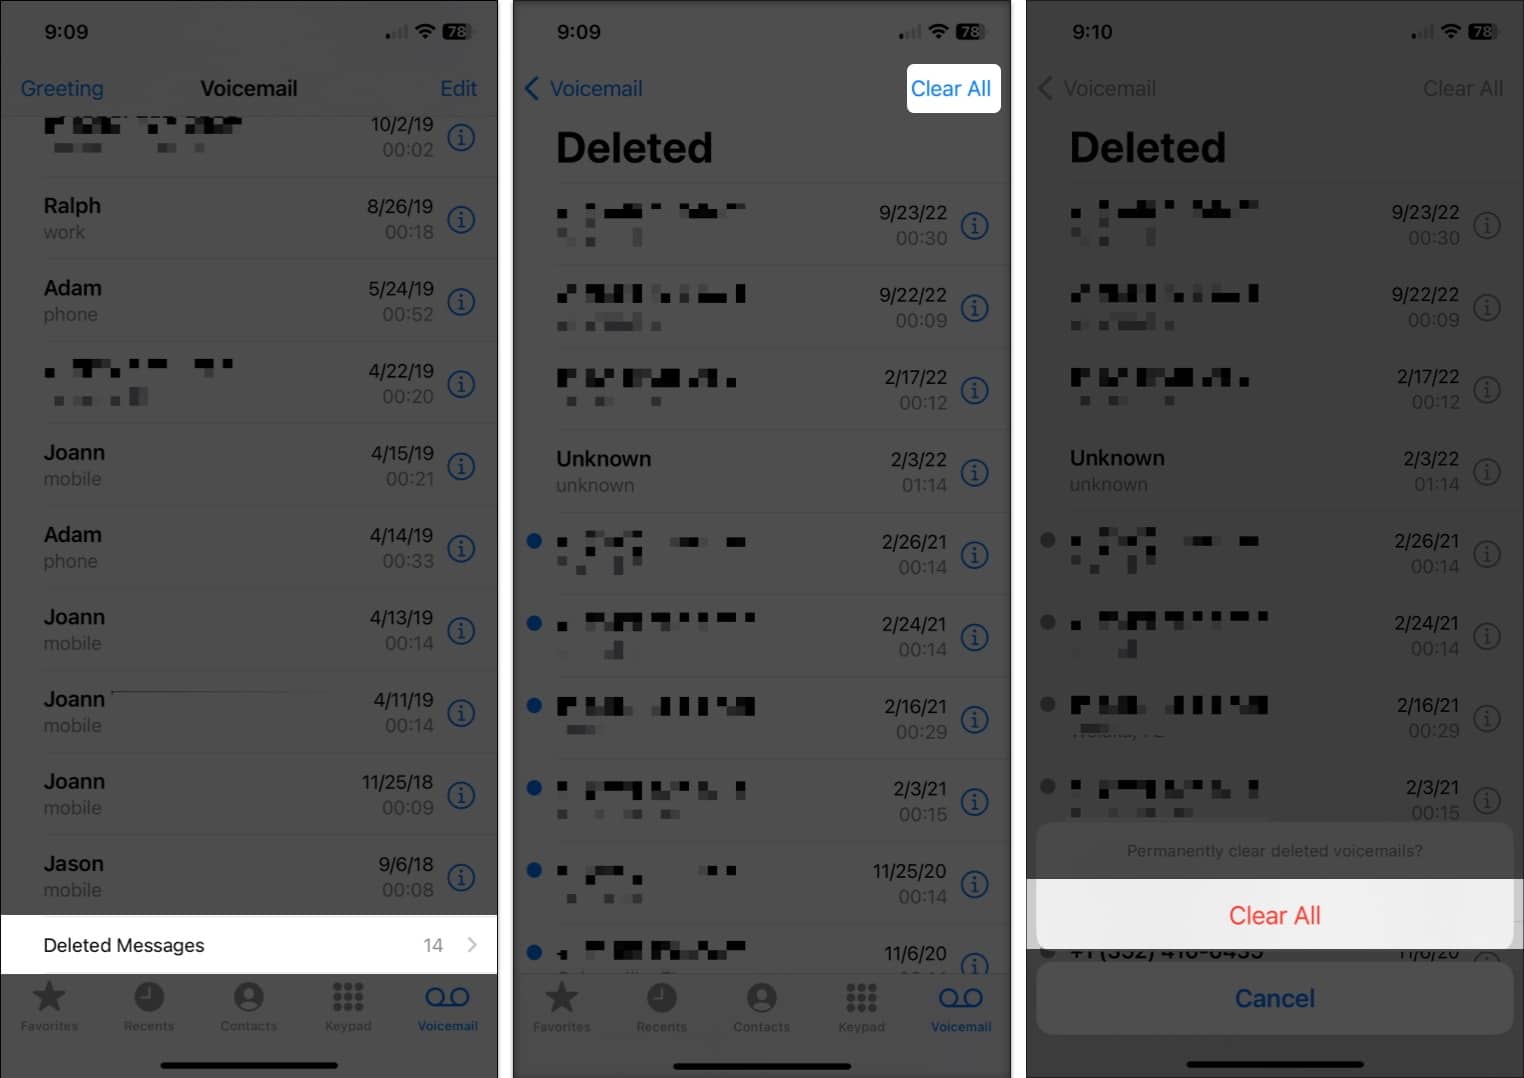
Your deleted messages will be removed entirely.
With this in mind, you may be wondering how to recover permanently deleted voicemails on your iPhone. For this, you’ll need to contact your carrier. There’s no guarantee that you can retrieve a permanently deleted voicemail, but it’s worth a try if you really need that message back.
Wrapping up
Now that you know how to delete and retrieve messages, will you take some time to clean up your iPhone voicemail list? Let us know!
For more, take a look at how to turn off voicemail on your iPhone if you no longer want to use the feature.
Read more:
- How to set up and use voicemail on iPhone
- How to use Live Voicemail on iPhone
- iPhone Voicemail not working? 14 Ways to fix it!
- Best Voicemail iPhone Apps
🗣️ Our site is supported by our readers like you. When you purchase through our links, we earn a small commission. Read Disclaimer.