
Domain Name System or DNS is a basic configuration that works in the backend every time you connect your iPhone/iPad to the web. While it’s unique with every internet service provider, it can be customized or changed through various online mediums using services of Google, Cloudfare, and Open DNS. Let’s have a sneak into how you can change the DNS server on your iPhone and iPad.
- Why Change DNS Servers?
- How to Change DNS Settings on iPhone and iPad
- How to Change DNS Settings for Cellular Data
- Free DNS Servers
Why Change DNS Servers?
- To fix Wi-Fi connectivity issues.
- With different DNS settings, you may be able to access websites that are inaccessible or blocked by your internet provider.
- A different DNS may improve website loading times.
- May let you access the latest, updated version of a webpage.
- It may provide better online security, especially if you are on public Wi-Fi hotspots.
How to Change DNS Settings on iPhone and iPad
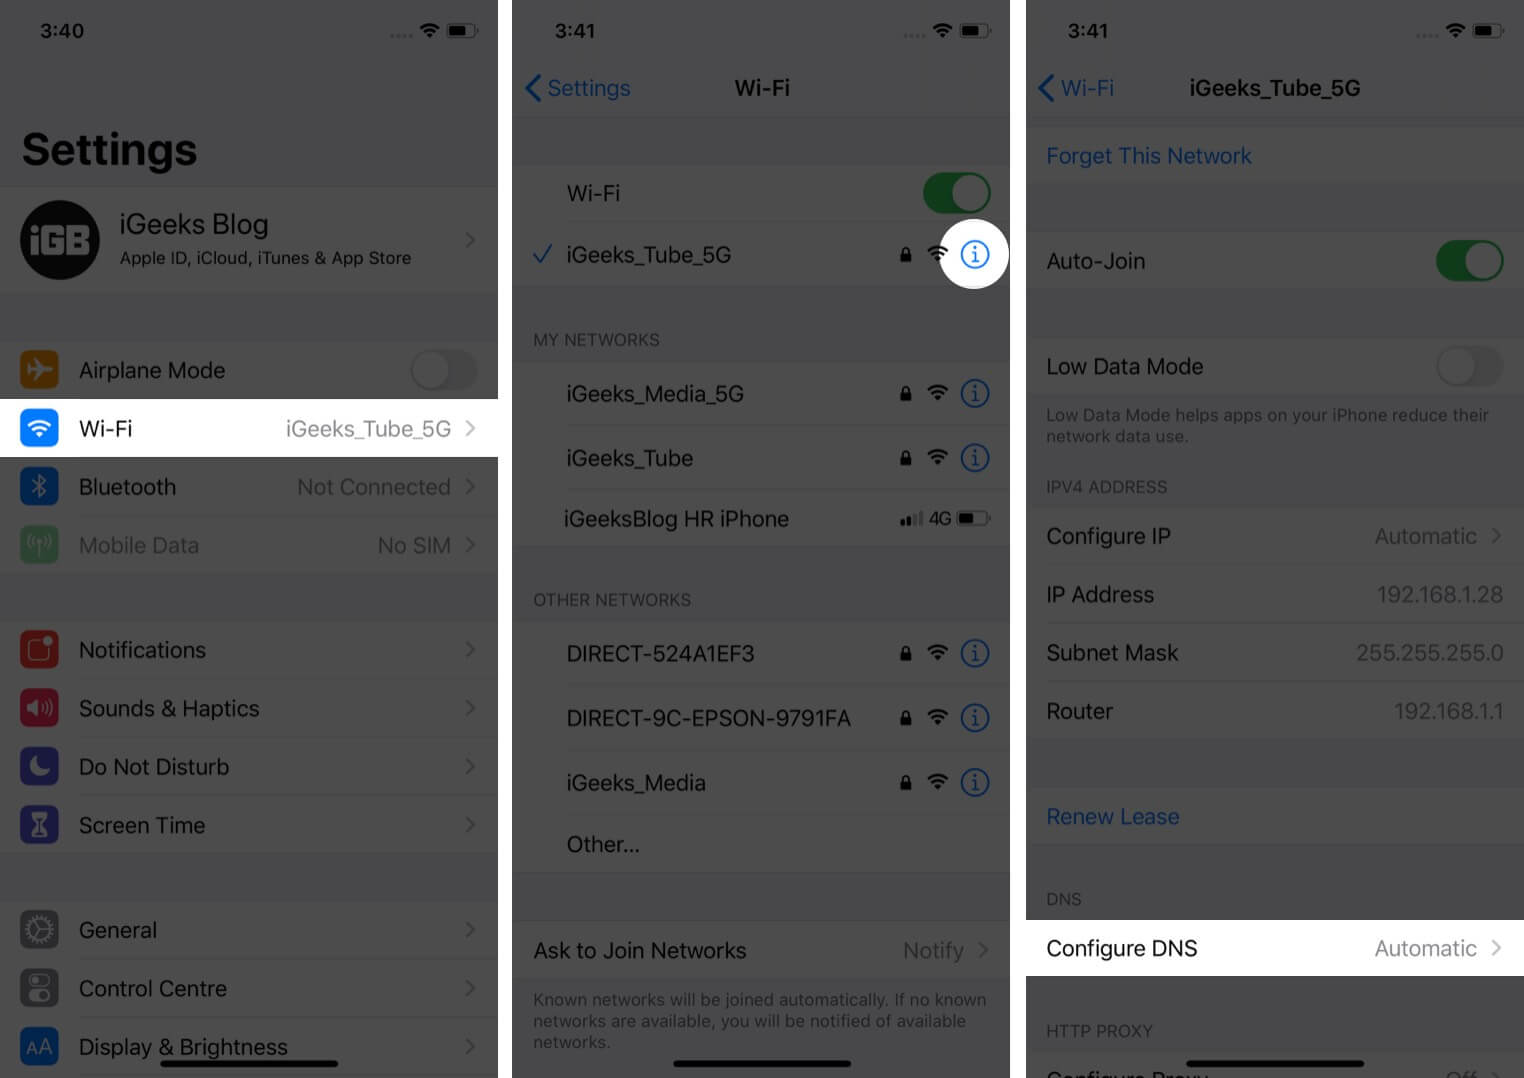
- Open the Settings app and tap on Wi-Fi.
- Tap on “i” next to the connected Wi-Fi name or any other Wi-Fi.
- Tap on Configure DNS.
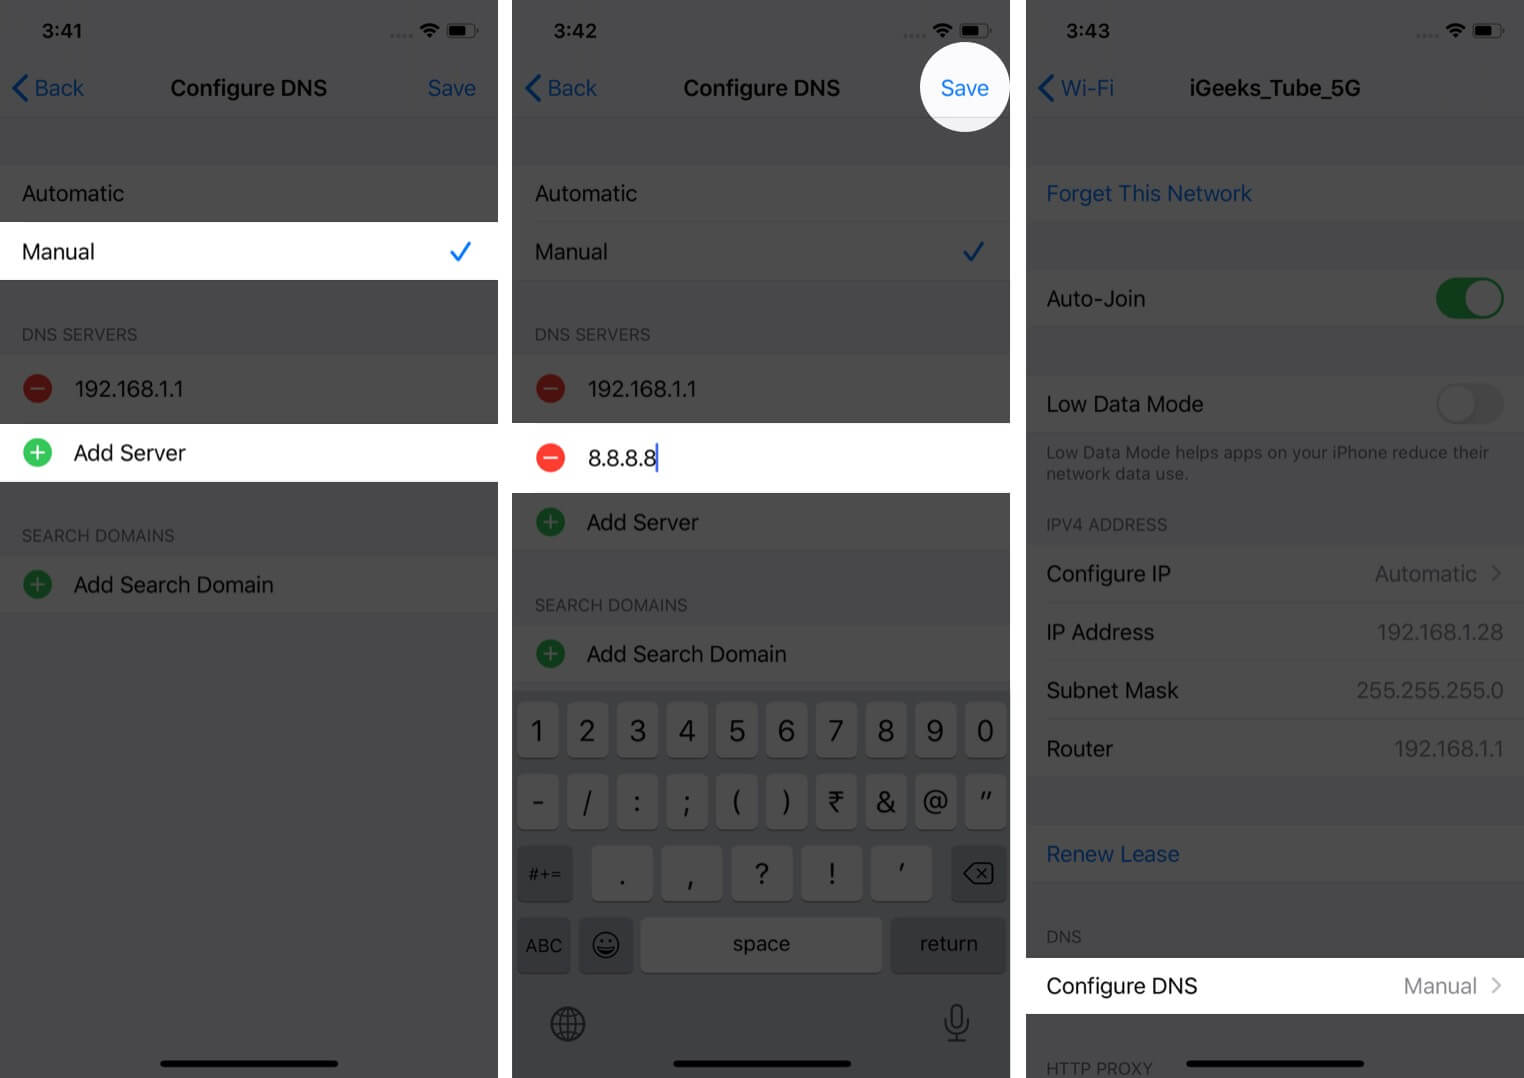
- Tap on Manual → Add Server.
- Next, type the DNS server address. If needed, you may use one from the table below.
- Finally, tap on Save.
This changed DNS will keep working even if you temporarily disconnect from this Wi-Fi network and reconnect. But, if you forget this network, it will erase the custom DNS too.
In case you use multiple Wi-Fi networks (like home, office, best friend’s house, etc.), and wish to use custom DNS everywhere, you will have to set this up for each network individually.
How to Revert Back to Default DNS Settings
To do this, launch the Settings app → Wi-Fi → “i” next to a Wi-Fi name → Configure DNS. On the next screen, tap on Automatic. Finally, tap on Save.
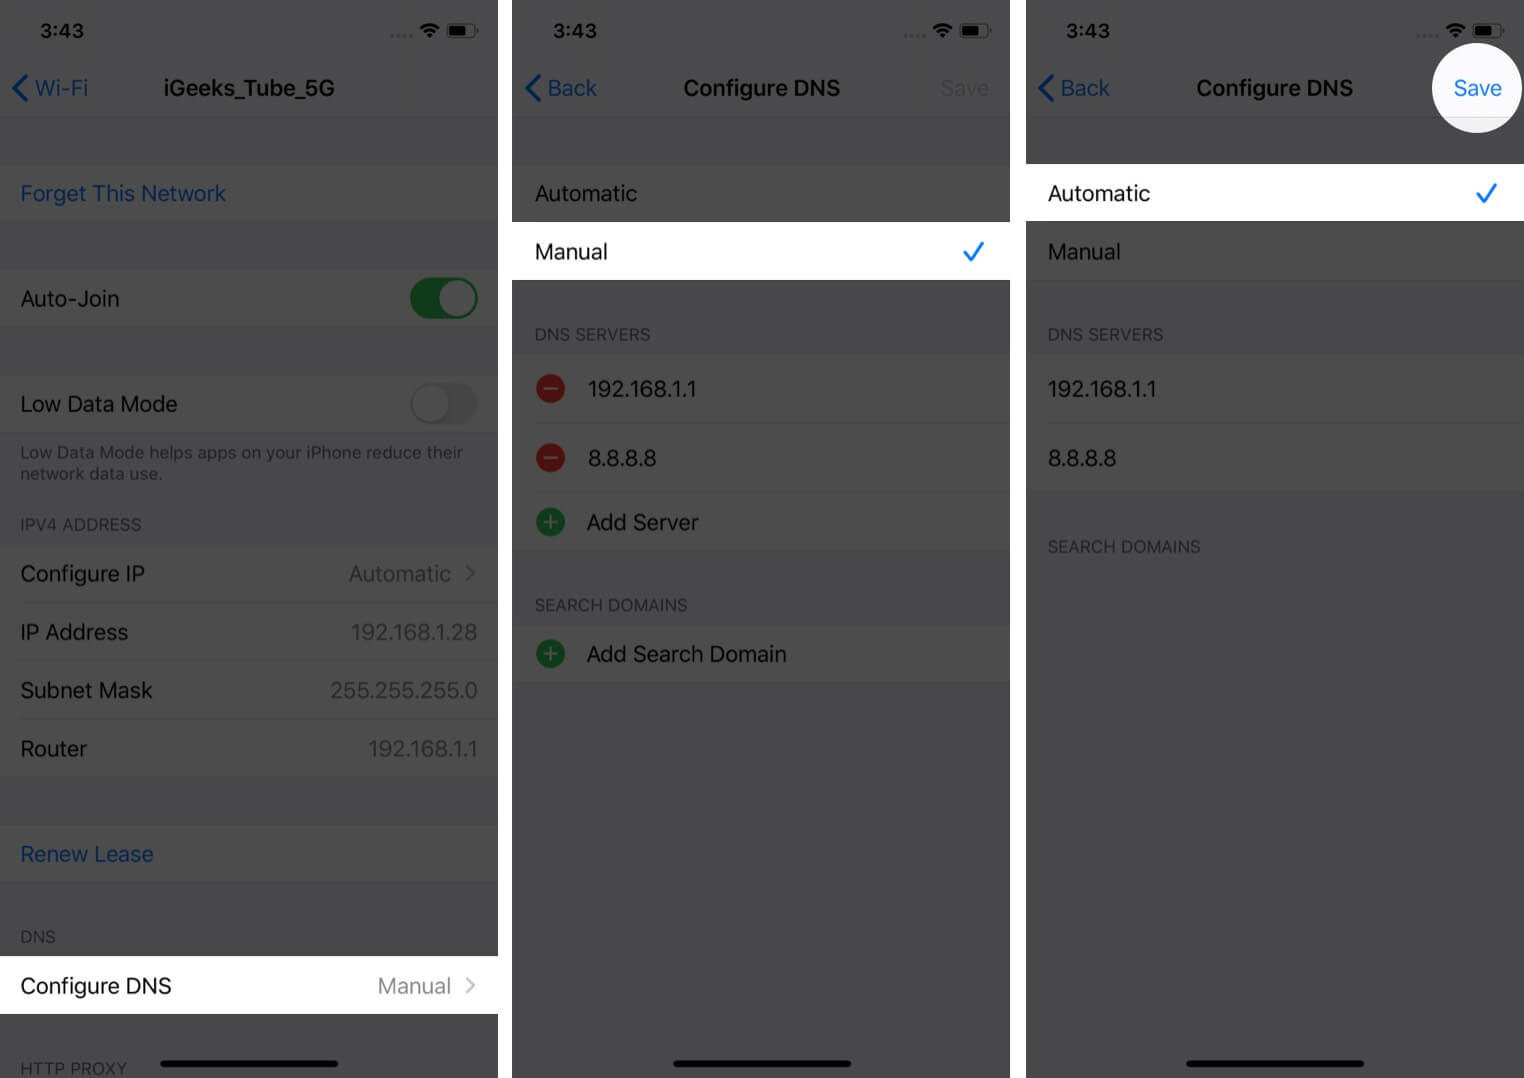
You are now using the default DNS set by your Wi-Fi provider.
How to Change DNS Settings for Cellular Data
iOS or iPadOS does not let you change DNS settings for cellular data. But you can use third-party apps like 1.1.1.1 by Cloudflare that let you change DNS.
Alternatively, if you use a VPN app, it uses its own server before connecting you with websites and services you are trying to access. This effectively bypasses your cellular data provider’s default DNS server.
Free DNS Servers
Here are some of the most popular public DNS server address you can use on your devices.
| Provider | Primary DNS | Secondary DNS |
|---|---|---|
| Google’s Public DNS | 8.8.8.8 | 8.8.4.4 |
| Open DNS Server | 208.67.222.222 | 208.67.220.220 |
| Cloudflare DNS Server | 1.1.1.1 | 1.0.0.1 |
| CleanBrowsing | 185.228.168.9 | 185.228.169.9 |
Signing off…
This is how you can change DNS settings on your iPhone and iPad. Now that you know the basics, you can use this information to switch DNS on Mac as well. For this, launch System Preferences → Network → Wi-Fi → Advanced → DNS.
What are your thoughts on this? Were you able to successfully jump to a different DNS on your iOS or iPadOS device? Share your experience with the world in the comments section below.
READ NEXT:
- iPhone Connected to Wi-Fi But No Internet? How to Fix it
- How to Use iCloud Keychain on iPhone or iPad
- Find Saved Passwords on iPhone and iPad
- Best Password Manager iPhone Apps
Author
🗣️ Our site is supported by our readers like you. When you purchase through our links, we earn a small commission. Read Disclaimer.