Whether you’re going to reside in another country or want to try out apps and services of a different nation, you need to update the country or region that’s associated with your Apple ID. But before you make changes, it’s essential to take note of some points like canceling your subscriptions and leaving the Family Sharing group.
To know more, let me give you a walkthrough on how to change your Apple Store country or region on iPhone, iPad, and Mac.
What should you do before you change your App Store country?
Before you make the required changes in the App Store and native Apple apps, here’s a checklist you need to adhere to strictly.
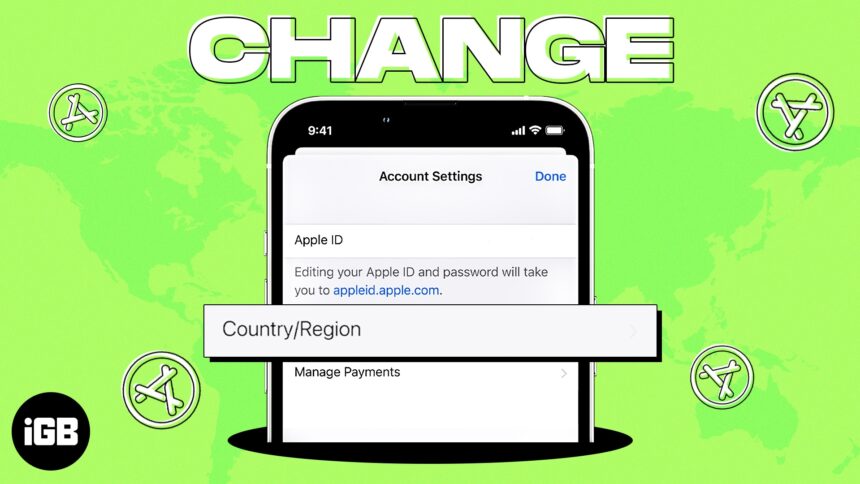
How to change Apple Store country or region on iPhone and iPad
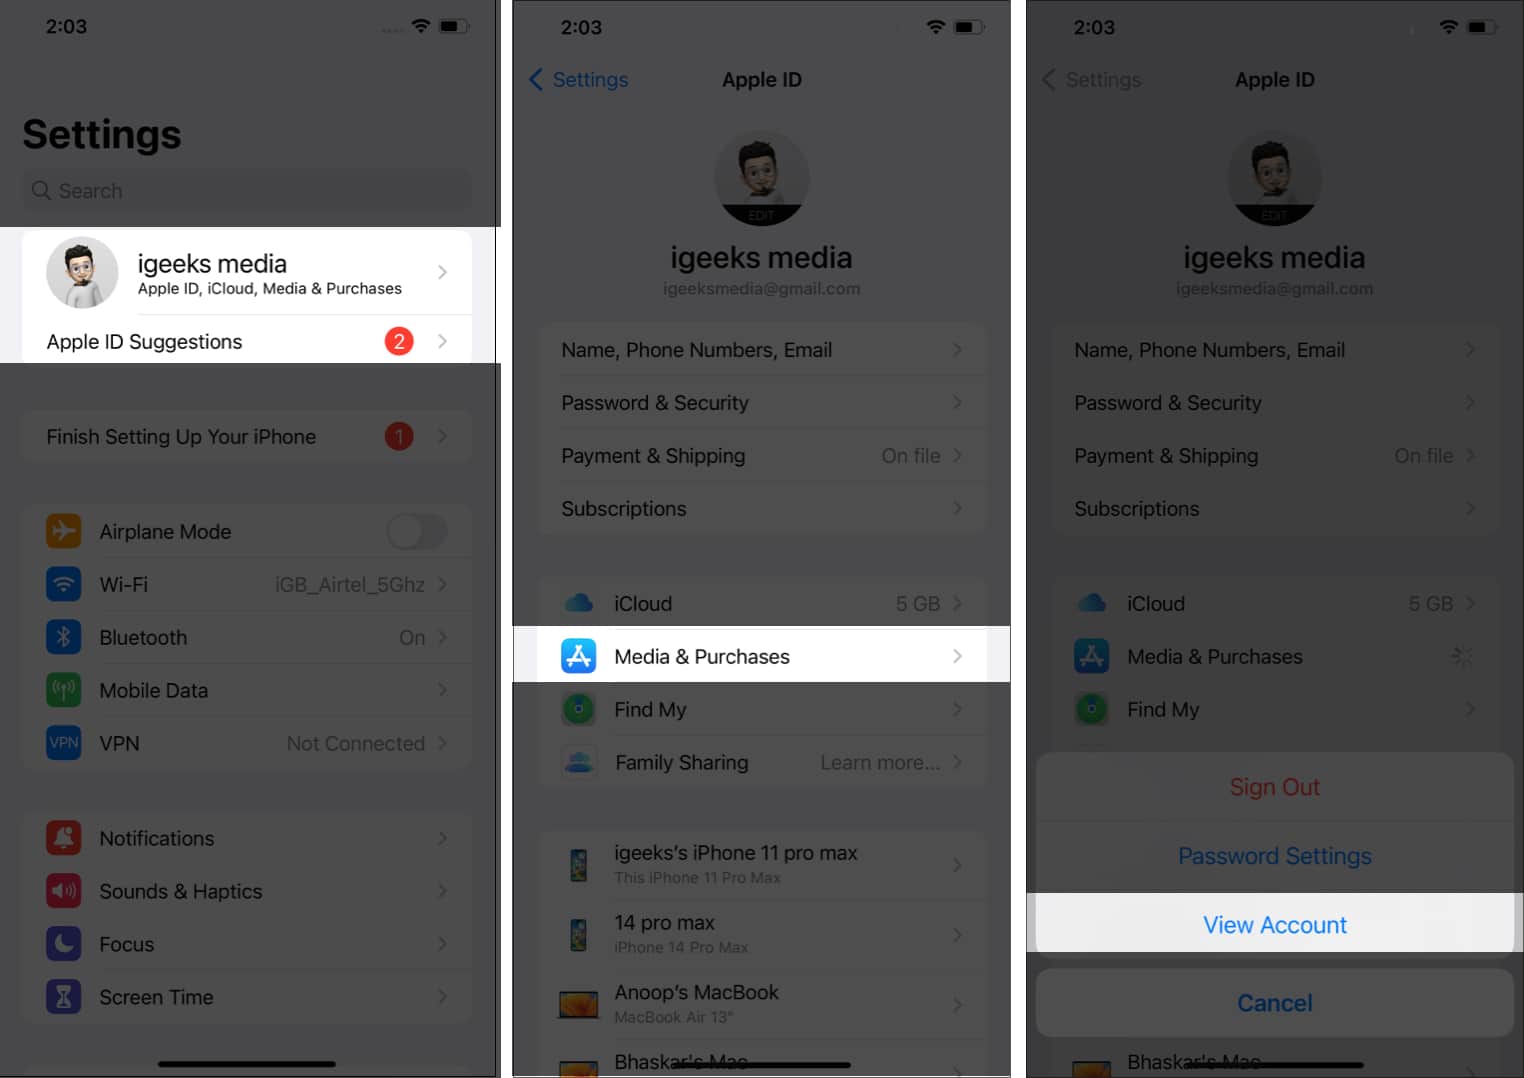
- Launch the Settings app on your iPhone.
- Tap your Apple ID → Media & Purchases.
- Choose View Account from the drop-down list.

- You will be asked to sign in.
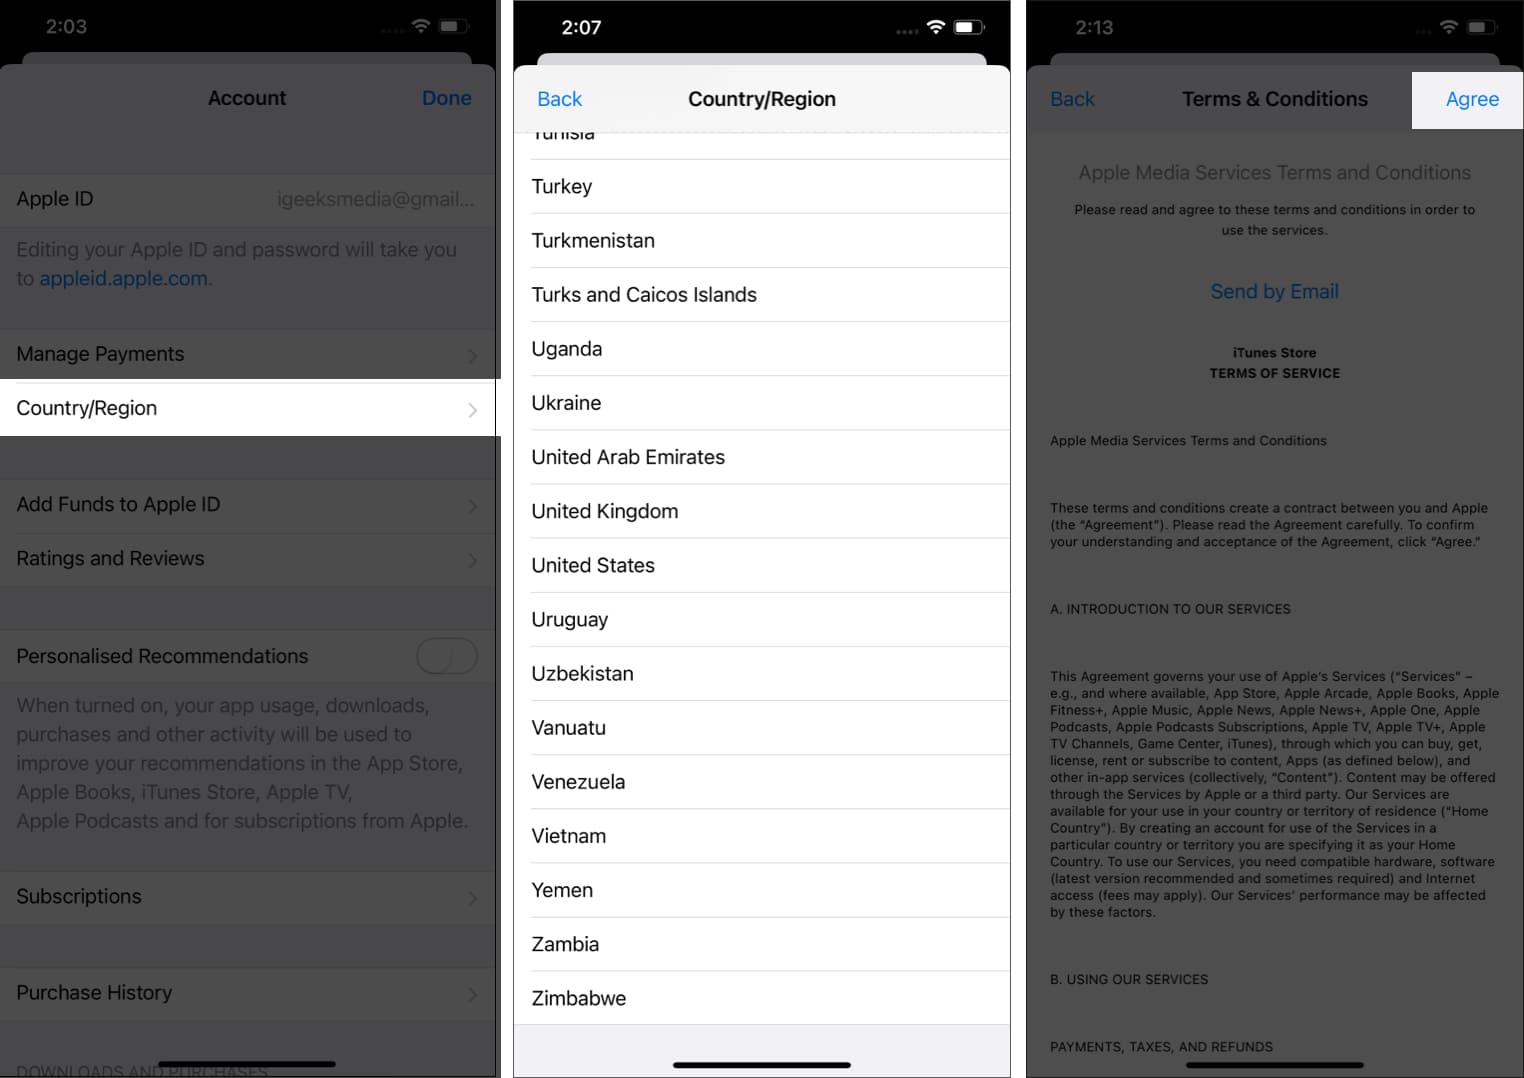
- Tap Country/Region → Change Country or Region.
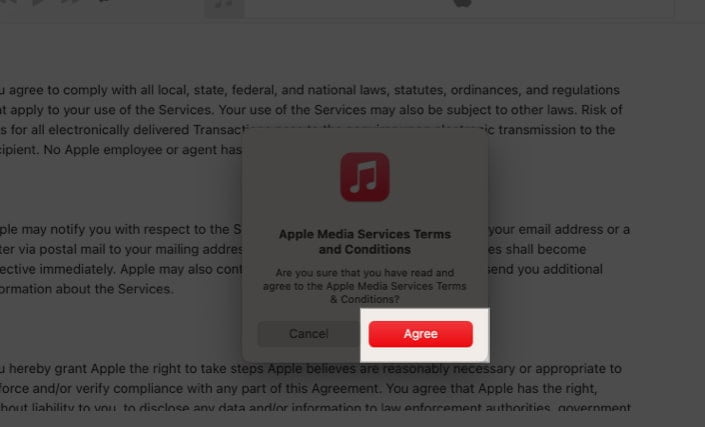
- From the country list, choose your new country or region. Review the Terms and Conditions.
- Tap Agree, appearing in the upper-right corner → tap Agree again to confirm.
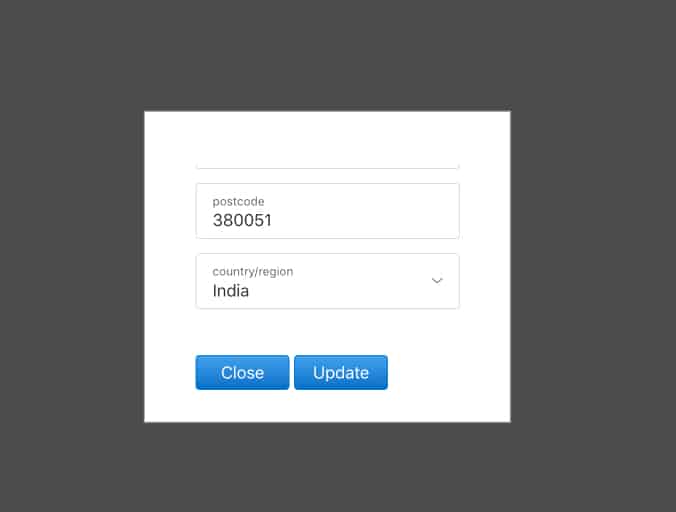
- Pick your preferred payment method → enter the payment details and billing address.
- Tap Next.
That’s it! Upon entering a valid local payment method, you will have changed your App Store’s country and region!
How to change Apple Store country or region on Mac
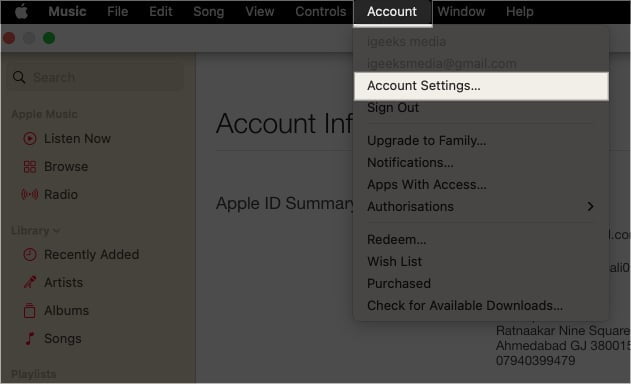
- Launch Music app or iTunes on your Mac.
- Click Account → Account Settings.

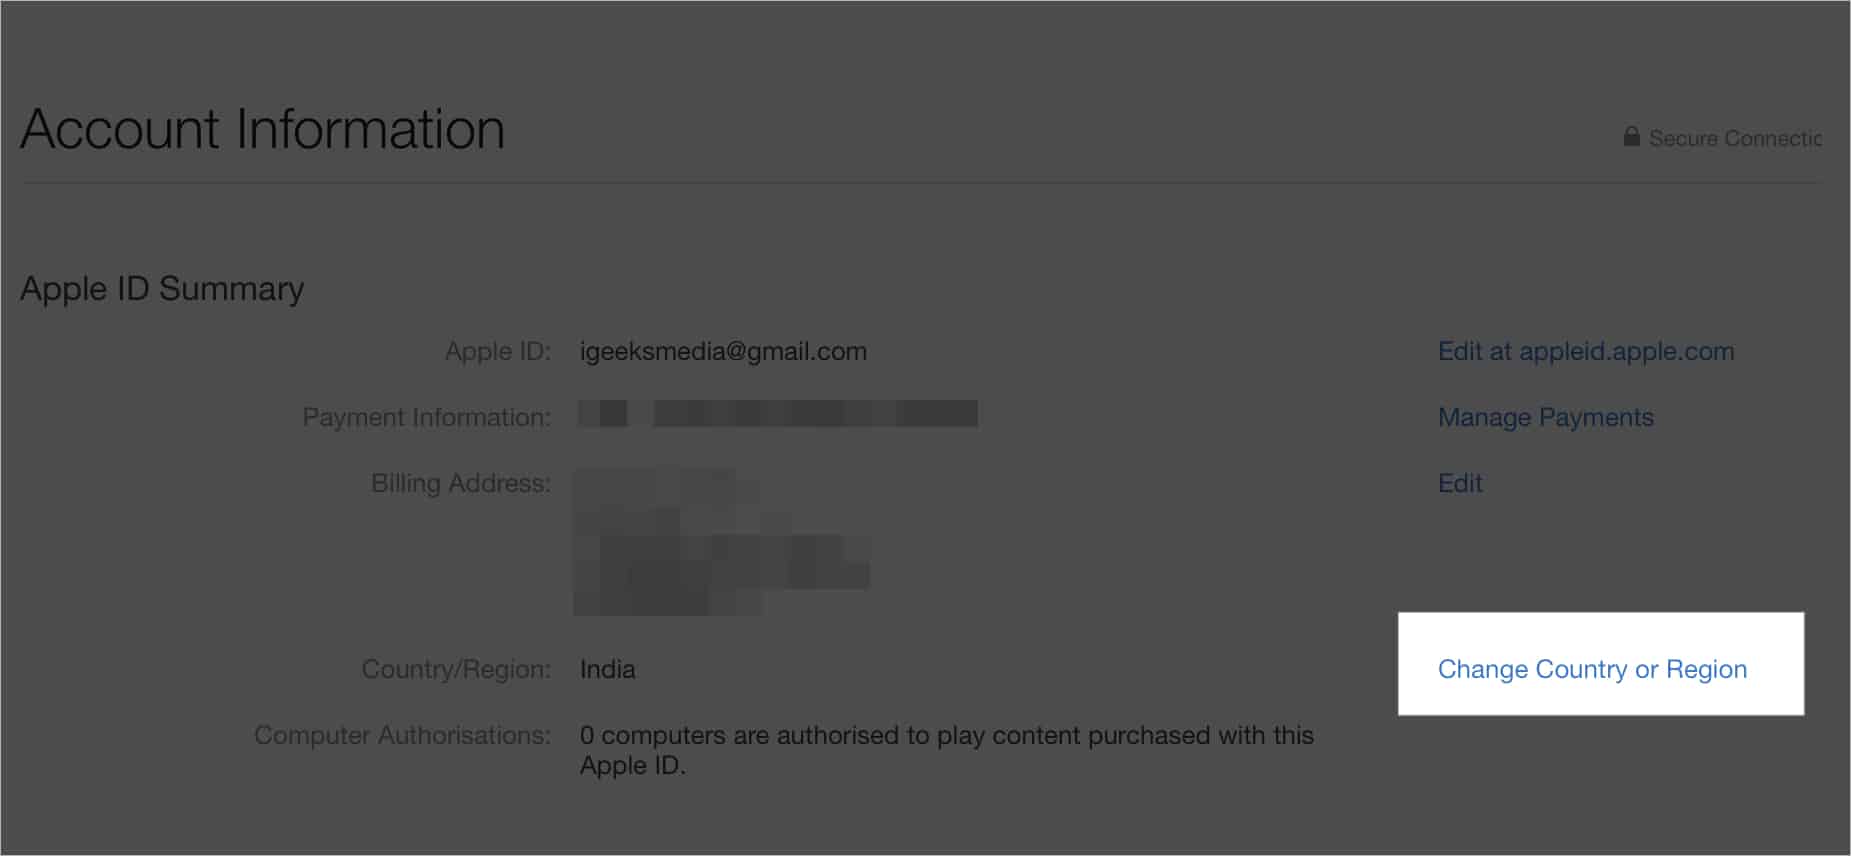
- Fill in your Apple ID and password → Sign In.
- On the Account Information page, go to Change Country or Region option.

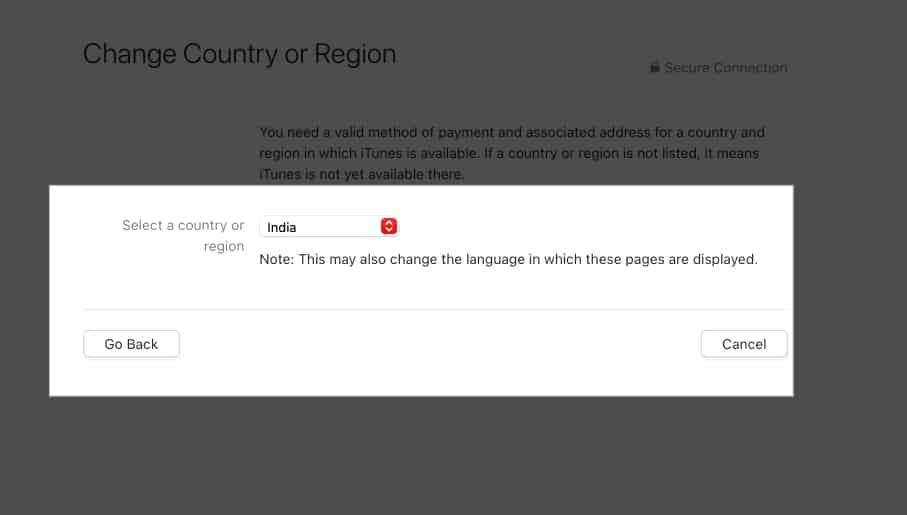
- Pick your new country/region from the list.

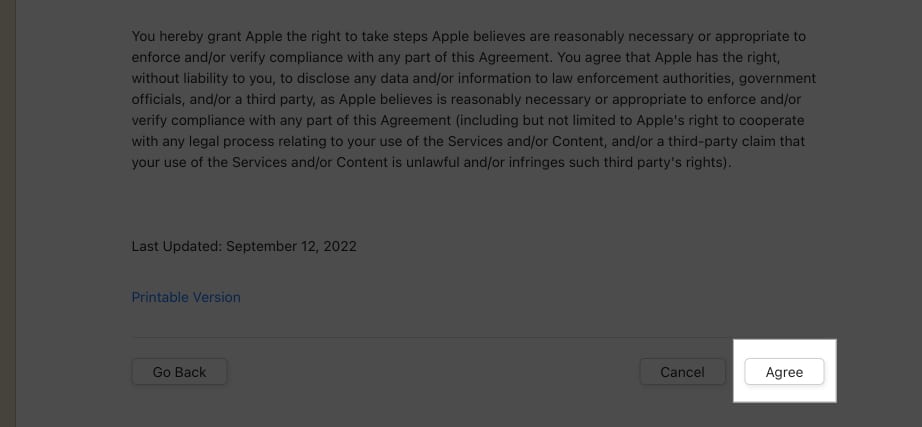
- Read the Terms & Conditions → select Agree.

- Tap Agree to confirm.

- Provide the new payment details and billing address.
- Press Continue.
Voila, you’ve changed your location on the App Store!
How to change Apple ID country or region from Web browser
- Open a browser on your computer and visit appleid.apple.com.
- Sign in by providing your Apple ID and Password.
- Enter the verification code you receive on another Apple device that uses the same Apple ID.
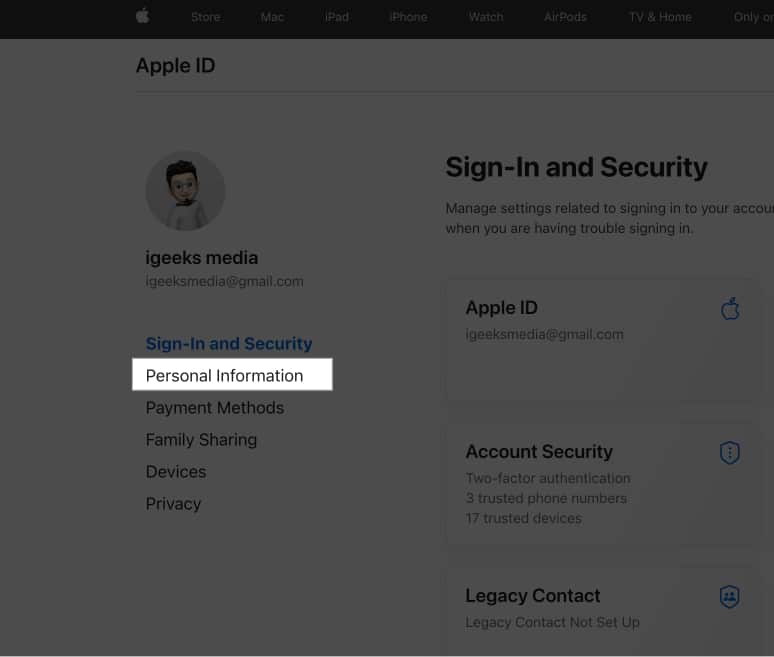
- Choose Personal Information.

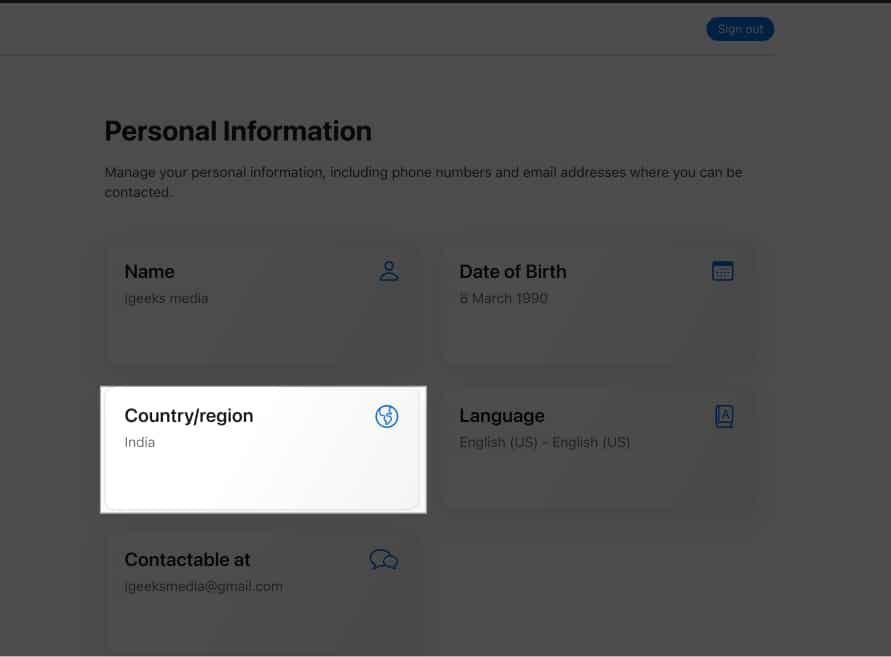
- Click Country/Region → Change country/region.


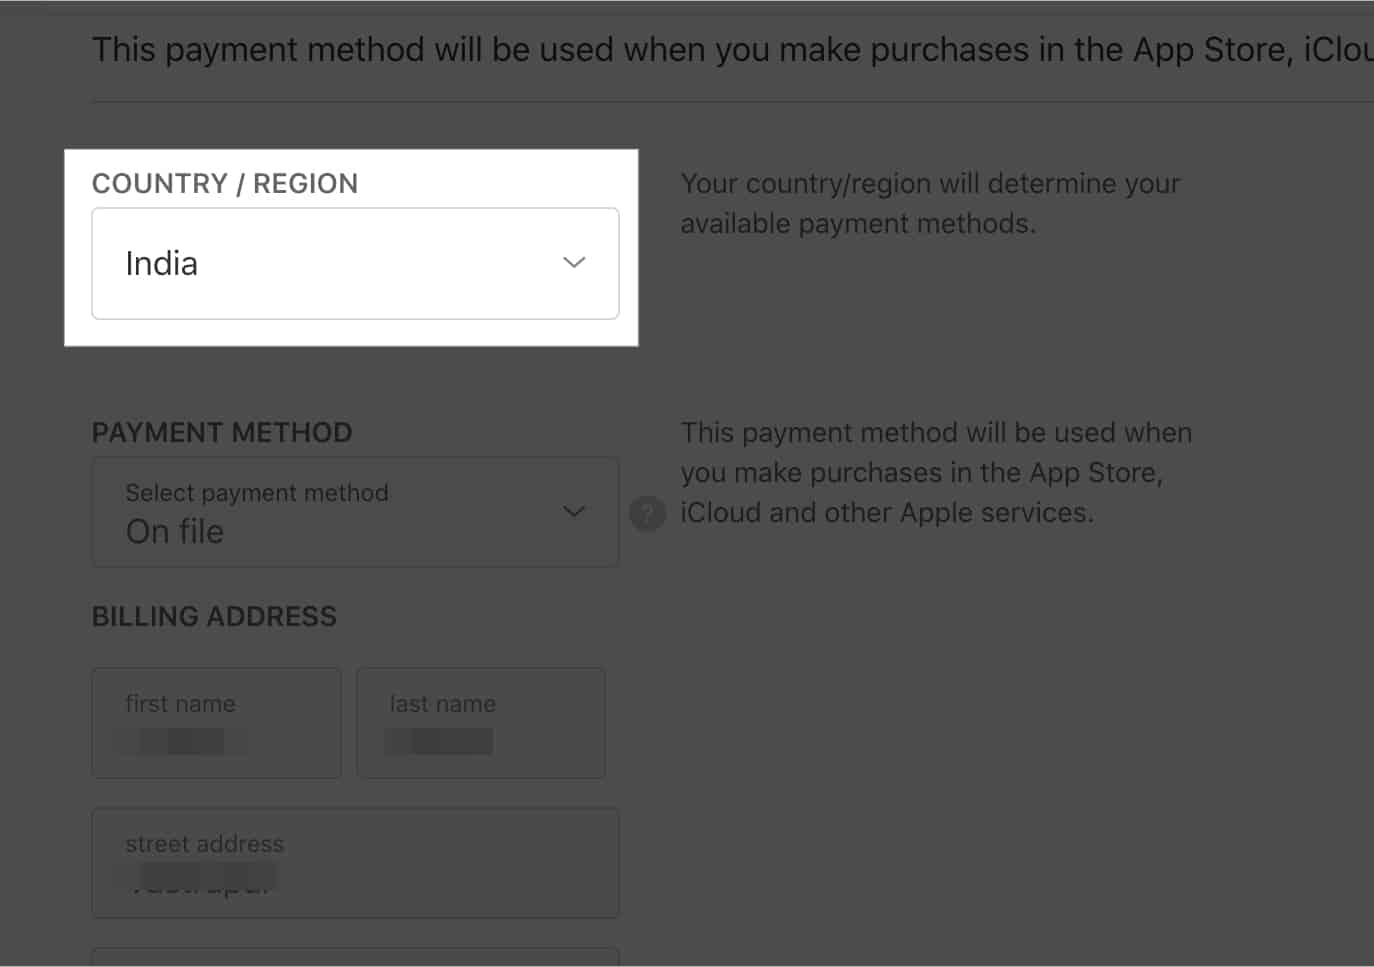
- Enter your preferred payment method for your new country to check its accessibility.
- Fill in the details and click Update.

If you want to avoid providing a payment method, wait until you have reached your new country or region. Then, create a new Apple ID.
Can’t change App Store country or region?
Are you having problems changing the country or region on your iPhone, iPad, or Mac? Here’s a comprehensive guide to help you out.
Note: If you don’t want to lose your subscriptions or you’ve moved to another country temporarily, consider creating a new Apple ID and using it as an alternative for another country.
Changing the Apple store country does not delete anything from your device. However, to change the App Store country and region on iPhone, iPad, and Mac, you must cancel all your subscriptions, pre-orders, etc.
You can have two different Apple IDs on your device. First, however, you need to register for each country with a new Apple ID.
The word region for Apple Store hints toward the area you inhabit and set for your Apple ID.
Wrapping up!
With this handy guide, we tried giving you a step-by-step walk-through. You can now enjoy apps, music, services, and games connected with your Apple ID in the new country. If you still have any issues with accomplishing the process, please feel free to communicate with us and drop your feedback in the comment section below.
Read more:
- How to Change Apple ID Payment Method on iPhone, iPad, and Mac
- How to hide App Store purchases on iPhone, iPad, and Mac
- iPhone keeps asking for Apple ID password (8 Ways to fix)
🗣️ Our site is supported by our readers like you. When you purchase through our links, we earn a small commission. Read Disclaimer.