You had recently allowed some third-party music apps to access your Apple Music and the media library. But due to some personal reasons, you have decided to revoke the access and hence looking for a quick way to de-authorize third-party app permissions for Apple Music.
Fret not! Apple lets you perfectly manage app permissions for the music service. Moreover, you can get it done both from the iOS device and Mac/PC with ease. Let me walk you through the steps:
How to Revoke Third-Party App Access to Apple Music on iPhone and iPad
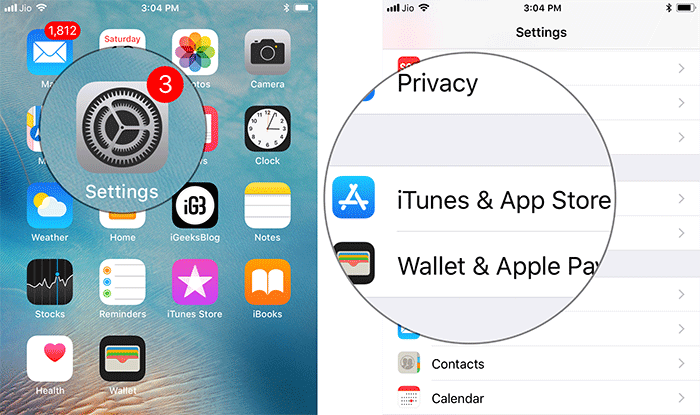
Step #1. Launch Settings app on your iOS device → Tap on iTunes & App Store.
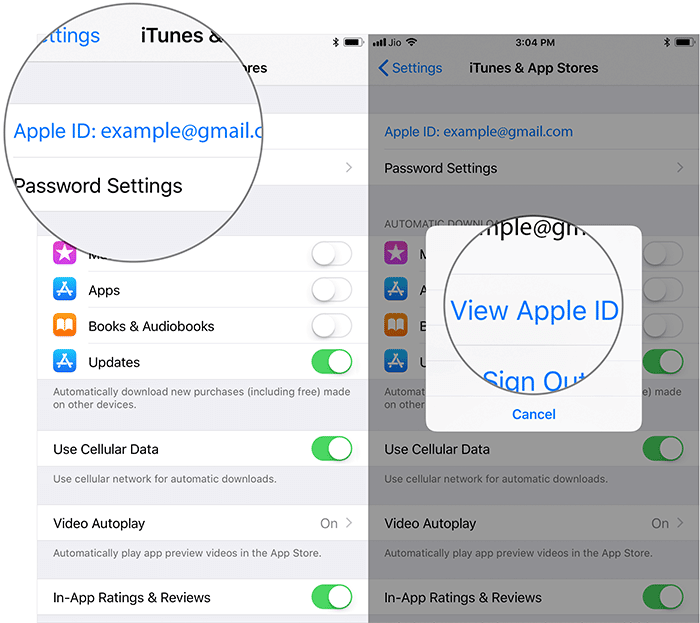
Step #2. Now, tap on your Apple ID and select View Apple ID in the popup.
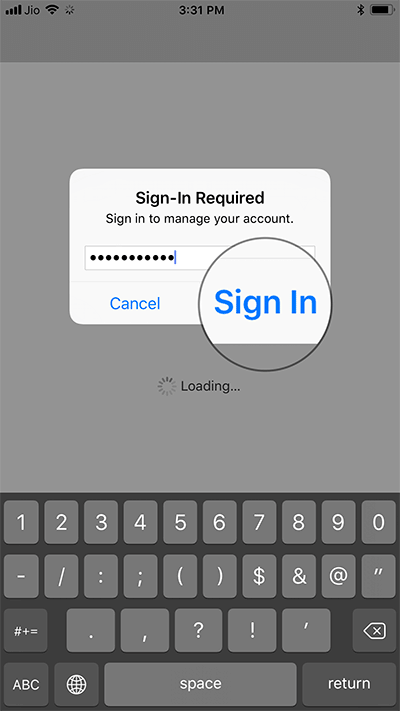
Step #3. Now, you need to enter your Apple ID password or use Touch/Face ID to authenticate.
Step #4. Next, head over to the App Permissions section.
Note: In case you haven’t yet authorized any apps, App Permissions section won’t appear.
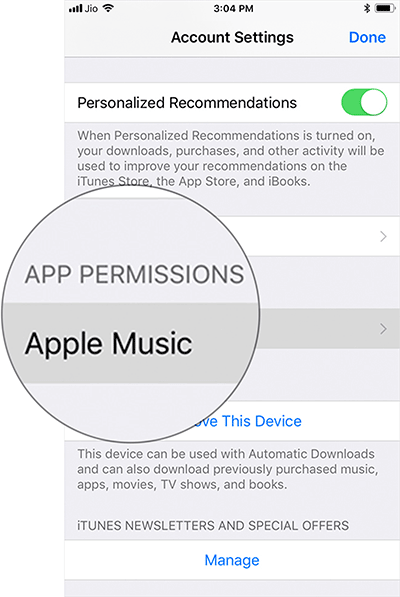
Step #5. Choose the service that you no longer want to have access to your media library.
Step #6. Next up, locate the third party app and then swipe left on it.
Step #7. Finally, tap on Delete.
That’s it!
Alternately,
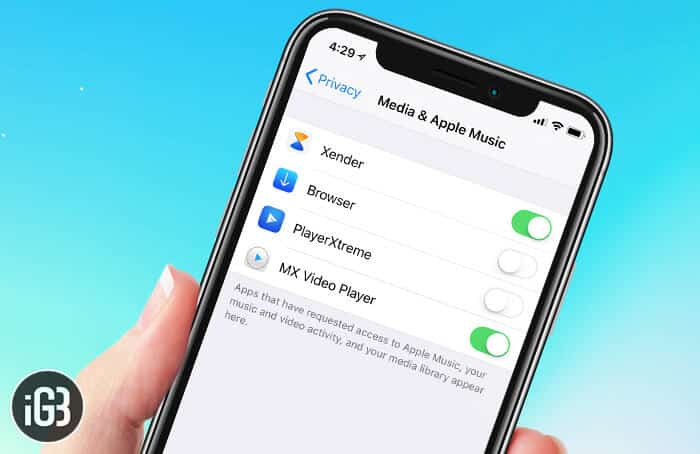
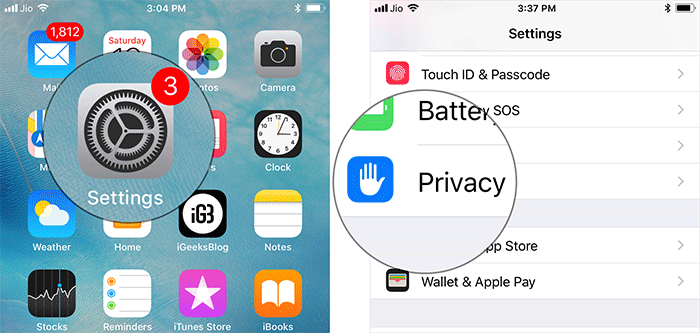
Step #1. Head over to Settings → Tap on Privacy.
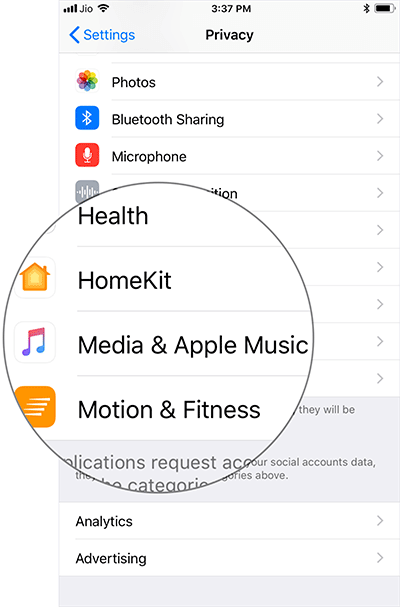
Step #2. Tap on Media & Apple Music.
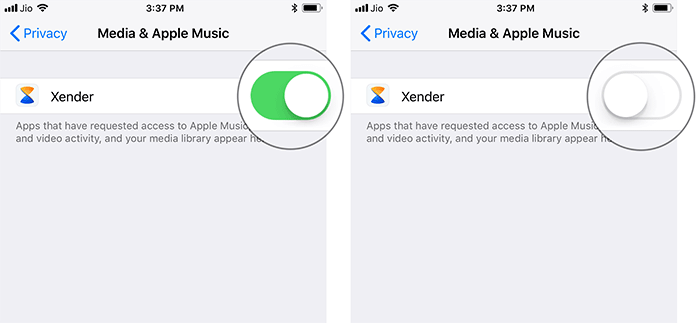
Step #3. You should see all the apps that had requested access to the music streaming service, video activity, and media library. Simply turn off the switch next to each app which you want to prevent from using your data.
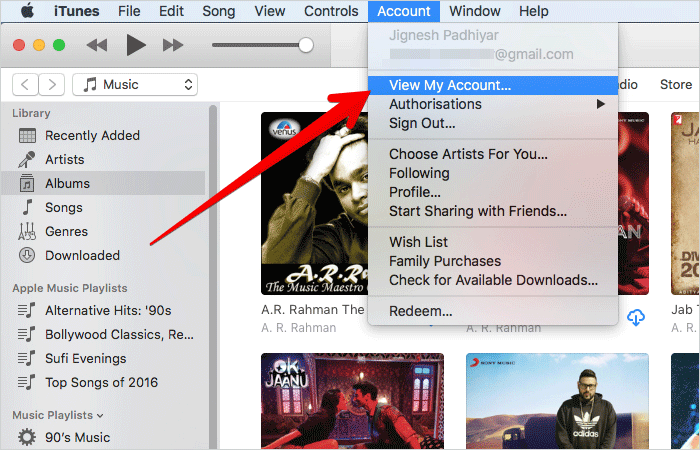
How to Remove a Third Party App Access for Apple Music from your Mac or PC
Step #1. Launch iTunes on your computer.
Step #2. Now, click on Account menu and select View My Account. Then, you have to enter your password and hit Return.
Step #3. On the Account Information page, go to the App Permissions section. Click on Manage next to Apple Music.
Note: In case, you haven’t authorized any apps, App Permissions section will not show up.
Step #4. Finally, locate the app and click on Remove.
That’s all folks!
Over to you
So, that’s how you can ideally manage app permissions for the music streaming service. Have any question? Shoot it in the comments.
You might want to take a peek at these posts as well:
🗣️ Our site is supported by our readers like you. When you purchase through our links, we earn a small commission. Read Disclaimer.