
As the main way to transfer files among Apple devices, AirDrop not working on your iPhone, iPad, or Mac can be frustrating. Many users have reported failed AirDrop transfers after the iOS 17 update. Fortunately, most AirDrop issues are easy to fix. Below are different ways to get your AirDrop working again in no time!
Why is AirDrop not working?
There are several potential reasons for the non-functioning AirDrop. So before troubleshooting the issue, you find the root cause.
You may be unable to send files over AirDrop due to software glitches, device compatibility issues, network issues, incorrect visibility settings, or distance issues.
However, you can easily address all the issues and start using AirDrop again.
15 Ways to fix AirDrop not working on your iPhone, iPad, or Mac
Several factors ensure your files are transferred successfully via AirDrop. Here, I have listed potential solutions if AirDrop fails to work.
1. Check device compatibility
Before anything else, it’s essential to ensure your Apple device supports AirDrop. At the time of writing, you can use AirDrop with the following:
2. Unlock your device
If you’re trying to send a file via AirDrop, ensure the target Apple device is unlocked and awake. Your device won’t be able to detect the target device if it isn’t awake.
Additionally, make sure that your Mac’s display is turned on. Don’t put your Mac to sleep while sending or receiving files via AirDrop.
3. Enable Wi-Fi and Bluetooth
Make sure that both Bluetooth and Wi-Fi are enabled on both devices and connected to the same network.
Don’t worry. Your device doesn’t necessarily have to be connected to the internet — you simply must turn these on.
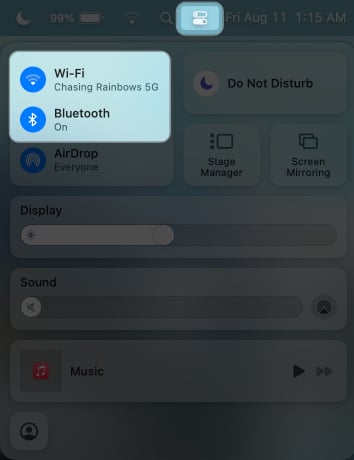
- On your iPhone or iPad: Access the Control Center → Tap the Wi-Fi and Bluetooth icons to enable them (the icons should turn blue).

- On your Mac: Click the Control Center icon in the menu bar → Click the Bluetooth and Wi-Fi icons to enable them (the icons should turn blue).


4. Reset your devices
A hard reset is often all you need to flush out all the bugs and glitches affecting your device’s functionalities.
- Force restarting your iPhone or iPad depends on its model.
- For your Mac, just go to the Apple menu → Restart.
5. Turn off personal hotspot on iPhone or iPad
Both Personal Hotspot and AirDrop utilize your Wi-Fi and Bluetooth connections. That said, you won’t be able to use AirDrop if you’re hosting a personal hotspot on your iPhone.
The only way to make AirDrop work is to turn off your hotspot temporarily. Go to Settings → Personal Hotspot → Toggle off Allow Others to Join.
6. Bring devices closer to each other
The performance of AirDrop can be affected by physical barriers, including distance and interference.
Ensure that both devices are close (at least 30 feet) and that there are no physical obstacles like concrete walls separating them.
However, with iOS/iPadOS 17.1 (or later), AirDrop file transfers continue using LTE or 5G cellular data.
So, you can receive the file even after you leave the range. To ensure this, navigate to Settings → General → AirDrop → Toggle on Use Cellular Data.
7. Check AirDrop Visibility Settings
AirDrop has three settings:
- No One/Receiving Off: Prevents everyone from discovering your device.
- Contacts Only: Allows only people with mobile numbers or email addresses saved in your contacts to send you files.
- Everyone/Everyone for 10 minutes: Allows everyone to discover your device and send files.
While the Contacts Only option tightens your device’s security, it prevents people who aren’t saved in your Contact from sending you files.
Meanwhile, when you’re on the receiving end of Contacts Only, Apple requires that both devices be signed in to their iCloud accounts.
8. Turn off Airplane Mode
When enabled, Airplane Mode shuts down all your wireless connections, including Bluetooth and Wi-Fi.
Disable Airplane Mode on your iPhone or iPad by going to Settings → toggle Airplane Mode off.
9. Turn off DND or Focus Mode
While you can still send files to others via AirDrop while on a particular Focus mode, the opposite is true regarding receiving AirDrop transfers.
This is because enabling Do Not Disturb and other Focus blocks AirDrop alerts and notifications and renders devices undiscoverable.
10. Check Privacy Restrictions
If you couldn’t find the AirDrop icon at all, you or someone else might have blocked it using your device’s Restrictions feature.
On iPhone or iPad:
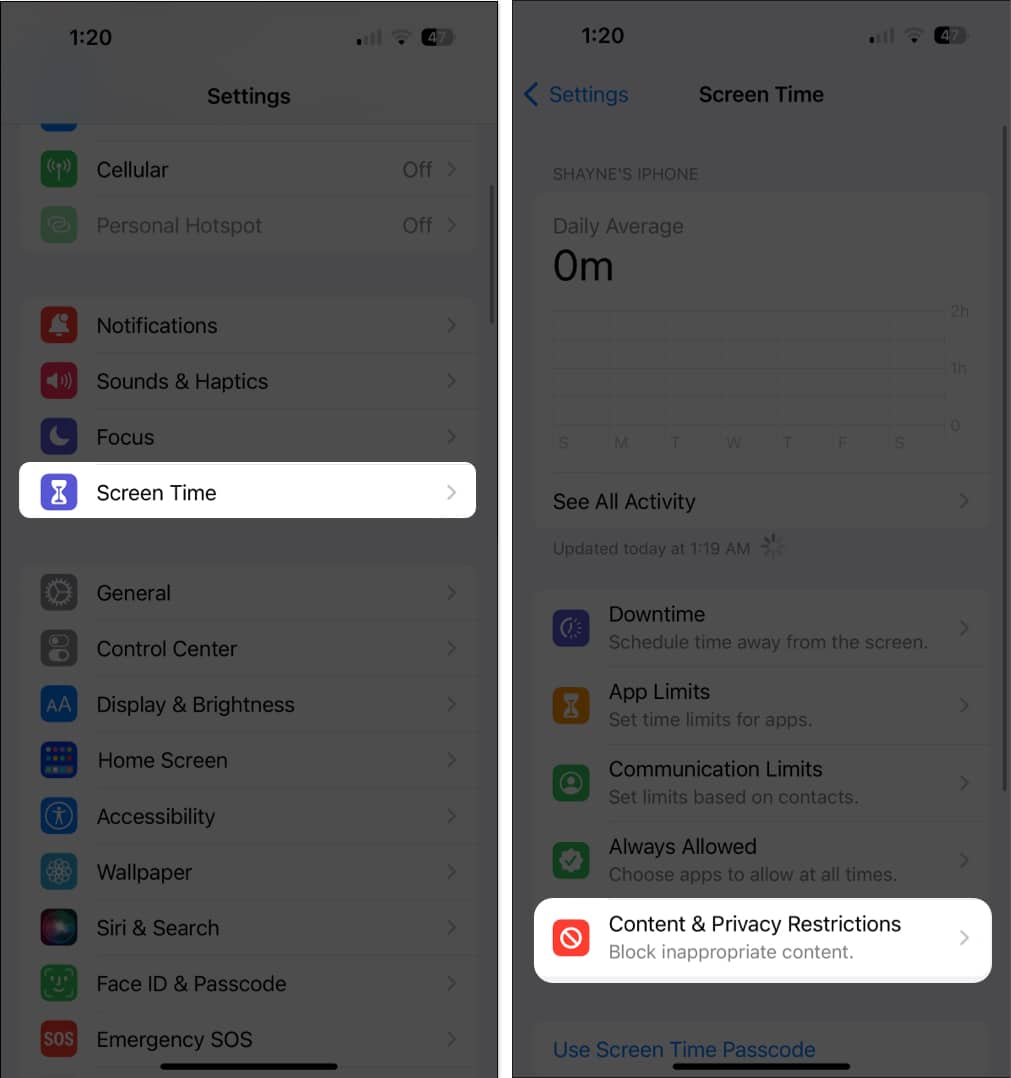
- Open Settings → Screen Time.
- Tap Content & Privacy Restrictions.

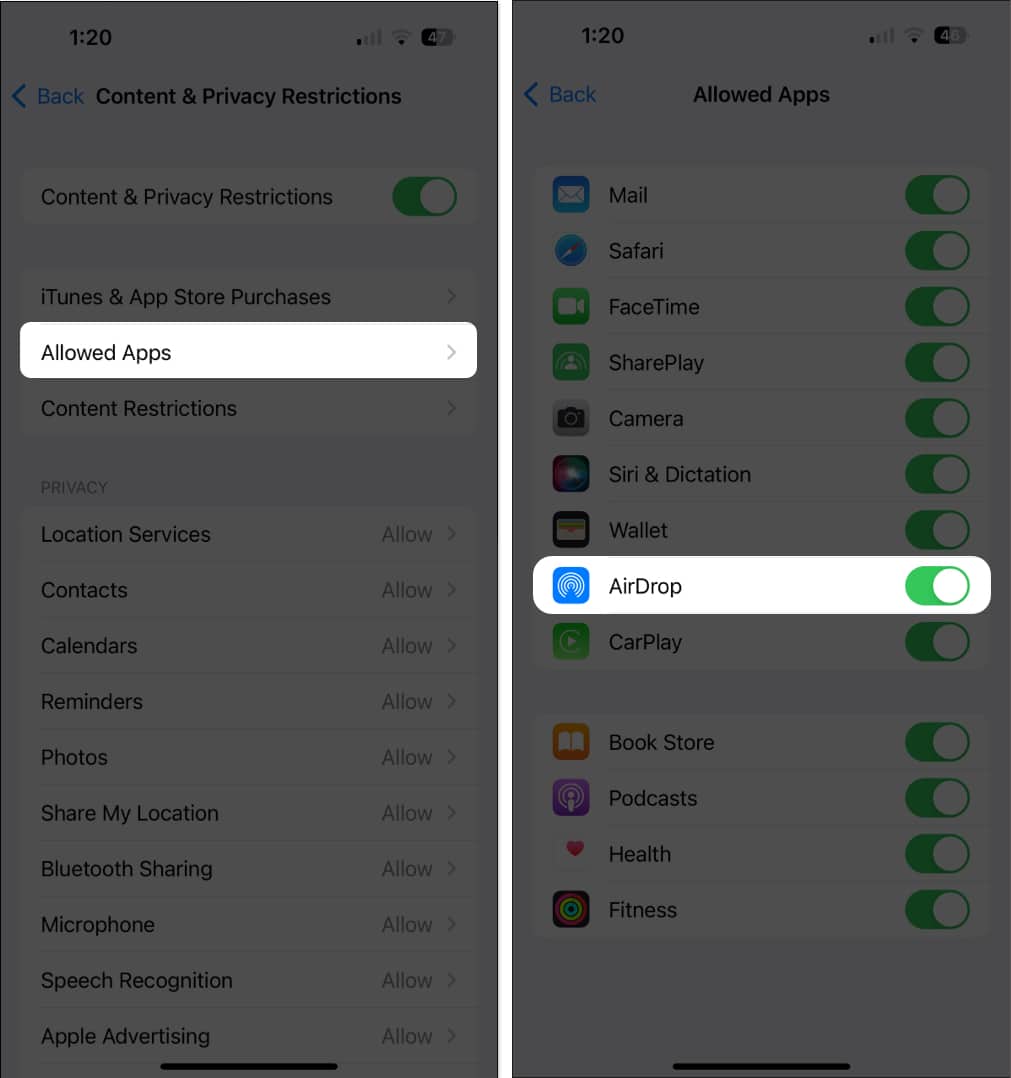
- Select Allowed Apps. Make sure that AirDrop is enabled.
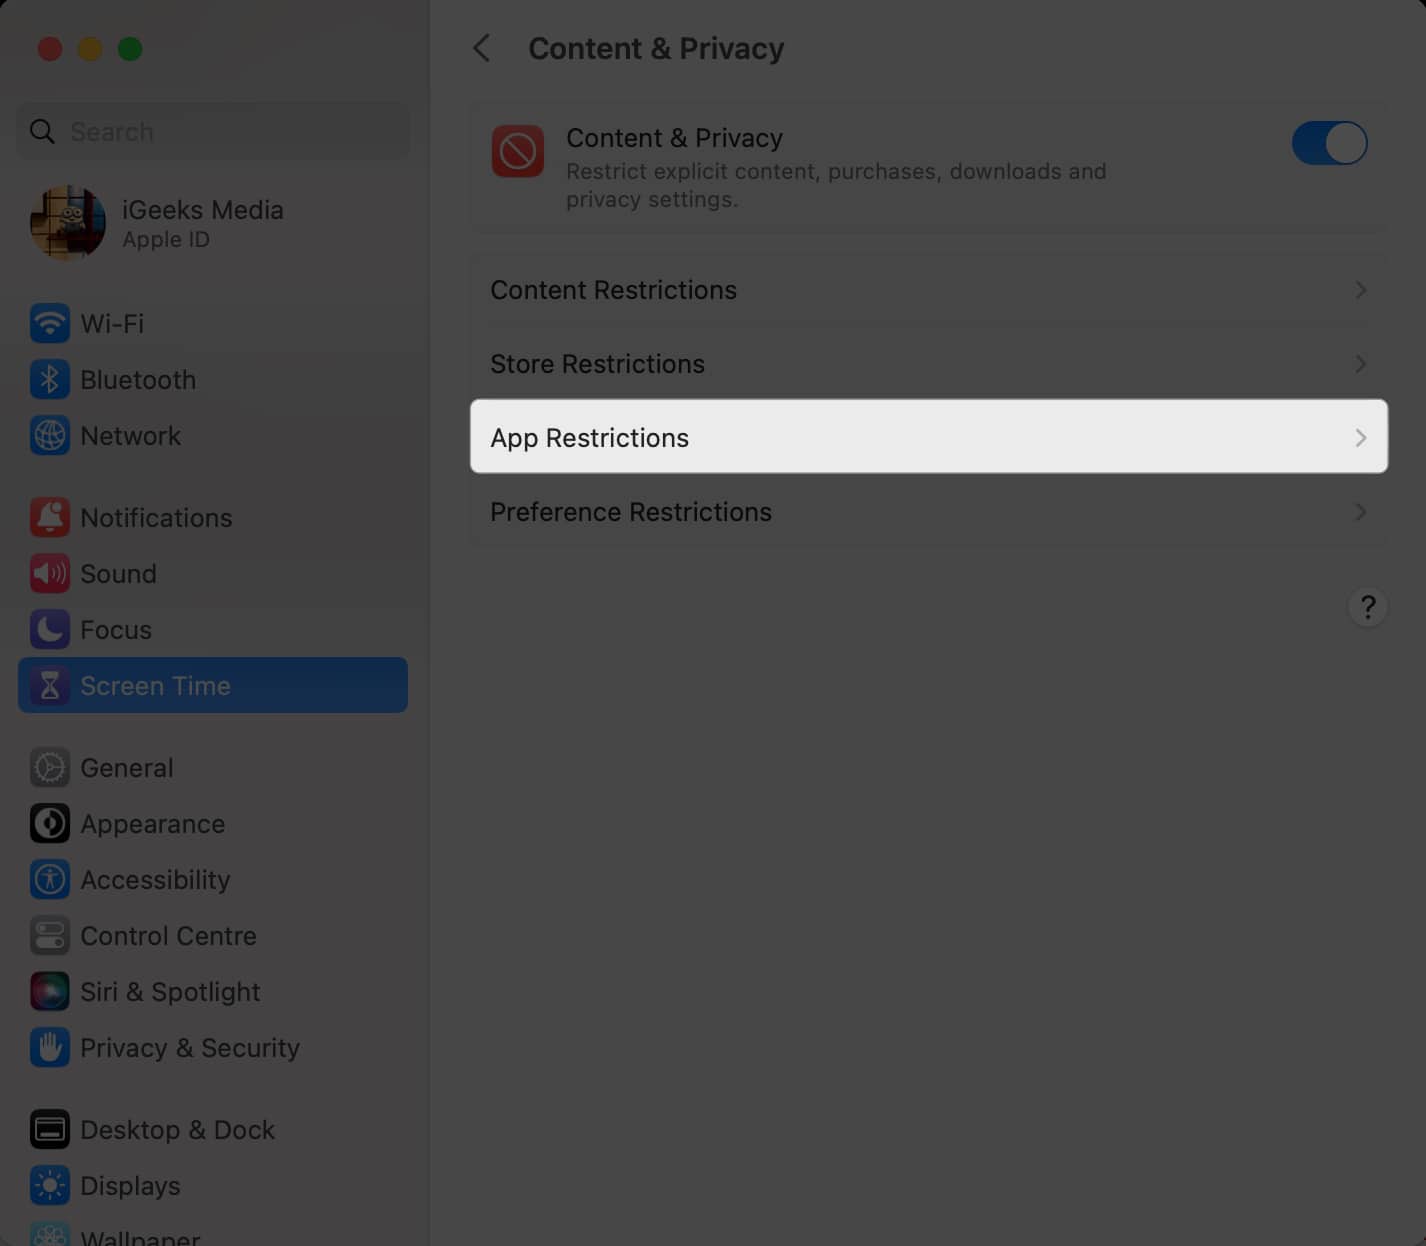
On your Mac:
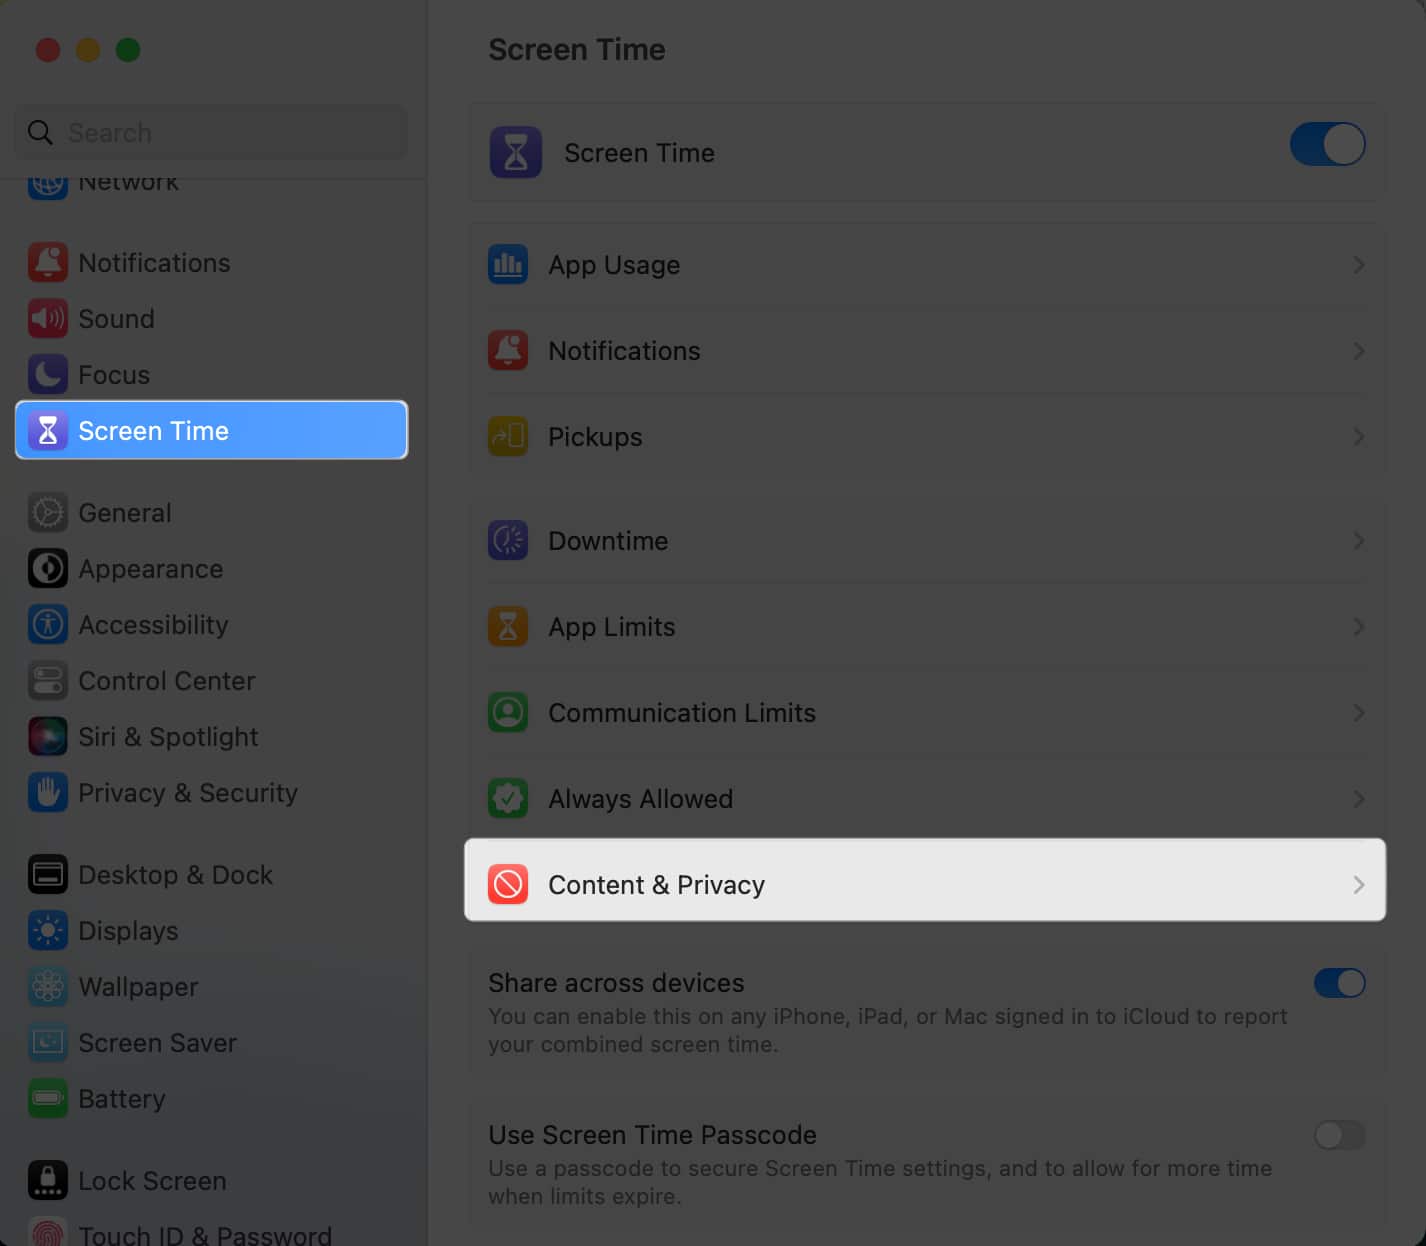
- Open System Settings → Screen Time.
- Click Content & Privacy. You don’t need to proceed if you have Content & Privacy turned off.

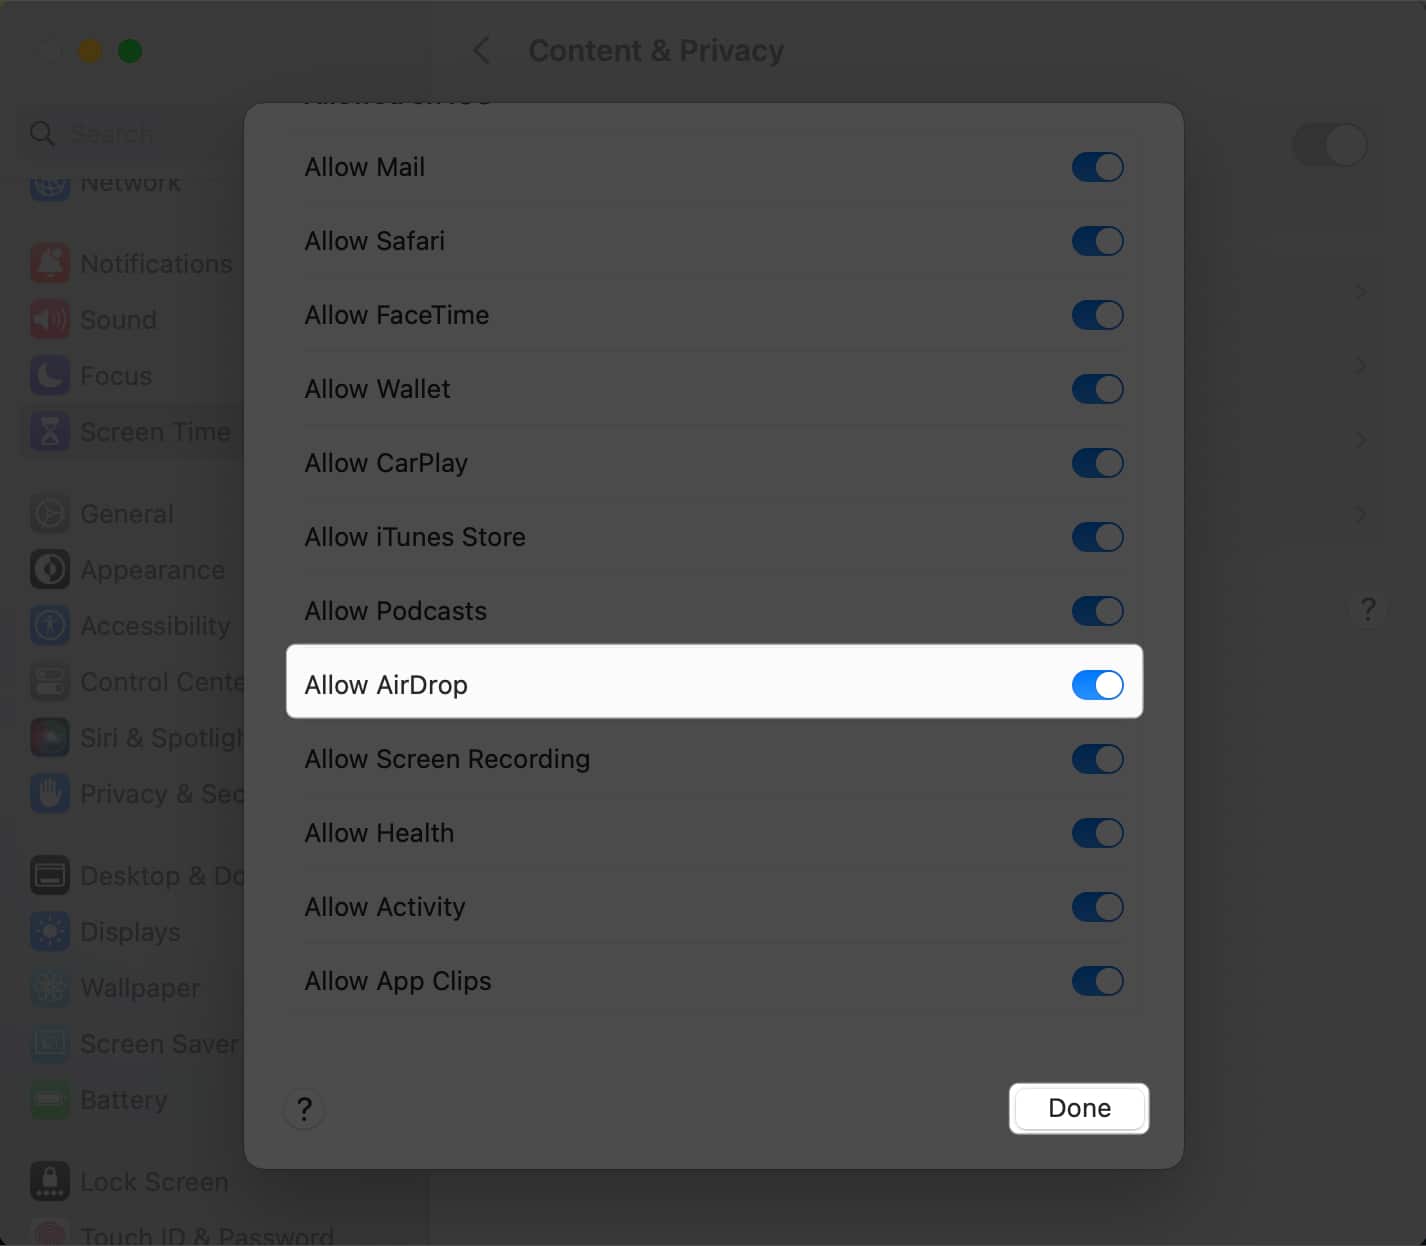
- Select App Restrictions.
- Toggle AirDrop on and Select Done.
11. Sign In to your Apple Account
Signing out and signing back in on your Apple ID can get your AirDrop to work again.
- On your iPhone or iPad: Go to Settings → Tap your account and choose Sign Out.
- On your Mac: Go to System Settings → select your account and Sign Out.
Wait for some time, and sign back in.
12. Check storage on your devices
AirDrop by default saves files received in the Downloads folder. So, ensure your system has enough space to save it.
To check storage space:
- On iPhone: Go to Settings → General → iPhone storage. Free up some space if you don’t have enough.
- On Mac: Go to System Settings → General → Storage. Free up disk space on your Mac if you don’t have enough.
Additionally, if you received a file on your device via AirDrop and you can’t find it, don’t immediately assume that your AirDrop is malfunctioning. Try to check your Downloads folder.
- On iPhone, open the Files app and look for a Downloads folder.
- Meanwhile, you can usually find the Downloads folder on your Mac by opening a new Finder window and pressing Option + Cmd + L.
13. Turn off VPN
Some users reported that their AirDrop didn’t work until they turned off their VPN. If you’re using a third-party VPN app, turn it off. Here’s how to disable VPN on your device’s settings.
- On your iPhone or iPad: Go to Settings → Toggle off VPN. If you are using a third-party app, disconnect the service from there.
- On your Mac: Go to System Settings → Select VPN on the sidebar and disable the service. If you can’t see it, VPN is not enabled on your Mac or you must be using a third-party app. If it’s the latter, disable the service from the app.
14. Update your OS
Make sure to keep your device/s running on the latest OS. Beta OS versions are also notorious for their glitches and bugs.
So, if you’re using a beta version, revert to the older, most stable OS for your iPhone or Mac; this might be the reason behind your AirDrop not working after an update.
15. Reset Network Settings
Resetting your Network Settings can help fix all network and connectivity issues, such as Wi-Fi and AirDrop problems. Note that resetting these settings will also cause your device to forget your saved passwords, requiring you to reconnect and enter their passwords again.
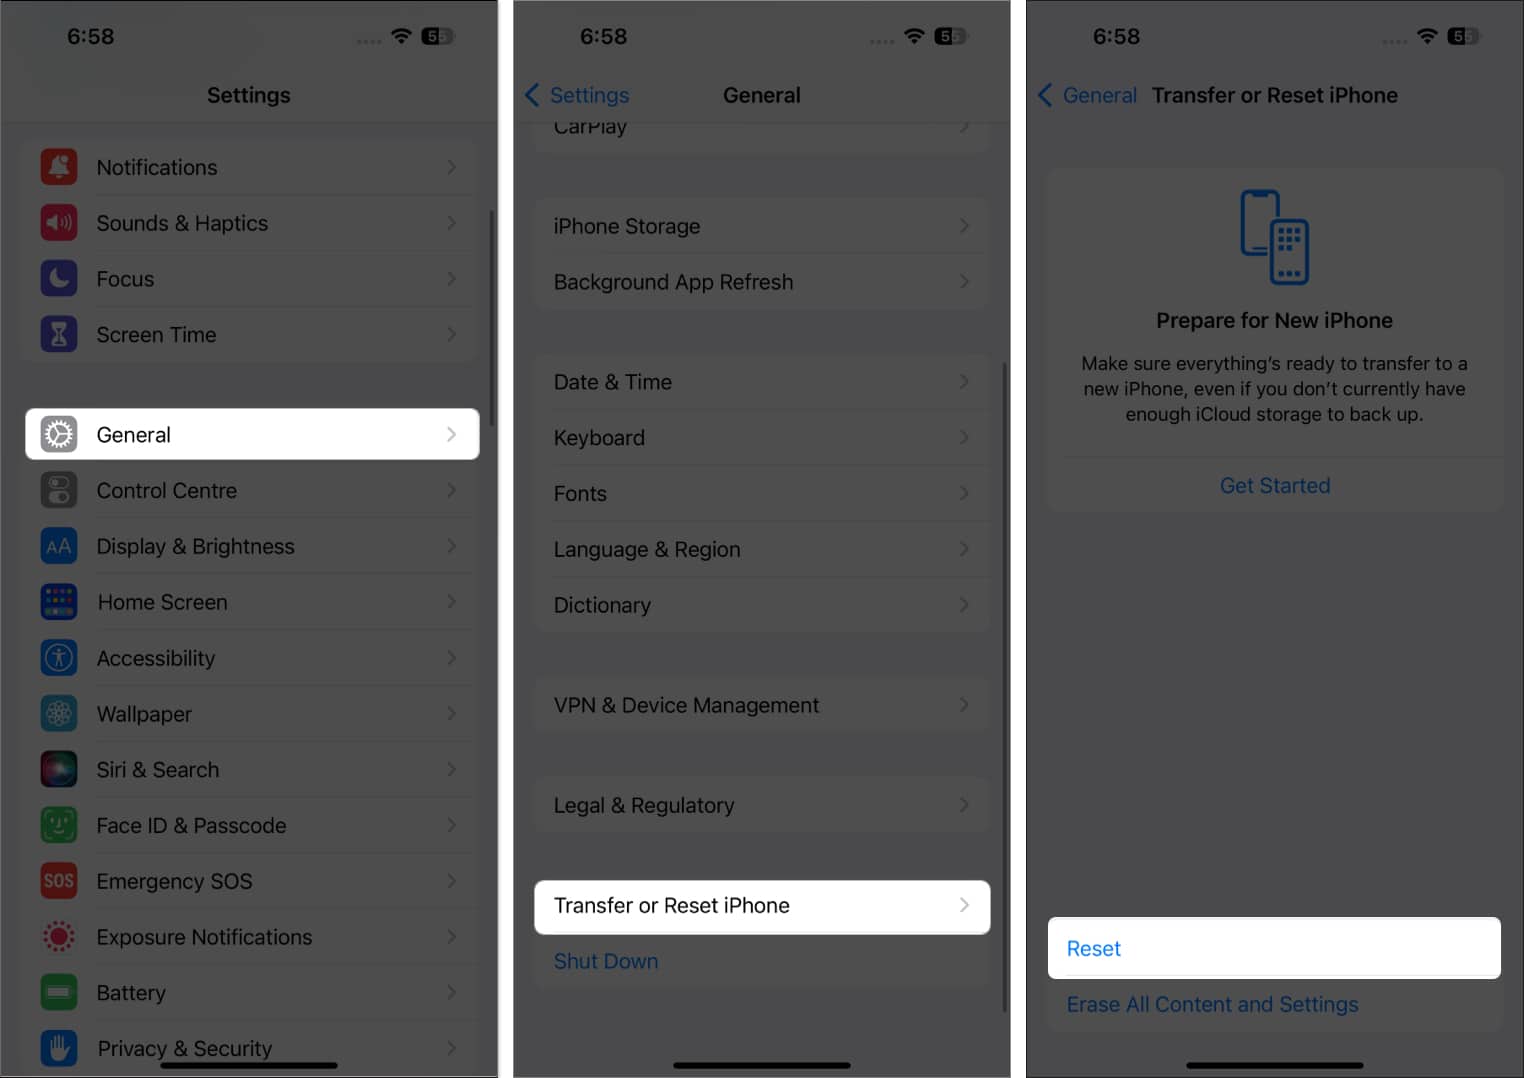
On your iPhone or iPad:
- Go to Settings → General.
- Select Transfer or Reset [device] → Tap Reset

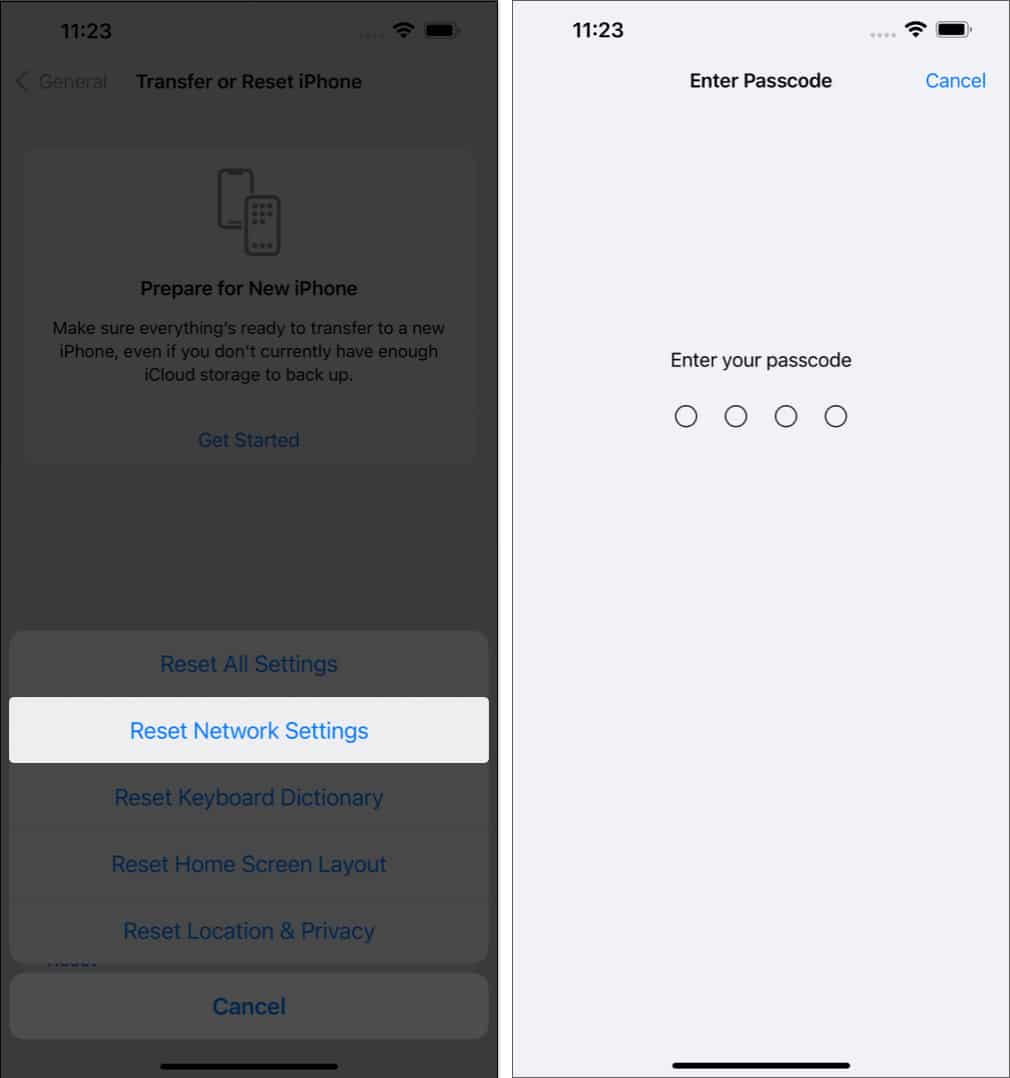
- Tap Reset Network Settings and Enter your passcode.

Sadly, Macs don’t have a dedicated button for resetting your Network Settings. However, you can use some workarounds mentioned in our guide to reset network settings on Mac.
Wrapping up…
AirDrop acting up is often just a temporary issue. Which one did the trick for you? Share them below.
If none of the above tips helped troubleshoot your AirDrop issue, you might want to seek help from Apple Support.
Read more:
- Can’t share passwords with AirDrop on iPhone? 9 Real fixes
- How to change AirDrop name on iPhone, iPad, and Mac
🗣️ Our site is supported by our readers like you. When you purchase through our links, we earn a small commission. Read Disclaimer.