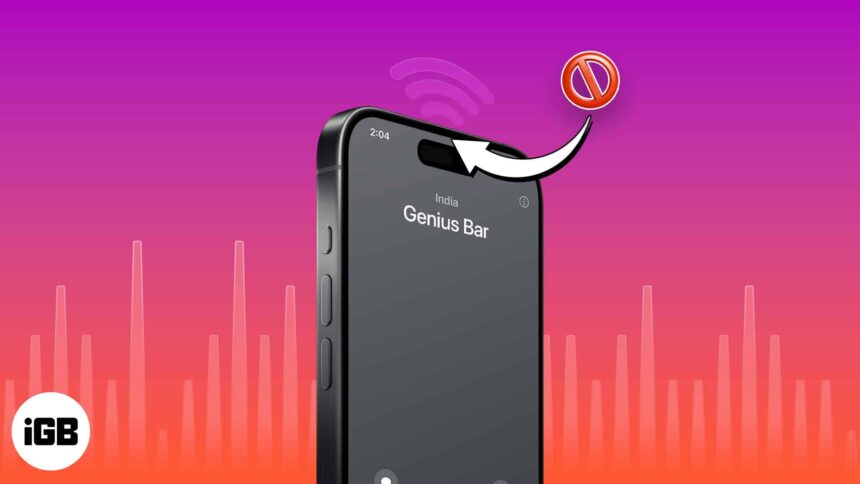
Have you ever been on a call when suddenly the person on the other end cannot hear you? It can be pretty frustrating if your device has decided to go mute on you. Fear not! The following guide will show you how to fix the error when the microphone on your iPhone is not working properly.
1. Clean the iPhone microphones
The microphone holes are tiny, and thus it takes special care to clean them. Use a soft brush of any kind (it can be a toothbrush) to scrub the grills carefully. When you do so, make sure to hold the iPhone in such a way that gravity gets to do its job. For example, if you are cleaning the bottom microphone, try to hold the phone vertically so that the dirt easily falls down.
After this, take a few minutes to carefully clean the 3.5 mm headphone jack or the Lightning port.
Note: Make sure your case or screen protector isn’t blocking the microphone holes.
2. Disconnect Bluetooth headset and wired headphones
We’re humans, and as such, we often forget things. Sometimes you may try to play music, watch a video, make calls, or send a voice note only to find that things aren’t working. This may be because a Bluetooth headset is connected to the iPhone and routing the voice to it, as well as using the on-headset microphone. To tackle this, here’s how to disconnect wireless earphones.
- Navigate to Settings → Tap Bluetooth.
- Toggle off Bluetooth → Hit Turn Off when prompted.
- Alternatively, open Control Centre → Tap the Bluetooth icon if enabled.

- If you don’t want to turn Bluetooth off, tap on the information icon (i) next to the specific wireless headphone. On the next screen, tap Disconnect.
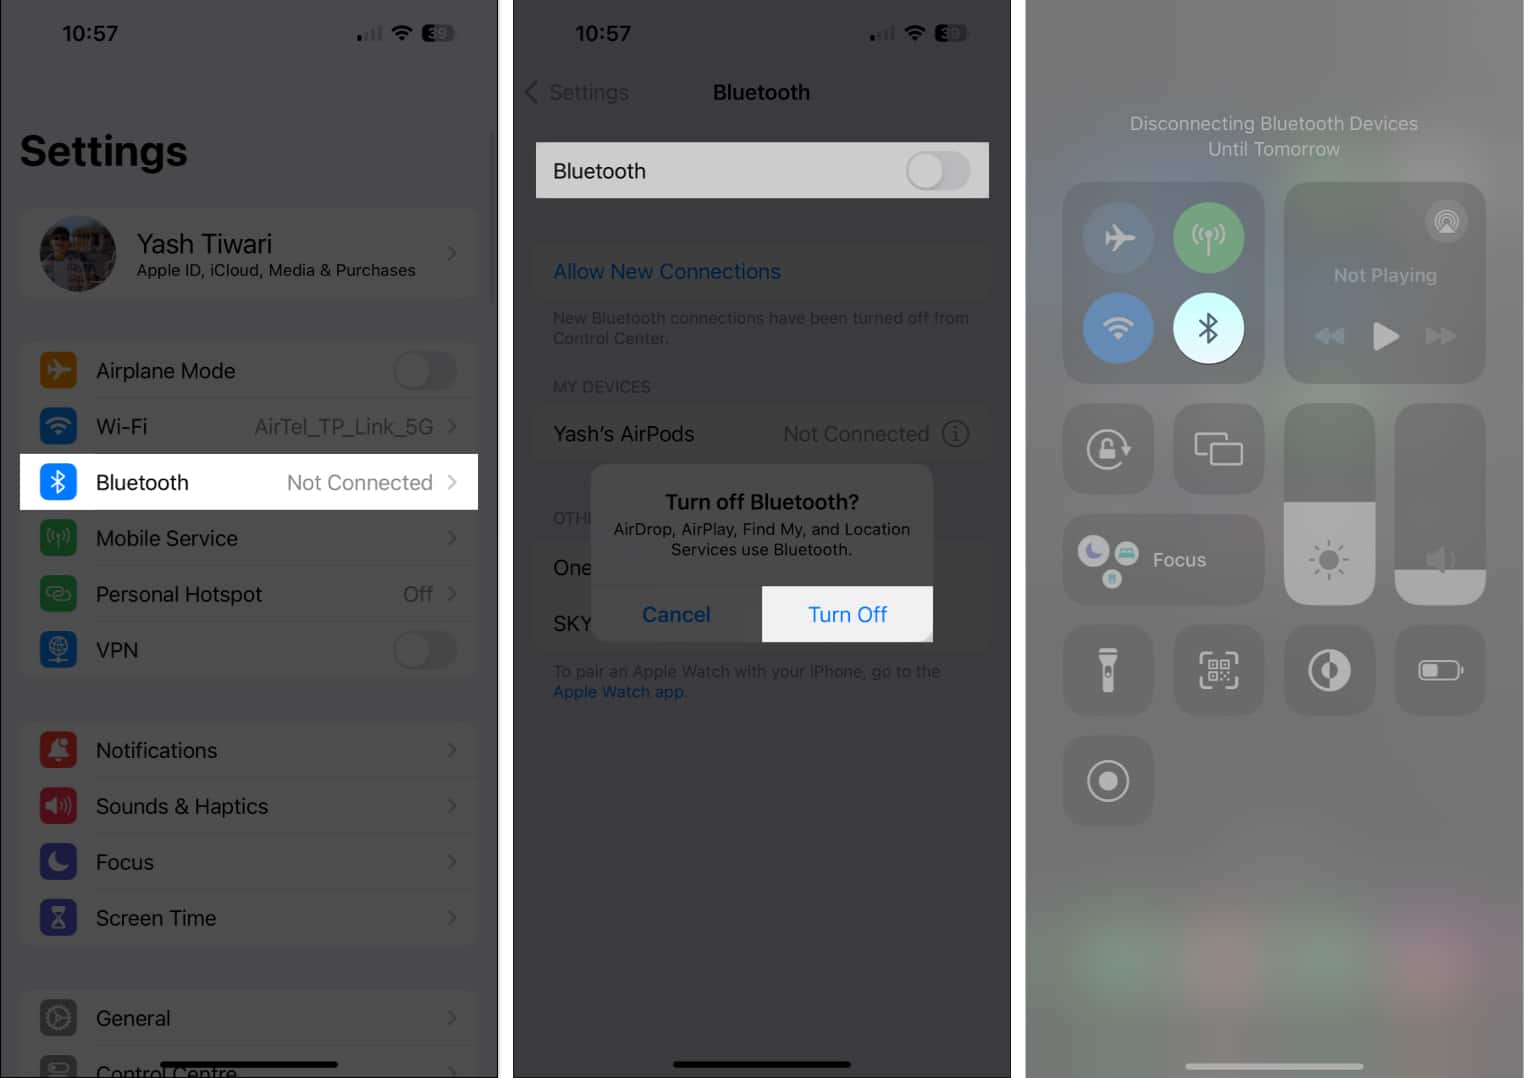
Tip: If you use AirPods, tap on the info icon (i) and make sure the toggle for Automatic Ear Detection is on. This will ensure that whenever the buds are connected but not in your ear, they won’t output sound to it or use its microphone. Additionally, you can also tap on Microphone and customize the settings, if needed.
For wired headphones, unplug them. After this, the iPhone’s main microphones will be used for calls and other related functions.
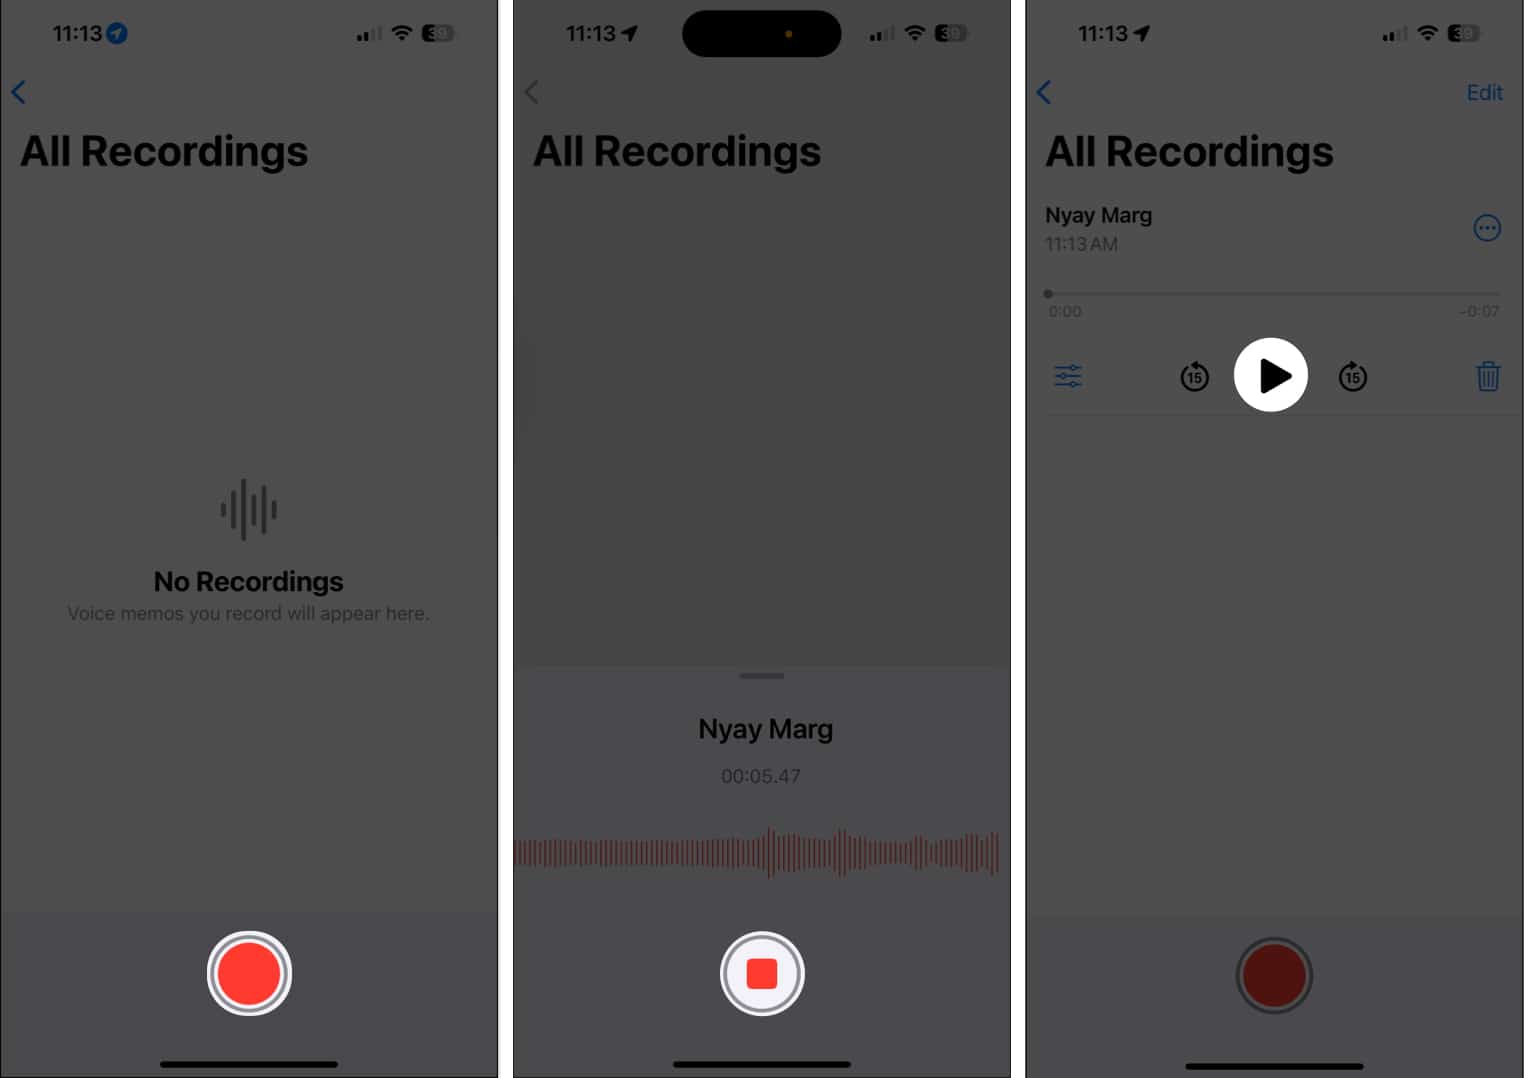
3. Run audio diagnostics on iPhone
When you suspect that the microphone on your iPhone is not working, perform a manual diagnostic test yourself to get the gist of the error. To do so, remove the case of your iPhone if you use any, and consider the following:
For the primary microphone:
- Launch the Voice Memos app on your iPhone.
- Tap the record icon and start talking.
- After 10-20 seconds, pause the recording.
- Now, play the recorded audio.
- If you can hear your voice clearly, then your primary microphone is working correctly.
For back microphone:
- Open the Camera and shift to Video.
- Switch to the rear camera view.
- Hit the record option and let the recording run for a while.
- Now, stop the recording and play your recent video from the Photos app.

- Your back microphone is also delicate if you can hear your voice without interruptions.
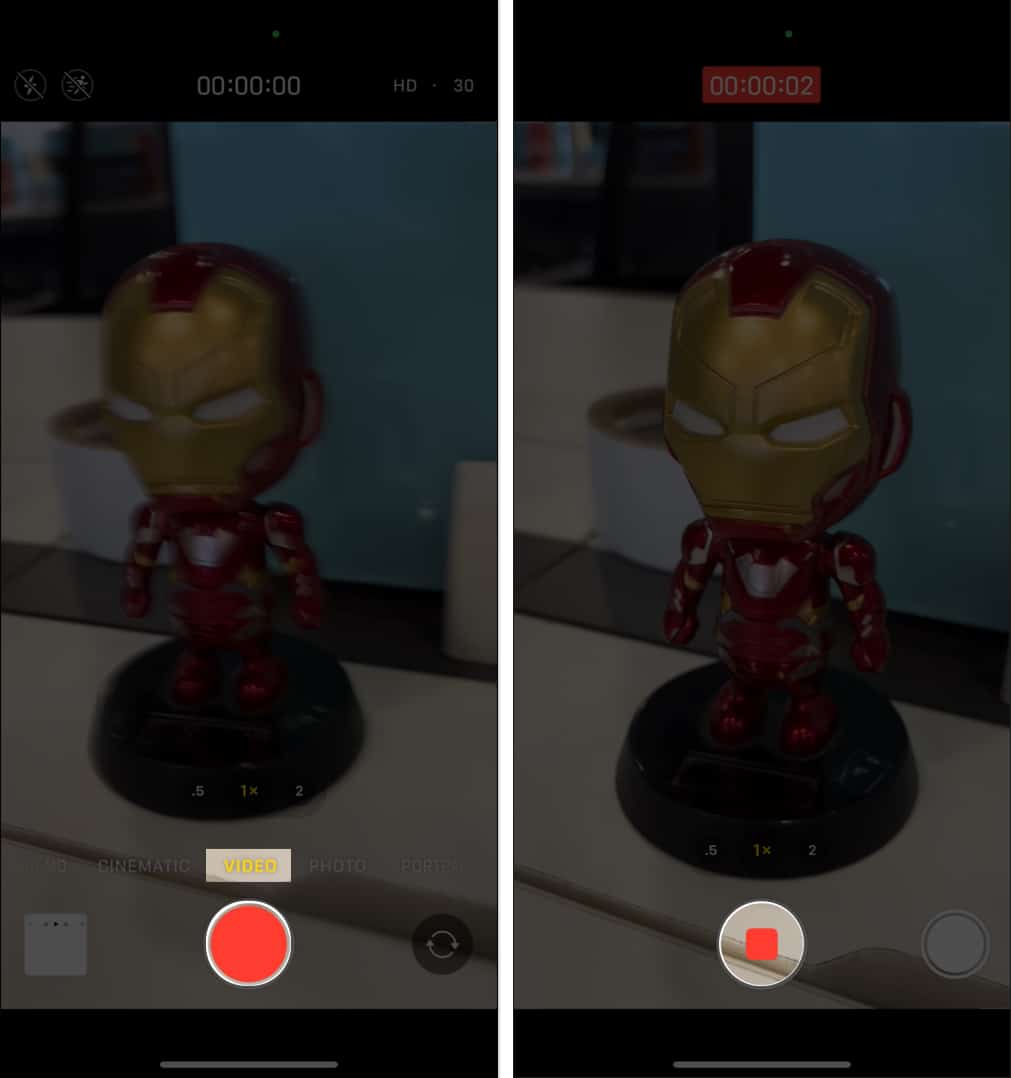
For front microphone:
- Now repeat the same with the front-view camera.
- Simply record and play the video.
- If you can hear your voice clearly, the front microphone is working correctly.
These tests will allow you to test both internal microphones and determine if there are any faults or malfunctions. Thus, you can pinpoint any underlying problems with your iPhone’s microphone and take appropriate measures to resolve them effectively.
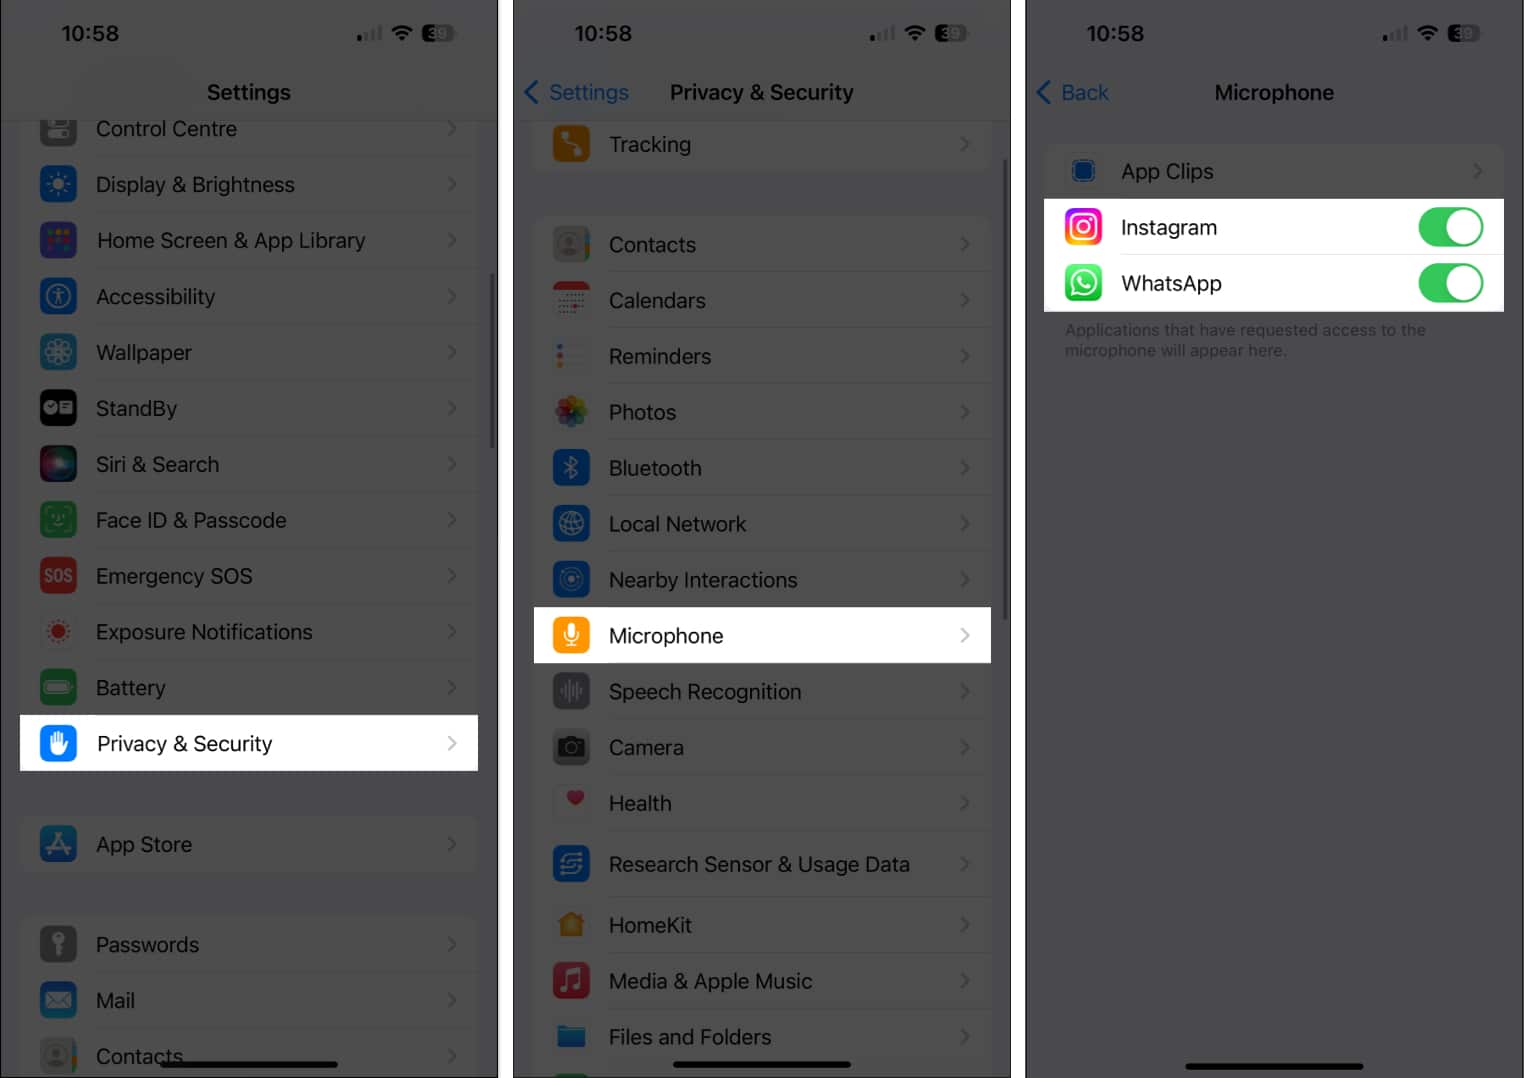
4. Give the app microphone access
Applications need your consent before they can access your iPhone’s microphones. Usually, when you open the app for the first time or perform an in-app activity that requires the mic, you see a popup asking for your permission. In case you chose Don’t Allow, here’s how to reverse it:
- Go to to Settings → Select Privacy and Security.
- Tap Microphone to view all installed apps that require microphone access.
- Toggle on the app in which you want to use the mic.
Additional Method: Settings → tap on the app name → toggle on microphone access. Next, force close the app and relaunch it.
5. Disable noise cancellation on iPhone
In some situations, like when on phone calls, it may help if you go against the norm and turn off noise cancellation. Here’s how:
- Open Settings → Navigate to Accessibility.
- Now, select Audio/Visual.
- Toggle off Phone Noise Cancellation.
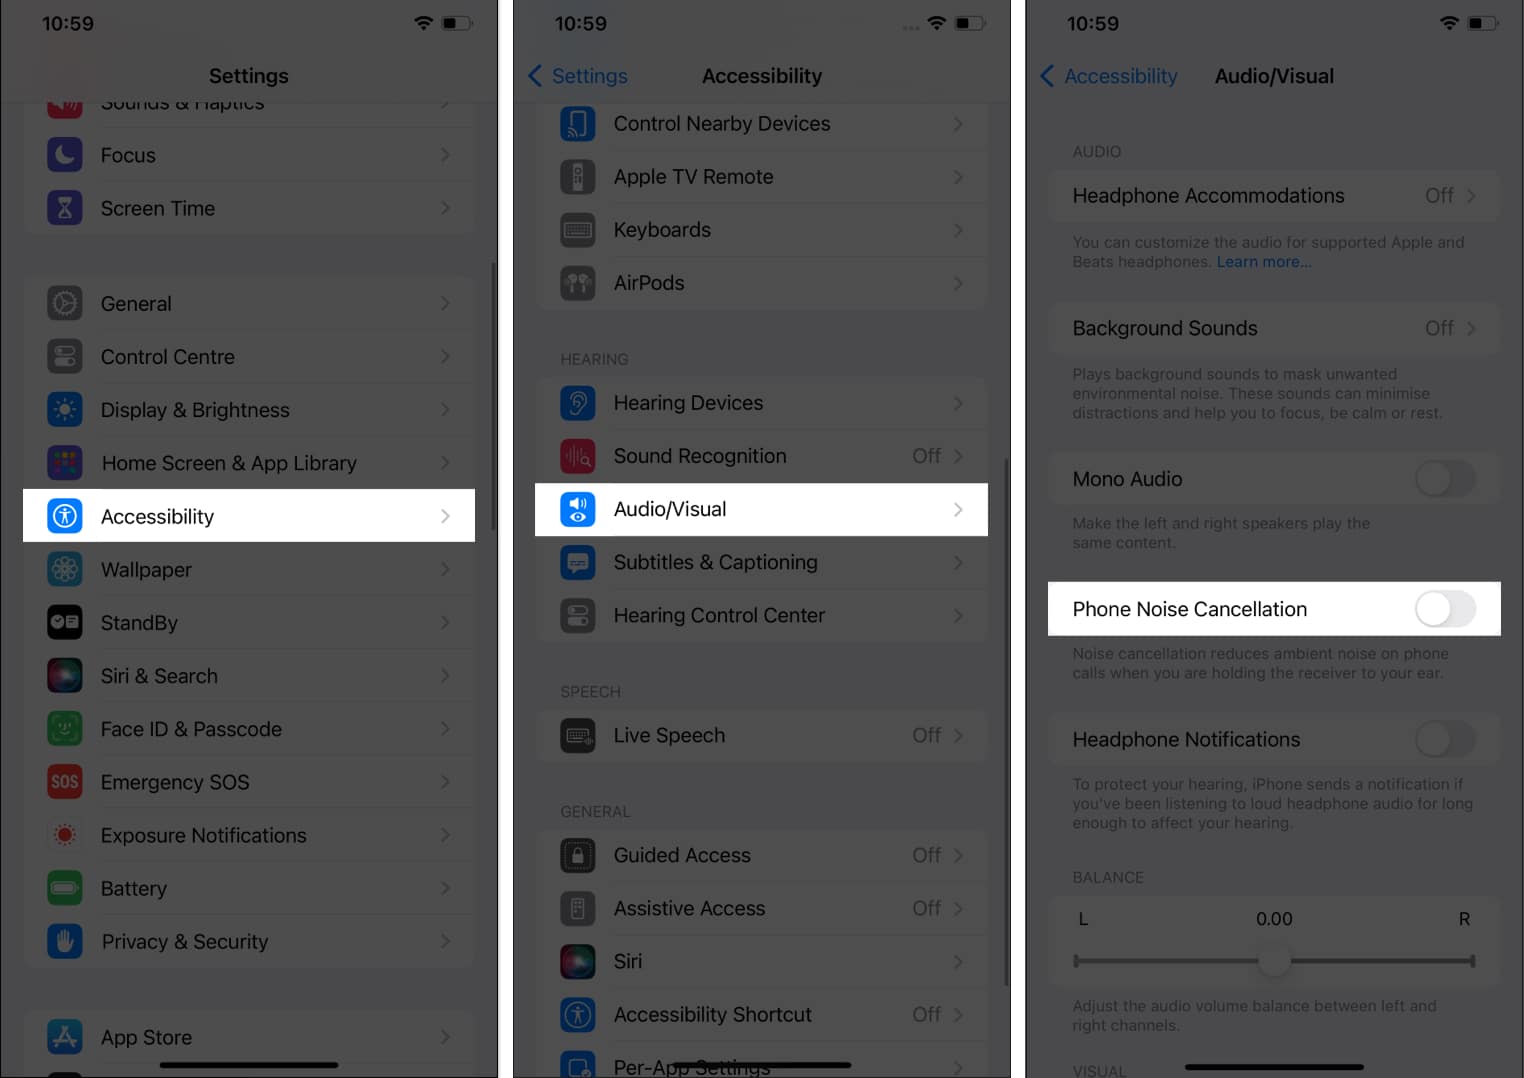
Note: This feature is only available in iPhone 12 & earlier models. The newer iPhone models have advanced Voice Isolation feature.
However, it’s important to note that if the problem persists even after disabling noise cancellation or voice isolation, there may be other underlying factors causing this inconvenience.
6. Update to the latest version of iOS
We remind you to update your iPhone in almost all guides. It fixes bugs, introduces new features, and enhances the experience. Since you’re facing microphone troubles, it’s a good idea to check for pending software updates and install it, if any.
7. Reset all Settings
Restoring your iPhone to default settings is a catch all for problems like this. Performing this action won’t delete personal data like music, photos, videos, or apps.
However, all settings that you’ve changed will be removed. This includes Wi-Fi passwords, saved Bluetooth devices, your Home screen layout, notifications, privacy settings, etc.
- Launch Settings and tap General.
- Tap Transfer or Reset.
- Tap Reset All Settings.
- Enter your iPhone passcode and confirm the action.
Revive the silence!
I hope these solutions were helpful and fixed your broken iPhone microphone. If you have any other questions, feel free to put them in the comments down below.
Microphones are interesting! We can’t perform basic tasks like calls, video chats, or video recordings without them. And at the same time, we may be uncomfortable thinking the HomePod, Alexa, Google Home, or other smart devices might continuously be listening to our private conversations!
Read more:
- How to Remove Microphone Icon from Keyboard on iPhone and iPad
- AirPods microphone not working? 11 Ways to fix it!
- How to use iPhone as microphone for Mac
- How to Stop Apps from Accessing iPhone Microphone
🗣️ Our site is supported by our readers like you. When you purchase through our links, we earn a small commission. Read Disclaimer.