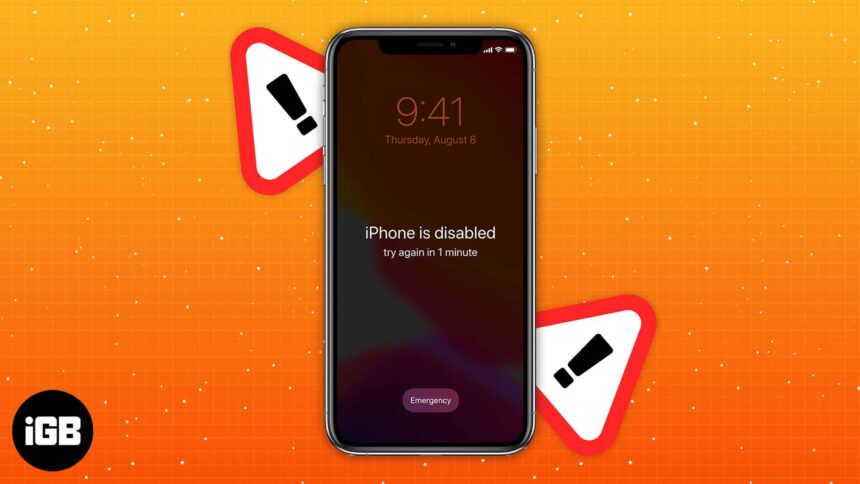
When you forget your iPhone’s passcode and mistype it multiple times, you’ll see the “iPhone is Disabled” message on your screen. Your situation might be stressful, but it’d be best if you don’t panic.
Before you think of reaching out to Apple Support, a few fixes might bring your iPhone back to normal. This guide will show you how to fix a disabled iPhone. In the end, I’ll also provide some tips to avoid getting into this situation again.
What causes an iPhone to be disabled?
The only way your iPhone can get disabled is when you enter the wrong passcode multiple times.
Generally, when you enter the wrong passcode five times consecutively, you will see ‘iPhone Unavailable’ on your screen, and it will be disabled for one minute. If you wait a minute and enter the incorrect passcode two more times, it’ll be disabled for five minutes.
The best solution is to wait until the mentioned time is up and enter the correct passcode.
After ten failed attempts, your iPhone will get disabled entirely. Furthermore, if you previously enabled the Erase Data option under Settings → Face ID & Passcode, your iPhone will erase all the data on your iPhone.
Now that you’ve understood how your iPhone gets disabled, here’s a guide on how to fix a disabled iPhone.
1. Fix disabled iPhone using Finder on Mac
If you have taken a backup previously on your Mac, you could use Finder to unlock your disabled iPhone. Follow the instructions to find out how.
- Connect your iPhone to the Mac using the Lightning cable.
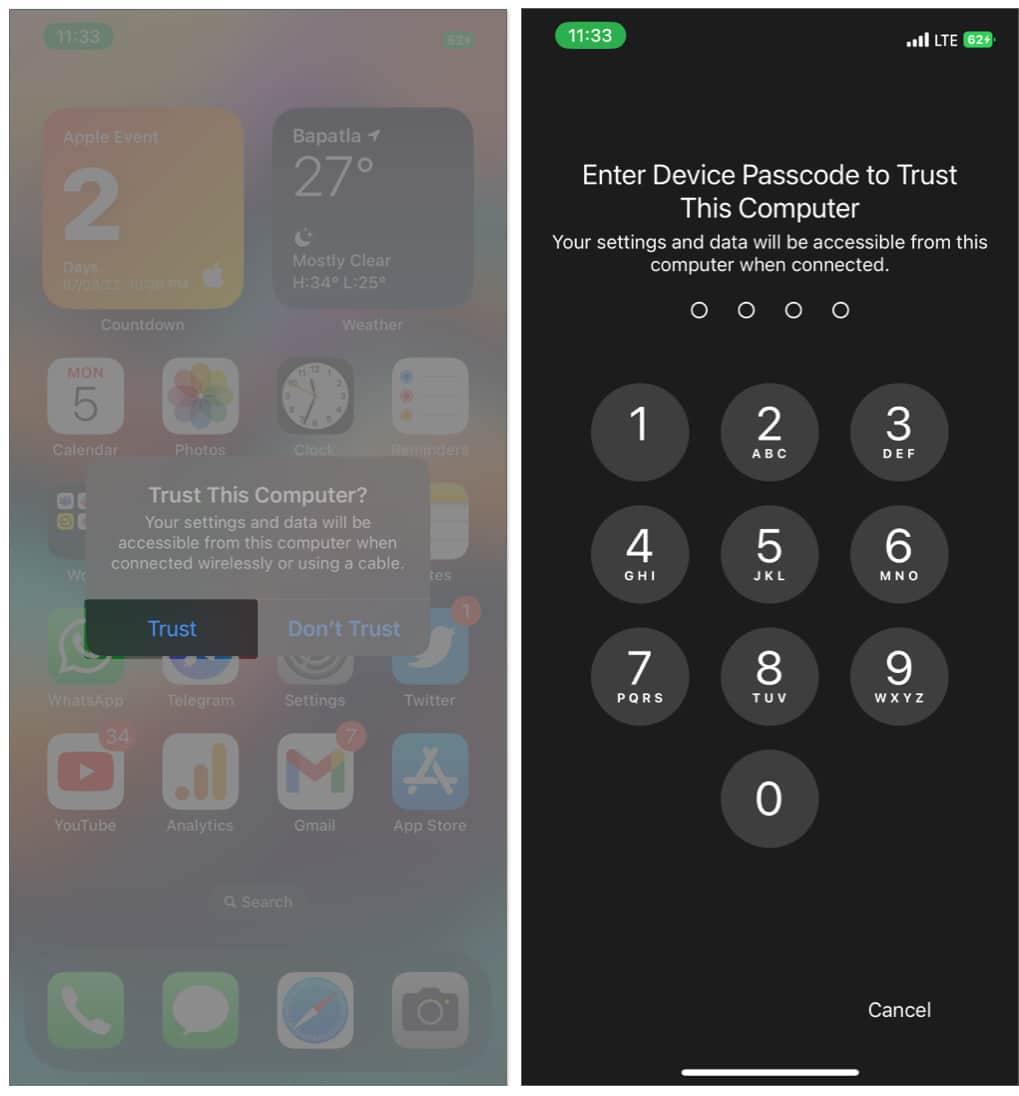
- Tap Trust This Computer on your iPhone and enter your passcode when prompted.

- Open Finder on your Mac.
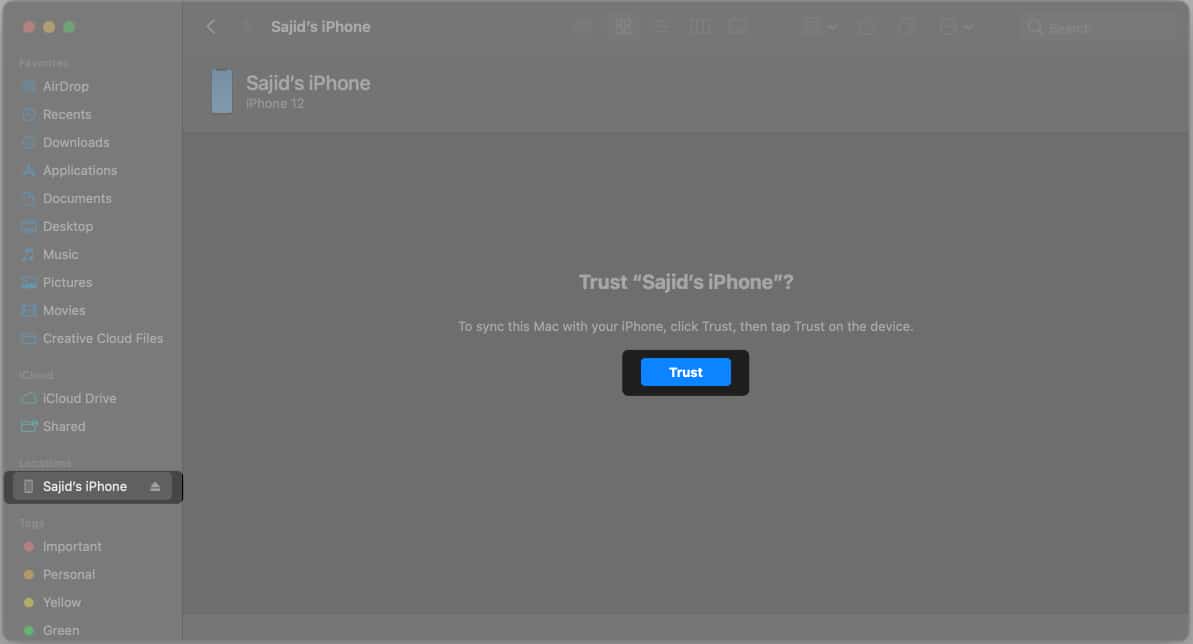
- Select your iPhone’s name from the Locations tab on the left pane.
- Click on Trust if you get a prompt. Wait until your iPhone finishes syncing its data with the Mac.

- Select the General tab and select the Restore iPhone option.

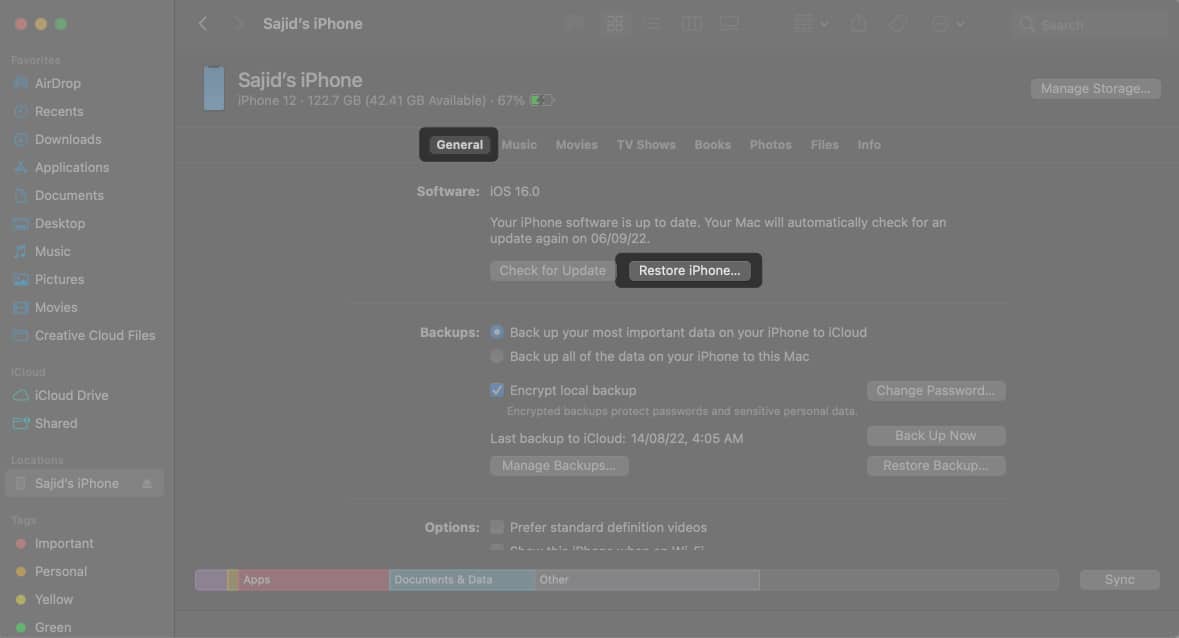
Keep your device connected to the Mac until it finishes restoring the backup.
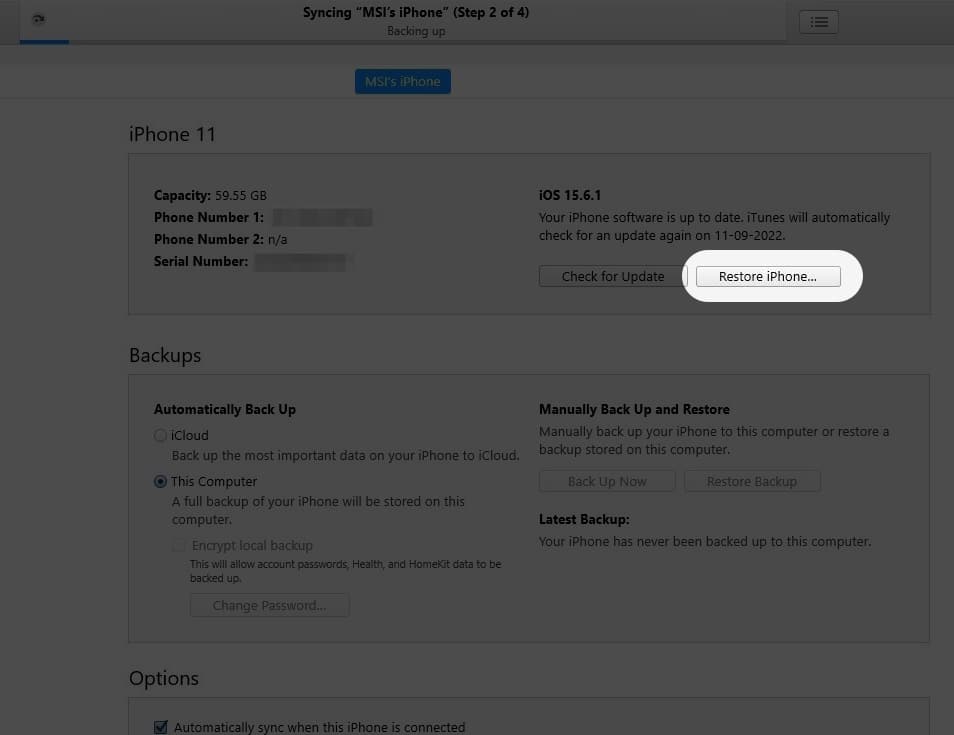
2. Fix disabled iPhone via iTunes (Windows and macOS Mojave or older)
- Connect your iPhone to your Mac or PC via the Lightning cable.
- When you receive a prompt, select Trust This Computer on your iPhone and enter your passcode.
- iTunes will open automatically on your Mac; if not, open it manually. The same applies to Windows.
- Click on the iPhone icon in the iTunes window at the screen’s top-left.

- Select the Summary section on the left pane.
- Click the Restore iPhone button next to the Check for Updates button.

- Follow the on-screen prompts and wait for the iPhone to restore from the backup.
If you see an error message that says, “Find My must be turned off” after clicking on the Restore iPhone button, you should use a recovery or Find My method to restore your iPhone to normal.
3. Try recovery mode or DFU mode to restore iPhone
When nothing works, the best way to fix a disabled iPhone is to restore it using recovery or DFU mode. There’s a slight difference between these methods; you can choose any one.
DFU methods will allow you to bypass your iPhone’s bootloader, while the Recovery Mode restores your iPhone using the latest iOS and firmware.
Restore iPhone using recovery mode
To restore your iPhone using the recovery method, follow the instructions below.
- Put your iPhone into recovery mode. If you don’t know how to do it, check this article.
- Find and open your device in Finder or iTunes accordingly.
- Select Restore when you see a prompt saying, “There is a problem with the iPhone that requires it to be updated or restored.”

Your iPhone will download the latest iOS and install it. The time it takes might depend on your internet connection. Once done, set up your iPhone like a new device.
Points to remember:
- Your iPhone will not have any data unless you’ve backed up the data to iTunes, Finder, or iCloud.
- If you disabled Find My before your iPhone got disabled, you’d have to enter your Apple ID password during the initial setup.
Use DFU mode to restore iPhone
In certain circumstances, you might be unable to restore your iPhone using the recovery mode. In that case, all you need to do is put your iPhone in DFU mode and follow the same steps mentioned above: restore your iPhone and set it up as new.
4. Erase your iPhone using Find My
If you don’t have access to iTunes or Finder to restore your iPhone, you can use Find My to erase your device. Follow the steps below to fix a disabled iPhone using Find My.
Note: You must know the Apple ID and password of your iPhone to bypass the activation lock.
Using iCloud
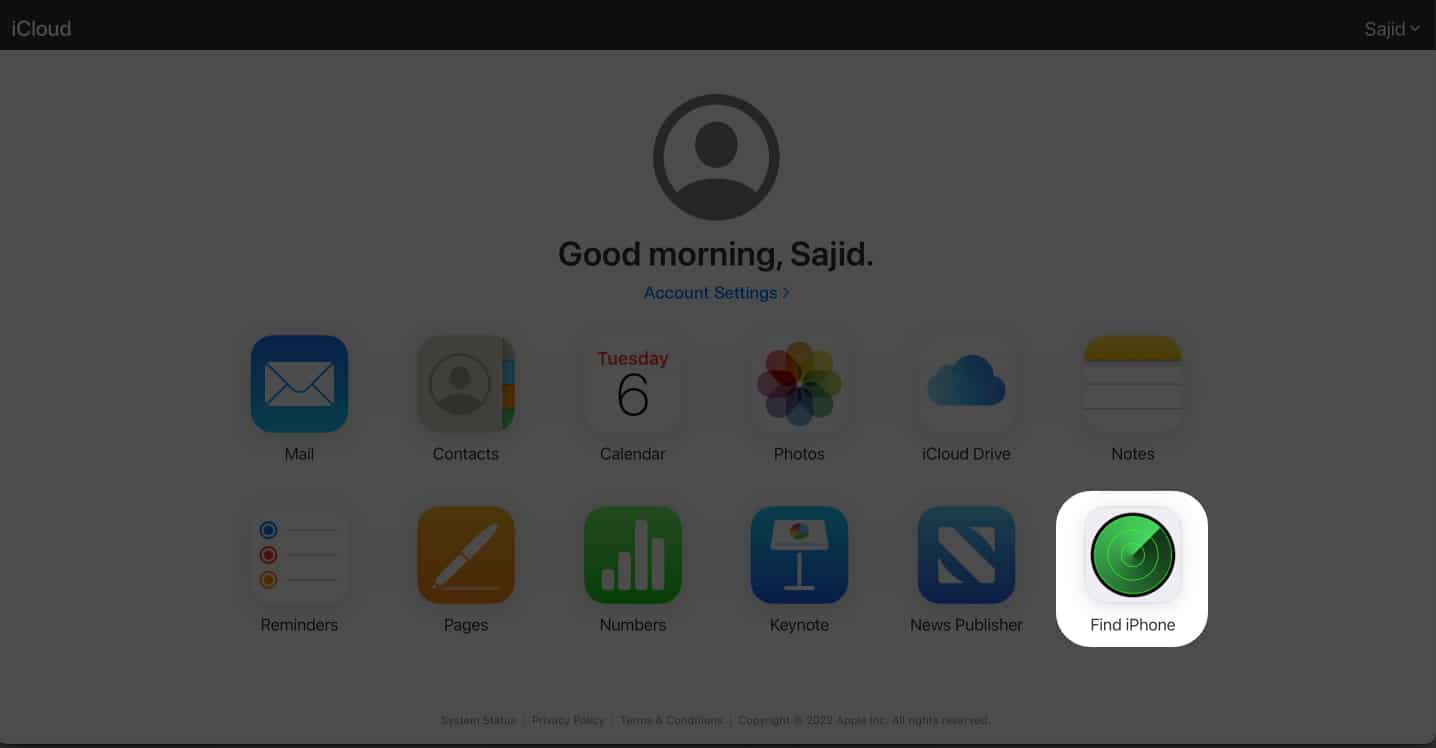
You’ll be able to access iCloud from any device by logging in to iCloud.com from any browser. It allows you to erase your disabled iPhone.
- Open iCloud.com and log in to your Apple ID (connected to your disabled iPhone).
- Select Find iPhone from the listed options. Enter your Apple ID password if prompted.

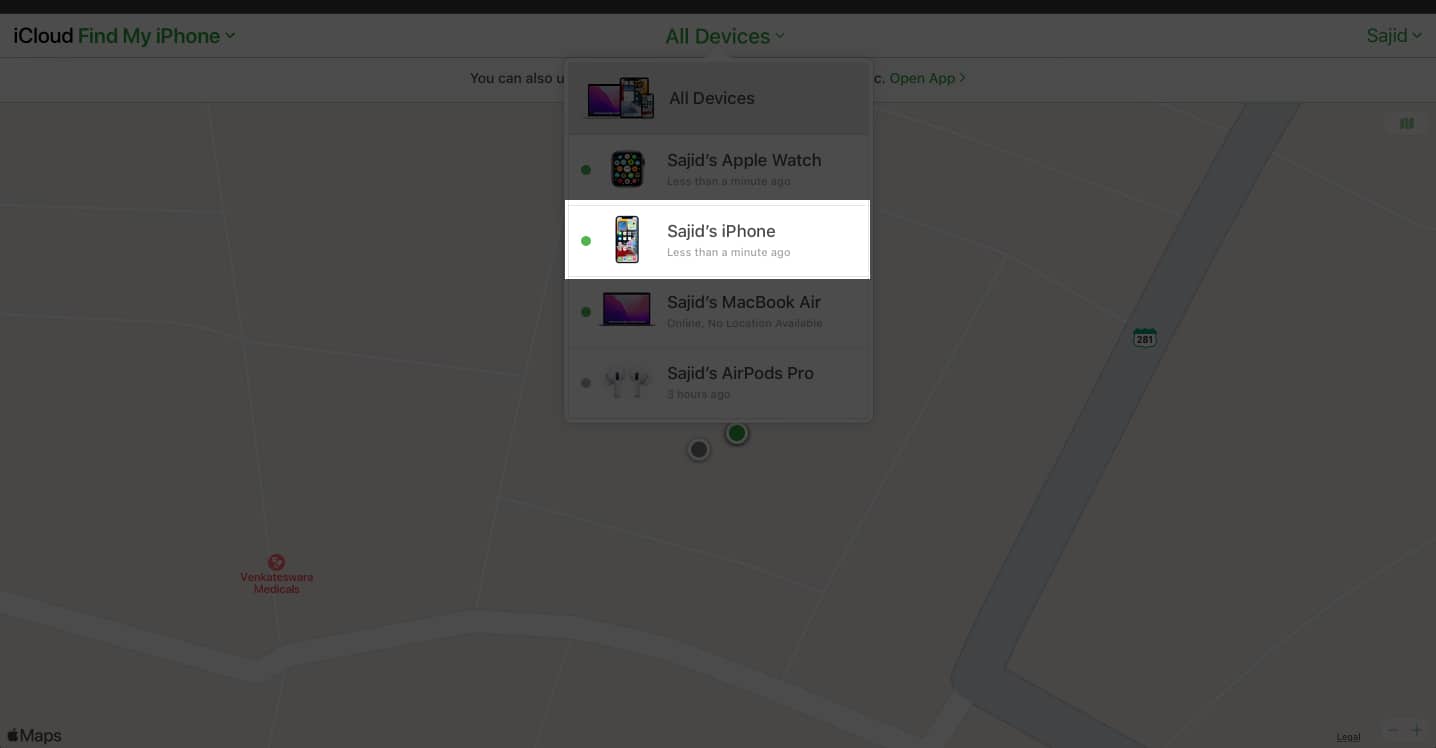
- Click on All Devices located in the top-middle of the website.
- Select the iPhone from the list of your Apple devices.
- Click Erase iPhone to erase your iPhone.

- Select Erase again when you receive a confirmation prompt.

- Enter your Apple ID password and follow the on-screen instructions to start erasing your iPhone.
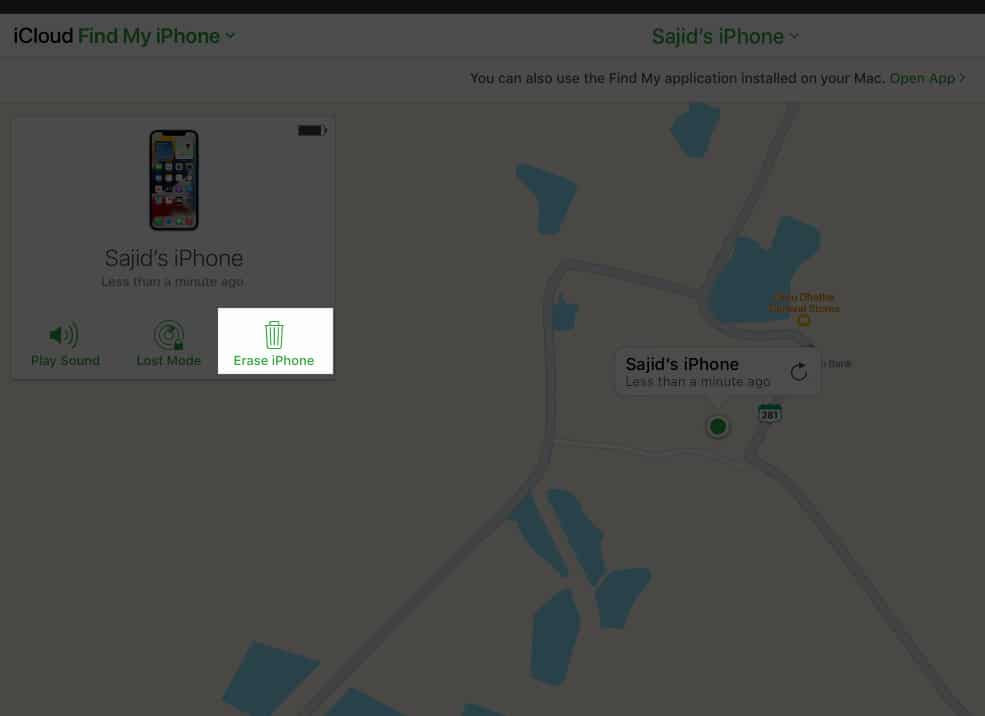

Your iPhone will take some time to erase itself. After it finishes, go through the iPhone setup. You can set up your device as new or restore an old backup if you prefer.
Using other Apple devices
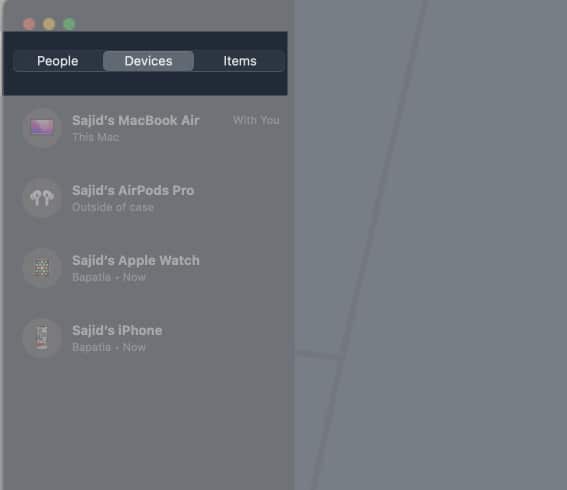
If you’ve got access to another Apple device like an iPad or Mac, you can use the Find my on that device to erase your iPhone.
- Open the Find My app on your secondary Apple device.
- Click the Devices tab.

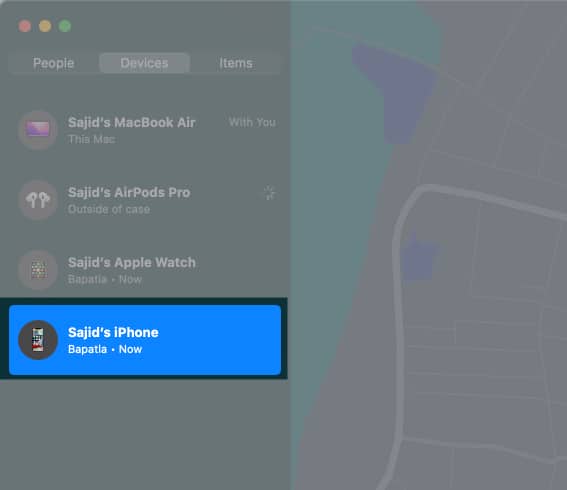
- Select your disabled iPhone from your Apple devices list.
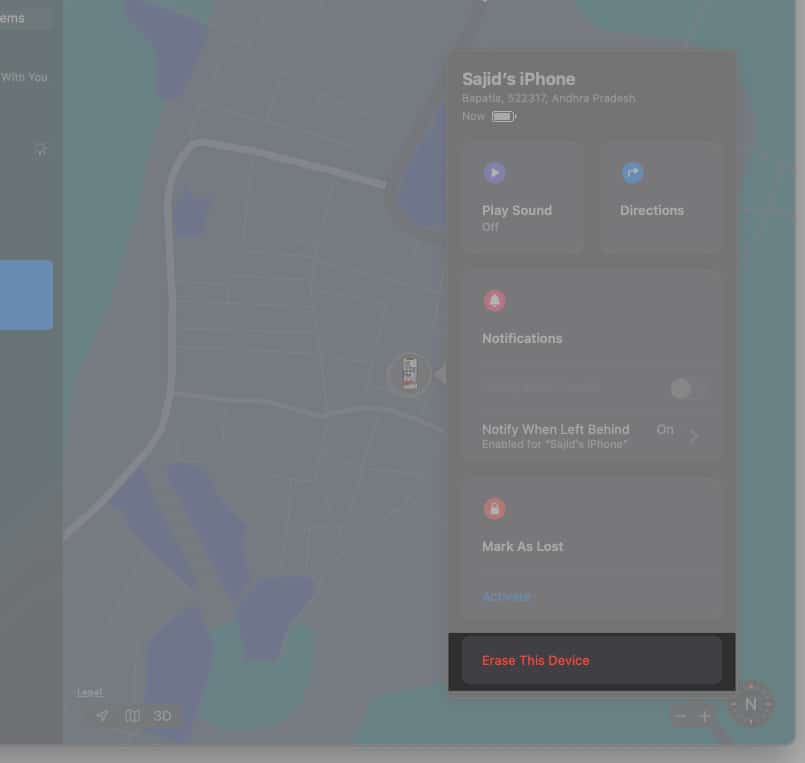
- If you’re on an iPhone, scroll down and select Erase This Device. If you’re on an iPad or Mac, tap the “i” button and click Erase This Device.

- Follow the on-screen prompts and instructions, and select the Erase option. Also, enter your Apple ID password if you receive a prompt.
It’ll take some time for your disabled iPhone to erase. You can set your iPhone up like new or restore an old backup once it finishes erasing it.
5. Restore an old backup
If you have taken a backup of your iPhone on any computer, you could restore it to avoid losing much data. Follow this guide to learn how to restore an iPhone from a backup.
The loss of data will depend on how recently you made the backup. For instance, if your iPhone was backed-up one week ago, you won’t lose a lot of data; but if the backup was taken three months ago, you’d probably lose a good amount of data.
Tips to avoid your iPhone from getting disabled
If you are worried that you might disable your iPhone again, follow these tips to avoid it:
- Use a 4-digit passcode that you can remember easily. We’re humans, and we tend to forget things. It’d be best to write your passcode somewhere and store it safely.
- Set up Face ID or Touch ID, if you already haven’t, to avoid getting into situations like these.
- Reduce the auto-lock time. Go to your iPhone Settings → Display & Brightness → Auto-Lock to allow your iPhone to lock at shorter intervals. It’ll force you to enter your passcode again, so there’ll be fewer chances of forgetting it.
Wrapping up…
I believe you were able to fix your disabled iPhone, making it ready to use. However, if these methods don’t fix your disabled iPhone, you should contact Apple Support for further assistance. It’s more likely that they’ll use the recovery or DFU processes and will warn you about erasing data.
Read more:
- How to downgrade or cancel your iCloud+ plan on iPhone, iPad, or Mac
- How to use Find My app to locate a lost or stolen iPhone or iPad
- 11 Ways to secure your Apple ID on iPhone, iPad, and Mac
- How to recover disabled Apple ID
🗣️ Our site is supported by our readers like you. When you purchase through our links, we earn a small commission. Read Disclaimer.