Apple wants you to have a seamless music experience irrespective of the device you use. Services like Apple Music and iTunes Match ensure that all your songs are available on your iOS device, Mac, and even PC or Android phone. The feature that makes all this possible is the iCloud Music Library. Here we’ve created the ultimate guide on how to use iCloud Music Library on iPhone, iPad, and Mac.
Note: iCloud Music Library, Sync Library, and Cloud Music Library are just different names for the same feature.
- What is the iCloud Music Library?
- How iCloud Music Library Works?
- Sign into iCloud Music Library
- How to Turn ON iCloud Music Library on Computer
- How to Turn ON iCloud Music Library on iPhone and iPad
- Play or Download Songs from iCloud Music Library
- Know the Status of Songs in iCloud Music Library
- How to Remove Songs from iCloud Music Library
- What To Do If iCloud Music Library Does Not Work?
- How to Disable iCloud Music Library on iPhone, iPad, or Mac
- What Happens If You Turn off the iCloud Music Library?
What is the iCloud Music Library?
Let us start with the basics. Suppose you have an iPhone, iPad, Mac, Windows PC, and an Android phone. You want your music on all these devices. Sure, you can connect the mobile devices to your computer and transfer the songs. You can do the same between two computers using an external drive.
But what if you wish to make this entire process effortless via the cloud. Well! iCloud Music Library (now shown as Sync Library) has got you covered.
iCloud Music Library lets you access your music, playlist, and smart playlists on all your different devices (up to 10). Besides ensuring your Apple Music songs are up-to-date on all devices, iCloud Music Library also uploads your existing songs (downloaded or purchased from anywhere like Amazon, ripped from CD, etc.) from your Mac or PC and makes them available for streaming and downloading on your iPhone, iPad, Android phone, and computer.
Now you may ask how it does that!
How iCloud Music Library Works?
After you enable this option in the Music app or iTunes, it will first scan your existing songs. Next, using audio fingerprinting and metadata matching, it will see which of your songs are already available in the iTunes Store catalog. If a track is available, it won’t upload the file from your computer (to save time and space) but simply ‘match‘ the song and make it available on all your devices. This will be 256kbps AAC, DRM free! Sweet!
Pro Tip: Suppose you have a song named ‘I Like It’ in 128kpbs. If it matches in the iTunes Store catalog, you can download the track in 256kbps on your devices. This is an upgrade from the original lower quality!
In case you have songs (like local tracks or live versions of a song, etc.) that are not available in the iTunes Store, they will be uploaded from your Mac or PC in original form to Apple cloud servers and made available for streaming and downloading on all your other devices. Excellent!
The next natural question you may ask is, ‘How do I subscribe to this excellent feature?’
Sign into iCloud Music Library
With an Apple Music subscription ($9.99), you already get iCloud Music Library functionality.
However, if you use alternative music streaming apps like Spotify, you may not want to pay for Apple Music. In this case, you can subscribe to a service called iTunes Match ($24.99 per year). This will let you upload your existing songs from Mac or PC and make them available for streaming and downloading inside the Music app on iPhone, iPad, Android, etc.
Now that we are done with the basics, let us look at some essential bullet points that tell you more about iCloud Music Library.
- You can have up to 100000 matched or uploaded songs. This does not count towards your iCloud storage.
- Note that this 100000 songs limit does not include the music (songs or videos) you purchased via iTunes Store. Your purchased tracks are available on all devices without needing any subscription or special option like the iCloud Music Library.
- If you have a song that does not match in the iTunes Store catalog and is of low quality (under 92kbps), it won’t be uploaded to iCloud. The same goes for a song over 200 MB in size, or more than two hours long, or purchased using someone else’s iTunes account.
- You can stream and download songs in your iCloud Music Library on up to 10 devices.
Before You Begin:
- Apple mentions that ‘after you turn on iCloud Music Library, all the music that’s currently on your iPhone and iPad is deleted and replaced with songs from iCloud.’ (But the Mac or PC you used to sync from previously still has the original files.)
- Apple also makes it crystal clear that this is not a backup service. So before proceeding, make sure you take a backup of the music to an external drive.
- Finally, you must know that since all music syncing will happen over the cloud, you won’t be able to transfer songs to iPhone using iTunes or the Finder.
How to Turn ON iCloud Music Library on Computer
Make sure you have either Apple Music or iTunes Match subscription and are signed in to the Music App or iTunes (from the top bar, click on Account → Sign In)
To Enable iCloud Music Library on Mac
Note: On macOS Catalina and Big Sur, use the Music app. On macOS Mojave and earlier, use iTunes. The steps for both are almost identical.
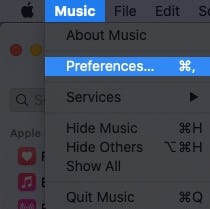
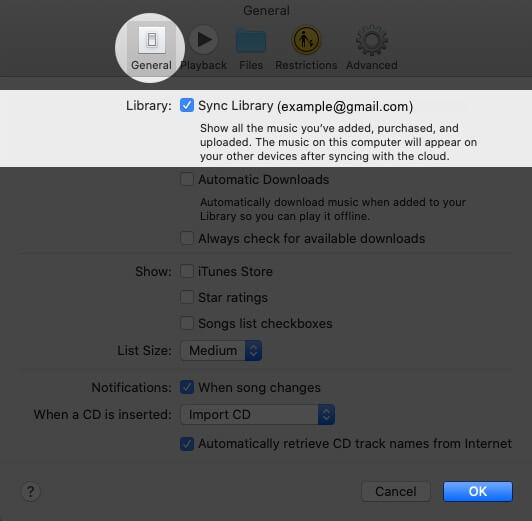
- Open the Music app and from the left of the top menu bar, click on Music → Preferences.

- Make sure you are in the General tab. Here, check the box for Sync Library (your Apple ID). Finally, click on OK → Merge Library.

To Enable iCloud Music Library on Windows
1. Open iTunes and click on Edit → Preferences.
2. Click on General and tick the checkbox for iCloud Music Library (or Sync Library).
Depending on your library size and internet speed, it may take considerable time. You may see various cloud symbols next to the songs. A dotted iCloud icon mostly means the song is being uploaded.
If you have another computer, make sure to sign in to it using the same Apple ID and follow the exact above steps. This will ensure that your multiple libraries merge, and you have all songs from everywhere.
How to Turn ON iCloud Music Library on iPhone and iPad
After you enable cloud syncing on your Mac or PC, here’s how to do the same on your mobile devices.
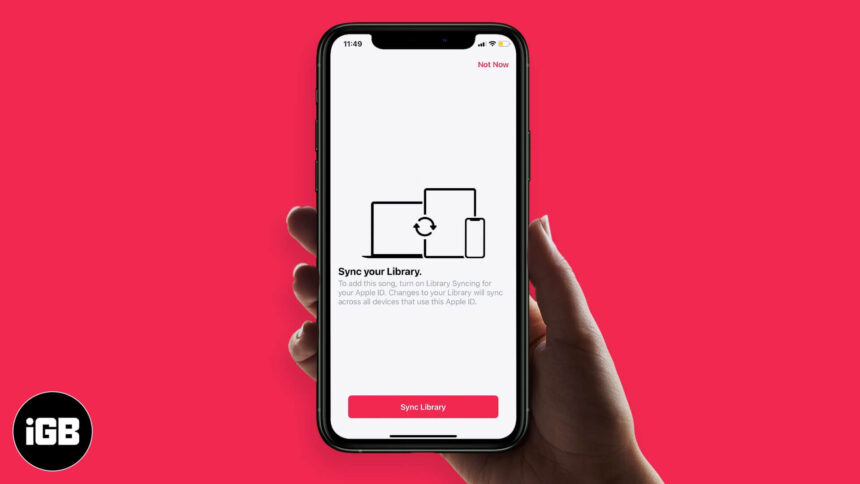
- Open the Settings app, scroll down, and tap on Music.
- Turn on the toggle for Sync Library.

- If you see a popup, read the description and choose ‘Keep Music’ or ‘Delete & Replace.’ In case you have previously synced songs from another computer, choose Keep Music. If you have just one music library, you may go with Delete & Replace. This will remove the current tracks from the iPhone and replace them with music in your iCloud Library.

If you have an unlimited mobile data plan, you may tap on Cellular Data and enable it on the next screen.
Play or Download Songs from iCloud Music Library
Once everything is set with iCloud Music Library, you can stream songs directly from the cloud or download it to save data and listen offline.
- Open the Music app on your iPhone, iPad, or Android phone.
- Tap on Library from the bottom row. Next, tap on Songs.
- Tap on the song to play it.
- Tap on the download icon to save it offline. In case you see no icon next to a song, this means it is already downloaded to the device.

To see only your downloaded songs, tap on Library → Downloaded.
In the same way, you can play or download songs on your Mac or PC using the Music app or iTunes.
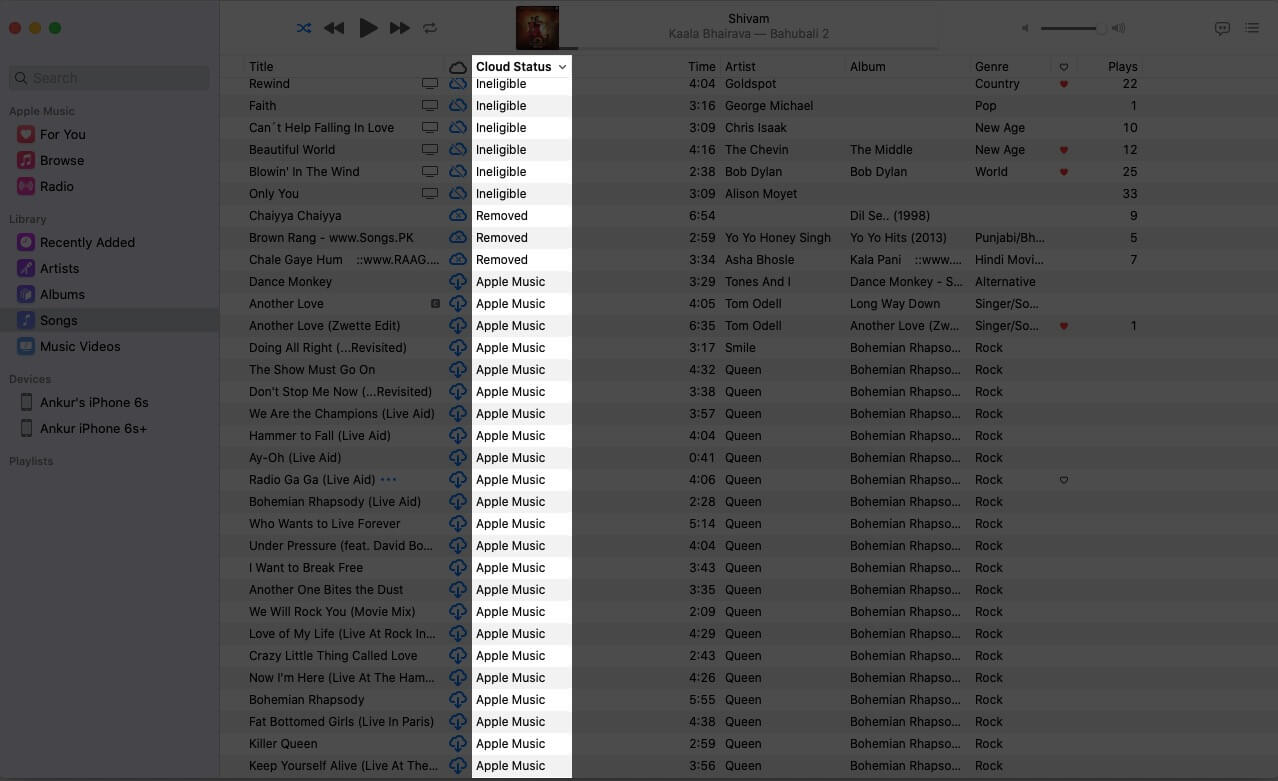
Know the Status of Songs in iCloud Music Library
By following the steps below, you will get to know which of your songs are Matched, Uploaded, added from Apple Music, Purchased by you, Waiting to upload, Removed, Duplicate, or Ineligible for uploading.
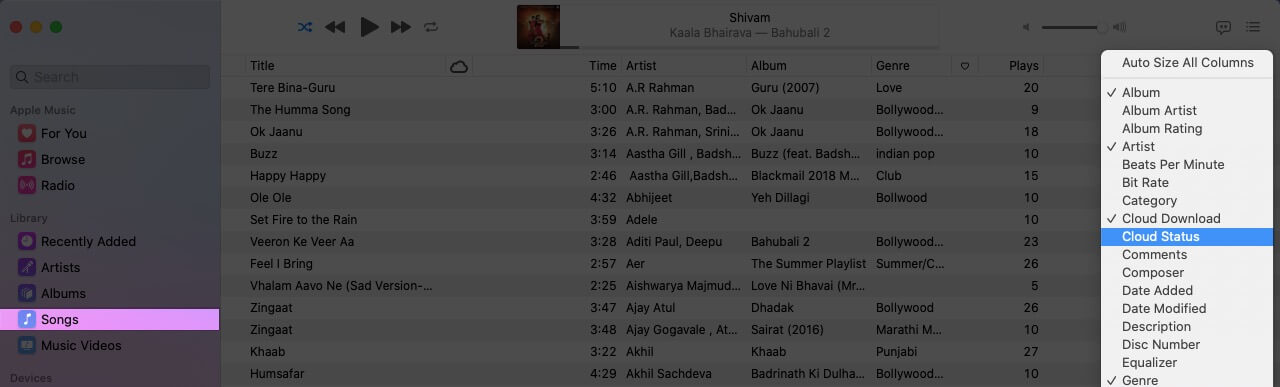
- Open the Music app or iTunes on Mac or PC.
- Click on Songs from the left sidebar.
- Place your mouse pointer on the tiny top row with the words Title, Artist, Album, etc. Now right-click. Next, click on Cloud Status.

- Now, click on the word Cloud Status. This will sort your songs accordingly.

How to Remove Songs from iCloud Music Library
On iPhone or iPad
- Open the Music app on the iPhone or iPad.
- From the Library tab, click on Songs.
- Long-press on a song. Choose Delete from Library → Delete Song. (Or, if the song is downloaded, Remove → Delete from Library)
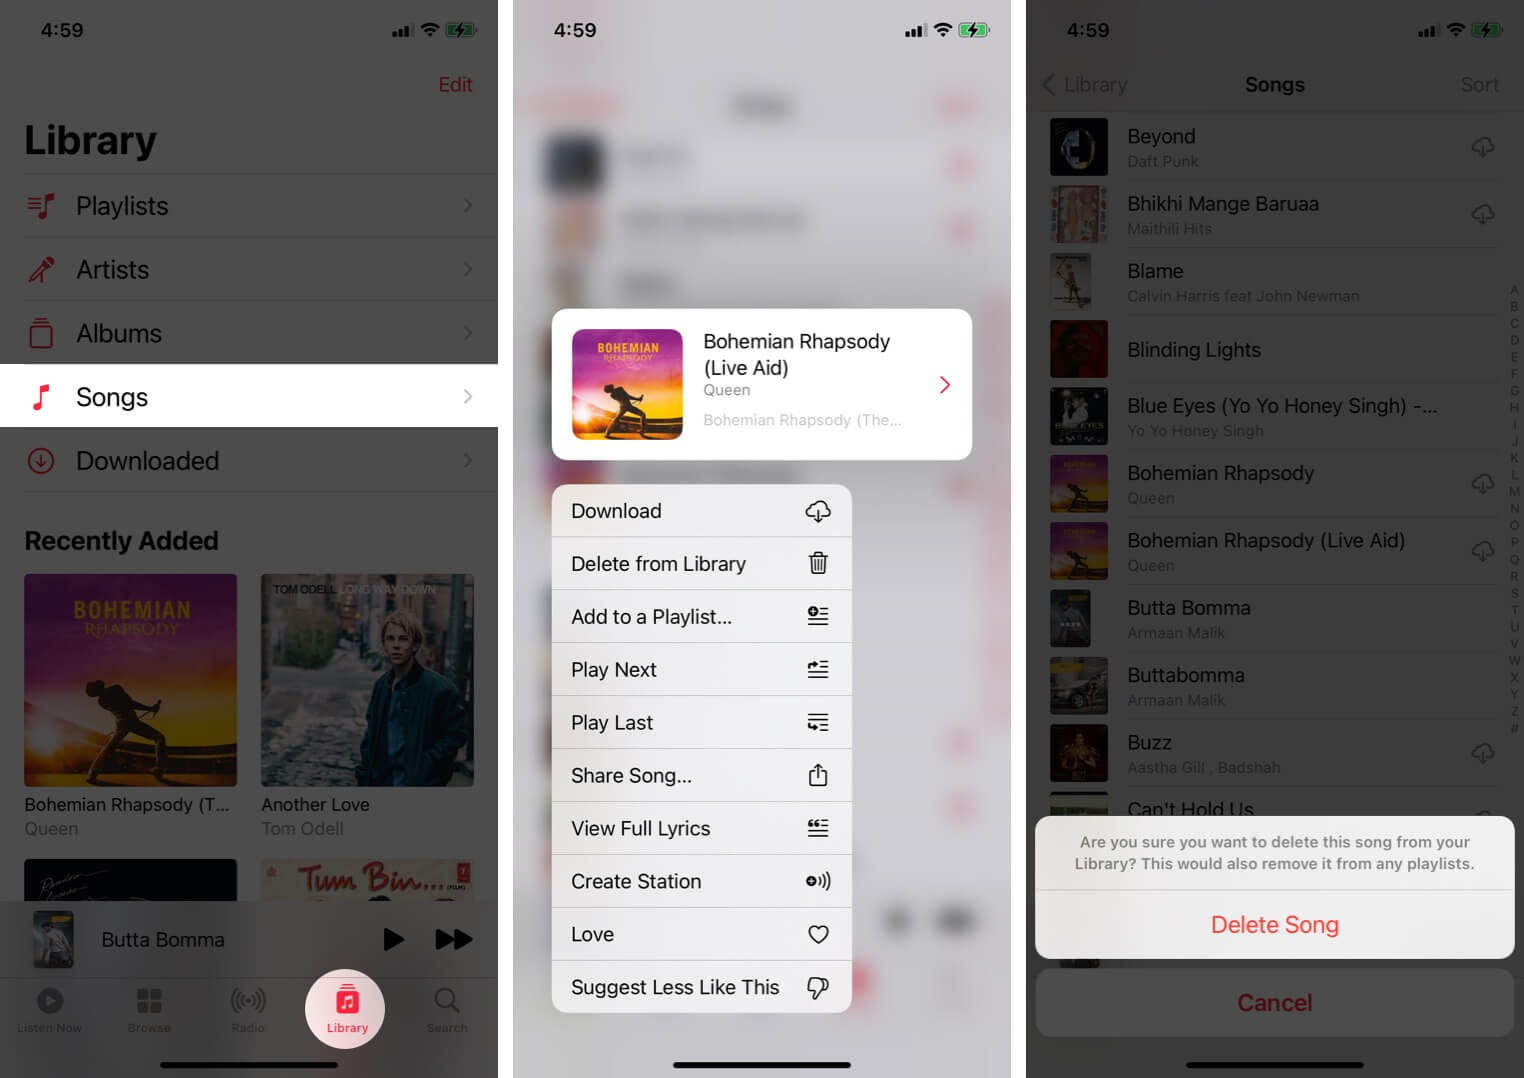
This will remove the song from all your iOS and iPadOS devices.
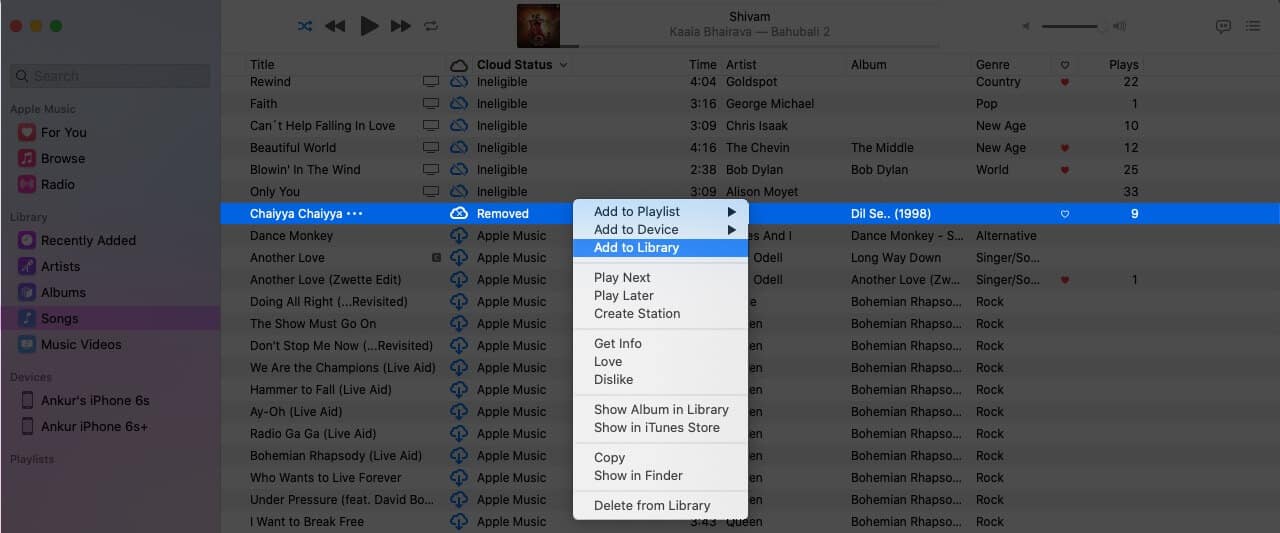
But if this deleted song was downloaded to any Mac or PC, it won’t be removed until you manually do so. However, if the deleted song was uploaded or matched, the Cloud Status in Mac’s Music app or iTunes will show as ‘Removed.’ If you want to add it again to iCloud Music Library, right-click on it and select Add to Library. It will once again be available to stream and download everywhere!
On Computer
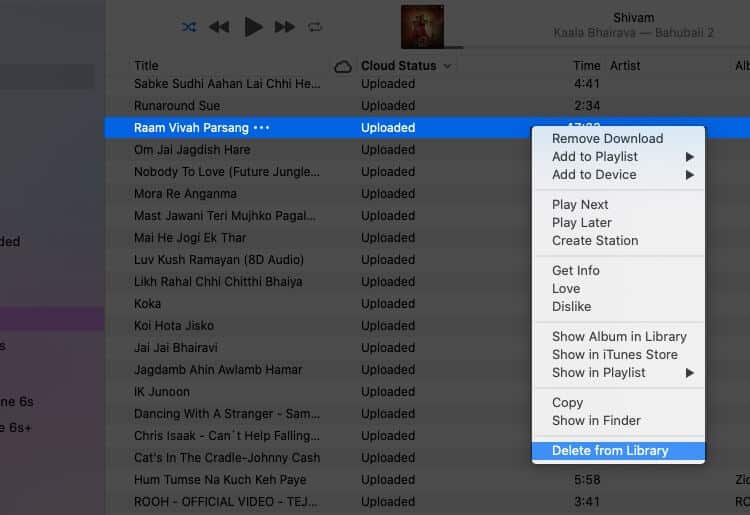
- Open the Music app or iTunes on Mac or PC.
- Right-click on a song and choose Delete from Library. Finally, click on ‘Delete Song’ from the popup. It will be removed from all your iOS devices and this computer.

What To Do If iCloud Music Library Does Not Work?
Here are some crucial points to consider if music isn’t syncing correctly among your devices.
- In case you cancel your Apple Music or iTunes Match subscription, you will lose access to Cloud Music Library.
- If you sign out of your Apple ID on any device, you won’t be able to use this feature.
- Connect to a stable internet on your devices.
- Double-check the above steps and make sure Sync Library is enabled on all the desired devices.
- On mobile devices, keep the Music app open. Do not force close it. On the computer as well, make sure the Music app or iTunes is open.
- In case an explicit song is grayed out, make sure to turn off Screen Time restrictions. If you are a child, you can not do this. And your guardian will most likely not turn it off for you!
- Visit the Apple System Status page and ensure things like Apple Music, iCloud Account & Sign In, iTunes Match, iTunes Store have a green dot next to them.
- Turn off Sync Library (steps below) and turn it back on after restarting your iPhone and Mac.
- Deauthorize and re-authorize your computer.
- In rare cases, it may be possible that the Apple Music song you added is no longer available due to licensing disagreements between the producer and Apple. Or, it might be available under a different name. Try searching for it again in Apple Music. Now, you can even search by lyrics!
- Still, if you face problems, visit this page or contact Apple Support.
How to Disable iCloud Music Library on iPhone, iPad, or Mac
No longer wish to use this feature? Here’s how to turn off the iCloud Music Library on mobile devices and computers.
On iPhone and iPad: Open the Settings app → Music → turn off Sync Library → Turn Off. This will remove all Apple Music songs (added or downloaded) and all non-downloaded listings. However, this won’t remove those downloaded songs that were purchased, or matched, or uploaded.
On Macs: In the Music app (or iTunes), from the top menu bar, click on Music (or iTunes) → Preferences → General → uncheck Sync Library (your Apple ID) → OK.
On iTunes: Click on Edit → Preferences → General → uncheck the box for iCloud Music Library (or Sync Library)
What Happens If You Turn off the iCloud Music Library?
- Your songs won’t be updated or made available wirelessly across devices.
- Even if you have an Apple Music subscription, you will only be able to stream music and not add it to your library or download them offline.
- After you turn off the iCloud Music Library, you can once again manually copy music from Mac or PC to iPhone or iPad via Lightning cable.
Signing Off
This is almost all you need to know about turning on and using the iCloud Music Library on various devices. Once you have it set, the entire experience becomes smooth sailing. If you have any further questions, please shoot it in the comments section below.
READ NEXT:
- How to Create and Share Apple Music Playlist with Friends
- Steps to Transfer Spotify Playlists to Apple Music
- How to Create Your Own Radio Station in Apple Music
- Super Cool Apple Music Siri Commands
🗣️ Our site is supported by our readers like you. When you purchase through our links, we earn a small commission. Read Disclaimer.