There are several ways to transfer photos from Mac and Windows PC to an iOS device. And yes, you can even move pictures from computer to iPhone without iTunes. Tools and services like AirDrop, iCloud, Finder, Google Photos, Dropbox make it a breeze to export and sync content on multiple devices. So, let us dive right in and see all the easy methods to copy photos and videos from Mac or PC to iPhone and iPad.
- Transfer Photos From Mac to iOS Device via AirDrop
- Move Photos From Mac to iOS Devices via iCloud Photos
- Use iCloud Drive to Transfer Photos From Mac or Windows PC to iPhone and iPad
- How to Transfer Photos From Mac or Windows PC to iPhone and iPad using Finder or iTunes
- How to Transfer Photos From Computer to iPhone Without iTunes or Finder
Transfer Photos From Mac to iOS Device via AirDrop
An AirDrop is a proprietary tool on Apple devices that is fast, secure, and an effortless way to transfer photos, videos, and files between the same or different Apple developed operating systems.
Before you begin:
- On iPhone: Open Setting app and turn ON Wi-Fi and Bluetooth. Also, ensure Personal Hotspot is OFF. Next, in the Settings app, tap on General → AirDrop → select Everyone
- On Mac: Turn on Wi-Fi and Bluetooth, to enable AirDrop
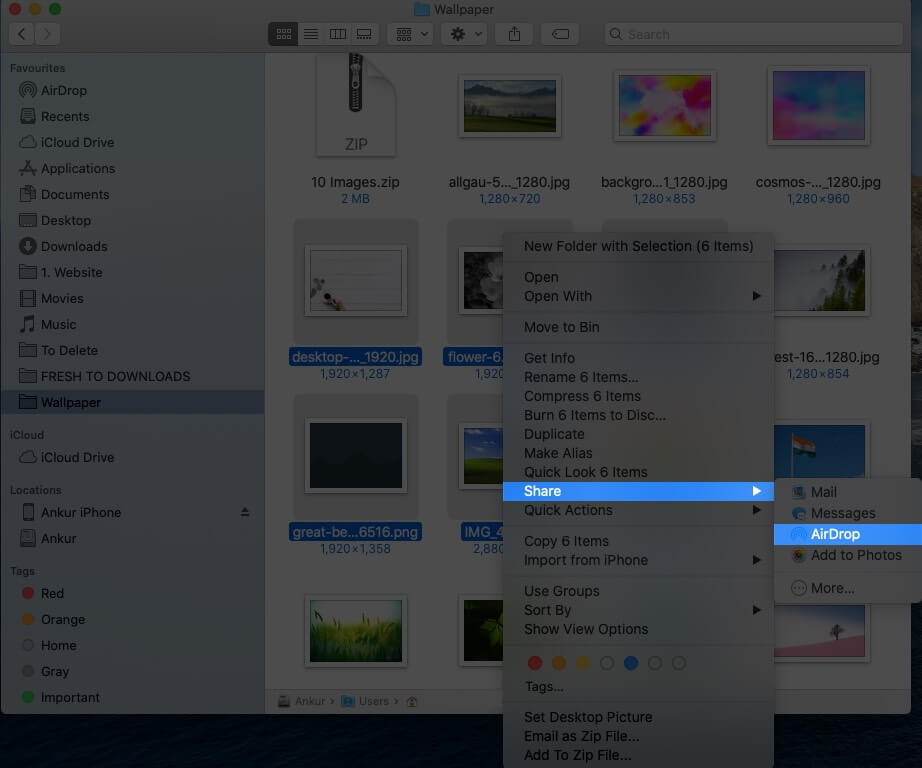
- Open the folder on Mac, where you have the photos.
Tip: If your pictures are inside Mac’s Photos app, drag them to the desktop or a folder - Select the photos. Hold the Command key to select multiple images
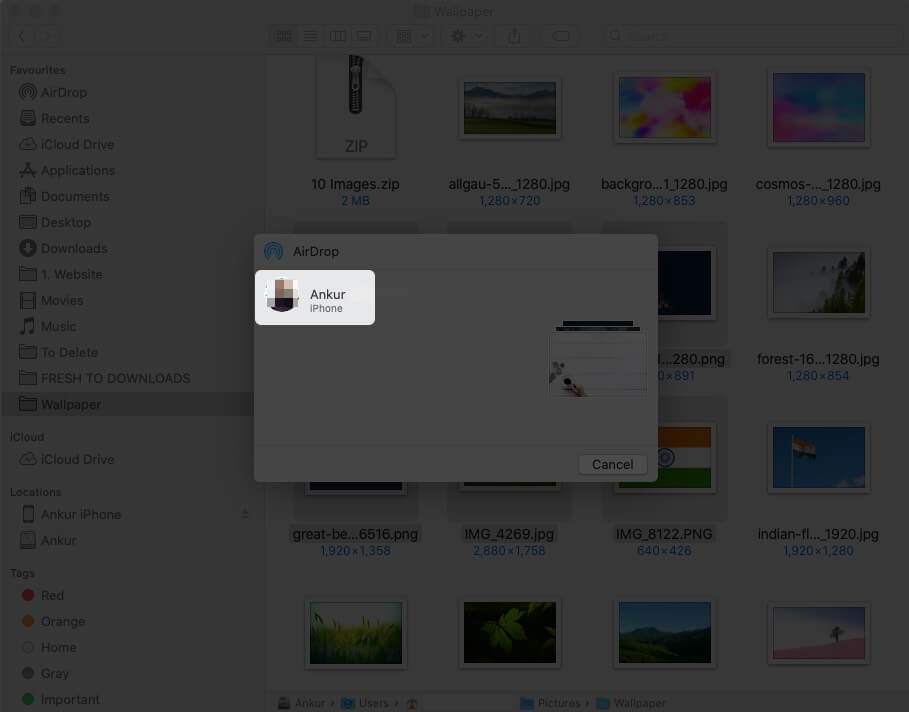
- Now, Right-Click → Share → AirDrop.

- Click on the iPhone or iPad’s name when you see it.

- Tap Accept on the iPhone or iPad if asked
- The selected photos and videos will be wirelessly and quickly sent to your iOS device. You will find them in the Photos app
Move Photos From Mac to iOS Devices via iCloud Photos
iCloud Photos is a built-in way to sync all your pictures and videos among Apple devices. You turn it on once, and the images are uploaded, stored, and synced across devices that have your Apple ID. You can even access it from Windows PC or web on iCloud.com. Images are organized into years, months, days, and the changes (edits) you make to an image on one device are synced everywhere. Pretty cool!
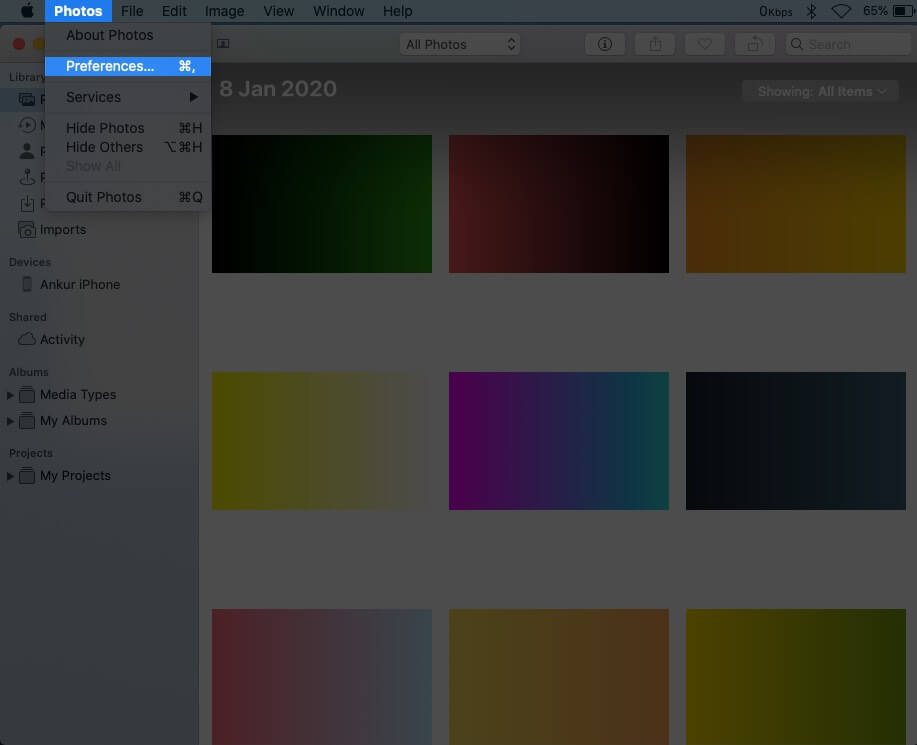
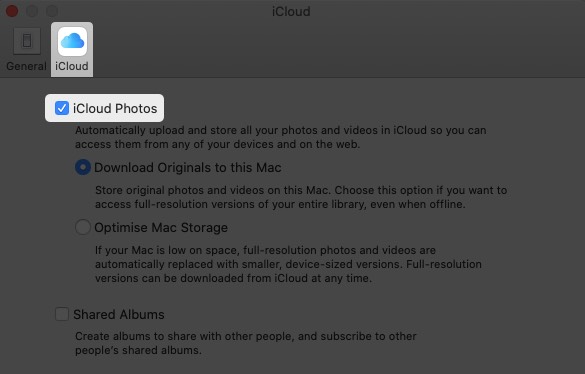
- Open Photos app on Mac
- Click on Photos from the top menu bar and select Preferences.

- Select iCloud Tab and check the box for iCloud Photos. Keep the Photos app open.

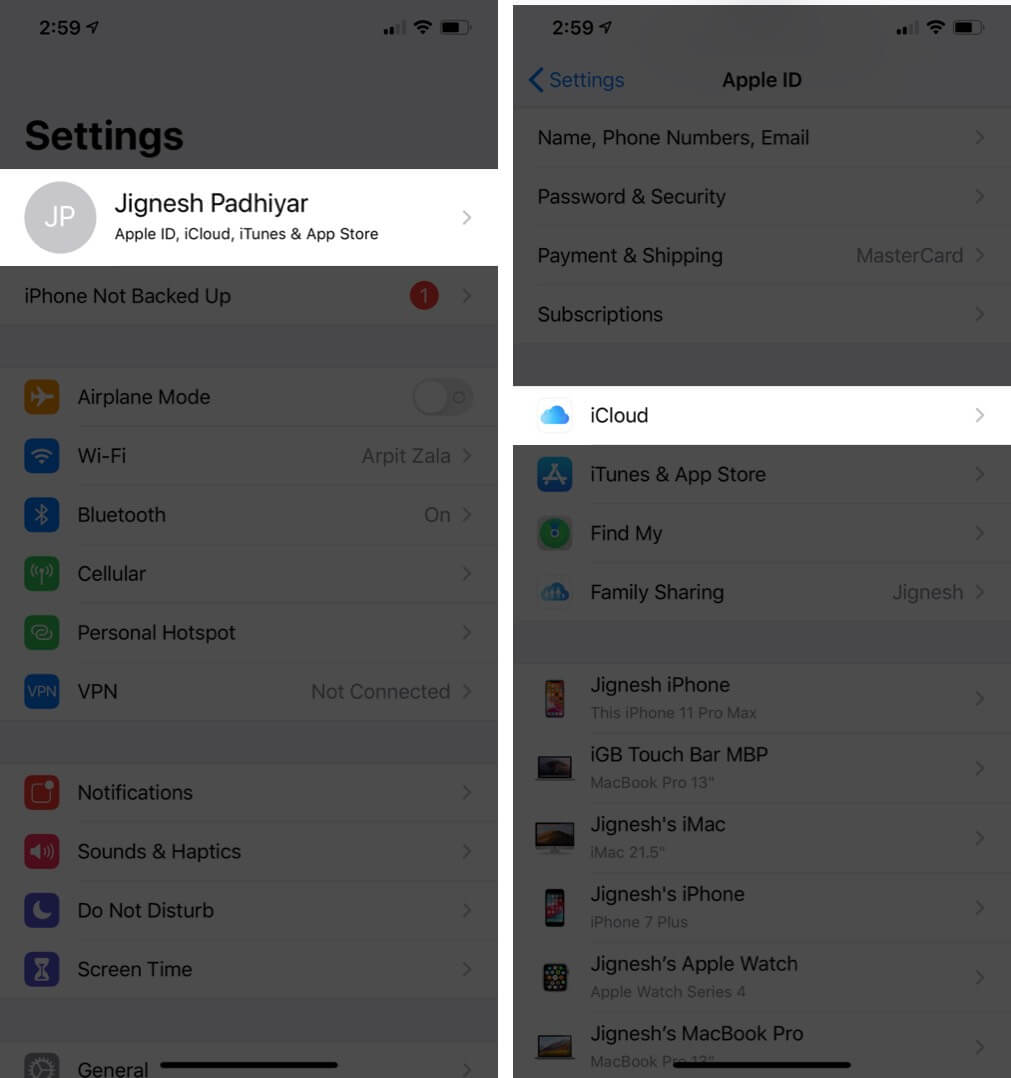
- On your iOS device:Open Settings app → tap on your name card → iCloud.
 Now Tap on Photos and then turn on iCloud Photos.
 Now Tap on Photos and then turn on iCloud Photos.
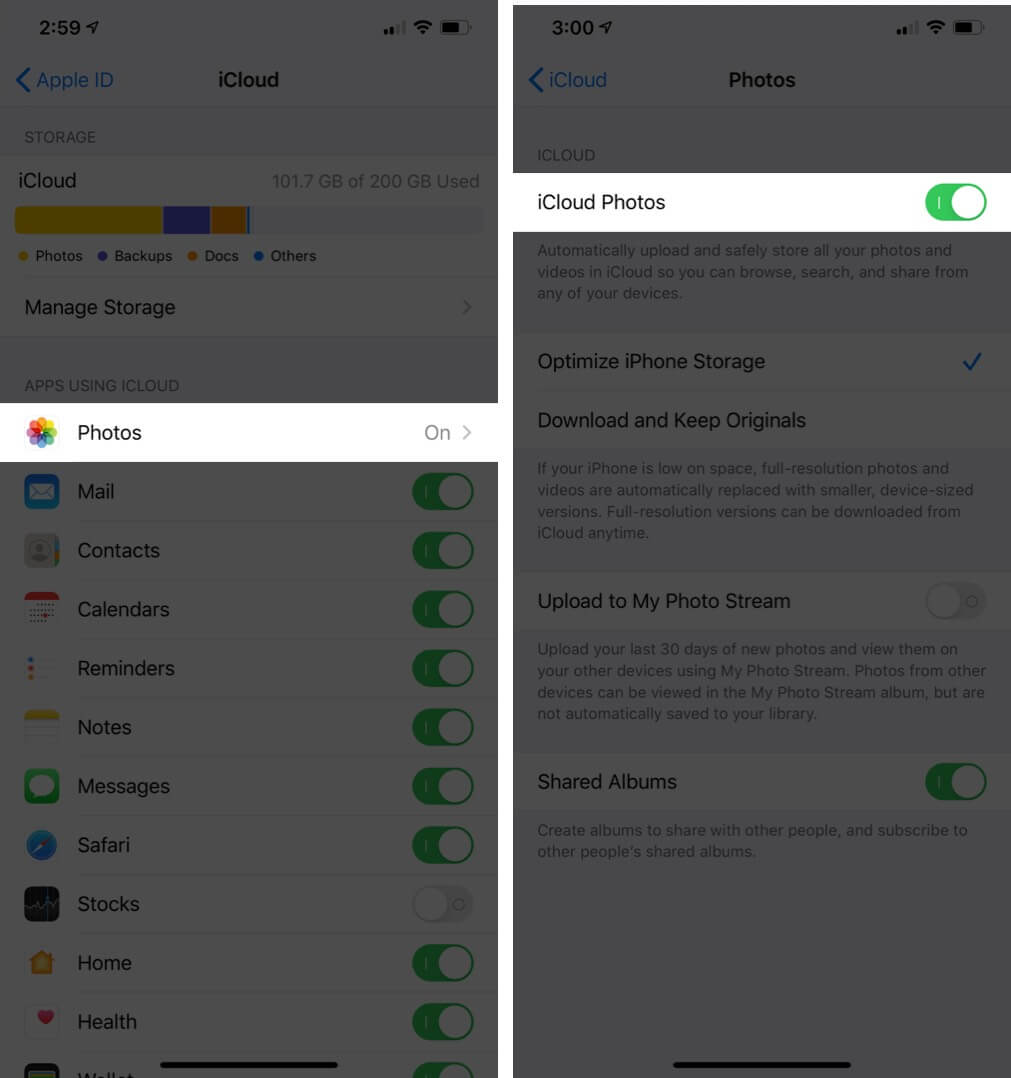
Now, you would have to wait until all of your pictures and videos are synced among your devices.
Related: How to Download photos from iCloud to iPhone, Mac, PC
Transfer Photos From Mac or Windows PC to iPhone and iPad with iCloud Drive
iCloud Drive is Apple’s version of Google Drive. You can access iCloud Drive inside the Files app on your iPhone and iPad. On Mac, when you enable it, you will find it in the left sidebar of Finder. And, yes, you guessed it right. It is also available for Windows and web. Let us see how to use iCloud Drive to transfer photos from computer to iOS devices.
Note: I am using iCloud Drive on the web.
- Go to iCloud.com on Mac or PC and log in using your Apple ID
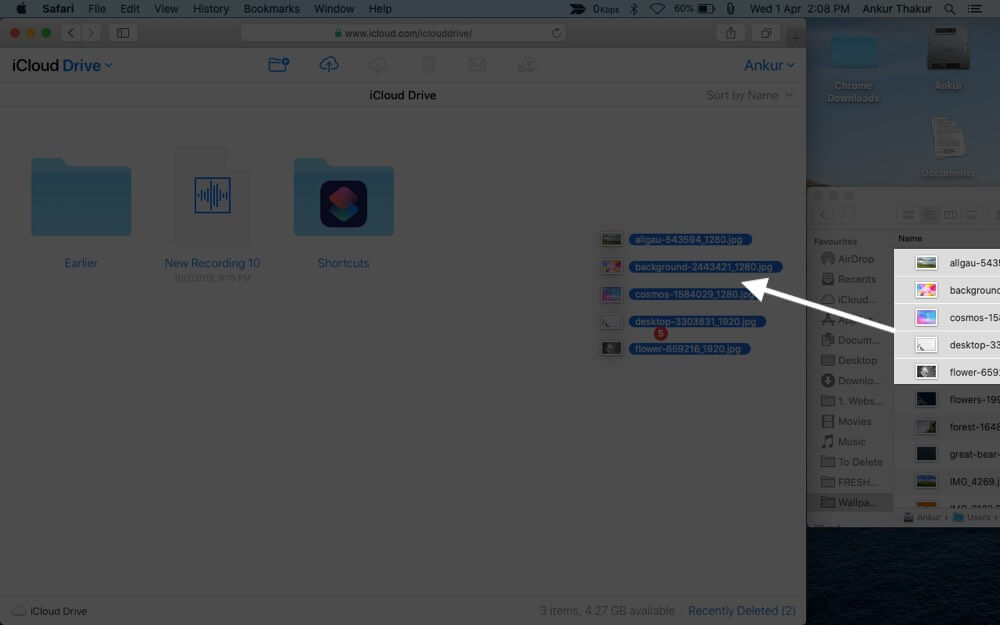
- Click on iCloud Drive.

- Reduce the browser window size. Now drag and drop photos from desktop or folder to it. Or click on the upload icon in the top bar.

- Open the Files app on your iPhone or iPad. Wait for the images to show here

Tip: You can download the photos inside the Files app, select them, tap the share icon, and then tap on Save Image to have them in the Photos app.
Transfer Photos From Mac or Windows PC to iPhone and iPad using iTunes or Finder
Finder for Macs running macOS Catalina and iTunes for earlier Macs and Windows PC is a viable medium to transfer photos and videos from computer to your iOS devices. The steps for Finder and iTunes are almost identical. Take a look.
- Unlock your iPhone or iPad and connect it to Mac/PC using a lightning cable. Tap Trust on your iOS device if asked
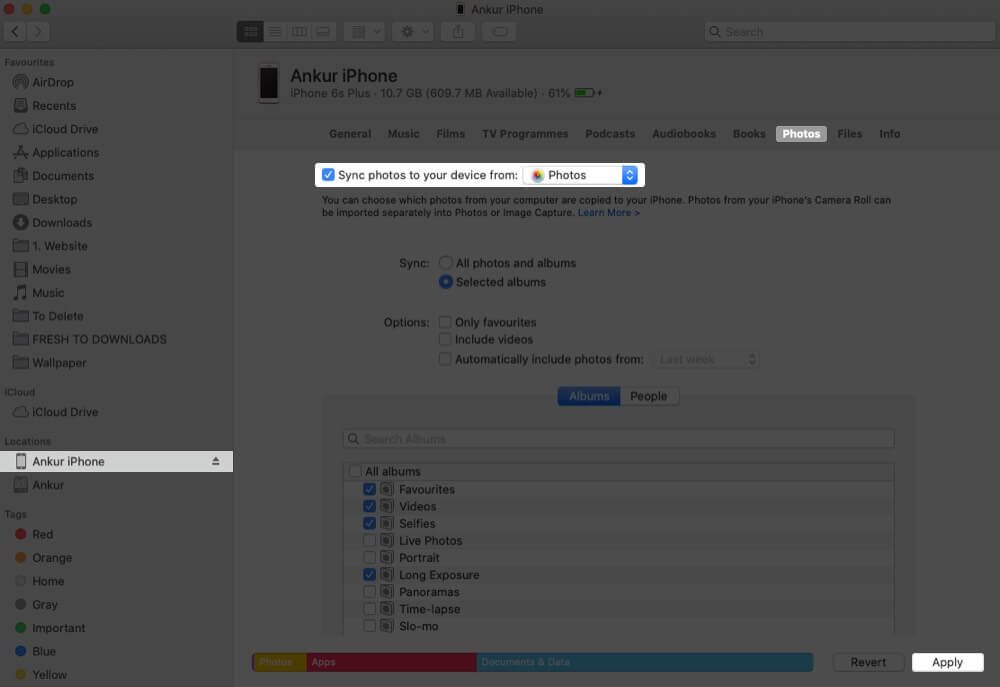
- From Finder, click on the device name. In iTunes, click on the iDevice icon.
- Click on Photos.
- Check the box for Sync photos to your device from:
- Select the Photos app or Choose Folder.
Note: You can only select a folder and not individual images - See other options like ‘sync all photos and videos’ or ‘only selected albums.’ Once done, click on Apply from the bottom right.
Note: You can select favorites, entire albums, or people. You can not choose individual images.
The pictures will be synced to the Photos app on your iPhone or iPad.
You can not delete them from the iOS device itself. To remove these photos, you have to follow the exact method above. In step 4, you can choose to un-sync all photos, or in step 5, you may uncheck the albums/people you wish to remove from your iPhone or iPad. Finally, click on Apply so that the changes can take effect.
Transfer Photos From Mac or Windows PC to iPhone and iPad without iTunes
There are several other ways to transfer photos from your Mac or Windows PC that does not require iTunes. Here are some of the easiest and most seamless methods.
- Transfer Photos from Mac to iPhone or iPad Using Google Photos
- Move Photos from Mac to iPhone and iPad Via Dropbox
- Export Photos from Mac to iPhone and iPad using Email
- Other Methods to Copy Photos from Mac to iPhone
#1. Transfer Photos from Mac to iPhone or iPad Using Google Photos
Google Photos is undoubtedly one of the finest and smartest services to store and manage your pictures and videos. You can save up to 15GB of photos in full original quality. You get unlimited storage if you opt for High Resolution. I choose the latter. To use Google Photos, we will first upload the pictures to it from the computer and then use its iOS (or Android) app to get all images on the smartphone.
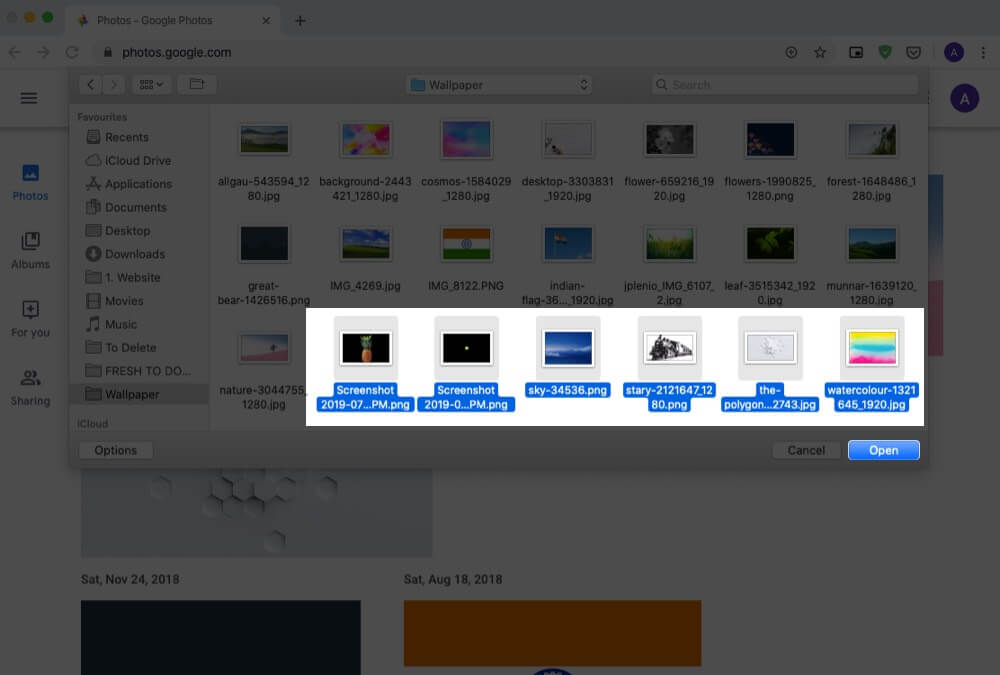
- Go to Google Photos and log in using your Gmail ID
- Drag and drop the pictures here. Or click on Upload → Computer and select the photos or folders.

- Click on Open. Files will start uploading. Wait for the process to complete.

- Download the Google Photos app on your iPhone or iPad
- Sign in using the same Gmail ID, and there you have it! All the photos and videos you uploaded from your computer are here

If you want to save pictures from Google Photos to the iPhone’s Photos app, select the images, tap on the Share button, and tap Save Image.
#2. Move Photos from Mac to iPhone and iPad Via Dropbox
Dropbox is another useful service to store and transfer photos and videos from computer to iPhone and iPad. But it pales in comparison to Google Photos. First, it only provides 2GB of free storage. So, if you have a few photos then, this is enough.
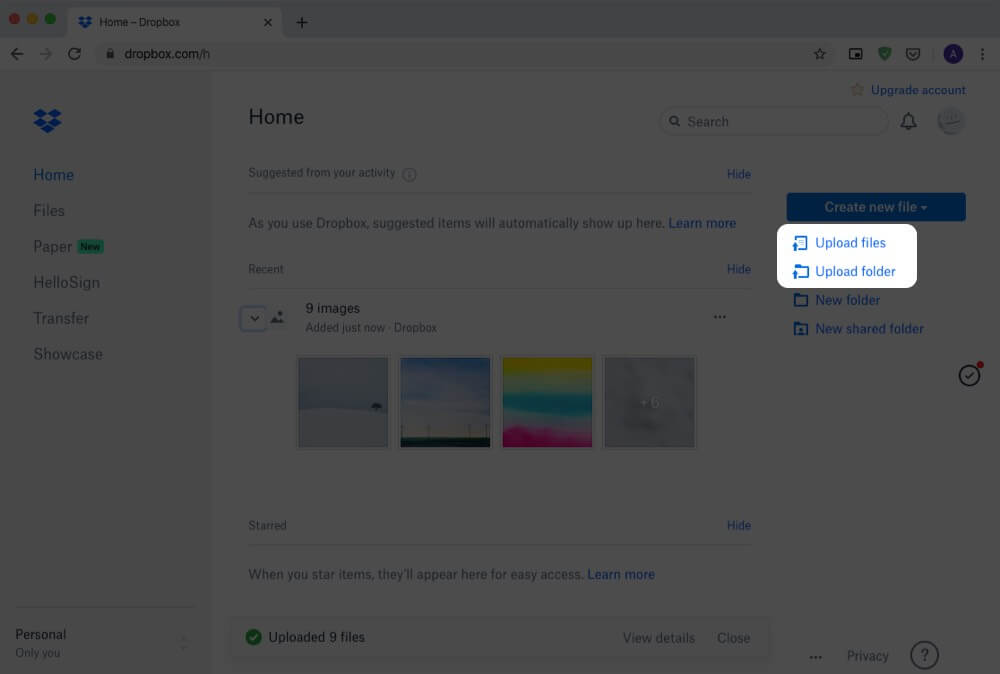
Secondly, Dropbox is now more focused on business. After you sign up (I did on a Mac), it takes you to a page where it kind of forces you to install its app (No, I do not want to install it now!).
Anyways, once you go through the signup and everything, you can upload photos and videos to Dropbox from the computer using a browser or its app. After that download, the Dropbox app from the App Store and you have all your images on iPhone and iPad. You can further choose to save these images to the iPhone Photos app, from where you can easily edit them.
Some of the excellent alternatives to Dropbox are Google Drive, Microsoft One Drive, Box, and Mega.
#3. Export Photos from Mac to iPhone and iPad using Email
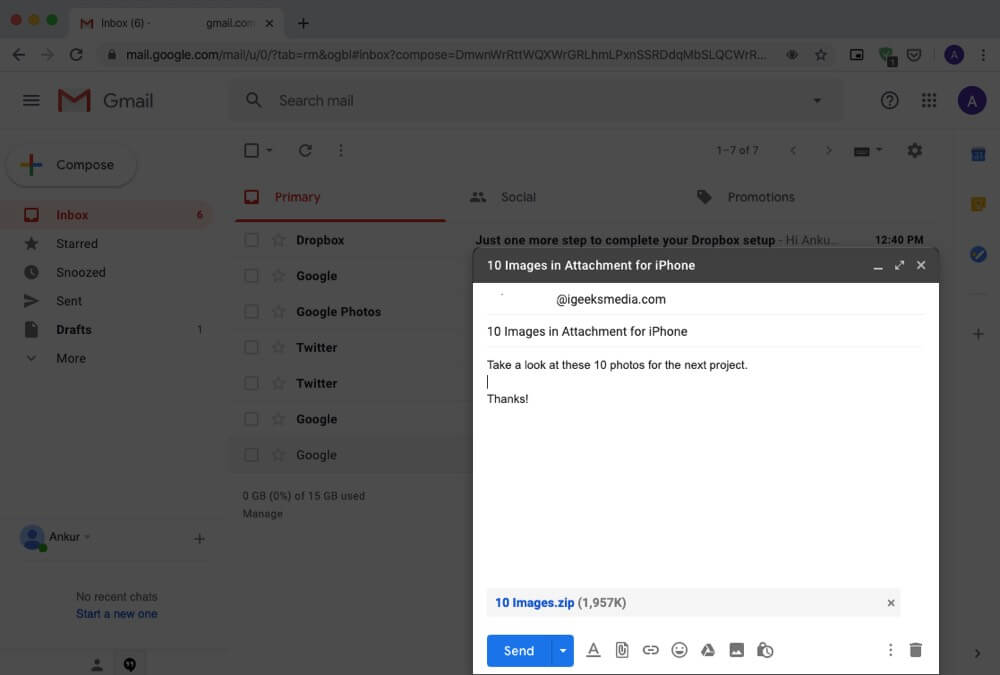
I guess you already know this. But let me refresh it for you. Email is a handy way to quickly transfer one or a few images from a computer to an iPhone or iPad. For this, open the mail service of your choice like Gmail, iCloud, Hotmail, Yahoo, and send an email to yourself or one of the accounts that you use on your iOS device.
Pro Tip for Multiple Images: Create a folder on your computer and add photographs you want in your iPhone; compress (zip) all images. Now send a mail to yourself with the zip file as an attachment. Finally, unzip the file on your iPhone or iPad.
#4. Other Methods to Copy Photos from Mac to iPhone
In addition to the above methods, there are other platforms or tricks to move photos from computer to your iOS device.
A. Social Media Services: You can even use social media services like Facebook, Flicker, to upload photos from PC and then view or save them on your iPhone or iPad using the respective app.
B. Chat Apps: You may even use chat services like iMessage, WhatsApp, Telegram, Hike, etc. Open one of these on your Mac or PC and then send yourself a photo or video. Most of the chat apps do reduce the picture quality, but for a quick share, they might be helpful.
C. Third-Party Transfer Apps: Yet another smart way to import photos from computer to iOS device is using tools like AnyTrans software or WinX MediaTrans.
That’s all, folks!
I hope this detailed guide was helpful and solved your photo transfer needs. If you have a follow-up question or confusion, ask it in the comments down below.
You may also be interested in these posts:
- Best Photo Vault Apps for iPhone
- How to Save Photos as PDF on iPhone and iPad
- How to transfer photos from iPhone to Mac and Windows PC
- How to transfer data from your Windows PC to a Mac
🗣️ Our site is supported by our readers like you. When you purchase through our links, we earn a small commission. Read Disclaimer.