Starting with iOS 11, you can screen record your iPhone in just a few taps. It enables you to capture what’s on-screen, make tutorials, film your gameplay, and more. On top of this, you can also record internal and external audio, making the experience richer and more functional.
Let us get straight in and show you how to screen record on iPhone and iPad.
- How to enable screen recording on iPhone via Control Center
- How to record your screen on iPhone and iPad
- Guide to screen recording with audio on iPhone and iPad
- Stop the screen recording on iPhone and iPad
- How to record iPhone screen using Mac
How to enable screen recording on iPhone via Control Center
Before you can start recording your screen, you have to add its button to the iPhone Control Center. Here’s how.
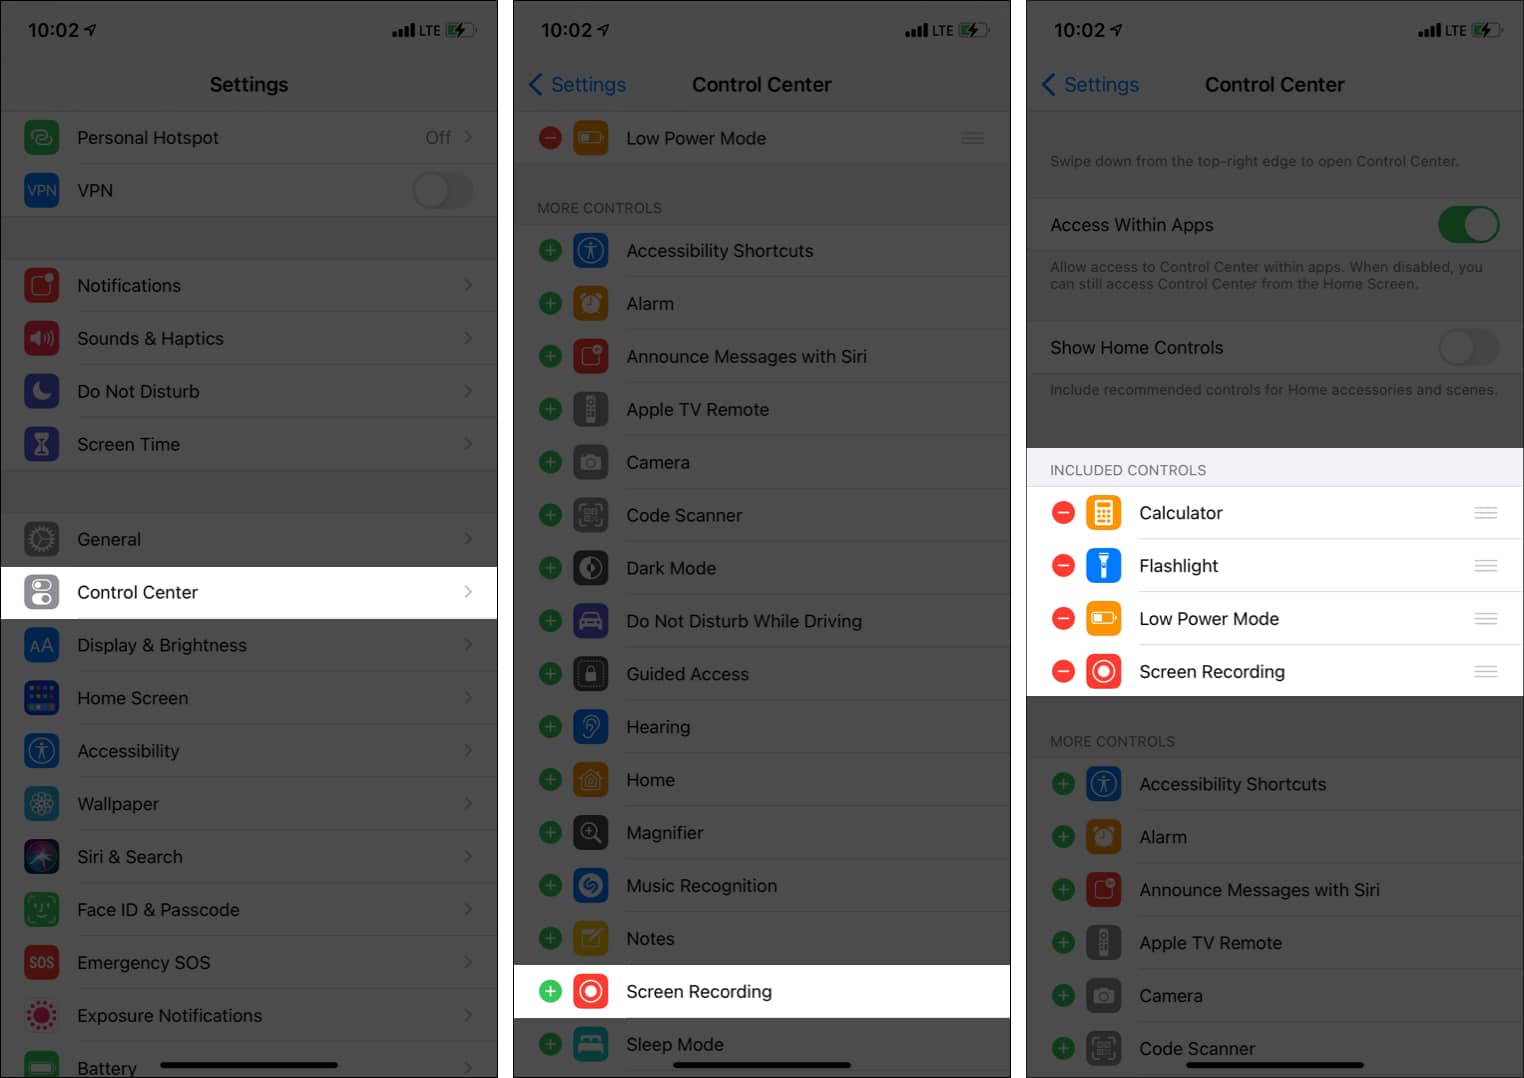
- Go to Settings and tap Control Center.
- From under MORE CONTROLS, tap the green plus icon for Screen Recording.
- It will be added under INCLUDED CONTROLS. You can exit from Settings now.
If it was already added, you could go straight to the steps below.
How to record screen on iPhone and iPad
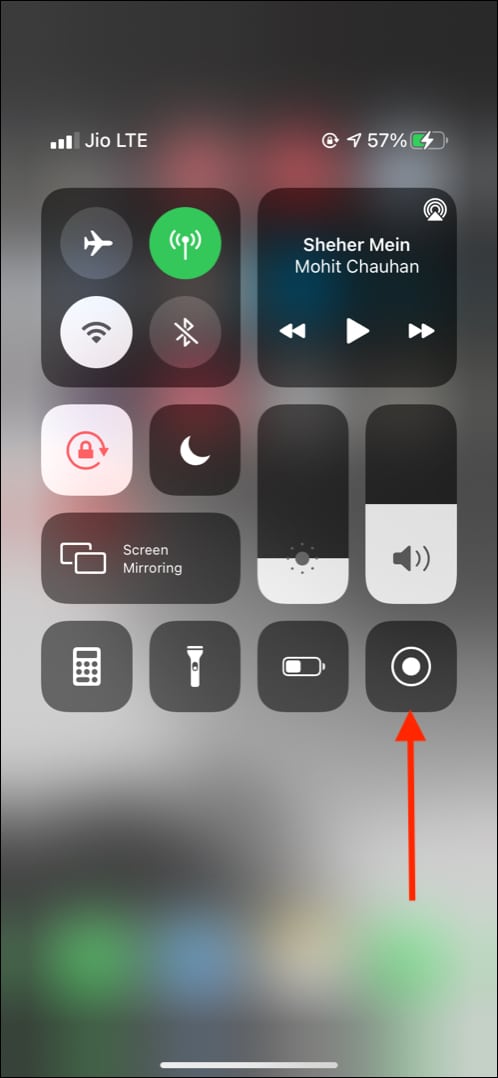
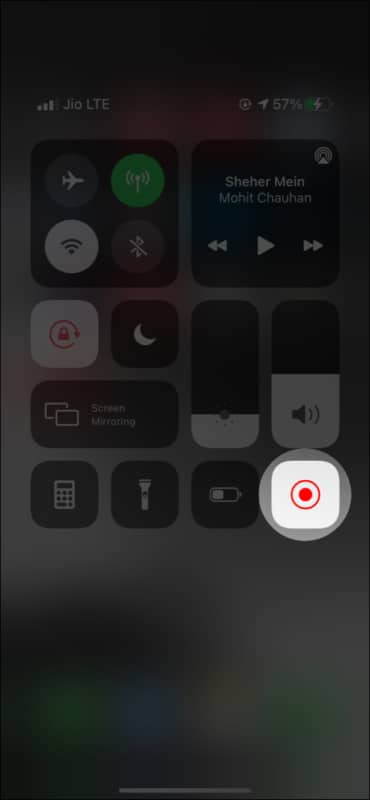
- Open Control Center.
- On iPhone with Face ID, swipe down from the top-right of the screen (where the battery icon is).
- On iPhone with a Home button, swipe up from the bottom of the screen.
- To record the iPhone screen, tap the Screen Recording button.

- After three seconds, everything on your iPhone, including notifications, will be recorded. You can enable DND beforehand to prevent future notifications from messing with the screen recording.
- Important: Along with the screen, internal audio will also be recorded. That is, if you start screen recording and play a video in VLC or a song in Amazon Music, the audio of the playing movie (in VLC) or song (in Amazon Music) will be recorded too. Some apps like Apple Music do not support internal audio recording while screen recording.
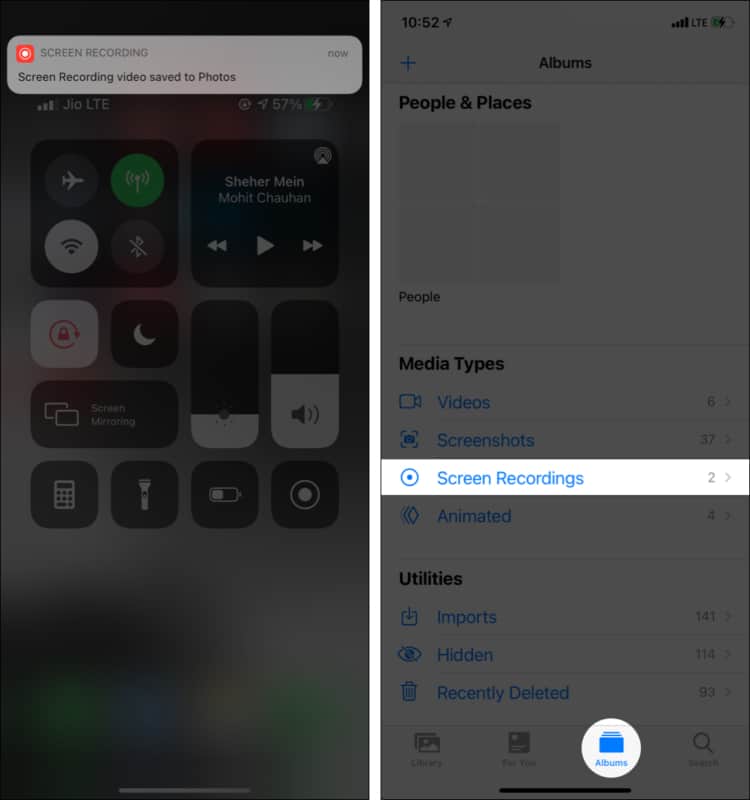
- After you stop the screen recording, it will be saved to the Photos app.
Guide to screen recording with audio on iPhone and iPad
Do you want to record the iPhone screen and the audio at the same time? It can be helpful when you are making a tutorial or recording gameplay with your commentary. Let me show you how to do it.
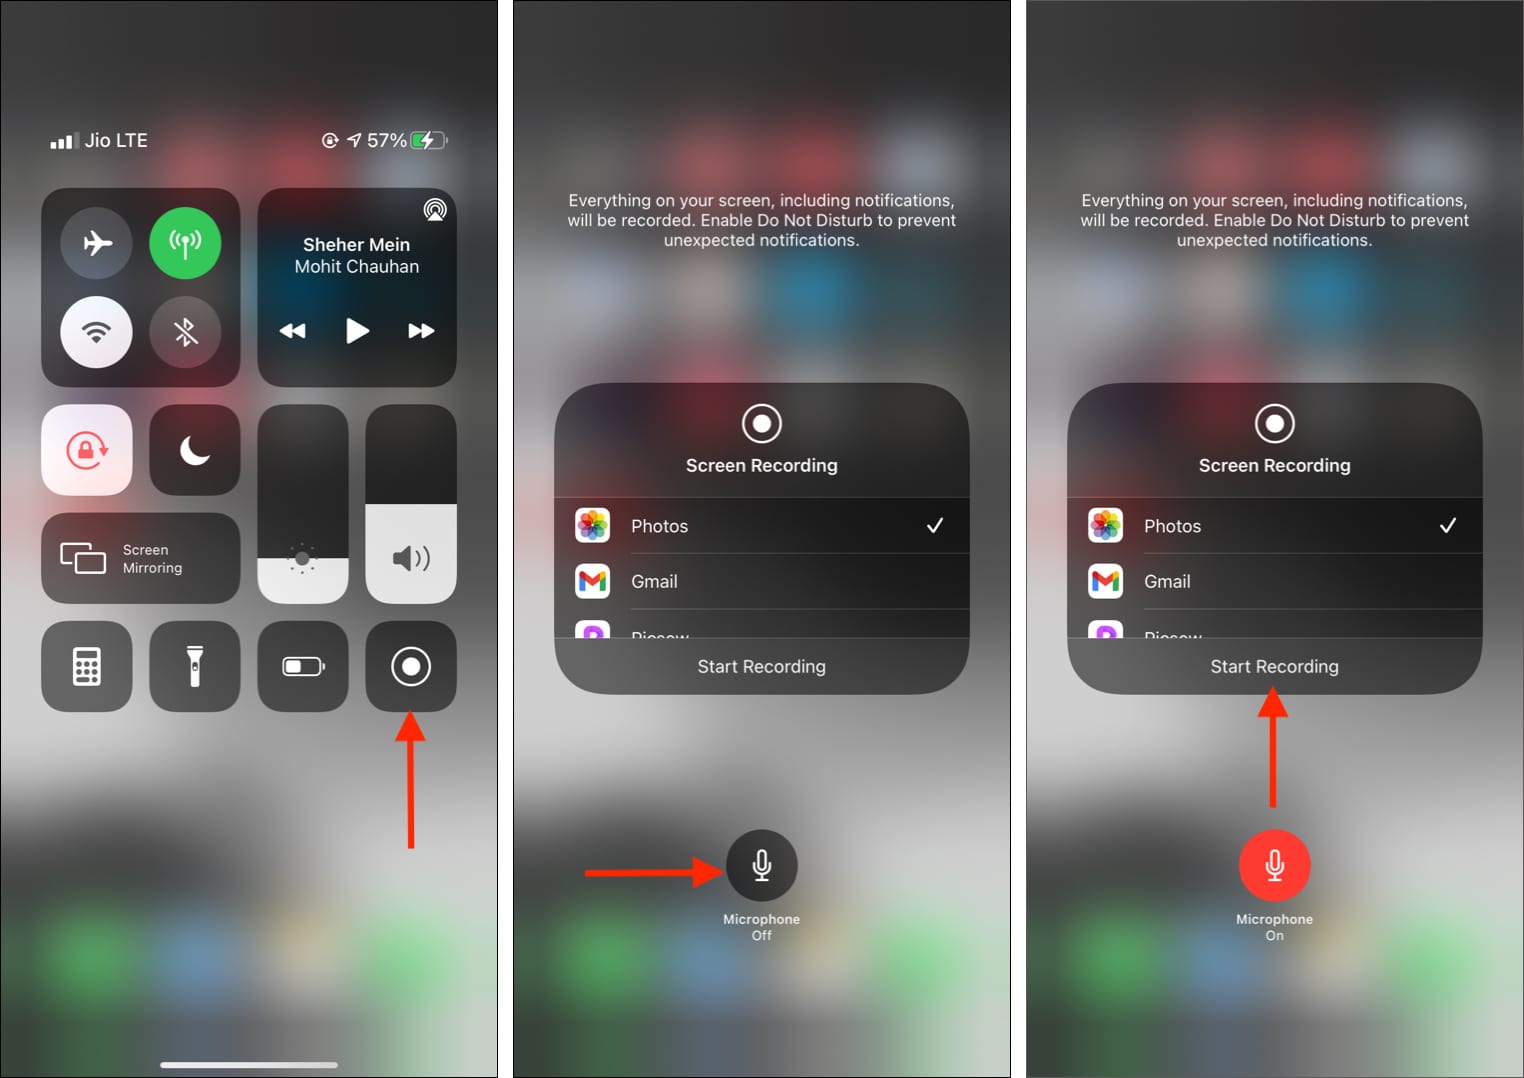
- Open Control Center.
- Long-press the Screen Recording button.
- Tap Microphone. It will become red.
- Make sure Photos is selected and tap Start Recording. The recording will start after three seconds.
- Important: Everything on the screen with internal audio and external audio will be recorded. For example, you are screen recording your gameplay. Now, the game’s visuals, the game’s audio, and what you speak will all be recorded (as long as the app has not restricted screen recording).
- After you stop the screen recording, it will be saved to the Photos app.
Note: When you long-press the Screen Recording button (step 2 above), you might see a few app names here. Photos is selected by default which means the screen recording will be saved to the Photos app. If you select some other third-party app, the screen recording can be broadcast/saved in that app.
For example, you can use this feature to share your iPhone screen while on a Zoom call. Instructions here. The Gmail app also supports this (for Google Meet).

Stop screen recording on iPhone and iPad
You can stop iPhone screen recording by tapping the top red status bar on iPhones with the Home button. On iPhone models with Face ID, tap the tiny red pill (that shows the time) at the top-left. Finally, tap Stop.
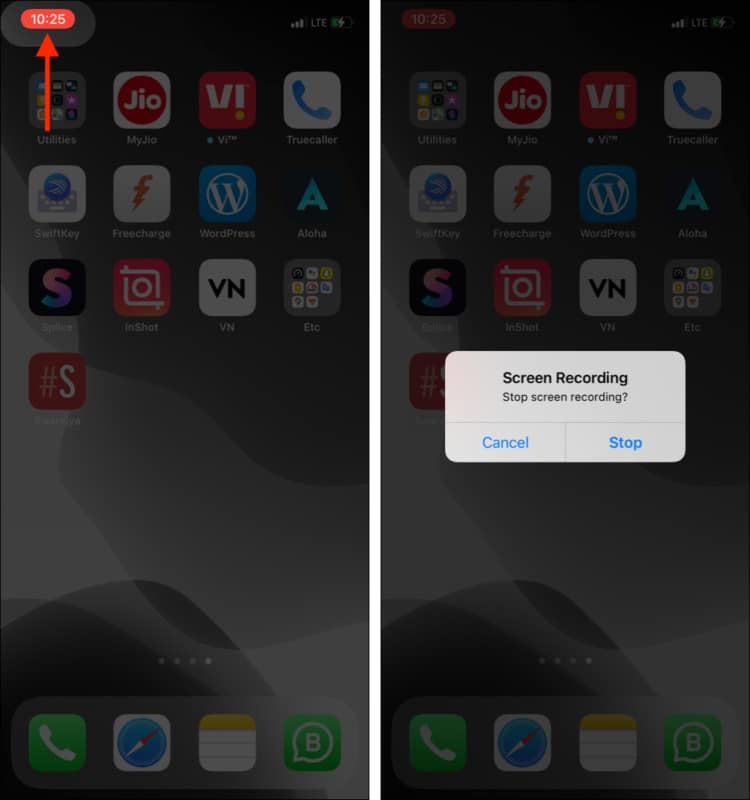
Alternatively, you may also open the Control Center and tap the red Screen Recording button.
The screen recording file will be saved to the Photos app. Scroll down the Albums tab, and under Media Types, you will see Screen Recordings. Tap to see all your screen recordings in one place.
How to record iPhone screen using Mac
If you have access to a Mac, you can use it to record the iPhone screen. Recently, I showed you how to record iPhone FaceTime calls with audio using this method. It is fun and informative.
Let us see how to use macOS to record your iOS/iPadOS screen!
- Connect your iPhone or iPad to Mac using an appropriate cable.
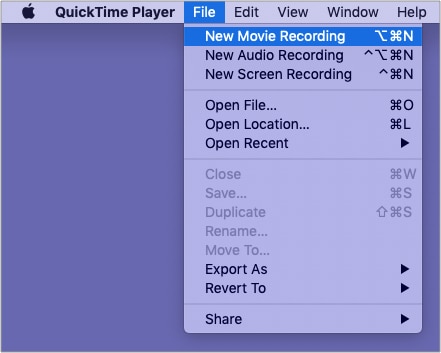
- On your Mac, open QuickTime Player from the Applications folder, Launchpad, or using Spotlight.
- Click File → New Movie Recording.

- Click the tiny downward arrow, and for Camera, choose iPhone. For the microphone, you may stay with the internal option. Also, drag the volume slider to the right.

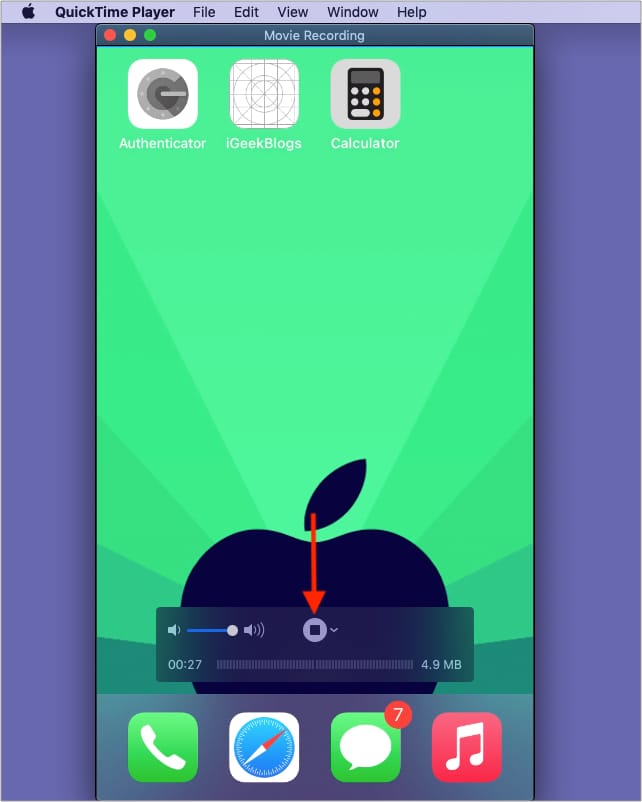
- Finally, click the record button to start capturing what is on your iPhone screen. Use the iPhone while your Mac records its screen.
Just make sure not to tug the wire, else the recording will fail. If you have an old phone, keep it flat on a surface so that you do not accidentally disconnect it from the Mac.
- When done, click the stop button.
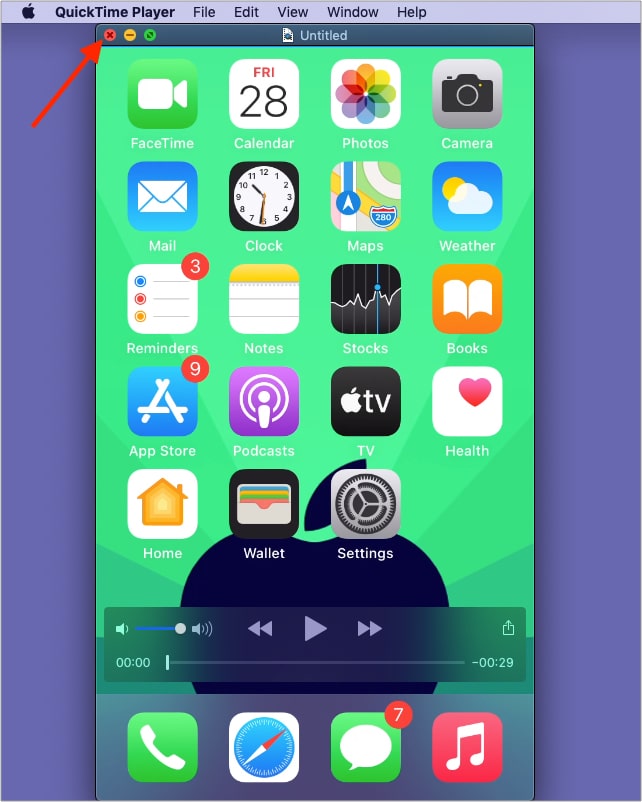
- Next, click the tiny red close button at the top left of the QuickTime window.
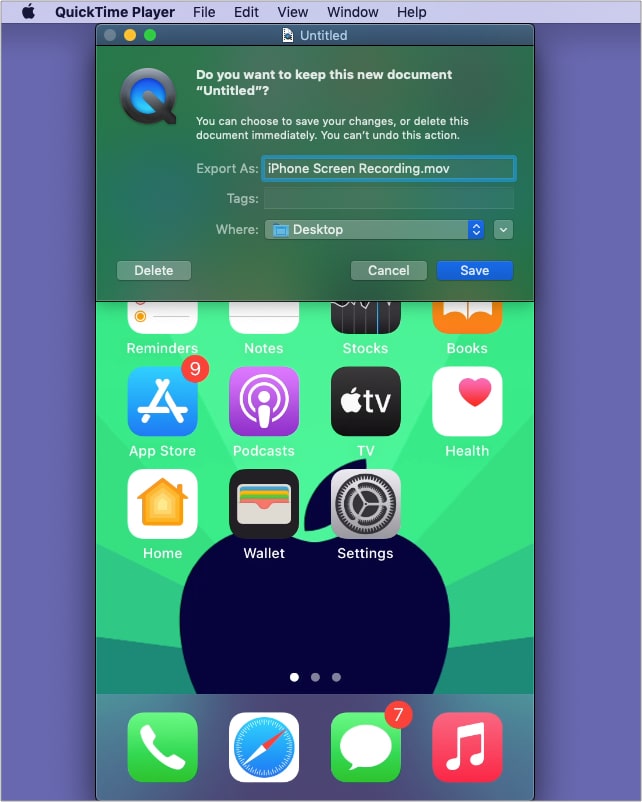
- Now, click Save to have your iPhone screen recording file on your Mac. You may AirDrop it to your iPhone if needed.

Note: In some apps (like FaceTime), you cannot record audio (unless you use a Mac. Steps above). Plus, with some apps (like Amazon Prime video), you may record the screen, but the recorded file will not have the on-screen movie or TV show content. This is primarily to prevent piracy. Finally, you cannot record your screen and use screen mirroring simultaneously.
This is how you can record your iPhone or iPad screen. I hope this quick guide helped you. If you have any confusion, share it in the comments below. I will have a look and reply.
You may also like to read:
- Screen recording not working on iPhone or iPad? Try these fixes
- How to take a picture or record a video on Mac
- How to record your Mac screen: 3 ways explained
- iPhone screen not rotating? How to fix it
🗣️ Our site is supported by our readers like you. When you purchase through our links, we earn a small commission. Read Disclaimer.