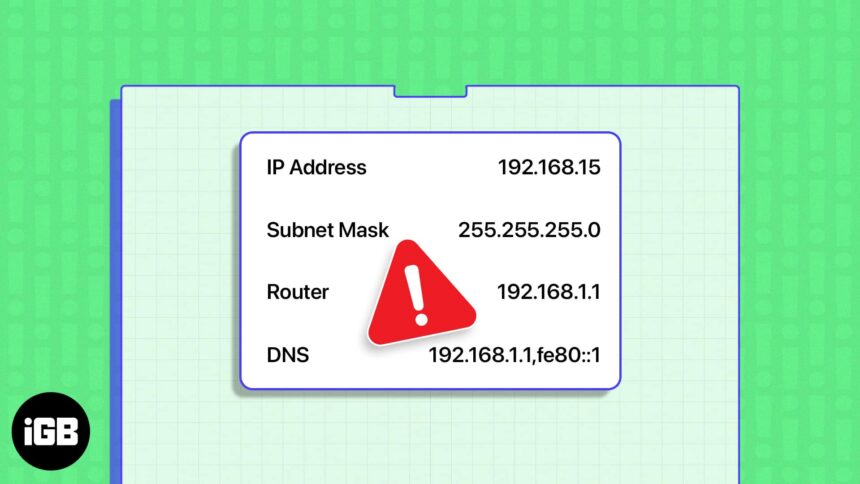
- IP address conflicts on Mac can occur if another device on your Wi-Fi network is using the same IP address.
- To fix the “Another device on the network is using your IP address” error on Mac, you can renew the DHCP Lease or manually enter your IP address.
As the name suggests, an IP conflict error occurs when two or more devices on your Wi-Fi network use the same IP address as your Mac. This can often lead to internet connection issues. Fortunately, macOS allows you to fix it.
In this guide, I’ll show several ways to fix the IP conflict issue on Mac when connected to a Wi-Fi network.
- Restart all devices and router
- Renew DHCP Lease on Mac
- Disable and re-enable iCloud Private Relay
- Disconnect VPN
- Manually enter the IP address
- Reset network settings on Mac
- Check for viruses and malware
1. Restart all devices and router
One of the best ways to fix the IP address conflict issue in Wi-Fi on Mac is to restart it so that it clears RAM and network connections.
To restart your Mac, simply click the Apple menu () on the top-left of your display → select Restart.

While you are at it, I’d also recommend restarting your router. Just unplug it, wait for a couple of minutes, and then plug it in again.
After your Mac and router restart, the IP conflict issue should be gone, and you should be able to use your network connection as usual. If not, try force-quitting and restarting the Mac app that is facing the issues.
Further, the IP conflict issue isn’t limited to Mac, iPhone, and iPad, but also other devices connected to the same network.
For instance, this issue can occur if you have a TV, Gaming console, smart devices, etc., connected to the Wi-Fi and share the same IP address.
To resolve this, restart other devices connected to the same network as your Mac to reset their IP address. The IP conflict error should be fixed once you restart all devices on your network.
If the restarting process doesn’t help, move on to some advanced features.
2. Renew DHCP Lease on Mac
Unlike iOS, the IP conflict issue still exists in macOS. So, you’ll find the Renew DHCP (Dynamic Host Configuration Protocol) Lease option on your Mac.
Renewing your DHCP lease prompts your Mac to request a new IP address from the network, potentially resolving the conflict with another device.
There are two ways to renew the DHCP Lease on your Mac – using System Settings and Terminal.
From System Settings
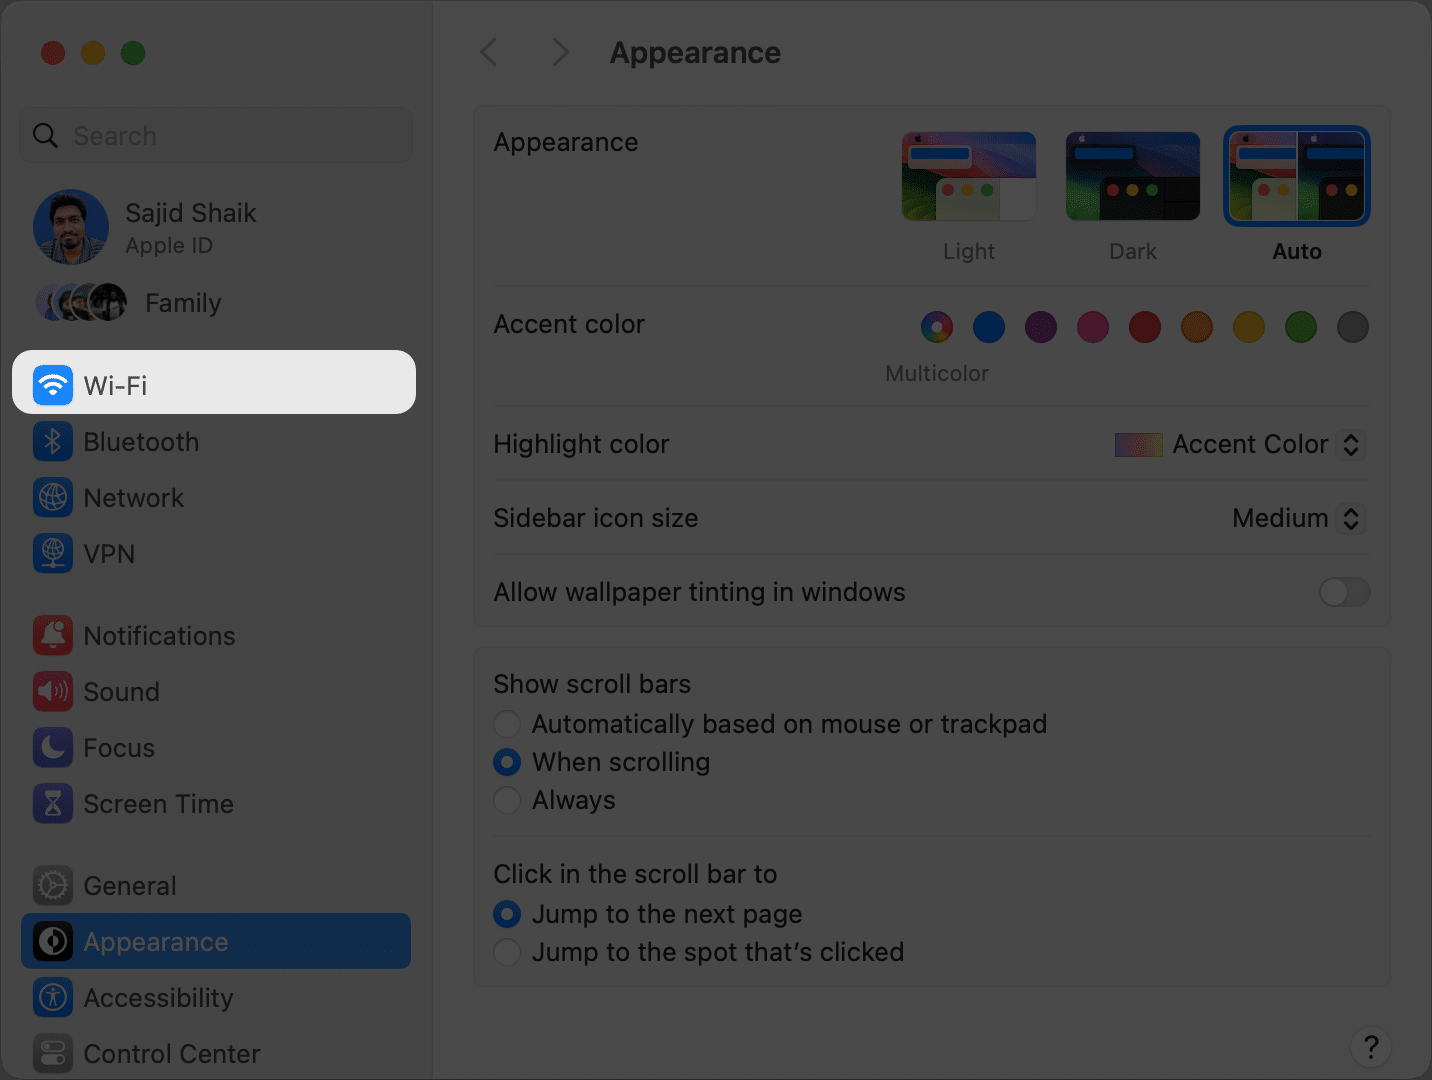
- Open System Settings from the Apple menu on the top-left of your display.
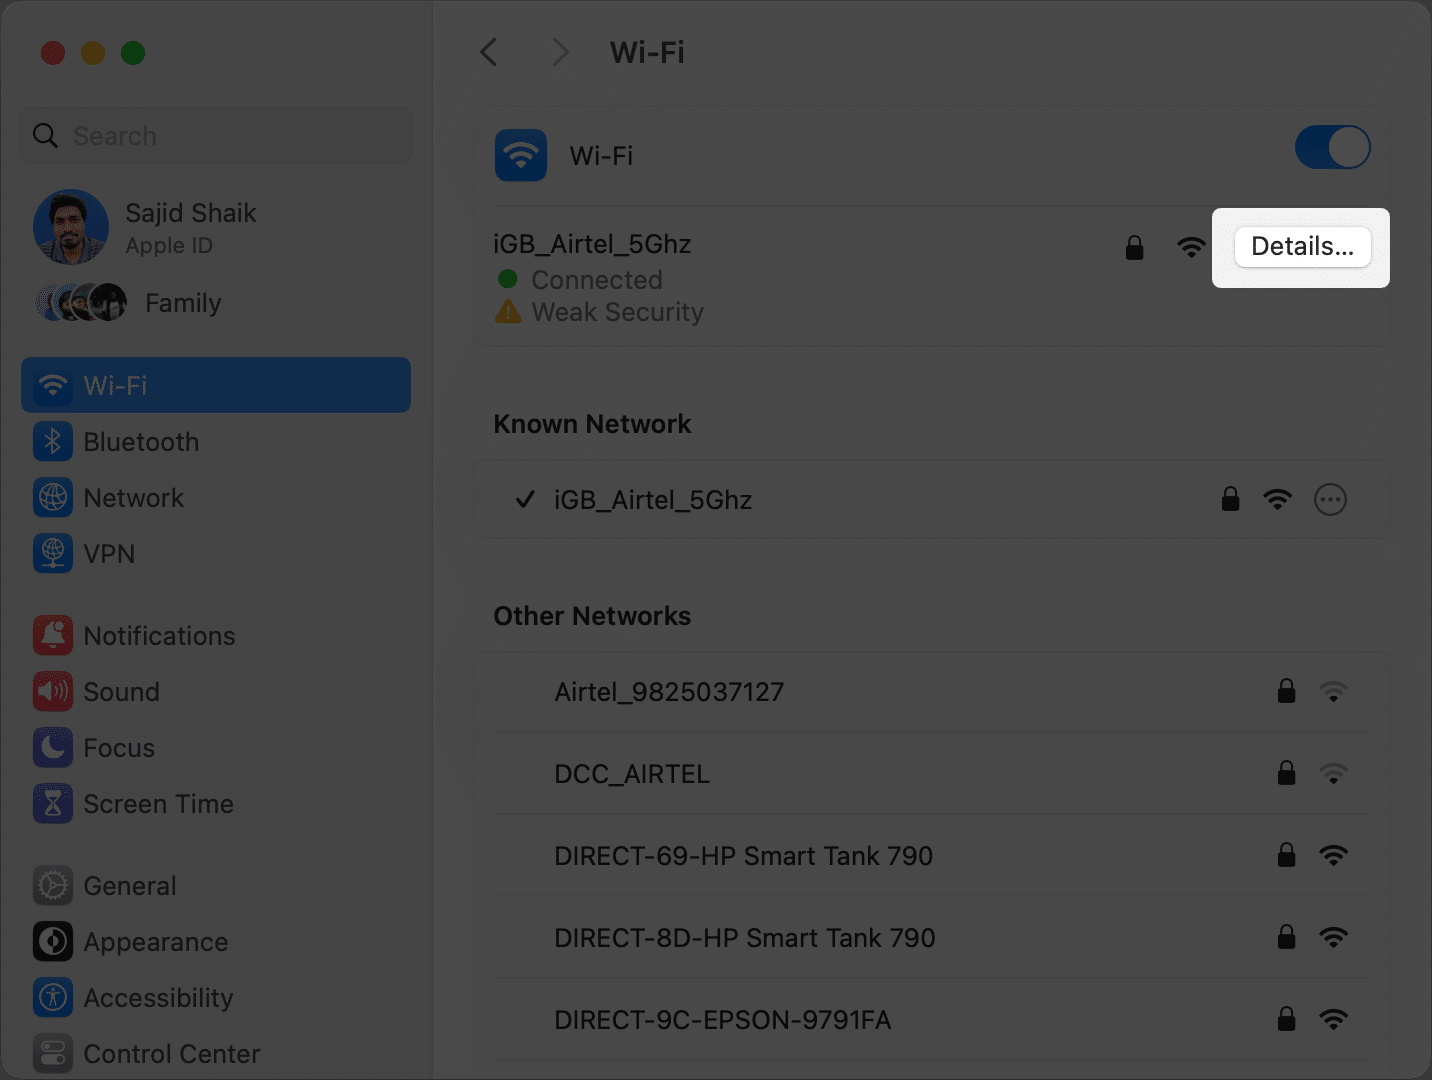
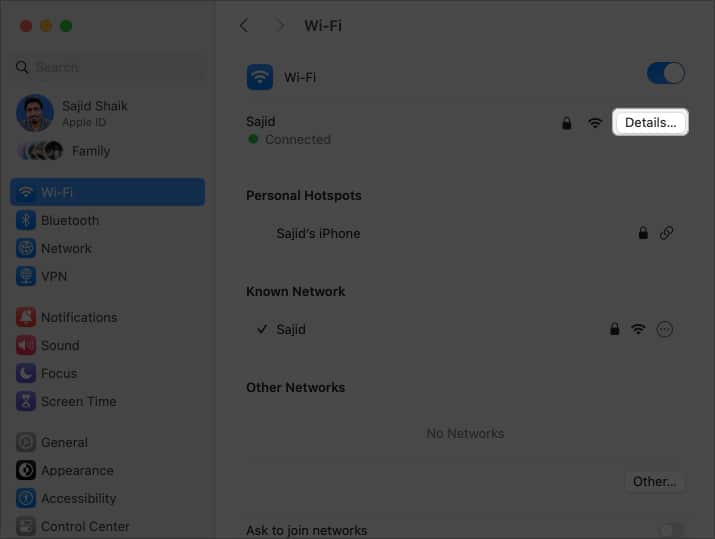
- Click Wi-Fi on the left pane.

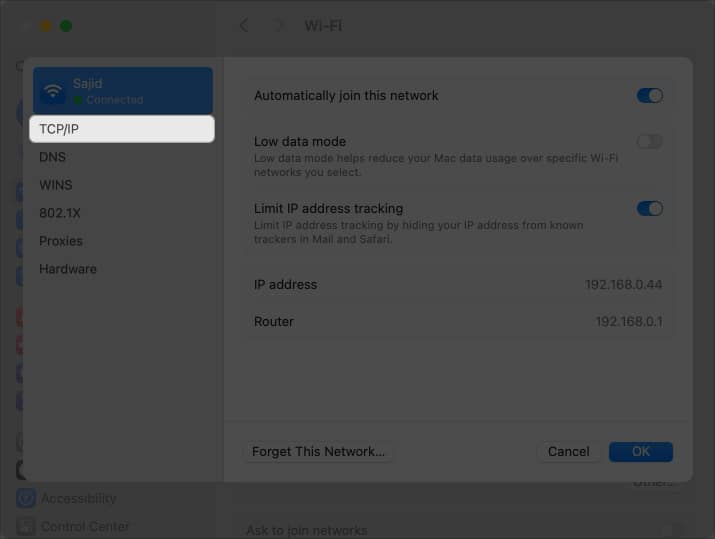
- In the right pane, click the Details button next to your connected Wi-Fi. A new window will pop up on your screen.
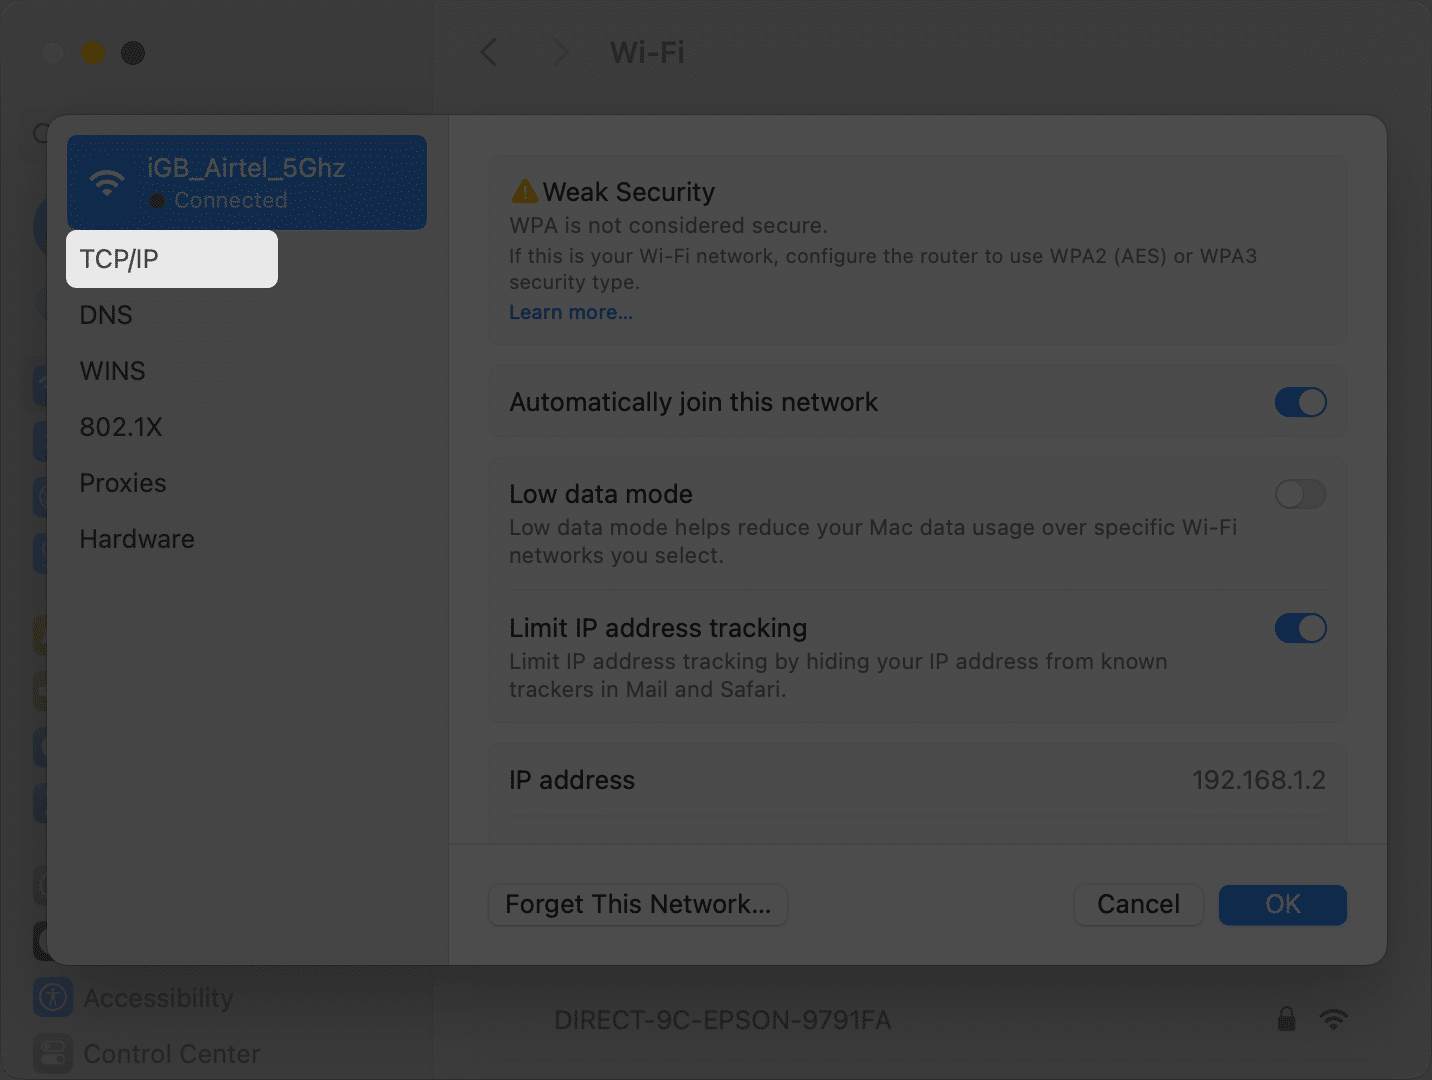
- Select TCP/IP on the left pane.
- Click the Renew DHCP Lease option.
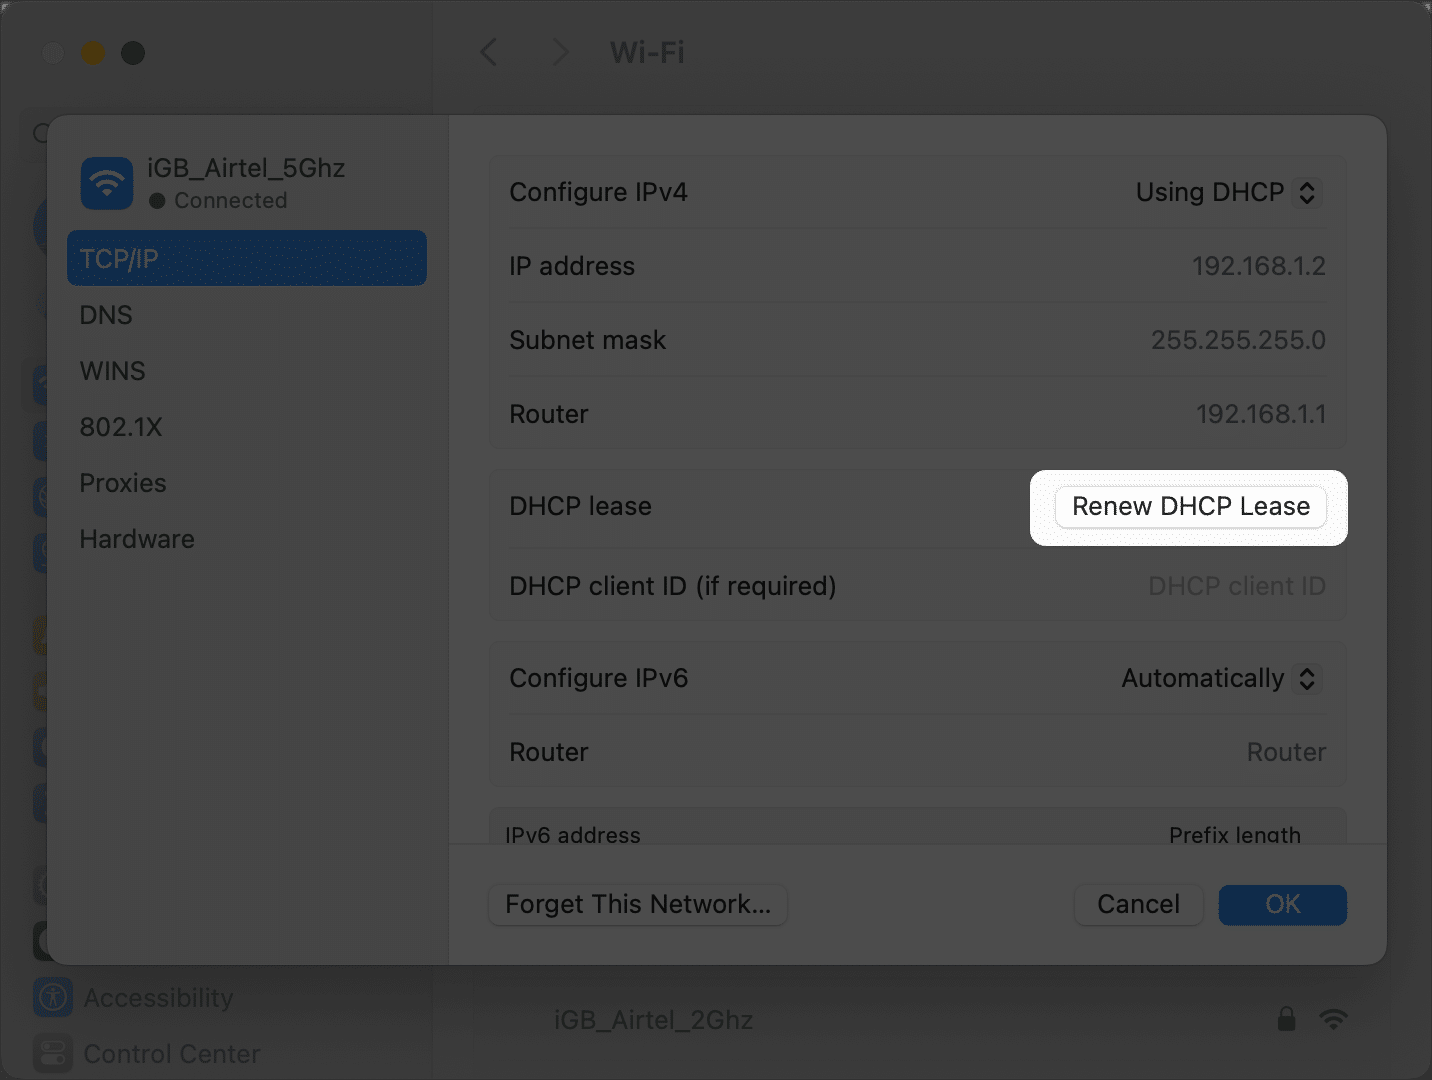
That’s it; your Mac’s IP address will reset, and you won’t face any IP conflict problems while connecting to the Wi-Fi network.
From Terminal
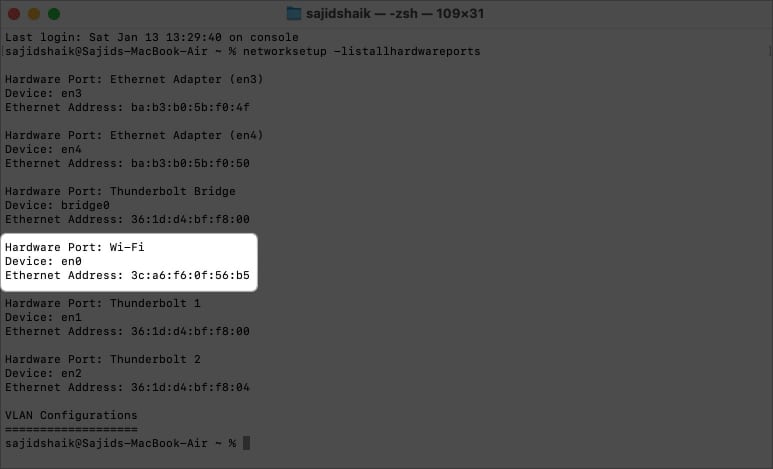
- Open Terminal on your Mac from Launchpad, Spotlight, or the Utilities folder in the Applications folder.
- Type the code below followed by return key.
networksetup -listallhardwareports - Check Hardware Port: Wi-Fi – Device section, where the port should be listed en0 by default. If it’s different, use the same port in the following steps.

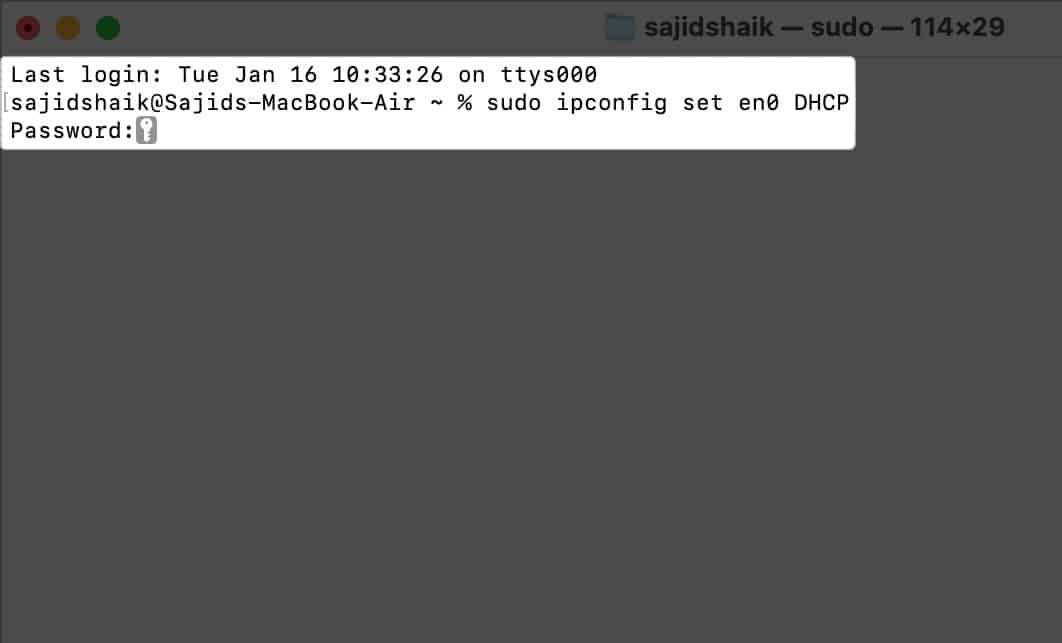
- Type the following command and press the return key.
sudo ipconfig set en0 DHCP - Enter your admin password when prompted to authenticate this process.

3. Disable and re-enable iCloud Private Relay
Private Relay in iCloud masks your DNS records and IP address to keep your browser history and data safe. As a result, you get a different IP address, which can be the same as one of your device’s IP addresses connected to the same network.
If you’ve turned on iCloud Private Relay and are using the Safari browser or any other application that uses Private Relay, an IP conflict error can occur.
However, you can disable and re-enable Private Relay to fix this issue quickly.
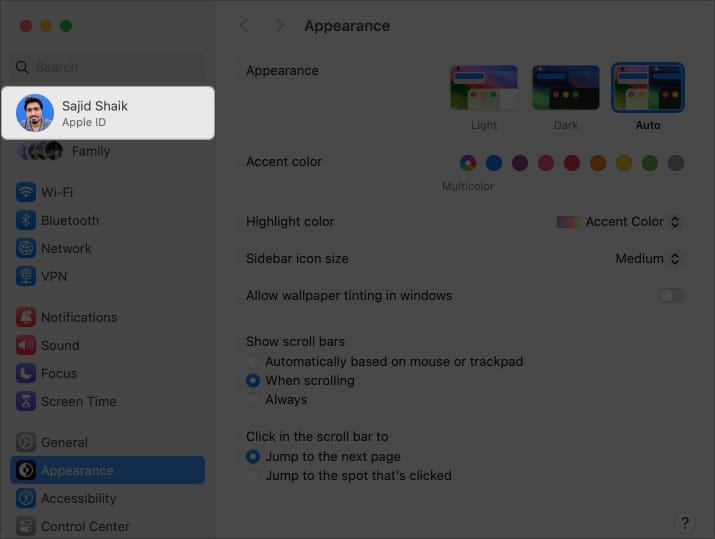
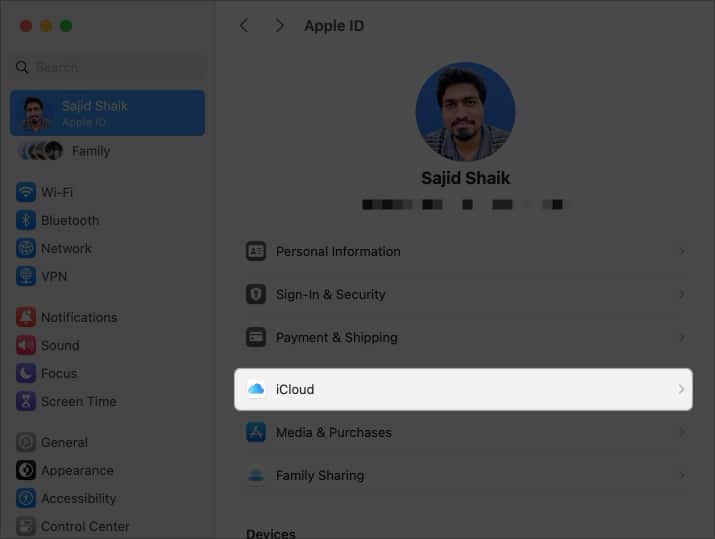
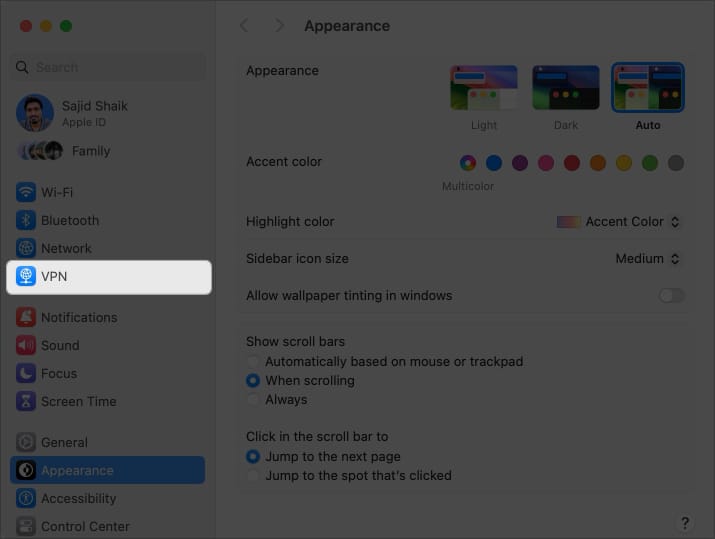
- Open System Settings on your Mac.
- Select your name or Apple ID from the left pane.

- Click iCloud.
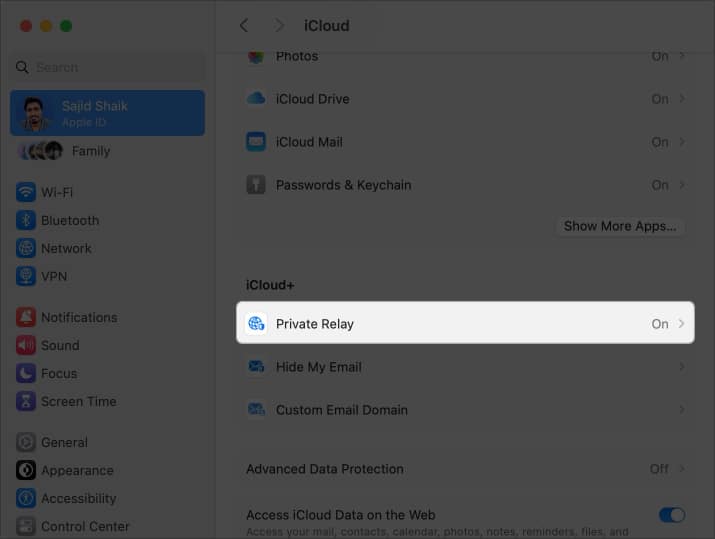
- Scroll down and select Private Relay under iCloud+.
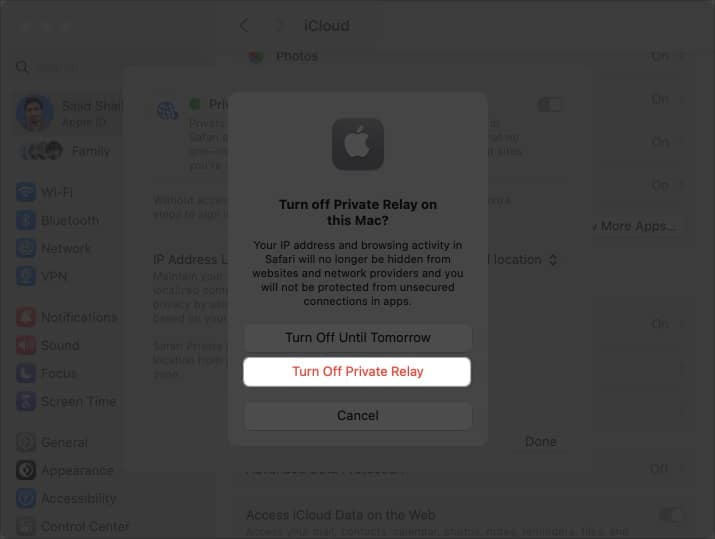
- Now, toggle off Private Relay. Choose Turn off Private Relay when prompted.
- Wait for a few seconds and toggle on Private Relay → click Done.
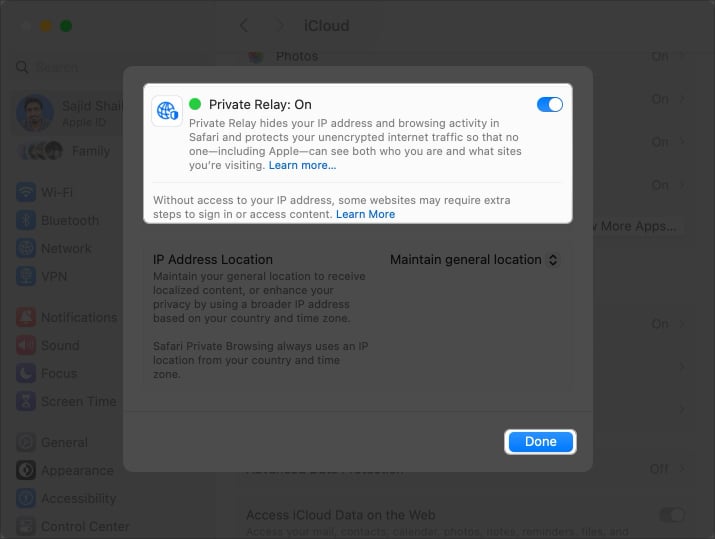
Besides, you can also switch between the Maintain general location and Use country and time zones options in Private Relay settings to change the IP address location.
4. Disconnect VPN
VPNs change your IP address to mask your location, but if the IP address of the connected location matches the IP address of one of your devices connected to the same network, you’ll get the IP conflict error issue.
You can turn off your VPN from System Settings on your Mac by following these simple steps, irrespective of the VPN you’re using:
- Open System Settings on your Mac.
- Select VPN from the left pane.
- Toggle off all enabled VPN connections.
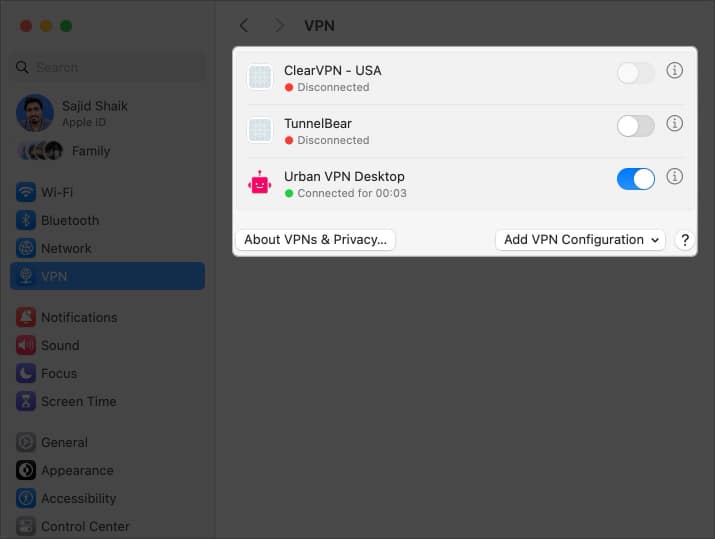
Once disconnected, your IP conflict issue should be resolved on your Mac.
5. Manually enter the IP address
If nothing above worked, you need not worry about it. macOS provides you with the option to manually enter your IP address.
When setting the IP address, ensure that it’s different from the current one that you’re using. You’ll need to know the current IP address of your Mac before proceeding. Follow these simple instructions to manually set the IP address on your Mac:
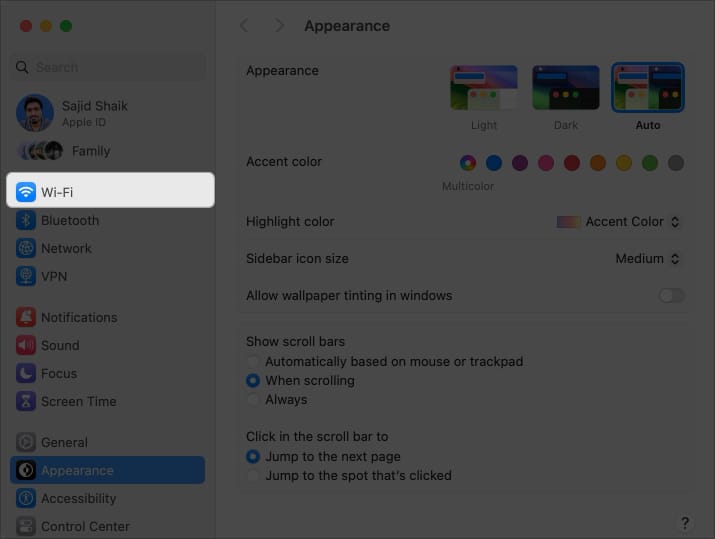
- Open System Settings on your Mac.
- Select Wi-Fi from the left pane.
- Click Details next to connected Wi-Fi network.
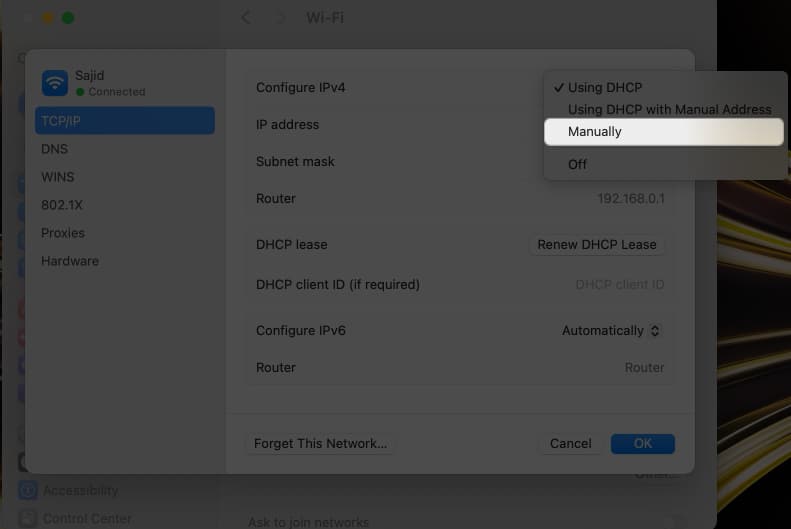
- Select TCP/IP from the left pane when a new window appears.
- Choose Manually from the options next to Configure IPv4.

- Enter the IP address provided by your ISP in the IP address field.
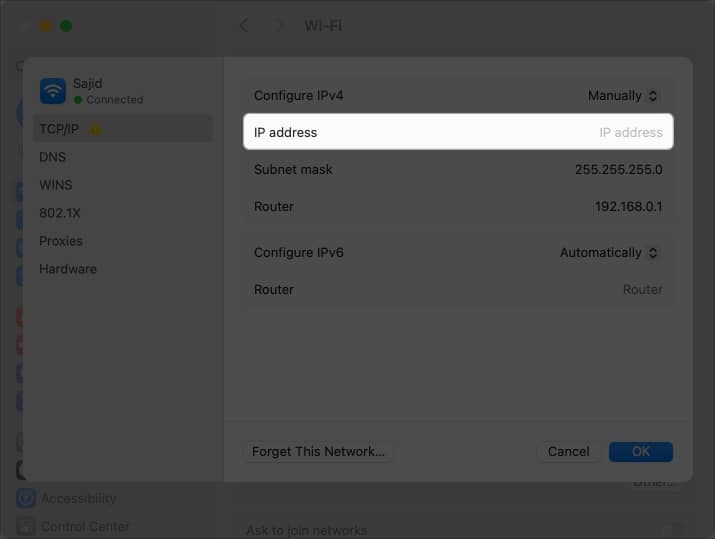
Moreover, you can set DNS and Subnet Mask if your ISP has provided you the required details. The IP conflict error should resolve after you manually set the IP address.
6. Reset network settings on Mac
Resetting network settings on your Mac can solve various issues related to Wi-Fi, Bluetooth, AirDrop, VPN, and more.
You can either use Terminal or Finder to delete network configuration files. It’ll reset the network settings to default, which in turn will also reset your Mac’s IP address.
To learn how this is done, follow our detailed guide on how to reset network settings on Mac.
7. Check for viruses and malware
Although Mac is mostly safe from viruses and malware, new vulnerabilities emerge to get into macOS.
While you might not differentiate a virus from system files, you can still identify and remove the most common Mac viruses.
Besides, some tools can help you identify and remove malware/viruses from your Mac, like Avast Premium Security, Malwarebytes Premium, CleanMyMac X, and more.
Concluding thoughts
IP conflict error is a common issue on many devices and is not limited to Macs. If you’re still facing this issue even after trying all the above mentioned troubleshooting methods, it’s best to contact your ISP to resolve this issue.
If the error isn’t from the ISP but your Mac, take it to the nearest Apple support so that they can diagnose and fix the IP conflict issue on your Mac. If you’ve got any other questions or suggestions regarding this guide, please leave them in the comments below.
Read more:
- How to fix “self-assigned IP address” issue on Mac
- Wi-Fi not working on Mac? How to fix it!
- How to find a router IP address on Mac (Easy ways)
🗣️ Our site is supported by our readers like you. When you purchase through our links, we earn a small commission. Read Disclaimer.