
How far would you like to go to safeguard your Mac from unauthorised access? If the answer to that question is, as far as it takes, you’d probably be interested in knowing about FileVault – a highly advanced encryption mechanism that allows you to apply an extra layer of security to your Mac HDD as well as Mac-based external USBs. Stay with us as we cover the salient features of File Vault and describe the process that you can use to protect your internal and external hard drives with this utility.
How to Encrypt Mac HDD and External USB in Mac OS X El Capitan using FileVault
What is FileVault?
Let’s start with a brief introduction. FileVault is a full-disk encryption scheme that uses XTS-AES 128 encryption to help prevent unauthorized access to your Mac. First introduced in 2003, the scheme encrypts and decrypts Mac volumes on-the-fly. When the Mac is shut down, FileVault encrypts it and locks it with a password. To access the system, the user must key in the password to unlock and decrypt it.
To use FileVault safely, you must always remember your password correctly. You can choose to backup your password on Apple server. The backup is protected by three security questions. To access the backed up password, you’ll have to answer the security questions.
The current version of FileVault is known as FileVault 2, and it is an improved version of the original or “Legacy FileVault.” FileVault 2 cannot be used with every Mac and all drive configurations. It can only be enabled on a single drive containing OS X and Recovery partitions.
In addition to encrypting Mac hard disk drive, FileVault 2 also helps you encrypt removable drives. This allows you to protect your Time Machine backup drives. Additional advantages of the scheme include the ability to instantly wipe all encryption keys and all data from your Mac, thus making all information completely inaccessible. It is thus quite a handy utility to protect your Mac and the crucial data on it.
Though it’s probably the most efficient way of making sure your data is always safe, FileVault 2 has its drawbacks, degraded performance being a major one. Applying encryption and decryption on-the-fly takes its toll on the processor and systems with older Core CPUs experience significant performance lag.
An aspect that you should take care of while using FileVault 2 is that it is transparent to anyone once the system is logged in. This means that once you’ve unlocked and decrypted the Mac with your password if anyone gains access to the machine all your data could very well be stolen. Hence, you must ensure that you don’t leave your Mac unattended if it is unlocked. To fully lock the encrypted drive, the best way is a full shutdown of the Mac.
How to Enable FileVault on Mac HDD
You can enable FileVault encryption on your Mac hard disk drive with the following steps:
Step #1. Log in to OS X El Capitan with an administrator account.
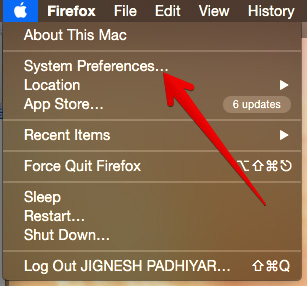
Step #2. Go to Apple menu (top left corner) → System Preference.
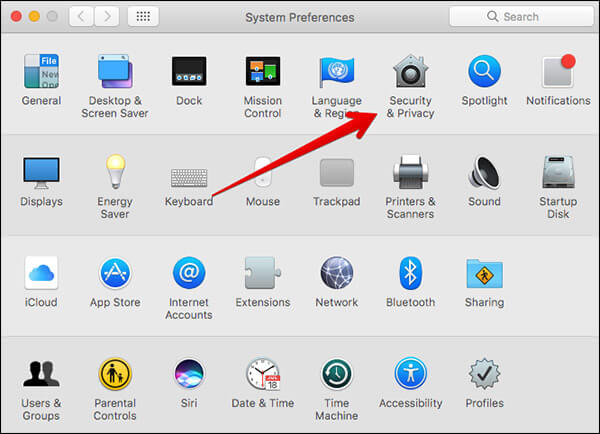
Step #3. Click on Security & Privacy.
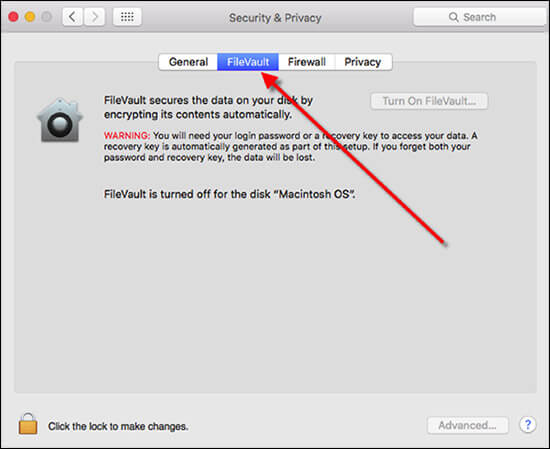
Step #4. Select the FileVault tab and click on the padlock (bottom left corner of the pop-up.)
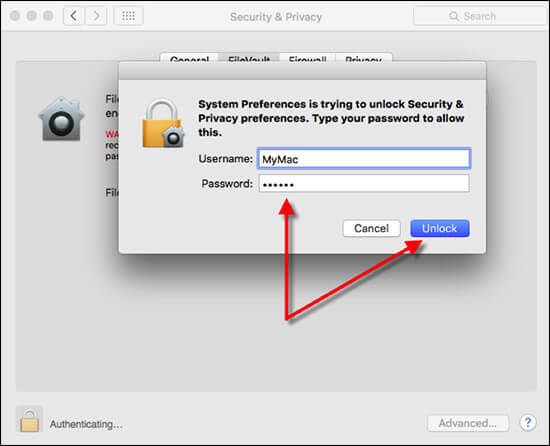
Step #5. Enter the administrator name and password when prompted.
Step #6. Click on the “Turn On FileVault” button.

If more than one user has the account on your Mac, each user will need to key in their password to unlock the disk. The Mac will display a message for this when you activate FileVault. Click the “Enable User” button and enter the user’s password. All user accounts added after enabling FileVault are automatically enabled.
Note: By default, FileVault uses your account password to encrypt the drive. In case you forget it, a recovery key is generated to allow you to still unlock the drive. However, this key is displayed only once, so if and when it happens, make a note of the key and store it safely.
Once FileVault is successfully enabled, your Mac will reboot and will prompt you to login with your account credentials. You’ll need to provide your password each time you wish to login once FileVault is enabled. When logged in, the encryption mechanism goes on in the background so you can continue using the Mac without any hurdles.
How to Enable FileVault on Mac external USB
Since most USB drives are formatted using the FAT file system, you won’t be able to encrypt it directly. First, you’ll need to reformat the external USB to Mac OS Extended (Journaled) file system. Thereafter, you’ll be able to turn on encryption on it. Once encrypted, it will be converted to Mac OS Extended (Journaled, Encrypted) file system.
Here are the steps to encrypt external USB with FileVault:
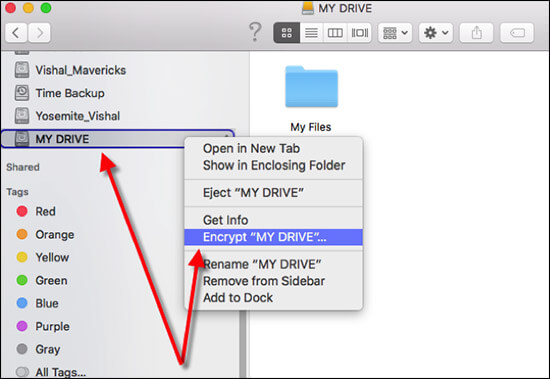
Step #1. Open Finder and select external USB from the list of drives on the left.
Step #2. Right-click and select Encrypt & flashdrivename>
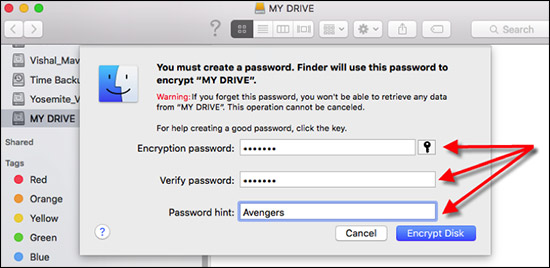
Step #3. Key-in encryption password, verify it and also provide a hint when prompted.
Note: The encryption process might take a while depending upon the size of the USB. There won’t be a progress indicator so the only way to tell would be the indicator light on the USB. Don’t disconnect until the light keeps flickering.
Once the drive is encrypted, you’ll be prompted to enter the password you set every time you wish to access the drive.
How to Break the Encryption on a USB Drive
This section explains the steps to decrypt an external USB that’s encrypted with FileVault 2.
Note: Decryption formats the drive so to avoid data loss, clone the encrypted drive before decrypting it.
Step #1. Log in to OS X El Capitan with an administrator account.
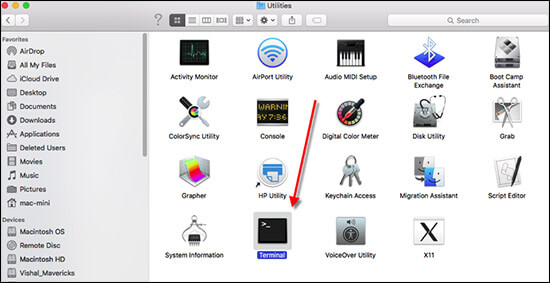
Step #2. Go to Utilities → Application → Finder and launch Terminal.
Step #3. Type diskutil cs list and press Return.
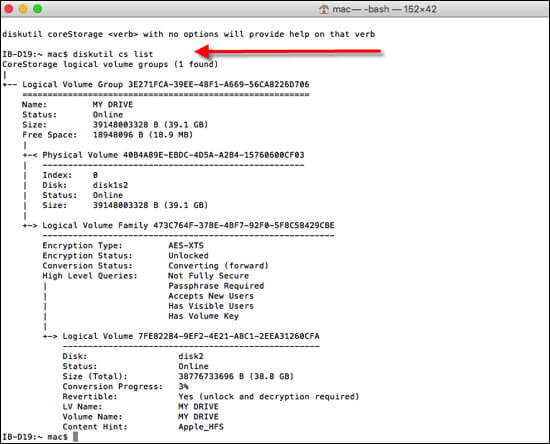
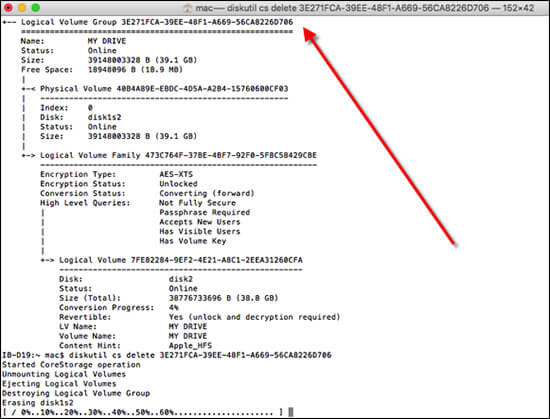
Step #5. In the resultant code, copy the alphanumeric sequence adjacent to “Logical Volume Group.”
Step #6. Type diskutil cs delete XXXX____YYYY___ZZZZ___XYZ and press return.
How to Turn Off Encryption on Mac HDD and External Drive
To turn off encryption on the drive, follow the below-mentioned steps:
Step #1. Log in to OS X El Capitan with an administrator account.
Step #2. Go to Apple menu (top left corner) → System Preference → Security & Privacy.
Step #3. Select the FileVault tab and click on the padlock (bottom left corner of the pop-up.)
Step #4. Enter the administrator name and password when prompted.
Step #5. Click on the “Turn Off FileVault” button.
Step #6. Restart your Mac.
To conclude
FileVault 2 is an extremely useful scheme to protect your Mac, but it can prove to be costly performance-wise. Also, there are precautions you should consider when working with it so please use it wisely or else you could end up with crucial data that’s locked up in your Mac hard drive or external USB drive forever.
🗣️ Our site is supported by our readers like you. When you purchase through our links, we earn a small commission. Read Disclaimer.