People like making friends on Facebook. Some Facebook users even wish to have more friends than anyone else just to show how popular they are on this social site. After all, who doesn’t want to have thousands of friends! However, there are many occasions you have to unfriend or completely block a Facebook friend due to personal reasons.
Should you wish to block or unfriend people on iPhone or iPad, here is how you can do so. But before you move on with the process, you should know the subtle difference between blocking and unfriend people in Facebook.
Difference between blocking or unfriending someone on Facebook
- Unfriend: When you unfriend someone on Facebook, he will still be able to view your profile and can even send you friend request.
- Block: When you block someone on Facebook, he won’t be able to view your profile and can’t send you friend request either.
Most Facebook users may not be able to distinguish between Unfriend and Block as both slightly sound to do similar function. However, they do have a lot of difference.
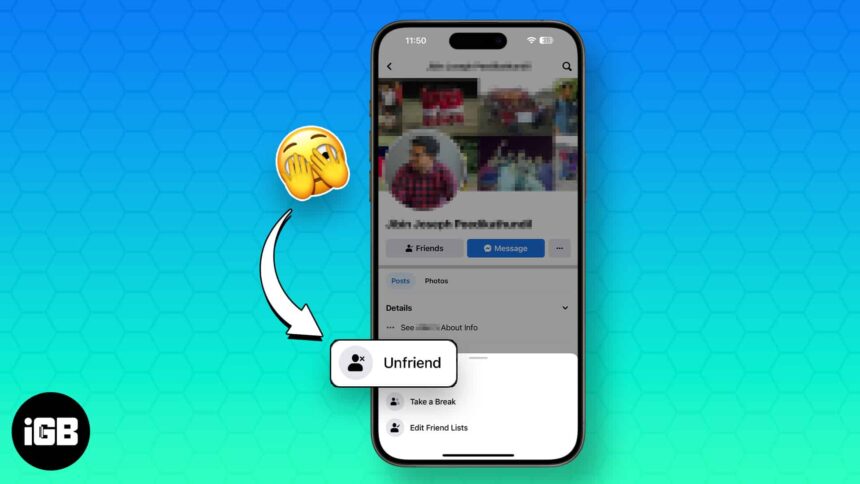
How to unfriend people on Facebook on iPhone or iPad
Here is how you can unfriend a Facebook friend, if you don’t want to completely block them. Remember, the person can still see your profile, view your photos and even send a friend request.
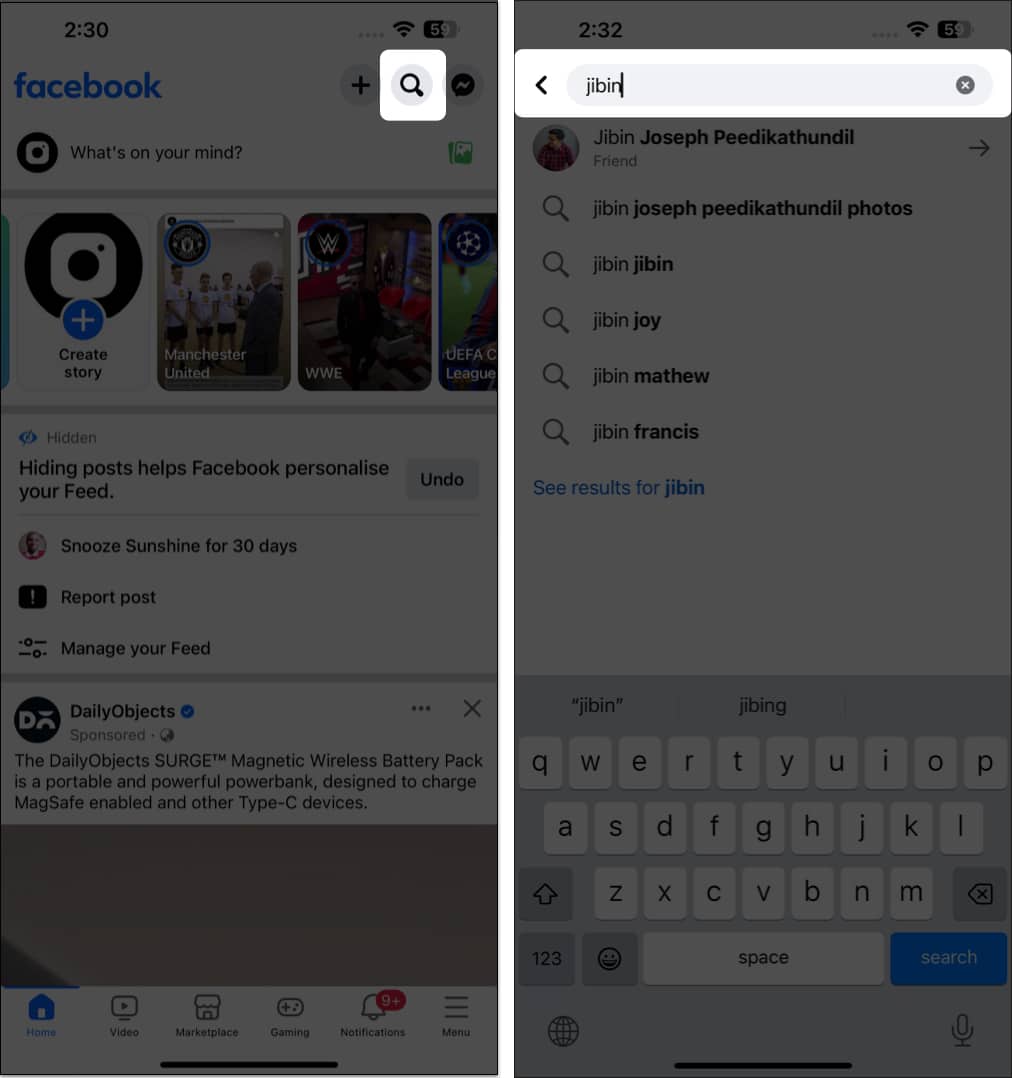
- Launch the Facebook app.
- In the Search bar, type the profile name you want to unfriend.

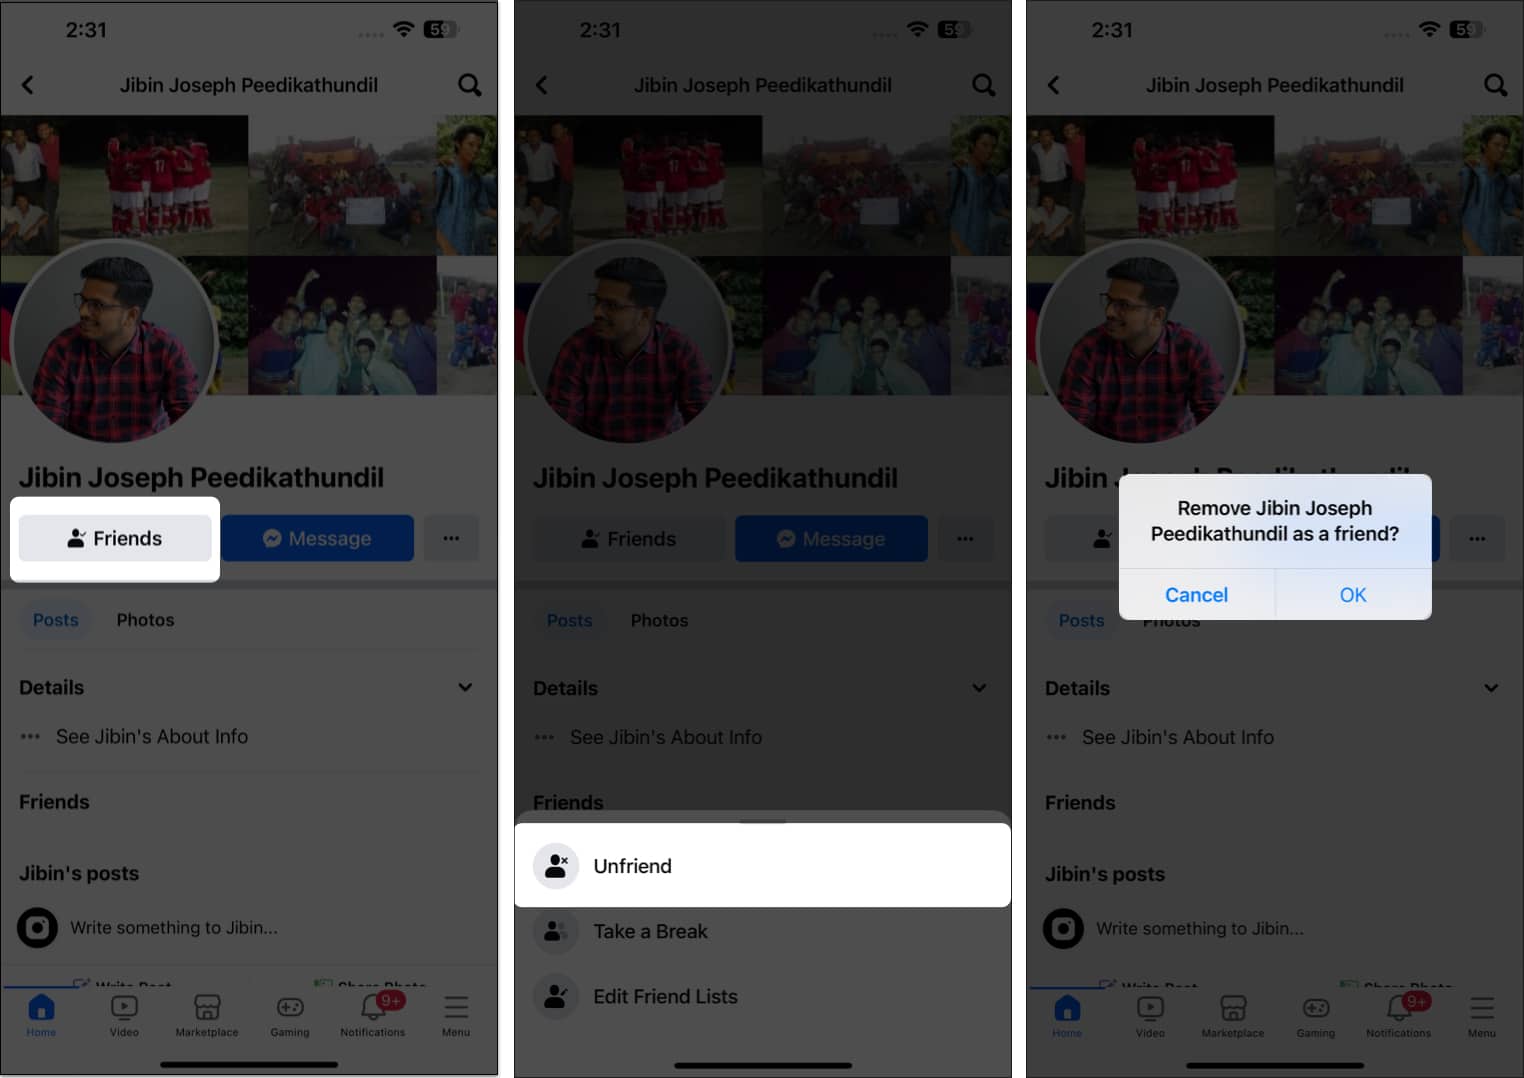
- Tap Friends → Choose Unfriend from the menu.
- Select OK in the pop-up.

When someone unfriends you on Facebook, you are not notified. However, there is a trick to see who unfriended you on Facebook. To add them to your friend list again, you must send a fresh friend request.
How to block someone on Facebook on iPhone or iPad
There are two ways to block friends on Facebook on iPhone. You can pick either of the options to permanently block someone on Facebook.
Method 1: From the user profile
- Go to Facebook → Visit the profile you want to block.
- Tap the ellipsis icon → Navigate to Block.
- Select Block from the pop-up to confirm.
Method 2: From the Menu
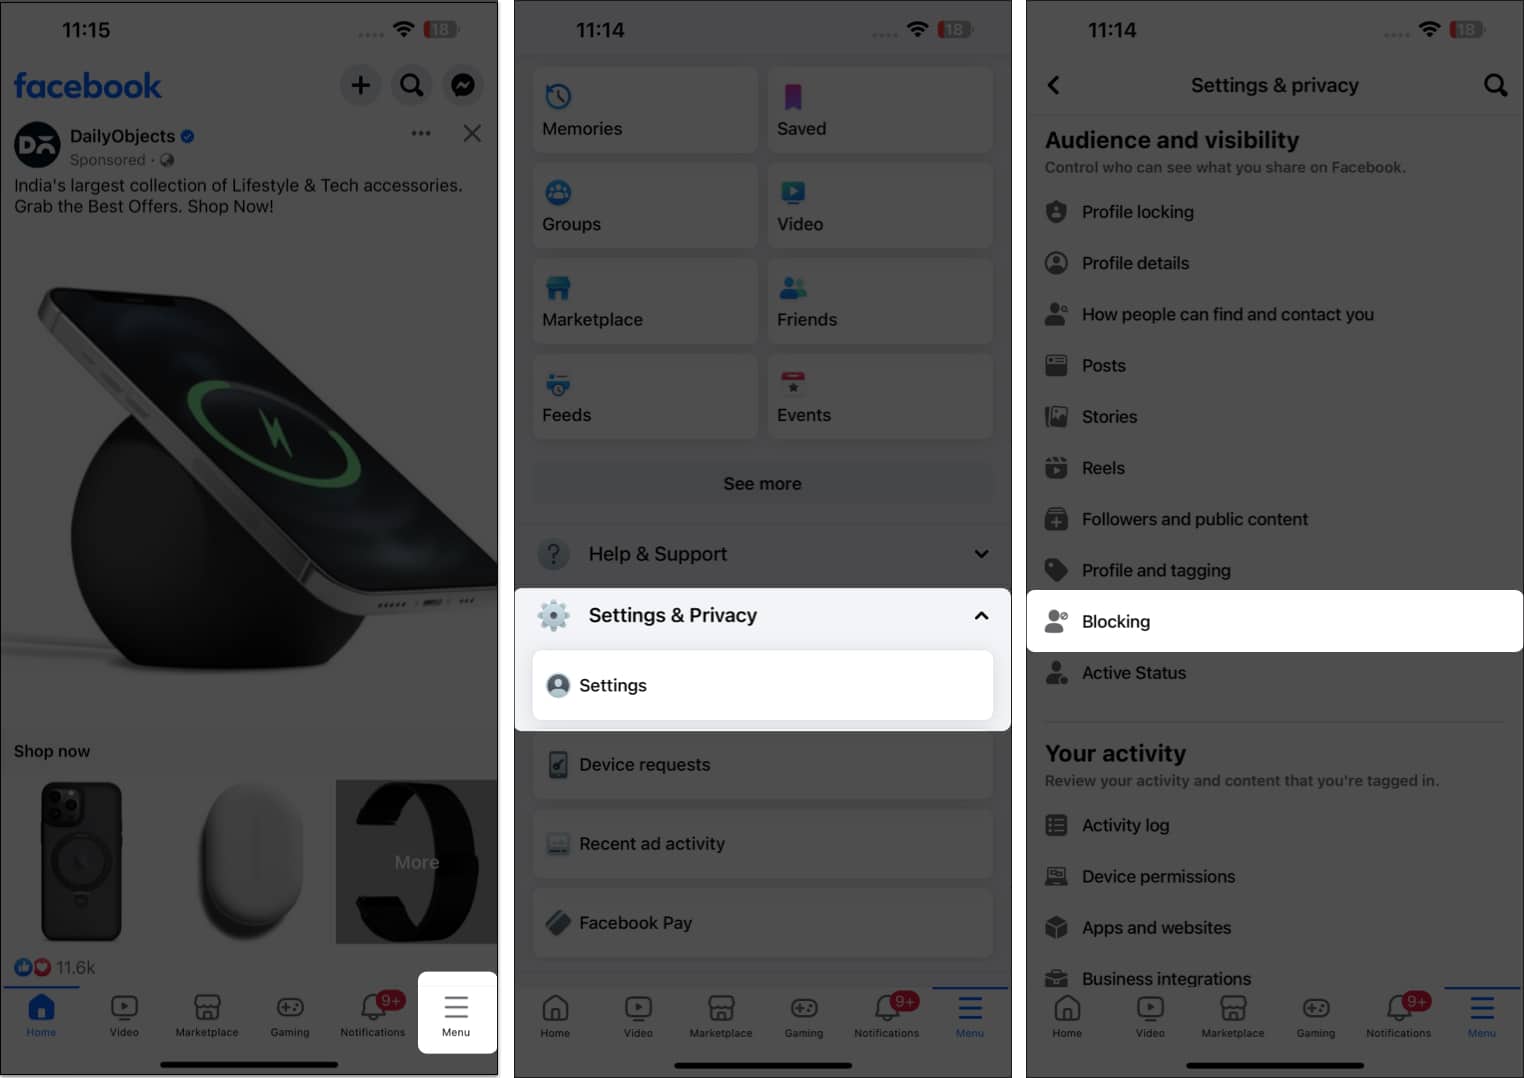
- Move to the Menu icon from your Facebook Home page.
- Tap Settings & Privacy → Select Settings.
- Scroll down to the Audience and Visibility section → Hit Blocking.
- Tap Add to blocked list.
- Type the profile name in the Search bar you are willing to block.
- Tap Block next to the profile name.
Alternatively, you can tap on the profile name. - Select Block again in the pop-up.
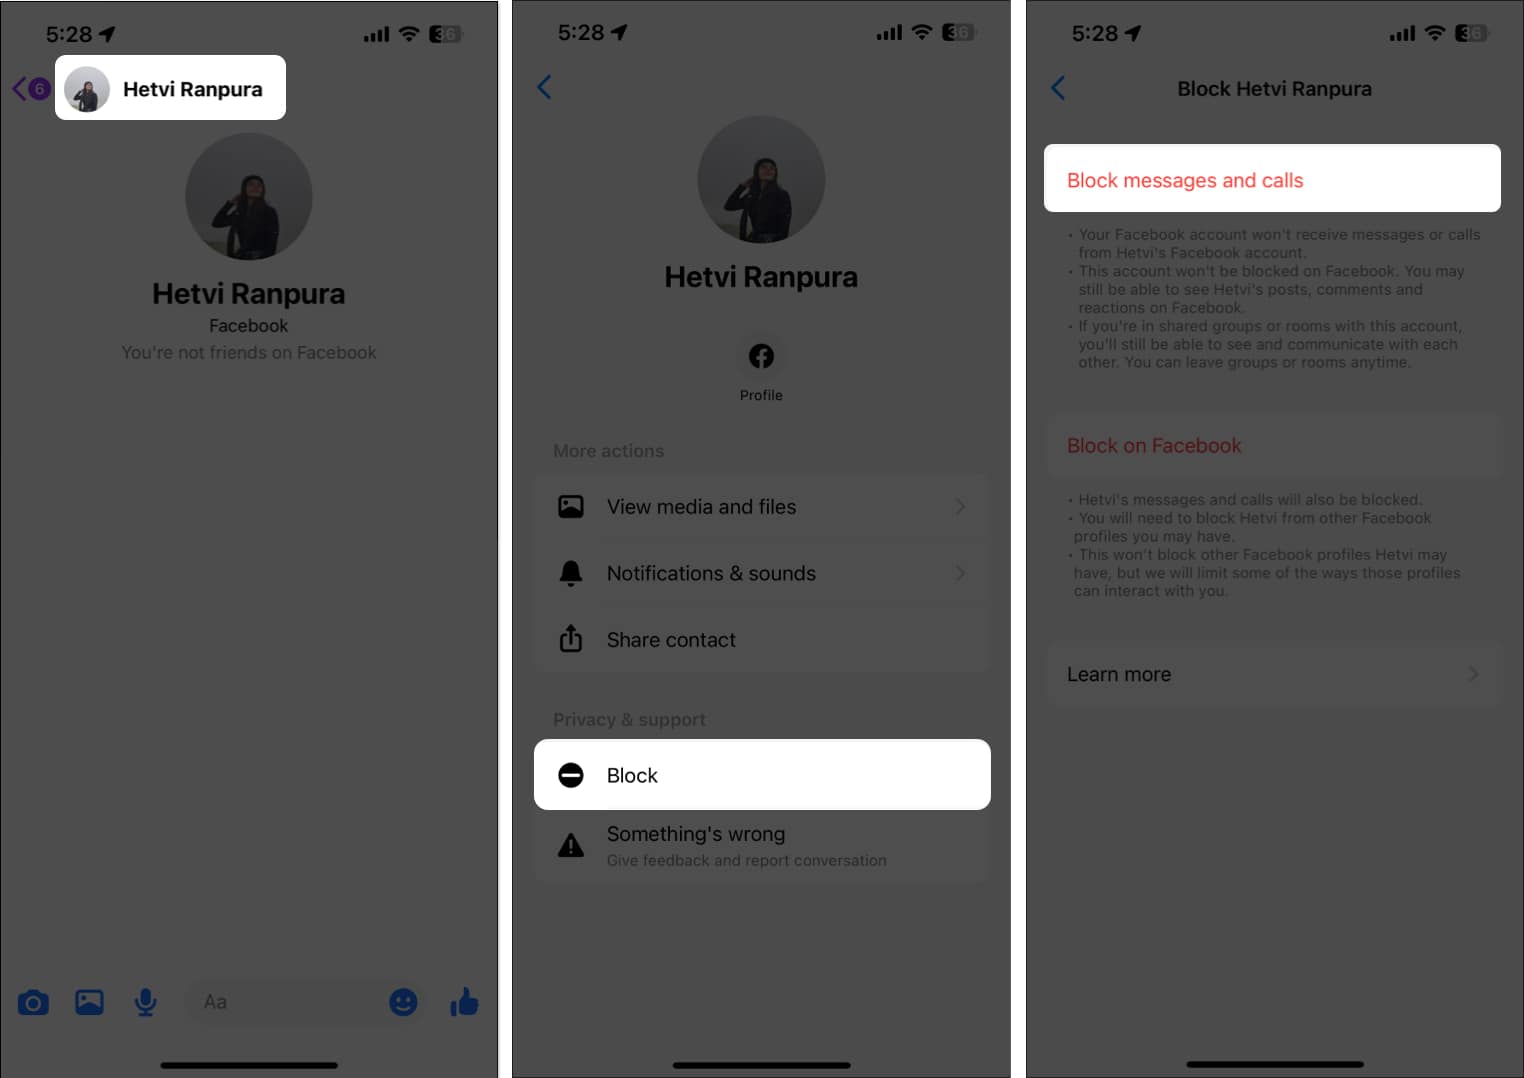
Bonus: Block messages and calls on Facebook Messenger on iPhone
If you are bothered by someone’s spam texts or continuous calls but still want to see their updates on Facebook, you can do so.
- Open Messenger → Go to the chat you want to block.
- Tap the profile name.
- Scroll down and select Block.
- Choose Block messages and calls → Tap Block.
How to unblock someone on Facebook on iPhone or iPad
- Go to Blocking from Facebook settings.
A list of all the profiles blocked by you appears on the screen. - Select Unblock against the profile you want to unblock.
- Tap Unblock again in the pop-up.
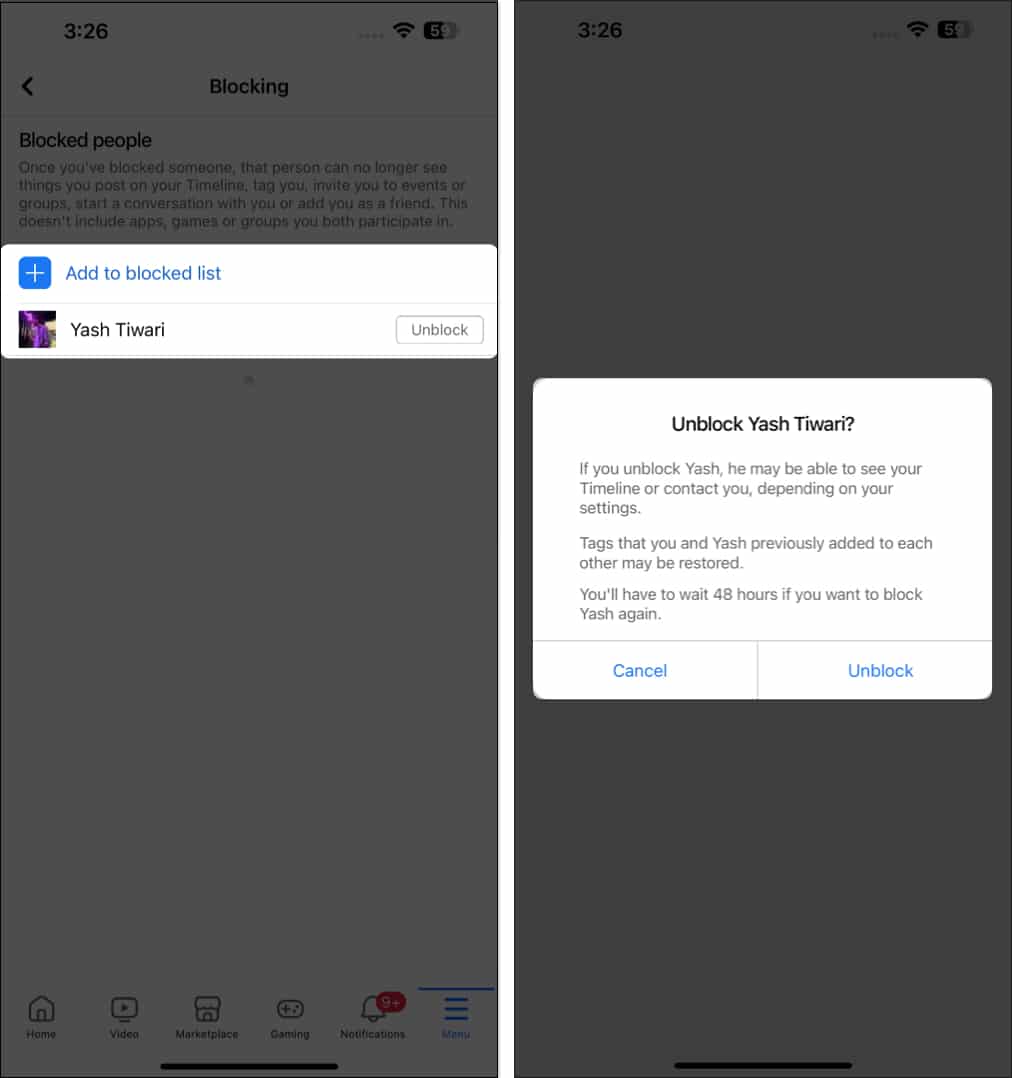
Once you unblock someone on Facebook on your iPhone, you must wait for the next 48 hours to block them again. If blocking seems too much, you may take a break from someone on Facebook.
Wrapping up…
Facebook lets you make social interactions, share your personal experiences, and build connections with others. But sometimes, things don’t go well with your Facebook friends or followers. Instead of bothering yourself, block or unfriend such people using the steps mentioned in this guide.
If you found my article helpful, do let me know in the comments section. I would love to hear from you.
Read more:
- How to unlink Facebook from Instagram account on iPhone and Mac
- How to deactivate or delete your Facebook account on iPhone, iPad, or Web
- How to turn on or off professional mode in Facebook on iPhone
🗣️ Our site is supported by our readers like you. When you purchase through our links, we earn a small commission. Read Disclaimer.